How to build a car my summer car
How to build a car my summer car
Last update: Tuesday, August 20, 2019
On this page of our guide to My Summer Car, you will learn the most important information about the assembly of the Satsuma car which stands in front of the garage. We will show you how to use the tools and how to install the individual parts. You will also find a list of additional parts and tips for finding them.
Preparations
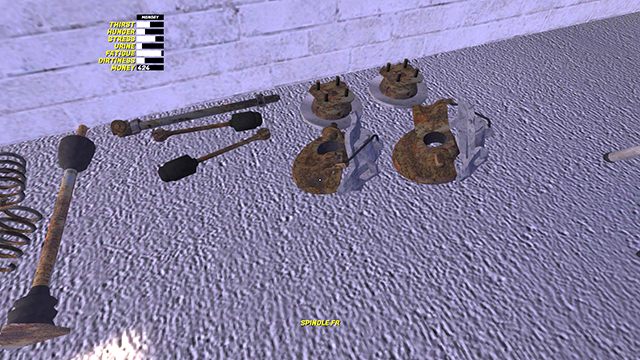
If you are sure what the individual parts are for, you can move them piece by piece in advance next to the car (e.g. suspension elements) and place them on the left and right to have faster access. If you are not sure, move them separately from the garage where most of them are grouped respectively.
Some parts are only for a specific place in the car: front or rear and left or right. They are described as follows:
Required parts
Before assembling the car, collect all the missing parts. Most of them are in your garage, but the rest must be bought at the store. Even though you have some of them in the garage, you should still purchase them and install new ones, because the ones you own are severely worn out. They will either not work properly after attaching or fall down instantly. You have to do this with the battery and the oil filter.
You also won’t find any wheels in the house. A free set is hidden on the map and you can easily get it (see section: Where to find wheels?), but these wheels should be considered only as a temporary solution. The free wheels are heavily worn out and won’t pass a vehicle inspection. Use them in the assembly process for moving the car with ease or in test drives. The good wheels have to be ordered in the workshop for the appropriate price.
The rest of the necessary parts are in the store in the city (chapter: Shopping). Remember to have at least 2,500 mk to buy spare parts, fuel and food.
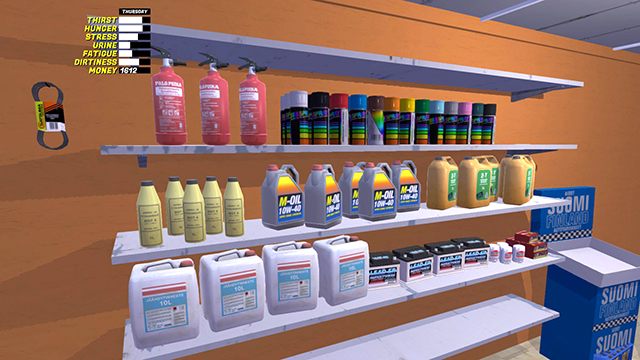
In general, you have to buy almost everything from the shelves on the left wall. Remember to bring the GASOLINE canister with you to the shop to fill it with the fuel necessary for the engine to start once the car is complete.
The shopping list will look like this:
Number of units required
You can also buy a new upholstery (blue stand with the Suomi text), but its pattern is exactly the same as the entire rack. Decide if it is worth the price.
How to use the tools
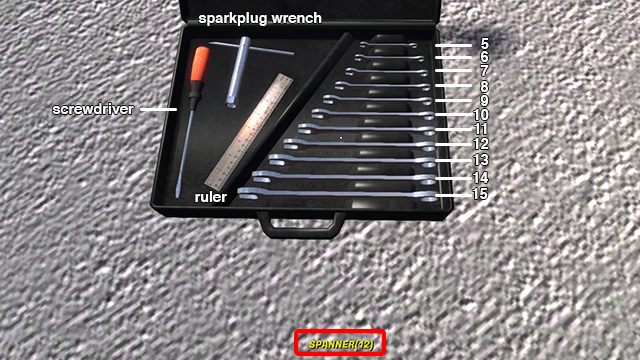
In the Spanner set, you will find size 5-15 wrenches, a screwdriver, a sparkplug wrench and a ruler.
During the assembly process, you will constantly switch between:
The assembly blueprint of the parts is as follows:
How to Build a Working Car in My Summer Car
Amistech Games released My Summer Car late last year, and quickly reached cult-hit status. In this simulation game, players must try to survive the Finnish summer and build their own car from various parts. The goal of the game is to persevere through harsh road conditions, while also being able to maintain your car’s integrity.
Building Your First Working Car in My Summer Car
Prepare before you try to build.
Since it will probably take a good bit of time both in and out of game to complete your first car, you will want to stock up on as many resources as you possibly can ahead of time. Necronomicron advised to first gather as much money as possible so that you can buy a fan belt, motor oil, and coolant.
All these things will be essential to get your car up and running, so it’s better to have them on hand before you start building.
Necromicon gives the following essential advice:
«. save the game before buying stuff, because your bag with goods will unpack on game load. It is easier to move just one bag rather than 20 items to your home.
I would recommend to buy everything on the left side of the store (which will cost 1,995 mk). However, you will need at least [one] fan belt, three brake/clutch fluids, one motor oil, [and] one coolant.»
He also suggests buying food and other supplies, since this will take awhile to build, and mother nature waits for no one.
| Part | Price |
|---|---|
| Fan Belt | 295 mk |
| Brake/Clutch Fluid | 35 mk |
| Motor Oil | 149 mk |
| Coolant | 195 mk |
Step One: Work on the Front Suspension
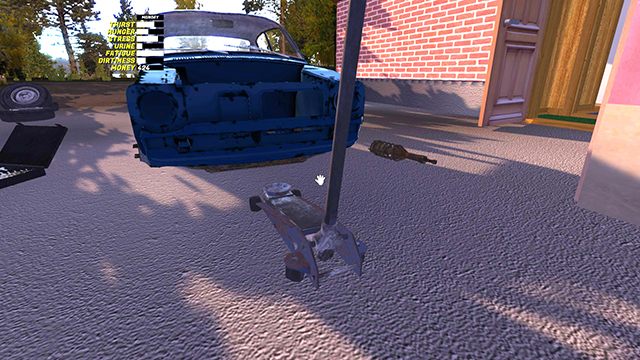
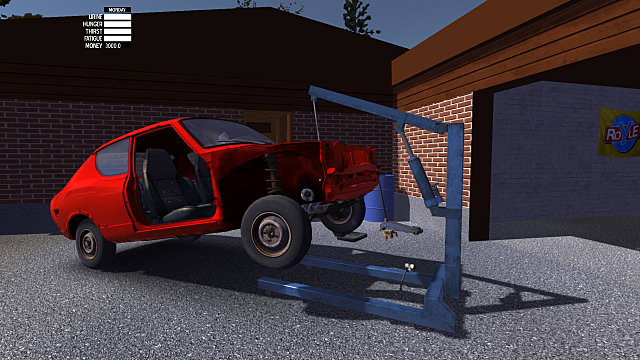
The first thing you need to do is jack the car up so you can work on the frame and underpinnings of the vehicle. To raise the body:
Once you’ve got the car jacked up, head over to the tool box. To use the tool box, hover your cursor to its opening and press «Use». You’ll need to come back here often to switch out tools as necessary. To get to a specific tool, press 2, then click on whichever one you need. Once you have it, press 1 to hide that tool.
Now it’s time to work on the front part of your car’s frame. Here’s the order in which you need to attach your parts (and what screws or bolts you need to use):
Step 2: Work on the Rear Suspension
The next major step in this process is putting together the rear suspension. So you’ll want to lower your frame and remove the floor jack. Move it to the rear bumper of the car, then jack the vehicle back up.
Once it’s up, you’ll need to add more parts in the following order:
Step 3: Put Together the Engine
Now that you’ve got your rear suspension built, lower the floor jack and remove it. Push your car into the garage where you’ll complete the next several steps.
For right now, though, you’re going to set the car aside and focus on building your engine. Set the engine block on a spacious work table and build it out as follows:
Step 4: Install the Engine
Now comes a tricky part. You need to get the engine you just built into the car by hoisting it. Grab the hoist and use it to lift up the engine. Be careful, though! The engine can detach from the hoist if you aren’t paying attention.
Once you’ve got the engine aligned properly, unscrew it from the hoist. Then raise the hoist again and put it away. Now you’re ready to start working on the guts of the car that will make it run!
Step 5: Work On Everything Under the Hood
It’s time to dig deep into your car building process and start making all the internal connections that will turn this hunk of metal from a collection of parts to a fully running vehicle. Here’s the order in which you need to build everything:
The nuts you’re looking for on each wheel look like this:
Step 6: Build Out the Car Interior
Finally! You’ve got a car that should be able to run on its own. But that’s pretty useless without a comfortable interior. So now it’s time to build out the inside of your summer ride.
Step 7: Work on the Car Exterior
Now that you have seats and a steering wheel to make your car much more driveable, you’ll need to add all the external features like doors and headlights that will keep you rolling along.
Step 8: Adjust Your Wheels
You’re almost ready to go! But before you start zooming around, you need to make sure your wheels are up to snuff. The orientation of your front wheels is probably pretty messed up by now, so you’ll need to adjust the nut on the inside of each wheel (14mm).
Step 9: Paint Your Car
Time to customize your sweet summer ride! There are 12 glossy and 1 matte paints. So pick which one you want to use and pick it up. Press the «Use» button to paint your car with that color.
Step 10: Start Your Engine!
You’re getting so close to vehicular freedom that you can almost taste it. But you have adjust your fan belt and test everything out to make sure it’s running smoothly before you hit the road.
To start your car:
When you do this, the fan belt may squeak. Even if it doesn’t, you should adjust it by following the steps below:
Step 11: Test Drive
Finally, the moment you’ve been waiting for. Time to see if your car can actually go anywhere.
Once your engine is heated, push in the choke and drive! Hopefully everything is running smoothly and you don’t experience any sort of breakdown.
Step 12: Register Your Car
The last step in getting your car road-ready is going through a car inspection to make sure that vehicle isn’t a safety risk to your or anyone else. You can have your car inspected for 325 mk.
Once it passes inspection, register your plates. Now you’re ready to go! Drive your car to your heart’s content.
Step 13: Upgrade as Necessary
This last step is optional, but we’re willing to bet that you’ll take advantage of it at some point or another. Once you’ve built a base car, you can invest in upgrades that will pimp out your ride and make you the talk of your Finnish town. If you want to buy everything, you’ll need almost 30,000 mk. But if you only want to invest in a few pieces here and there, below is a full list of each part you can upgrade and how much it costs:
| Upgraded Part | Price |
|---|---|
| Window Grille | 219 mk |
| Rear Spoiler 2 | 329 mk |
| Rear Spoiler | 199 mk |
| Front Spoiler | 249 mk |
| Fender Flares and Fender Flare Spoiler | 1195 mk |
| Wheels Rally | 3249 mk |
| Wheels Spoke | 1519 mk |
| Wheels Hayosiko | 1575 mk |
| Wheels Racing | 3615 mk |
| Windows Black Wrap | 299 mk |
| Sport Steering Wheel | 349 mk |
| Dash Cover Zebra | 295 mk |
| Dash Cover Leopard | 295 mk |
| Dash Cover Plush | 295 mk |
| Seat Cover Zebra | 139 mk |
| Seat Cover Leopard | 139 mk |
| Seat Cover Plush | 139 mk |
| Wheel Cover Zebra | 49 mk |
| Wheel Cover Leopard | 49 mk |
| Fuel Mixture Gauge | 549 mk |
| Extra Gauges | 299 mk |
| Tachometer | 829 mk |
| CD Player | 1395 mk |
| Subwoofers | 695 mk |
| Steel Headers | 649 mk |
| Twin Carburators | 1750 mk |
| Racing Exhaust | 429 mk |
| Racing Muffler | 169 mk |
| Racing Radiator | 1215 mk |
| Racing Harness | 645 mk |
| Bucket Seats | 5095 mk |
| Rally Steering Wheel | 895 mk |
That wraps up our guide to building a working car in My Summer Car! Now that you can roam freely around the roads of your small Finland town, be sure to check out the rest of our My Summer Car guides for even more tips and tricks:
My Summer Car Guide – Getting The Satsuma Up And Running
My Summer Car is not a game… It’s a fever dream. This is an imagination of what happens if you got transported into the middle of a rural Finnish countryside. Surrounded by a completely wacky world that can humor you as much as it can kill, you’re then tasked with building a car. Though for an experience this silly, the car building part of the game is surprisingly meticulous and detailed. That will the premise of our My Summer Car guide; how to actually put the car together.
My Summer Car Build Guide
Woah, hold on. Before heading straight for the garage and getting greasy, there are a few things you should probably do first. First of all, it’s worth bearing in mind that MSC has a permadeath mechanic in place, thus doubling this to become a survival game.
It means that you need to take care of your in-game player. They too have basic requirements such as having to eat, drink and get some sleep. For our My Summer Car guide, it won’t be enough to just build the Satsuma and ignore this.
If you do that, then the player could die, and you’ll have to start all over. Besides, you’re going to need to head to town and get some parts to finish that build, anyway. So, be sure to get enough food and drink to keep you stocked up while you’re there.
So, before we get into anything else, you’re going to want a van. In the most recent updates of the game, the van – a Hayosiko Pace – will spawn by Uncle Kesseli. Toivo Kesseli is the player’s uncle, and you can find his house near yours.
You’ll be prompted and hinted about Uncle Kesseli’s van through a note that the player’s parents left on the fridge. Here, the game tells you that you can borrow Uncle Kesseli’s van. However, once you get in the van, a time will count down to tell you how much time you have left before it needs to be returned.
If you somehow can’t get the van, then you could use a boat, moped, or tractor. The main town of the game, Peräjärvi is quite a distance away. These vehicles should spawn near the house.
My Summer Car Map
You’re going to need a vehicle to haul back anything you buy in the town. It would be prudent as well, that before you continue on our My Summer Car guide, you should get a few jerrycans. There’s a black diesel canister in the barn, and there’s a green gas can by the back left corner of the garage.
Bring along both. Now, let’s get in the van and head into town. Hopefully, you’ve gotten used to the game’s controls by now. After this, you can start by driving down the dirt path.
Just after a set of railroad tracks, there should be a three-way intersection at the end of this dirt path that leads to the player’s house. Turn left, and follow this road until you read a four-way intersection.
Now, take a right, and you should end up by a paved road, which is the game’s highway. Turn left and get onto the highway. Keep driving, and then take the fourth left-hand side exit in order to reach the game’s main town and urbanized area, Peräjärvi.
As a pretty large town, each exit on the highway should more or less lead you here. Nonetheless, the main point of interest that we want to look at is Teimo’s shop. It should be the first building on the left as you take that highway exit.
If you need a visual cue, there should be fuel pumps outside. Remember those jerrycans from earlier? Fill up not only the van but also those two extra canisters. While you’re inside Teimo’s shop, buy up some food and drinks to get you started.
What Are You Supposed To Buy From Teimo’s Shop?
If we take a glance of your garage at (the player’s) home, then there should already be a few parts that are ready and waiting to be fitted on the Satsuma. Most of the other bits and pieces, however, need to be acquired in the game. It could be easily bought from Teimo’s shop and a few other locations. However, certain parts could instead be found for free. One example is how you can find the starter wheels for your car by the Abandoned Mansion.
Still, much of our My Summer Car guide will hinge on buying these parts from Teimo’s shop. So, be sure to have enough money on hand. If you don’t, then you could complete a few jobs and tasks to earn markka, or ‘mk’, as the local currency is called. It’s for this reason why we’ve recommended taking the van to town, as it could fit more stuff in there than some other vehicles.
A Shopping List While You’re At Teimo’s
Anything Else You Need To Get?
Those parts that we highlighted above are absolutely necessary for you to properly build the Satsuma to completion. But as we’ve noted so far in our My Summer Car guide, there’s more you should get.
For starters, you’ll need to spend money on paying for gasoline and diesel that you’ve just pumped up. While you’re at Teimo’s, remember the bodily essentials. Sausages are the most efficient food item when it comes to filling up your hunger bar.
Beer is the best liquid in the game, cigarettes should help your character relieve stress in a pinch. Buy as much as you think is necessary before packing up the van and heading back home.
You might even want to buy a bottle of two-stroke fuel for 99mk. While not required for the Satsuma, you’ll find it handy if you need to use the boat or moped. In total, you’ll find that you could easily spend far over 2,000mk here alone.
Just Before You Start With Building The Satsuma…
There are a couple more tips and tricks for our My Summer Car guide before we get to building the Satsuma. Firstly, you should know that MSC also has a damage system for your car and its many parts.
Some components will get damaged over time and necessitate a replacement. Most of these ‘damageable’ parts that you’ll get at the start of the game are almost always in near-critical condition. You could have these parts delivered and serviced at the Fleetari repair shop.
This is a cheaper way to get them back to running order. However, we’ve found that it’s best to just go ahead and buy these parts completely brand new from Fleetari’s. Though more expensive, it will relieve a huge sore point later on as you now technically have more robust components that won’t have to be replaced so soon.
After this, you should drop by Teimo’s once again – or while you’re still there – to order a few extra nice to have. Only two are recommended; the fuel mixture gauge and ratchet set. You can find them through the parts catalog by Teimo’s.
The fuel mixture gauge will set you back 549mk and is used to monitor the air-fuel ratio for the Satsuma’s carburetors. The ratchet set is another 359mk and will be very handy to have as it can tighten bolts that much quicker. You can manage using the free spanner set you have at home, but this ratchet set will make life that bit easier.
What Do You Need To Do To Build The Satsuma?
At this stage in our My Summer Car guide, we should have everything that we need parts-wise to rebuild your Datsun. This includes the bits and bobs that spawn naturally by the player’s home or garage, as well as the things that we bought or picked up along the way.
As we mentioned much earlier, the car building aspect of MSC is actually very realistic, and almost simulator-like in feel. You need to individually pick up every single component, and align them in place before bolting them on.
There are a whole lot of different parts that require attaching, from the engine, chassis, and so on. For our My Summer Car guide, we’ll take a closer look at all the individual items on the Satsuma that you’ll have to put together.
We’ll even let you know how many nuts or bolts, as well as their sizes that are important for that particular part. So, if we use the term “2x10mm”, this means that if you want to put them together, you need 2 bolts or nuts, with the 10mm spanner or ratchet.
Some components instead require a screwdriver. Other times, the game asks you to interact with putting them together by using the scroll wheel on your mouse. Thus, you can scroll up or down to tighten and loosen them, but be careful to overtighten them. Meanwhile, there are other parts that just plug and play, without needing any fitting at all.
My Summer Car Engine Guide
In order of what you should do first, here are all the items that need for assembling the engine in our My Summer Car guide…
My Summer Car Alignment
My Summer Car Chassis
Once you’ve completed the engine part of our My Summer Car guide, it’s time to get to the chassis. You should consider jacking the car off the ground using the floor jack. Or, you could (carefully) push the car into the garage, where you can work on it from the pit.
Before we get into completing the rest of the bodywork, it would be helpful to lift the engine out of the Satsuma. Once you’ve already completed assembling the engine, you can attach the main block to a hoist (2x10mm). Once the chassis is done and ready, you can then very slowly lower the finished engine back in.
My Summer Car Steering And Suspension
My Summer Car Satsuma Build
This part of our My Summer Car guide will look at finishing up the rest of the car. This includes the electrics, exterior body panels, and trim, as well as the interior. A few other key mechanicals are in this section as well.
My Summer Car Wiring
My Summer Car Guide: In Conclusion…
If you’ve spent all those hours putting everything together, then good news, you’re very nearly at the end of our My Summer Car guide. What you’ll have to do now is fill up the Satsuma with all its fluids. This goes for fuel, brake and clutch fluids, coolant, and engine oil.
Now it comes time to turn the ignition on and let the engine run in for a little while. Be mindful to not let it overheat or over-revving the poor Satsuma once it gets the maiden start.
You can then check and see if everything is properly attached to something else. Hear any odd noises or notice bits falling out? As with any actual car, you can feel these problems happening in real time. If this is the case, then you’ll have to diagnose it step-by-step.
Of all the things we’ve learned in our My Summer Car guide, this is a surprisingly challenging and fulfilling game. Should you follow all these steps correctly, you have our permission to have fun in your new-old Datsun.
If you are into driving games. Then you might want to consider Fortnite also. Here is a list of all the cars available in Fortnite.
FAQs On My Summer Car
If you’re still curious to learn more in our My Summer Car guide, our FAQs here might help…
My Summer Car How To Drive Van
Before you start building a car, the first crucial step in getting up and running in My Summer Car is getting a van. Specifically, a Hayosiko Pace that’ll spawn by Uncle Kesseli’s house, near where the player’s home is. In a note left by the player’s parents, they mentioned that you can borrow Uncle Kesseli’s van. To do so, just knock on Uncle Kesseli’s front door, and speak to him briefly before he hands over the keys to the van. Know that once you get inside the van and drive off, there’s a countdown timer that’ll tell you when you need to return the van back to Uncle Kesseli. Having the van with you is important, as the main town is quite far away. And, if you plan on building your car, you could fit most of the stuff you need in the back of the van.
My Summer Car How To Build Car
To build a car in My Summer Car, you’ll first have to get all the parts necessary. Some of these components are already available in your garage. Meanwhile, others need to be found elsewhere in the world or could be bought at Teimo’s shop. Our detailed My Summer Car guide up above will provide all the necessary steps and procedures that you’ll have to go through to fully build your car from the ground up. In short, you can start by assembling together the engine. This is a fairly detailed section where you’ll need to put the engine together piece by piece. Once that’s done, you can move on to sorting out the chassis, suspension, steering, transmission, wheels, and electrics. Only after that’s complete can you move on to exterior trim pieces, interior, seats, other accessories, and so on.
How To Do Wiring My Summer Car
In My Summer Car, there are a total of 26 wires (as part of the main wiring harness of the car) that you’ll have to connect. It’s a good idea to have the wiring mess generally mounted inside the vehicle before you start installing any other electrical components. Once that’s done, you can slowly start plugging in all 26 of those wires from the wiring mess. Attaching the wires together is as simple as holding and hovering the wiring mess over a connector to a particular component. Then, press the F key (by default) when a checkmark icon appears. You could then repeat this process for every available electrical connector. They don’t need to be attached in any set order, nor would the game allow you to connect the wires incorrectly. After the wires are all connected, you can then connect them to the battery.
My Summer Car How To Order Parts
If you need to order parts for My Summer Car, head over to the garage, and you should be able to find the AMIS Catalog. Otherwise, there are other such magazines or catalogs elsewhere around the map, like at Fleetari’s workshop. These might contain other unique parts that you can’t order from the AMIS Catalog, but the latter should contain most of what you need. To order a part, browse around the catalog and find the part(s) you need. Then, click on a particular part and this will fill in an order form. Once you’re done, click on the ‘TILAA NYT!’ button (aka Order Now!), and an envelope will spawn. Next up, take this envelope to the main town, and place it in the mailbox next to the store. Soon, a clerk informs you that the parts are in, and you can pick them up.
My Summer Car How To Repair Body
My Summer Car is quite realistic in many ways, including how any damage appears on your car. If the bodywork is all dented and scratched up, it’s thankfully rather easy to have it repaired. First, you’ll need to head down to the town of Loppe, and find the local mechanic there. Drop off your car, and a checklist will appear. This would ask you what parts of the bodywork do you want to be repaired. Fill in the checklist as you see fit, but be wary that it can get rather expensive. Once you’ve made the necessary payment, leave your car there. In a week or two, the mechanic will call you once the repair work is done, and your car is ready to be picked up.
Approved Tools
These tools have been tried and tested by our team, they are ideal for fixing your car at home.
First engine start of the Satsuma car | My Summer Car My Summer Car guide, tips
Last update: Monday, September 23, 2019
This section of the My Summer Car guide shows how to prepare complete Satsuma for the first engine start. We tip what actions should be performed in order for the car to be ready for driving and what items will be needed for this.
If you’re planning to start the engine of Satsuma, it means that all parts are in their places and all is left to do is to apply the necessary liquids. All necessary containers should be ready after you had bought them at the store.
To begin with, the basis, i.e. applying gasoline. To do this, you should have had an opportunity to take a canister from the garage, carry it to the gas station next to the store, fill it up, and bring it back home. Remember to bring a GASOLINE canister from the garage, not the diesel one, found next to the tractor.
Unscrew the fuel cap of the car, open the canister and hold it in such a way so that the gasoline can flow freely into the tank. You will learn the correct placement thanks to the progress bar at the bottom of the screen.
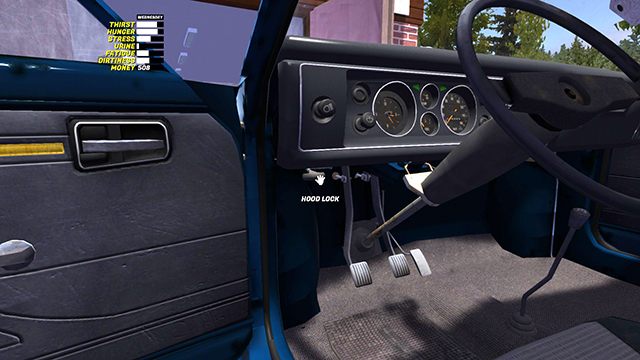
The locations for the rest of the liquids are placed under the hood. Open it with the HOOD LOCK lever which is found under the dashboard on the left side.
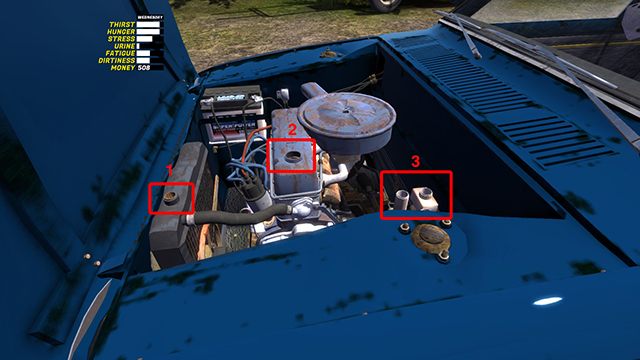
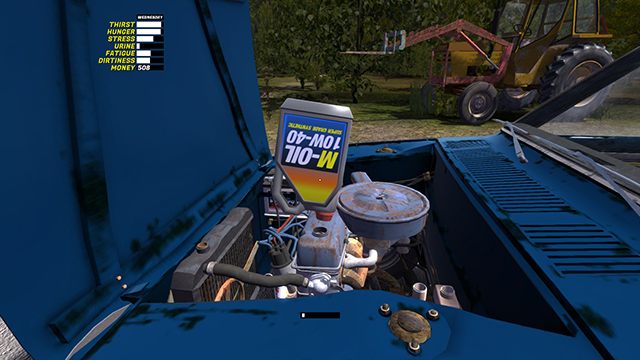
Unscrew all the corks: from the radiator (1) oil (2) and both containers of brake fluid (3).
Fill up the coolant (COOLANT) in radiator number 1.
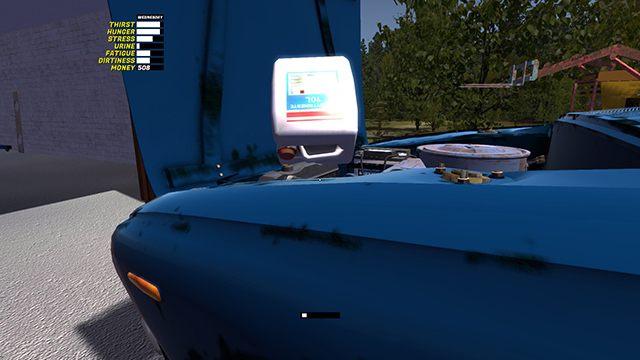
And brake fluid in both tanks. You will need at least 3 bottles of liquid.
Ready. Screw all the plugs and close the hood. Before starting the engine, be sure to run the throttle (CHOKE) under the dashboard. All is left to do is to turn the key in the IGNITION.
How to build a car my summer car

| 334,699 | просмотров на YouTube™ |
| 66 | уникальных посетителей |
| 0 | добавили в избранное |
«OPEN DESC FOR INFO! Feel free to ask questions in the comment section. 🙂
Assembling time stamps:
Notes: Timing belt, 3x brake fluid, coolant, motor oil, gasoline.
Take your canister with you to the store and fill it. You
will need food and drink too!
Notes: When assembling halfshafts, make sure you didn’t tighten the
hub when installing disc brakes. Just put disc brakes in, then get
halfshafts and tighten the bolt. When engine is in the car, tighten
remaining 3 bolts from other end of shafts.
BRAKE & CLUTCH LINING, GEARS 20:25
Notes: Tightening every bolt is very important. If you they are not
done correctly, fluids will come out and either brakes or clutch is
not working. Brakes has bolts in very hidden spots and usually they
are not working because you haven’t seen them. Tighten gear linkage
when engine is in the car!
Notes: Just follow very carefully, there’s some steps you might forget. 🙂
Loose the alternator and then install fan belt, then tighten it as much
as you can, then loosen alternator 2 steps back and it should be fine.
Notes: I forgot to tighten gear linkage (3x5mm bolts under engine) so fluids came out.
Make sure they are tightened!
Notes: Install doors before fenders.
Notes: See if the wheels look straight after adjusting and test them.
Notes: Here i noticed my halfshafts, gear linkage and clutch lining weren’t tightened.
Tighten them so they connect to the engine.
Notes: Try to tune the carburetor a bit. Fuel goes down very fast! If you hear clicking sound
from the engine you need to adjust your valves.

