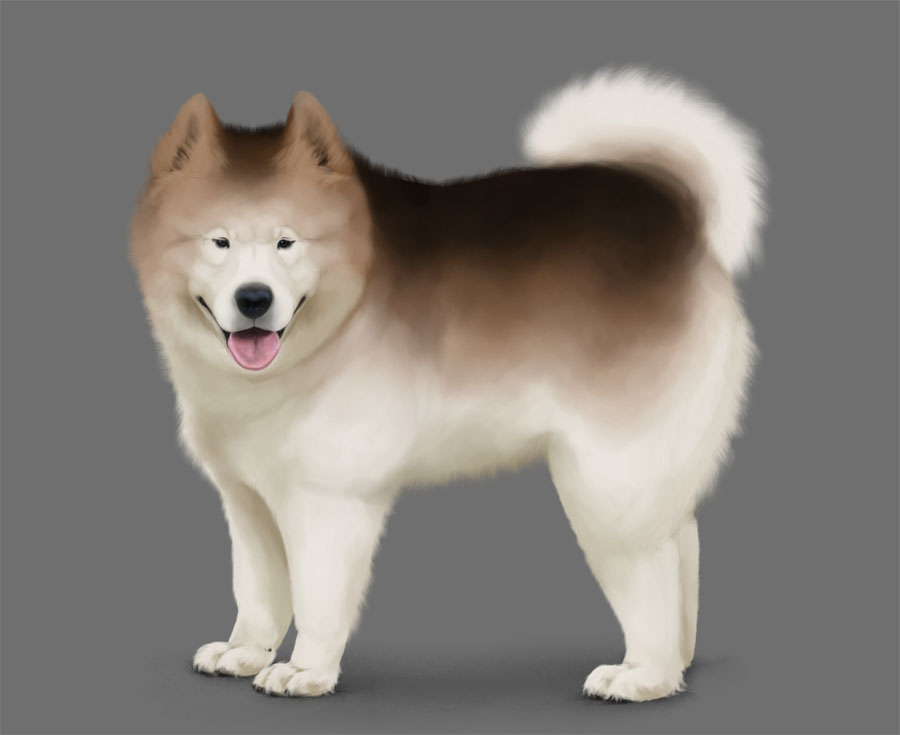
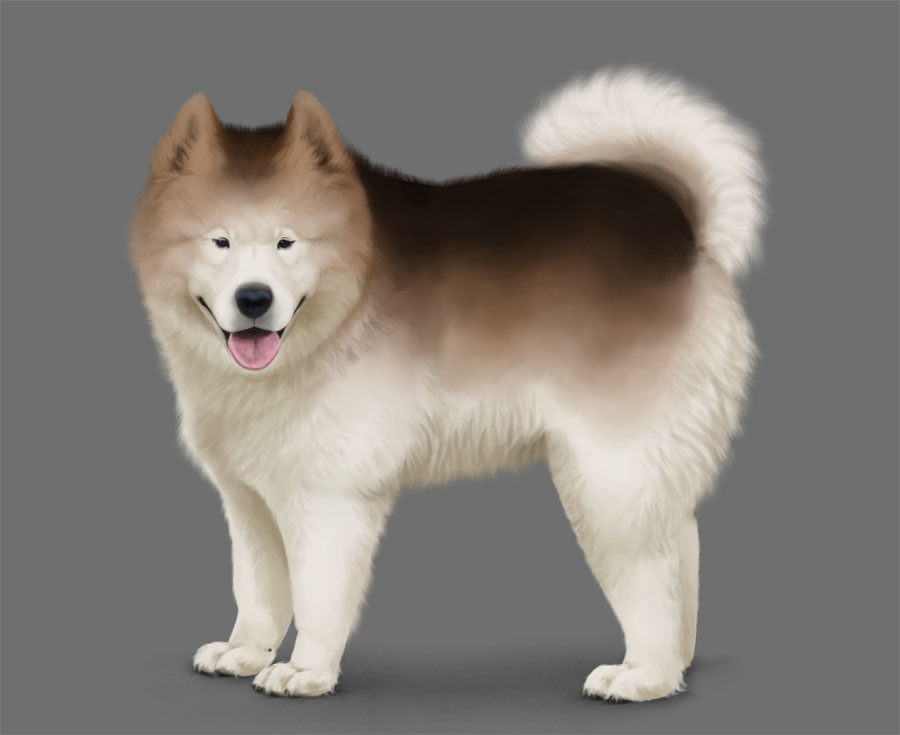
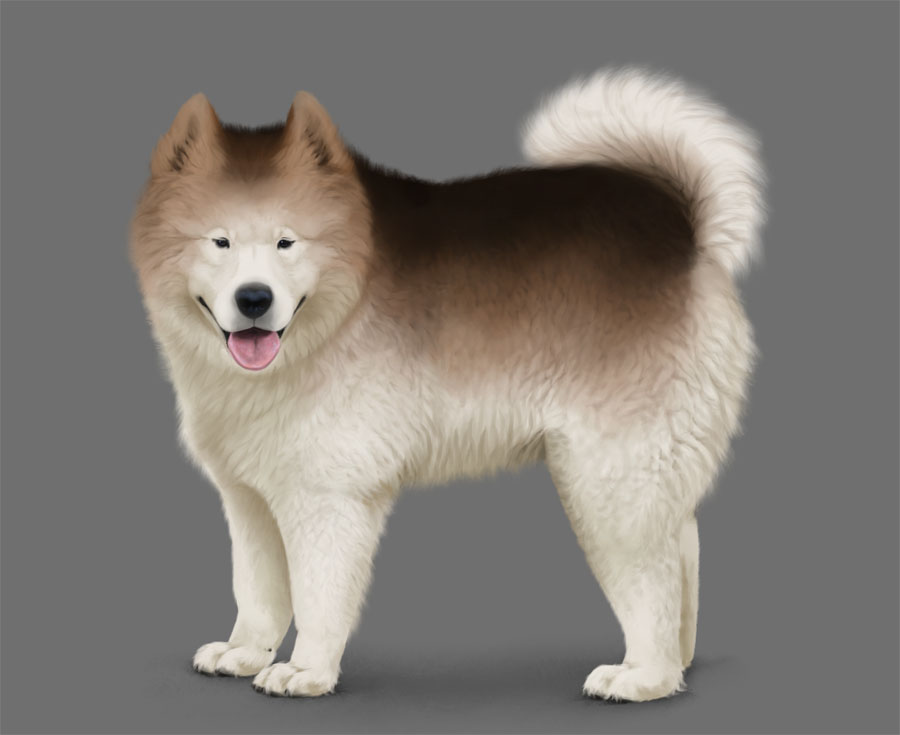
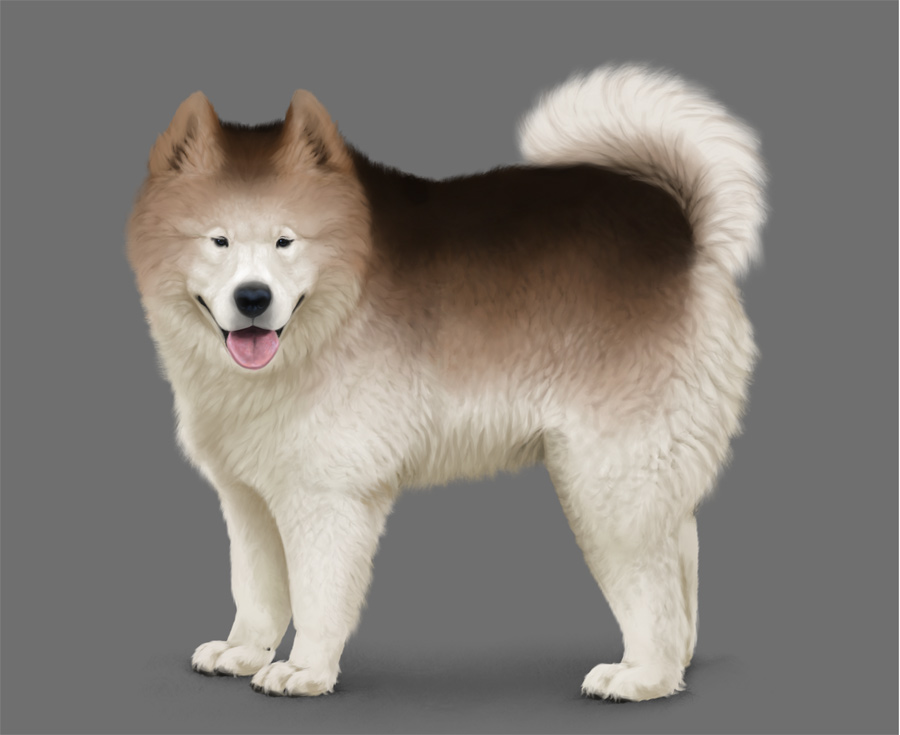
How to draw fur
How to draw fur
How to Draw Fur: Fluffy Fur + Fur Brush Set
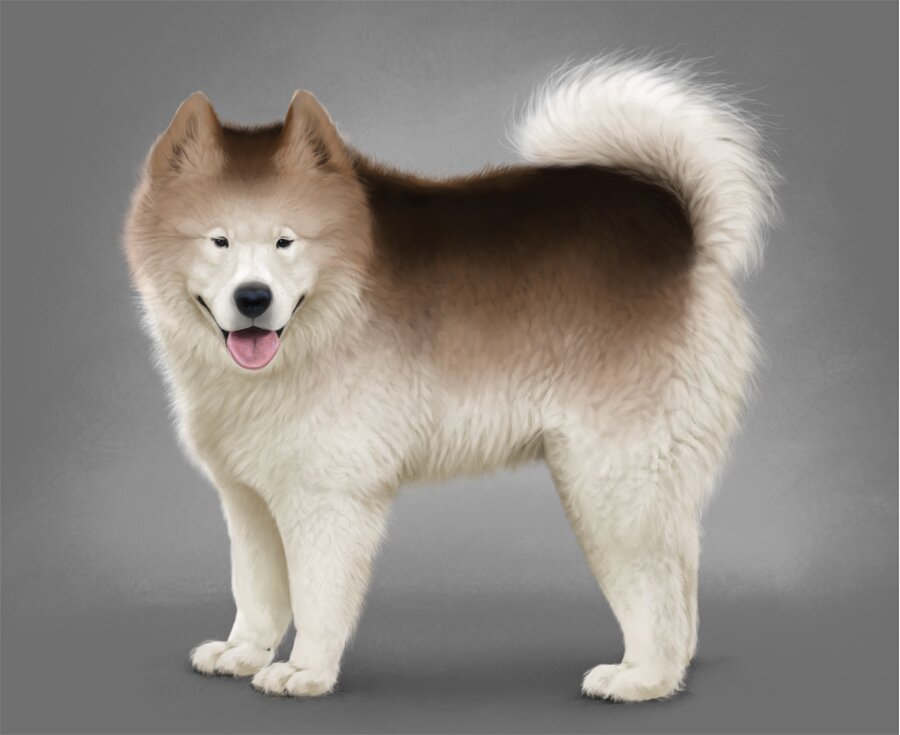
In this tutorial I’ll show you my method of painting fluffy fur. I’ll be using Autodesk SketchBook and two brush sets: my Quick Sketch Set that you can download from the SketchBook Extras panel (Window > SketchBook Extras), and a special fur brush set that I’ve created for this tutorial.
Also, in this tutorial for the first time I’m using a special plugin to better show the difference between certain steps. Please let me know if it works for you, and whether you find it useful or not!
1. Prepare the Layers
Step 1
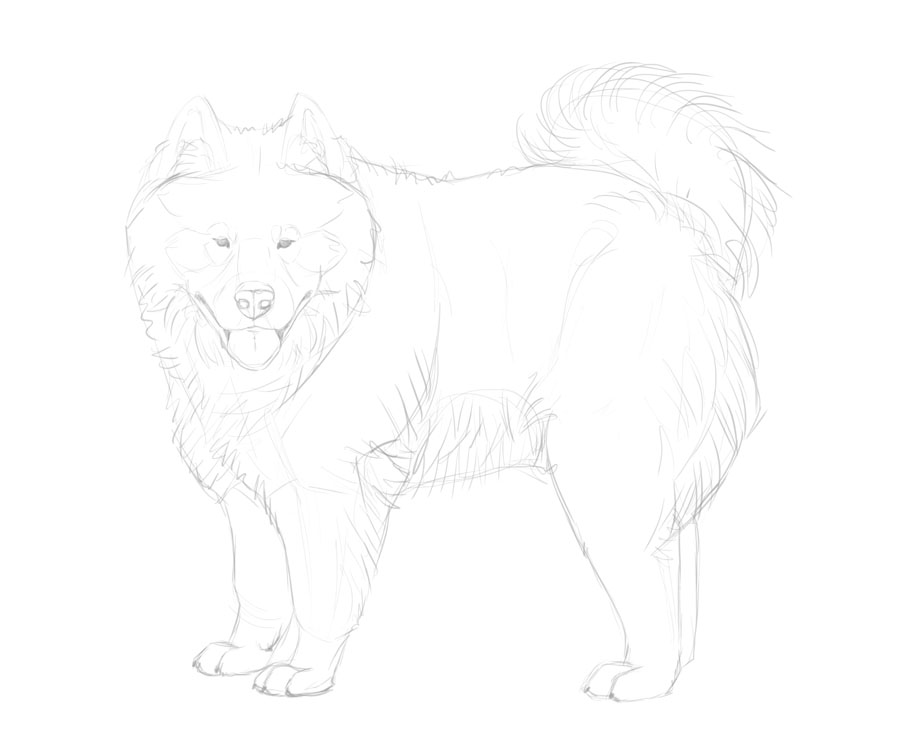
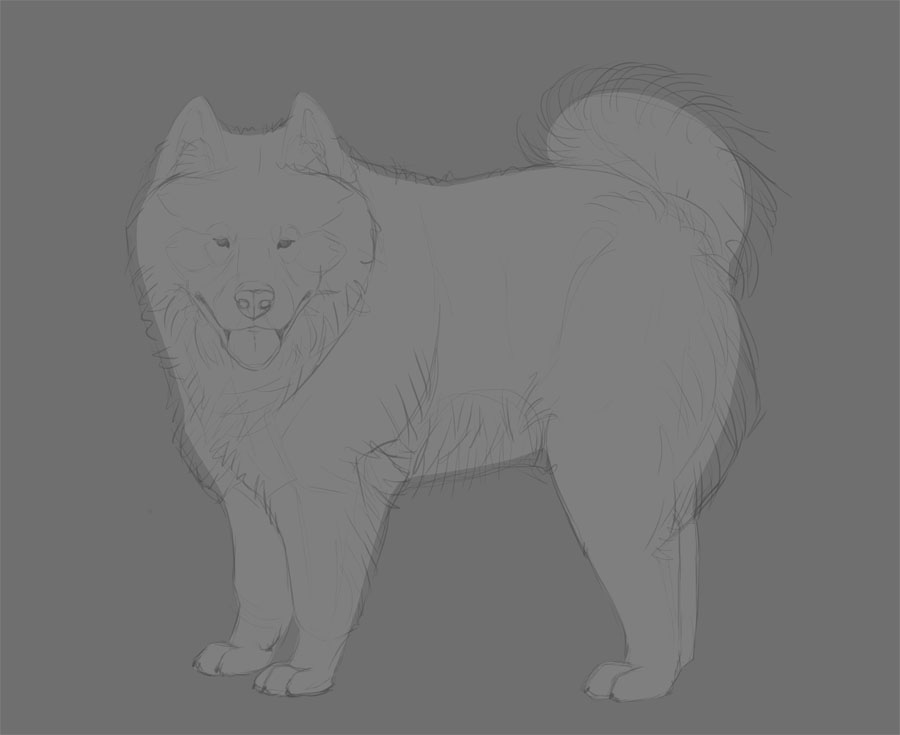
First, you need the line art. It doesn’t have to be super clean, but it must include all the important details. If you want, you can use mine for this exercise, or simply trace the lines from your reference. When you’re done, lower the Opacity of the layer to make it visible, yet non distracting.
Step 2
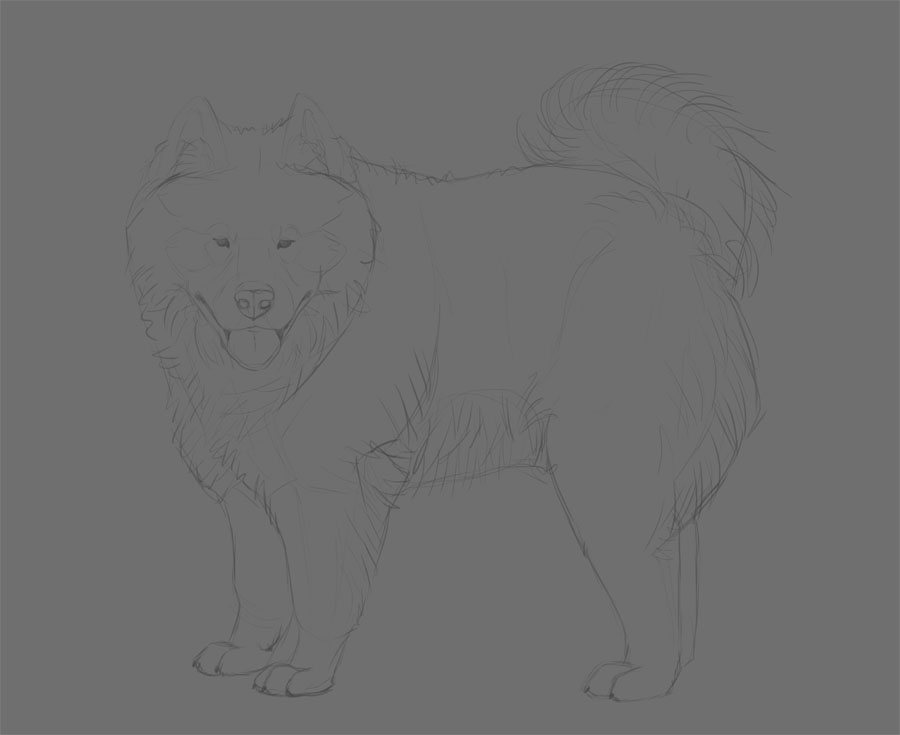
Switch the background color to medium grey. This will help us see all the shades of both light and dark colored fur.
Step 3
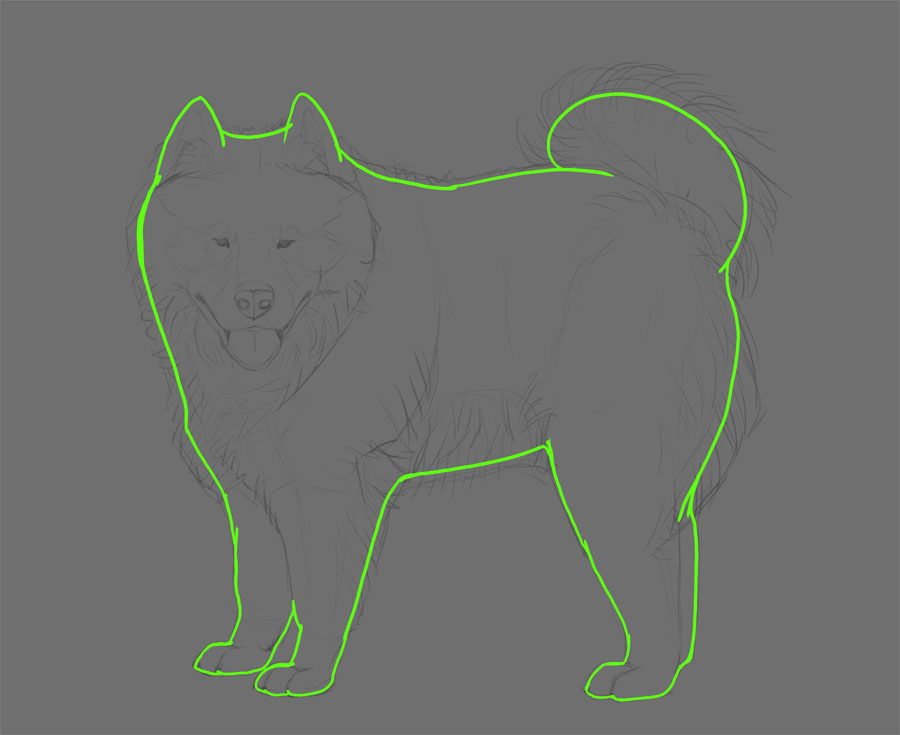
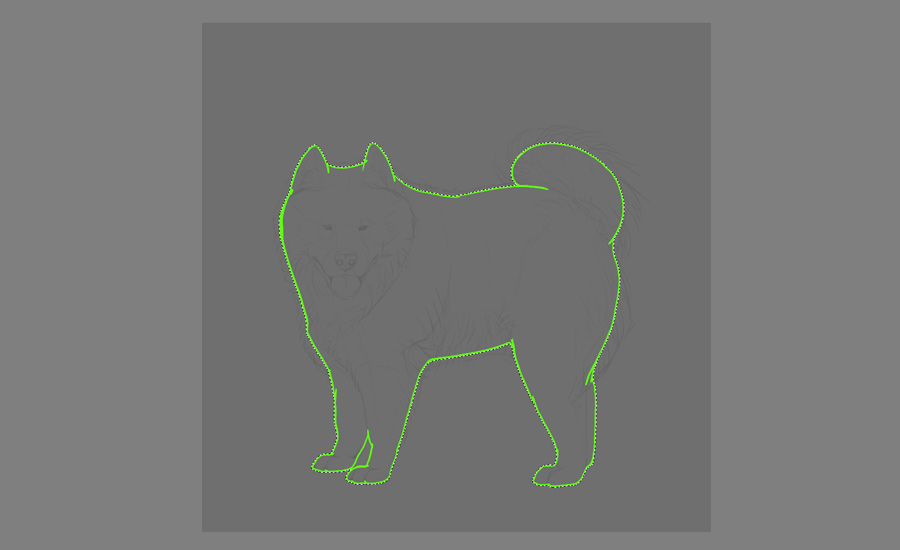
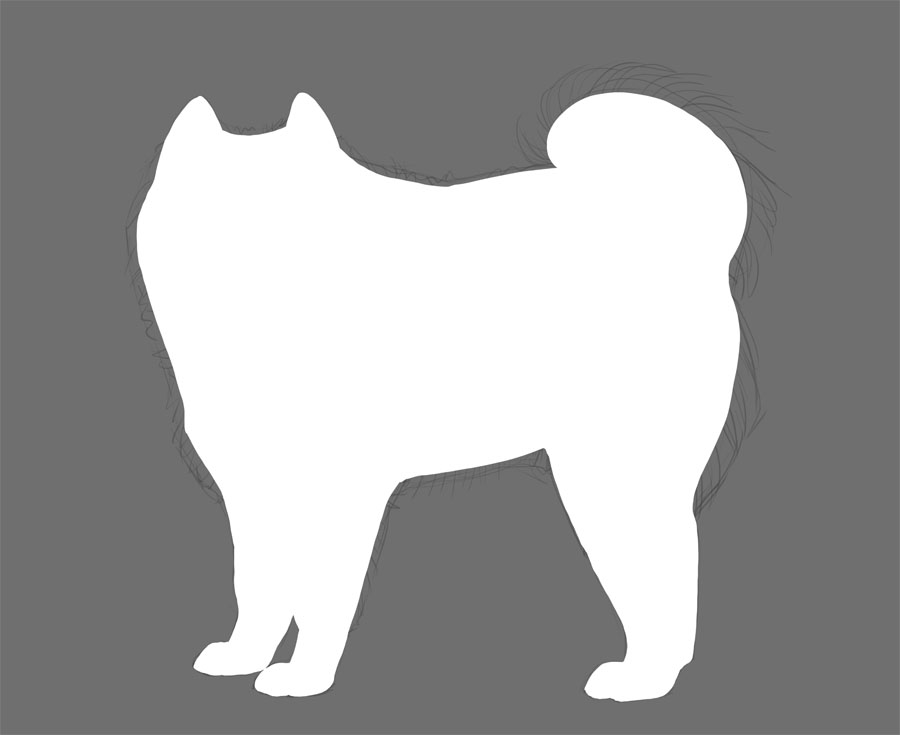
Create a new layer over the line art. Take the Inking Pen and draw the outline of the animal using a bright, neon color. Fluffy creatures seem bigger than they really are—try to draw this real outline rather than the seeming one.
Step 4
Take the Magic Wand Tool (W) and click the space outside of the outline.
Step 5
Invert the selection.

Step 6
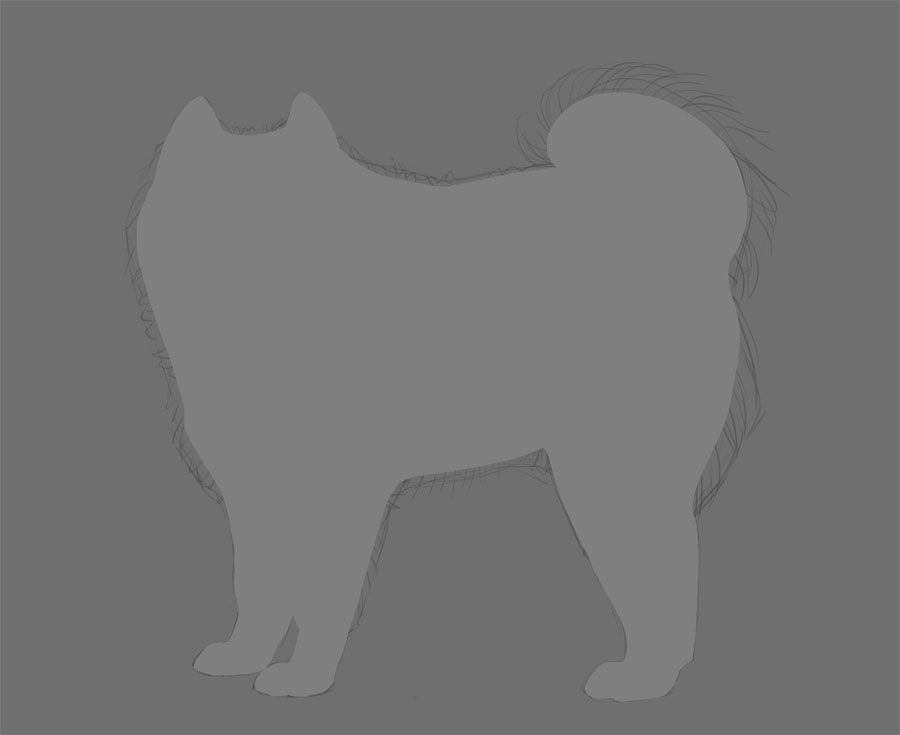
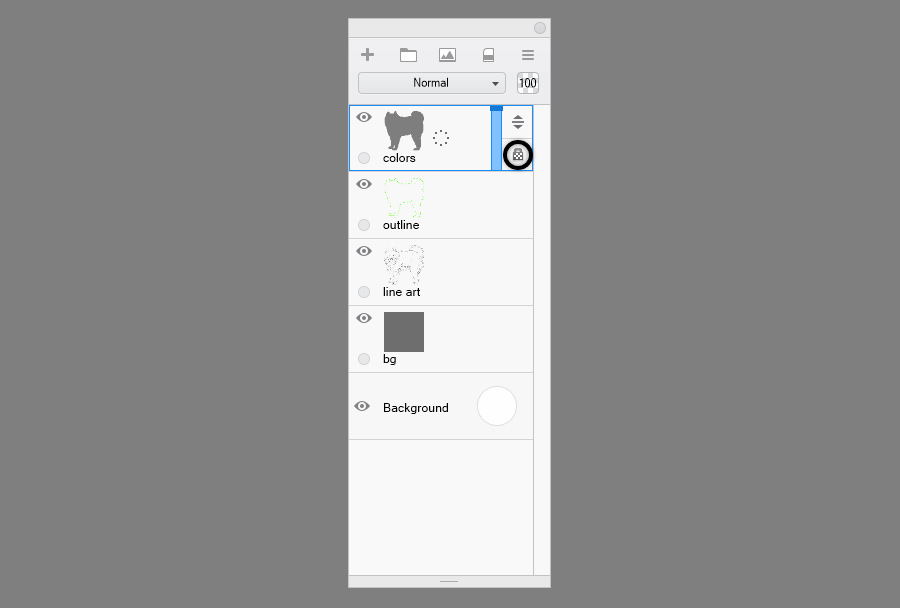
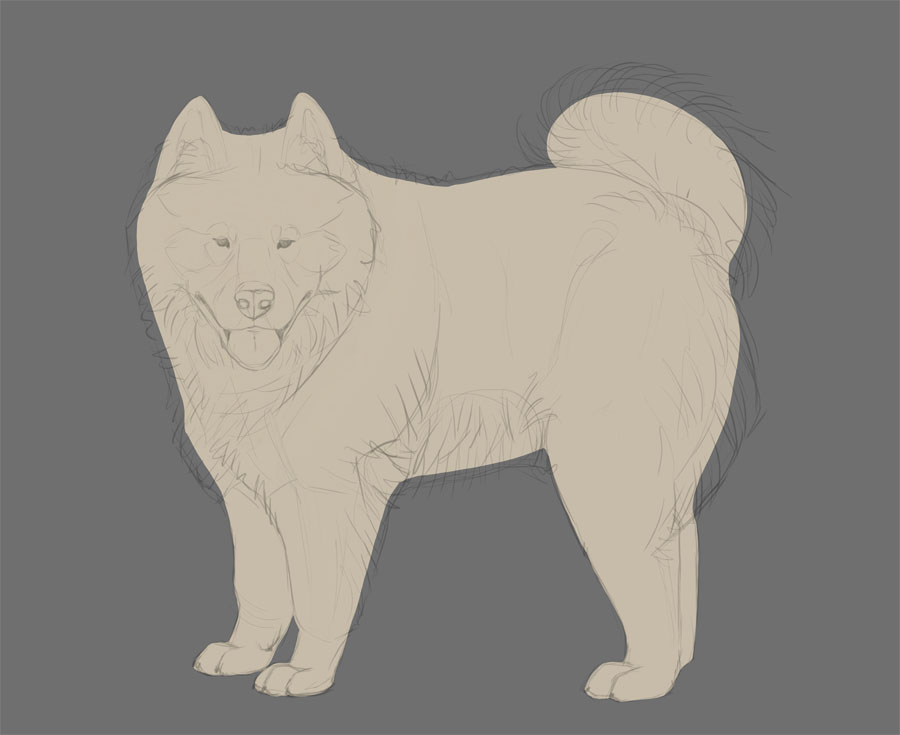
Create a New Layer and use the Flood Fill Tool to fill the selection with 50% gray. Name this layer Colors and lock its transparency.
Step 7
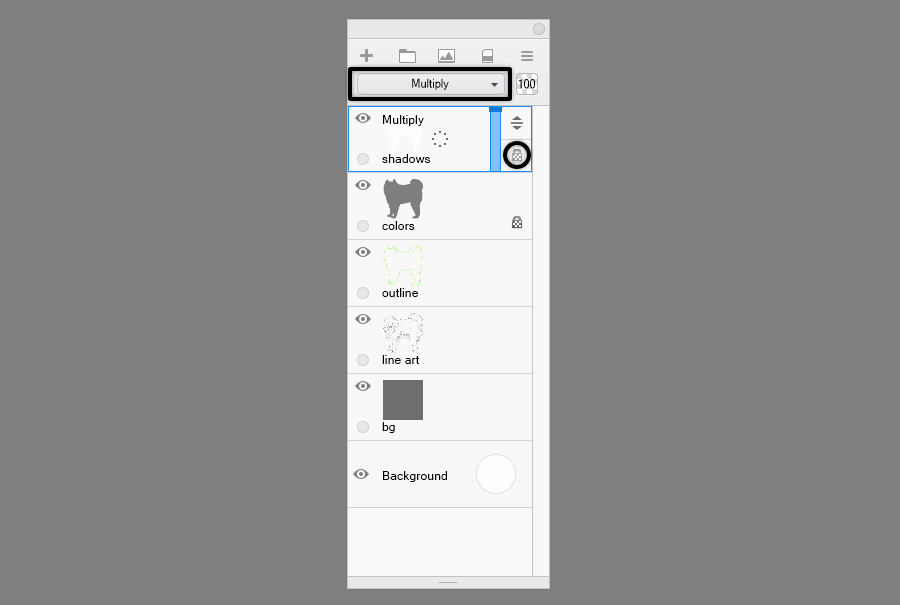
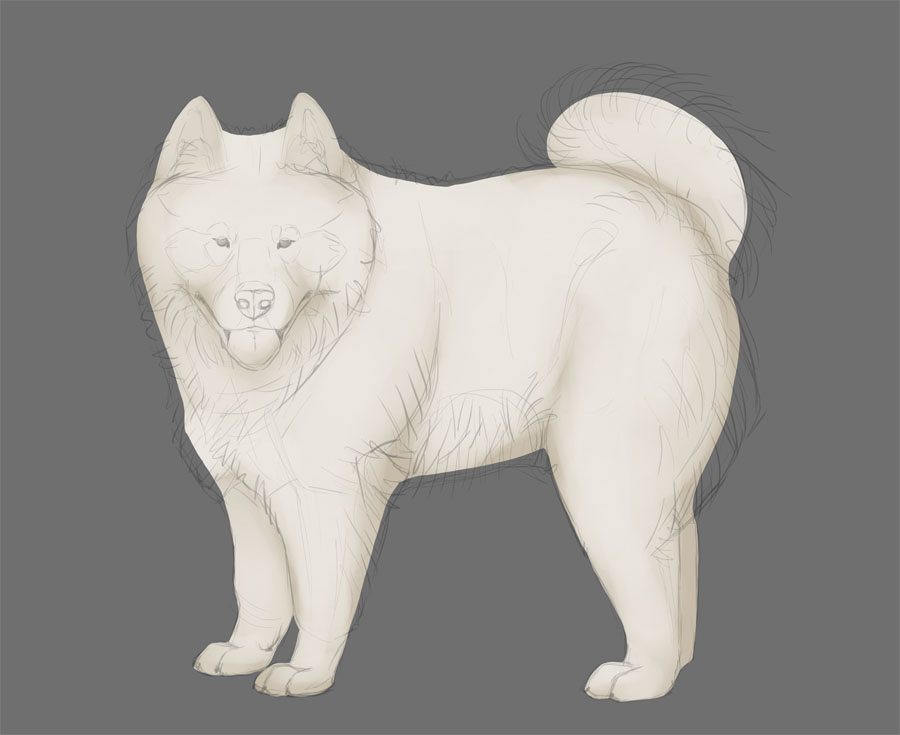
With the selection still active, create a New Layer and fill it with white. Name this layer Shadows, and set its Blend Mode to Multiply. Lock its transparency as well. Deselect with Control-D.
Step 8
You can now remove the neon outline—it will not be needed anymore. Drag the line art layer to the top.
2. Add Basic Colors and Shading
Step 1
Go back to the Colors layer. With the transparency locked, you can draw all over it and you’ll never cross the outline. First, pick a base color for your fur. I usually start with dark beige, because most creatures have light colored underside. You can use any brush for adding this base color.
Step 2
Take the Painting brush now. Pick a brighter version of the previous color and paint over the body parts. Don’t think about the position of the light source yet, but rather try to “sculpt” the form of the animal by leaving out the areas that would be darker regardless of the lighting. This is a very basic form of ambient occlusion.
Step 3
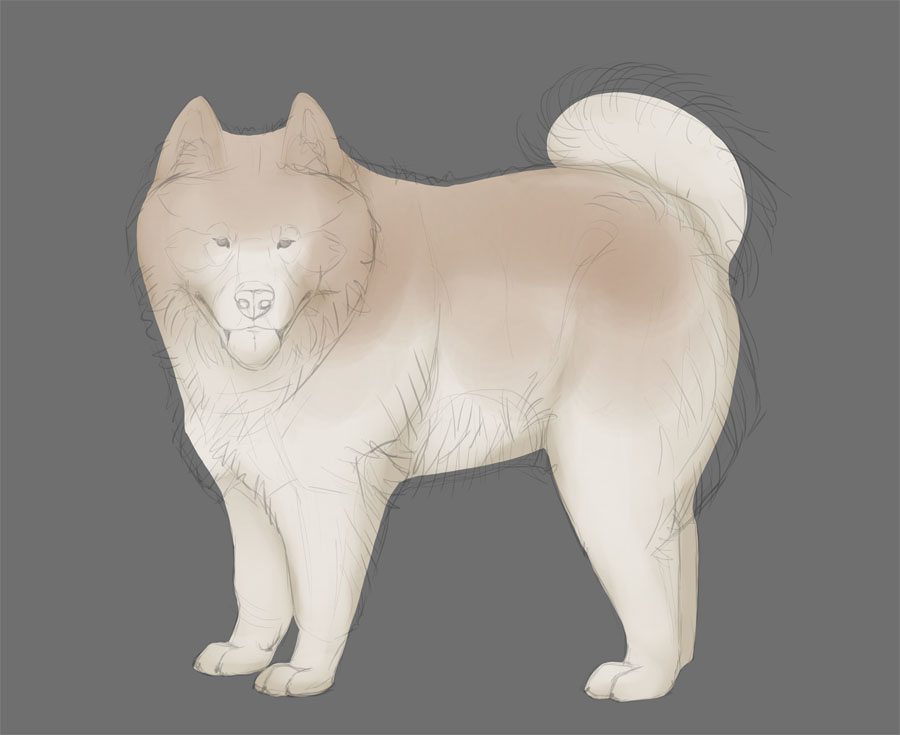
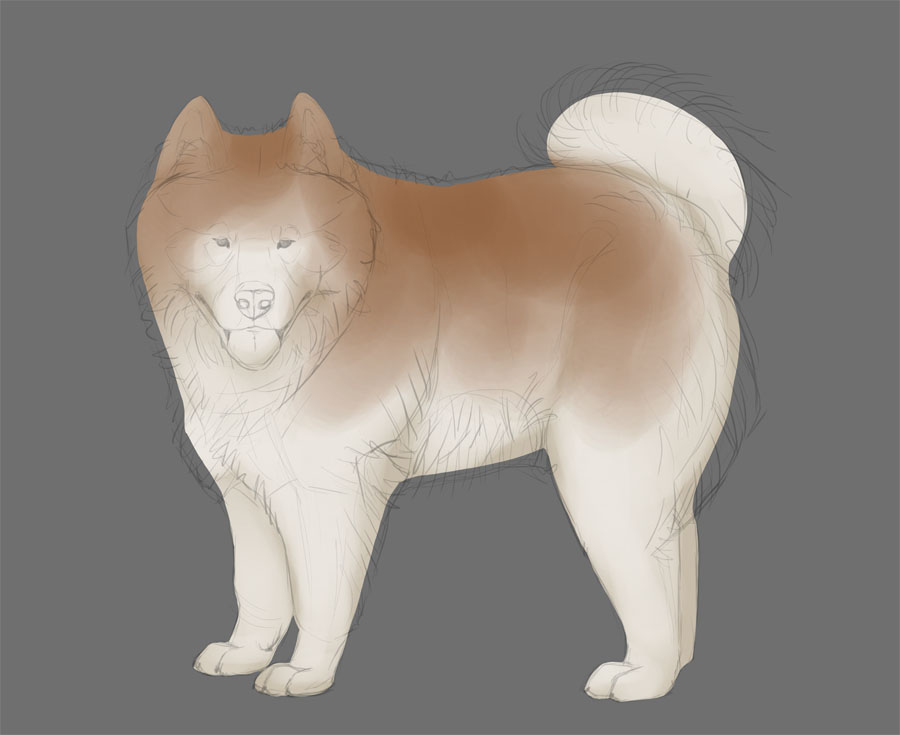
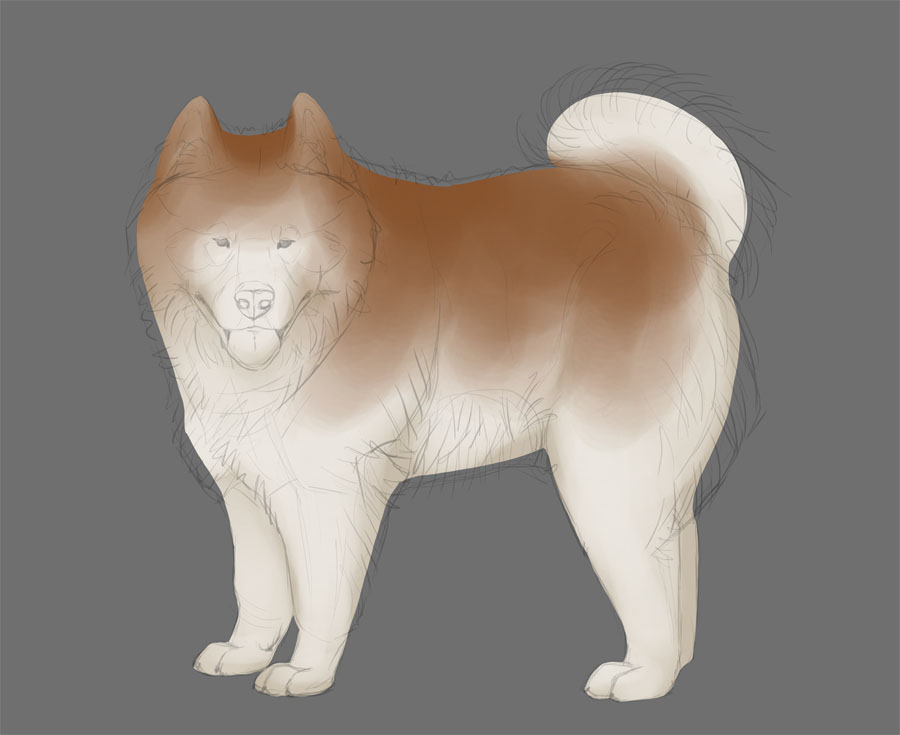
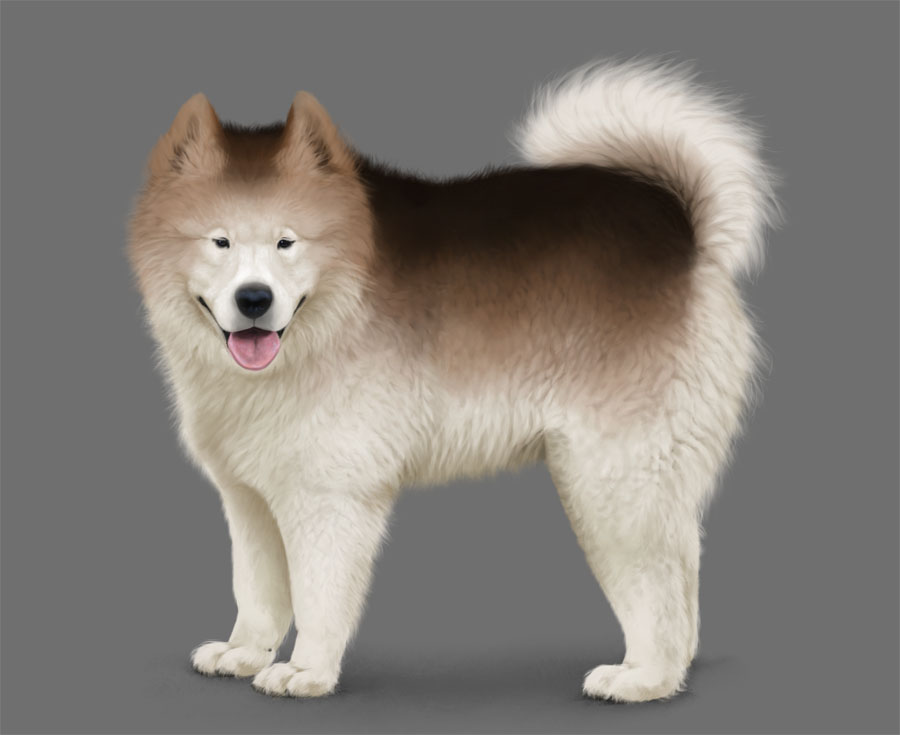
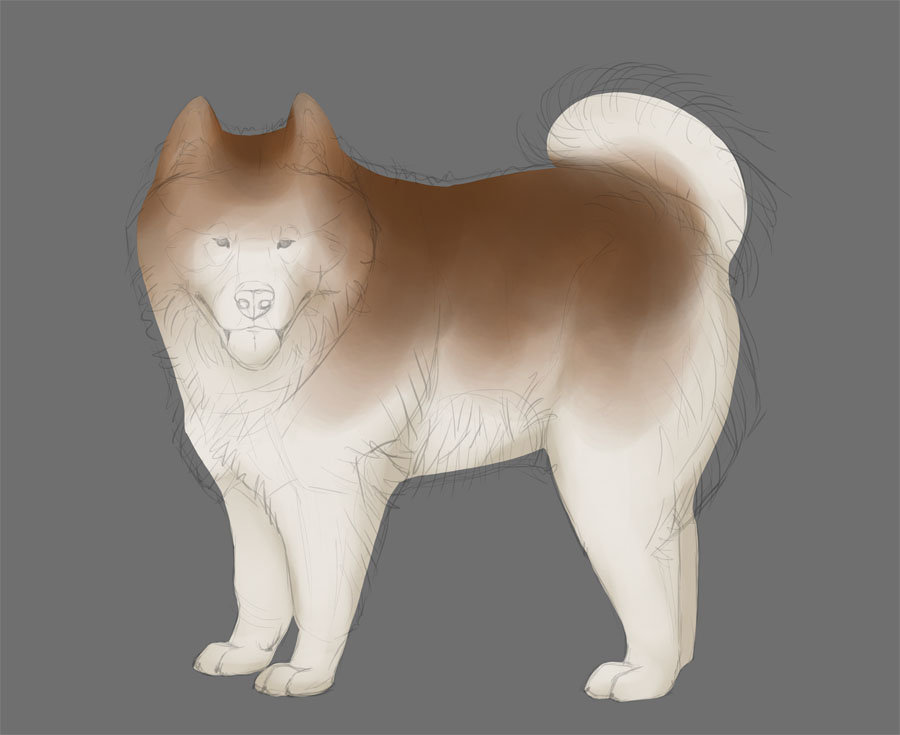
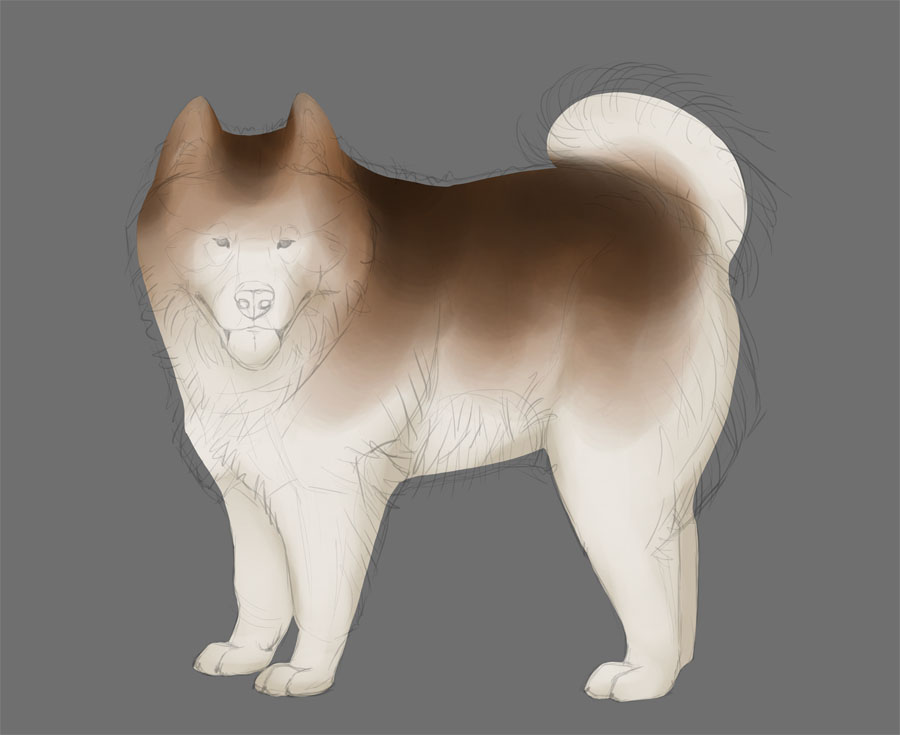
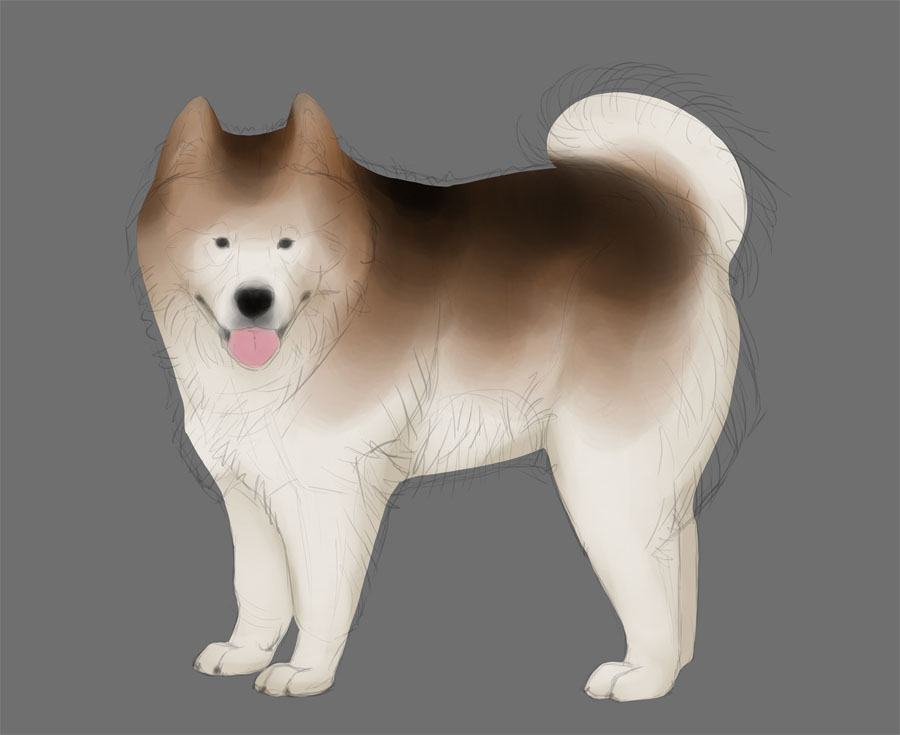
Samoyeds are normally white, but since I want to show you how to draw fur in all colors, I’ll add a simple pattern to mine. When adding different colors, it’s good to think in terms of gradients. For example, if an animal is brown with white underside, white turns into into brown gradually, sometimes even switching tone from warm to cold, to warm again.
To create this appealing gradient effect, first paint the pattern with the middle color, not the final one. And do it gradually as well! First, paint the pattern with a big brush, but press very lightly, to mark it subtly.
Then press harder as you go towards the area where the intended final color will be.
And then press even harder, until you add 100% of the current color.
Next select the final color, and repeat the gradual process. You should end up with a natural effect of one color turning into another.
Step 4
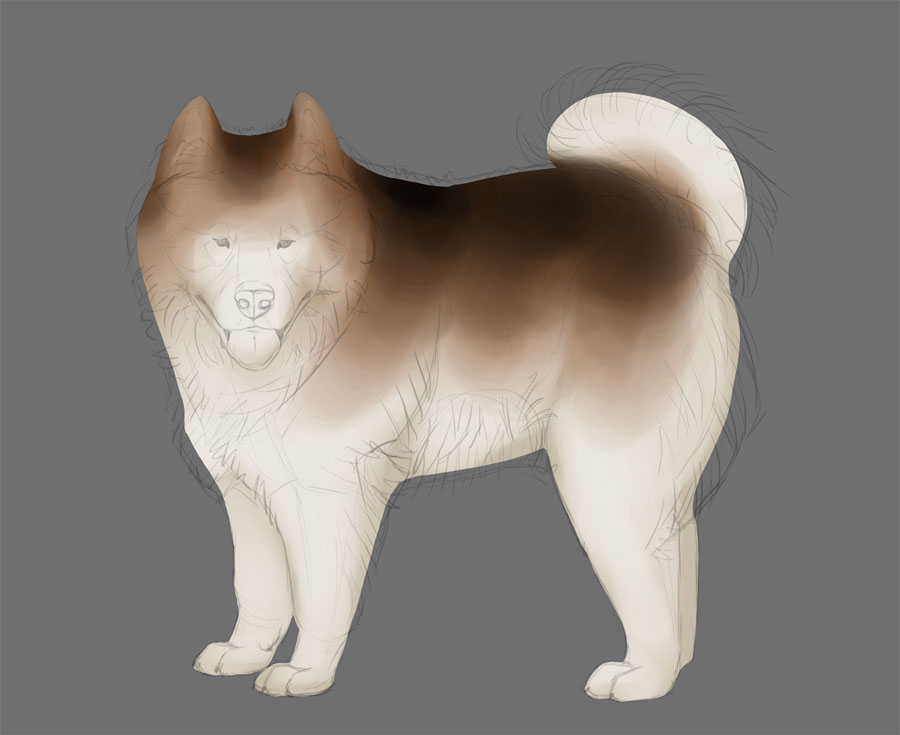
Once you have the basic color pattern, you can add colors to the details. Do it with big strokes, without trying to be precise—this is not the time for it yet! Avoid perfect black and perfect white.
Step 5
Now, go to the Shadows layer. In case of fluffy animals, big shadows are not that visible—light is caught in the fur and shines through everywhere. Still, there are certain areas that should be darker. Paint these with light, warm color—the darker the shadows, the warmer the color should be.
Step 6
Also, it’s a good time to paint the shadow on the ground. It will help us see the whole form of the animal better. Do it on a separate layer under the others.
Step 7
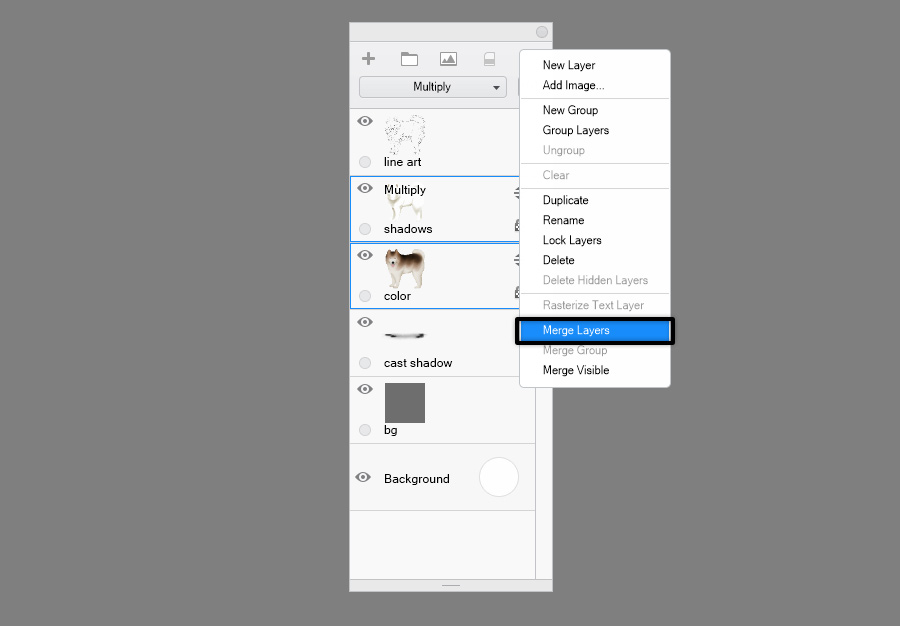
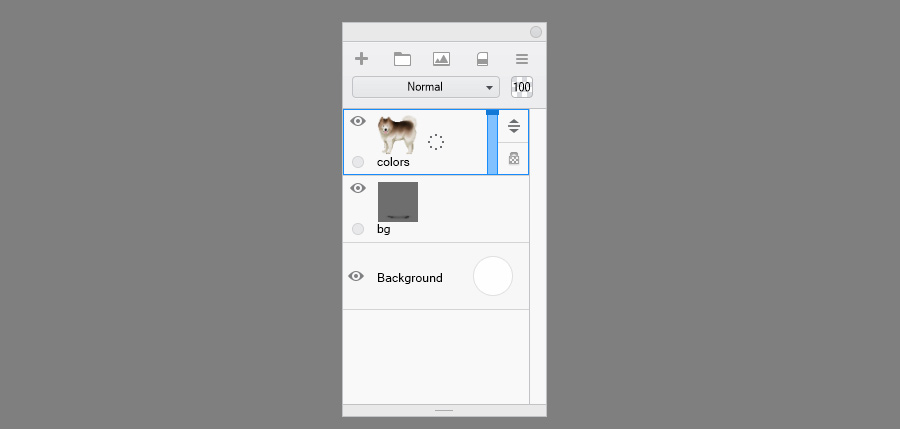
Merge the Colors layer with the Shadows layer. Go to Image > Image Size and make your image at least 6000 px wide.
3. Draw Simple Fluffy Fur
Step 1
Now take the Fur Maker brush and drag it over the outline, creating an illusion of fluffy fur. This is my favorite part, because the effect is instant! Just don’t overdo it—this isn’t the end yet.
Step 2
Take the Magic Wand Tool and again select the area outside of the creature. Go to the line art layer and press Backspace to remove the selected area. Deselect and merge this layer with the body.

Step 3
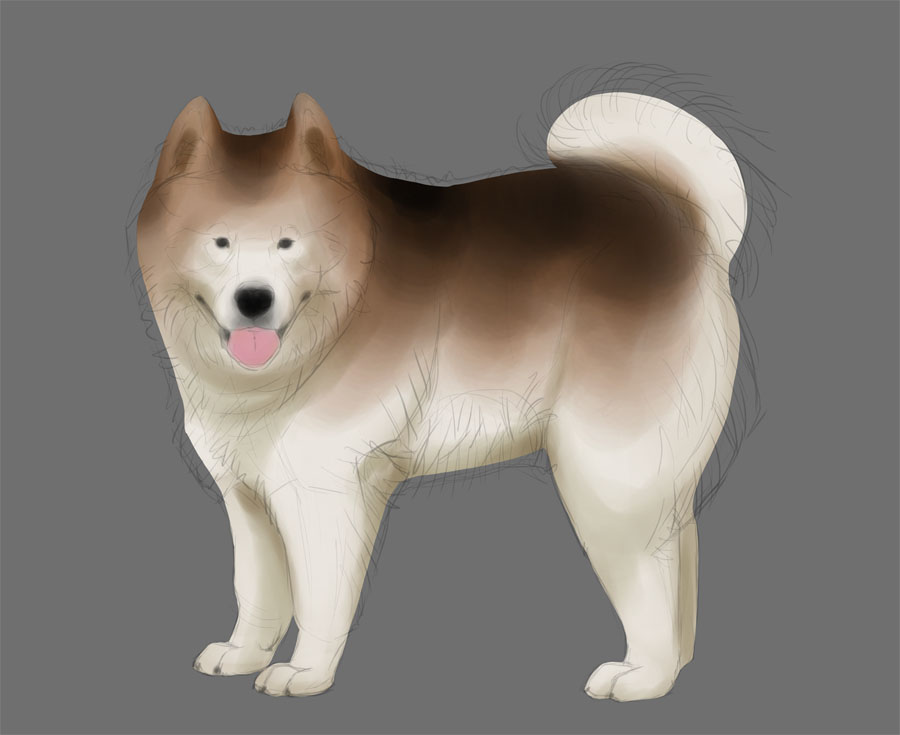
Now, take care of the details that have nothing to do with fur. Give them a finished look, so that you have a clear point of reference for the rest of the artwork. Since this tutorial is focused on drawing fur, I won’t be explaining how to draw these details.
Step 4
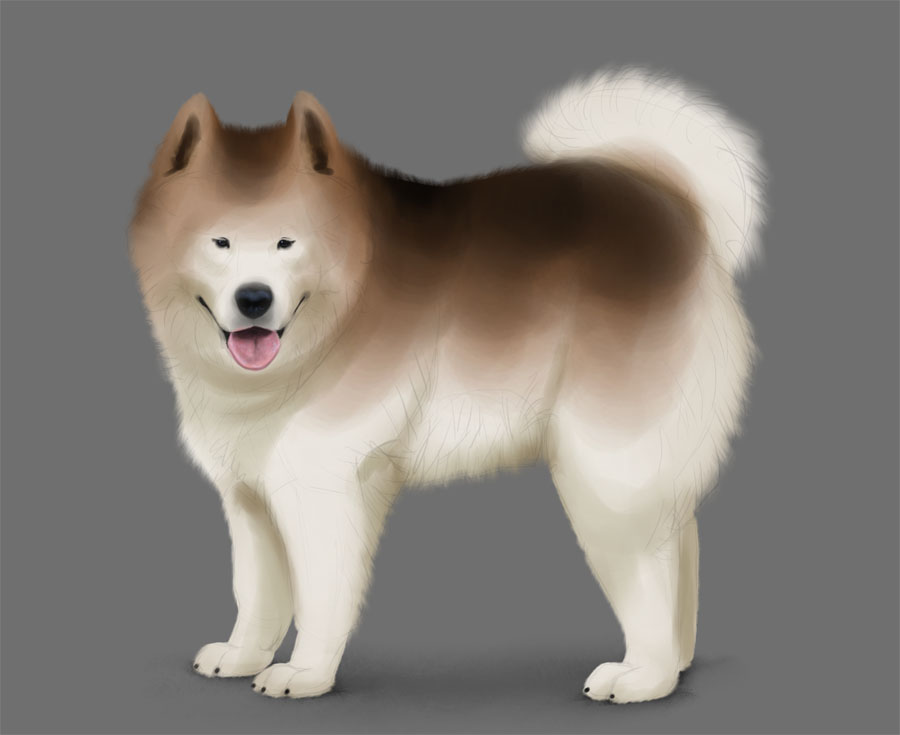
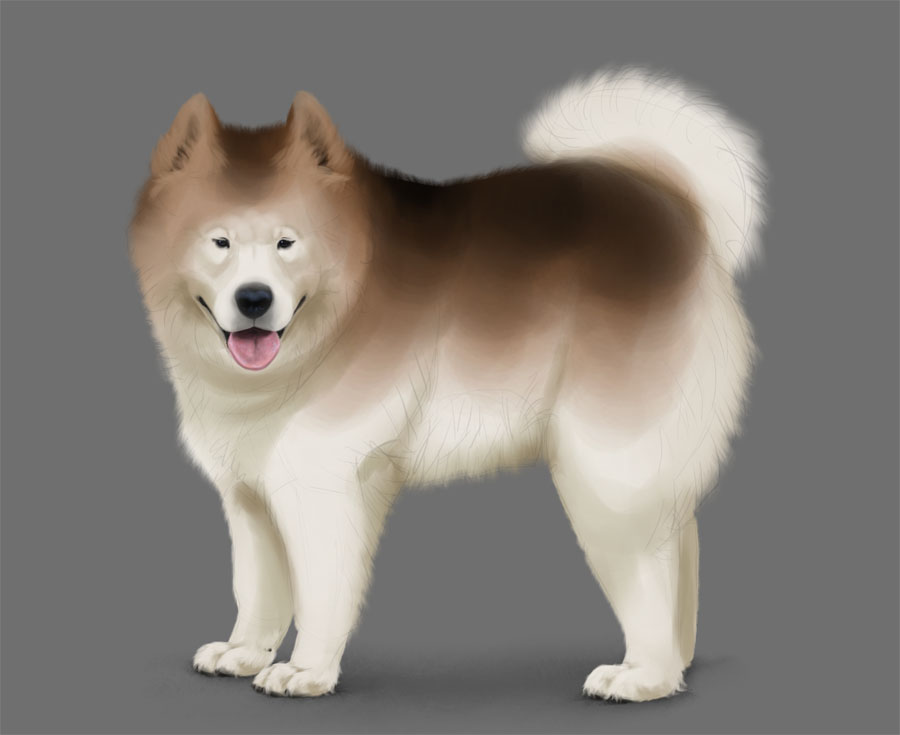
Next, let’s go to the ears. Fluffy ears are very easy to draw! First, draw their dark inner part.
Step 5
Unlock transparency, if it’s locked. Take the Fur Strand brush, pick the color of the fur next to the ears with the Eyedropper Tool, and paint over the edges of the dark area.
Step 6
To make the ears even fluffier, take the Airbrush and cover the upper part of the dark area.
Step 7
Let’s go to the paws now, since they’re another small detail that should be easy enough to finish. Pick the color of the shadow and cover the lines by sculpting the form of the toes with the Painting brush.
Step 8
Now pick the color of the illuminated area, take the Fur Strand brush, and paint over the illuminated part of the toes. Don’t draw too any details—your goal here is simply to hide the sharp outline of the paws.
Step 9
Let’s go back to the face. We need to cover the lines here using the same method, but this time you need to pay more attention to details.
Lock transparency again. Shade the smaller forms of the face using the Painting brush, and then cover the shadows with colors picked from the area. If you keep your brush big, and your strokes light, you should be able to achieve a soft type of shading that is perfect for fur.
Step 10
Do the same with the rest of the body. Remember: your goal here is to cover the lines, add more detailed shading, and create soft transition between the colors. Use the Painting brush only, and keep it big (unless you’re painting a shadow under a body part). The more often you pick the color from the area before you paint, the more natural the transition will look.
4. Draw Detailed Fluffy Fur
Step 1
The fur should look pretty fluffy already, but it lacks details. We need to cover the soft transition between the colors and the light and shadow with actual hair. To do this, take the Fur Shadow brush. It’s the opposite of the Fur Strand brush—instead of drawing the strands, you’re drawing the shadows between them. So pick the color of the shadow and paint over the transitional areas.
This brush works perfectly for short shadows, If you want to draw longer ones, cross them and mix their brightness for a more natural effect.
Step 2
But fur brushes have their limits. They’re perfect for drawing fur in side view, but what if the hair strands are directed towards you? Then it’s time to come back to the universal Painting brush and paint these shadows manually. You can achieve a natural effect of clumping hair by drawing a lot of loose X’s. Keep them fairly light.
Step 3
Now it’s time to finally make the brush smaller and draw tiny shadows inside these shadows. Find the areas where the strands are separated, and accentuate the separation by deepening the shadow between them. You should do it very subtly, though—you may feel the urge to add more details, but the truth is that real fluffy fur doesn’t have a very detailed look. If you make it too detailed, it will stop looking fluffy, and start looking wet instead!
Step 4
In the process of painting the shadows you might have covered some of the strands. Now it’s a good time to accentuate them back, to give them a right shape.
Step 5
Once we’re done with the strands, we can finally add some loose hair. With transparency unlocked, use the Loose Hair bush to add extra fluffiness to the fluffiest areas.
Step 6
And if you need even more fluffiness, you can draw single hairs using the Single Hair brush. Just keep these strokes loose and natural—it helps to shake your hand a little. Also, remember that loose hairs tend to clump together—if you draw them separated, they will look stiff.
Step 7
The fur is done! If you want, you can add some rim light by painting over the edge with much brighter version of the color (with transparency locked). You should also take a good look at the whole image and decide if there’s anything that can be improved. In my case, I made the tail fluffier by adding more loose hairs.
Conclusion
Now you know how to paint fluffy fur in SketchBook! But if you found this tutorial overwhelming, I would recommend going back to the basics of digital drawing with my series Digital Drawing for Beginners:
Hairy Details: How to Draw 3 Types of Fur
April 15, 2015 By Antonella Avogadro & filed under Art Blog.
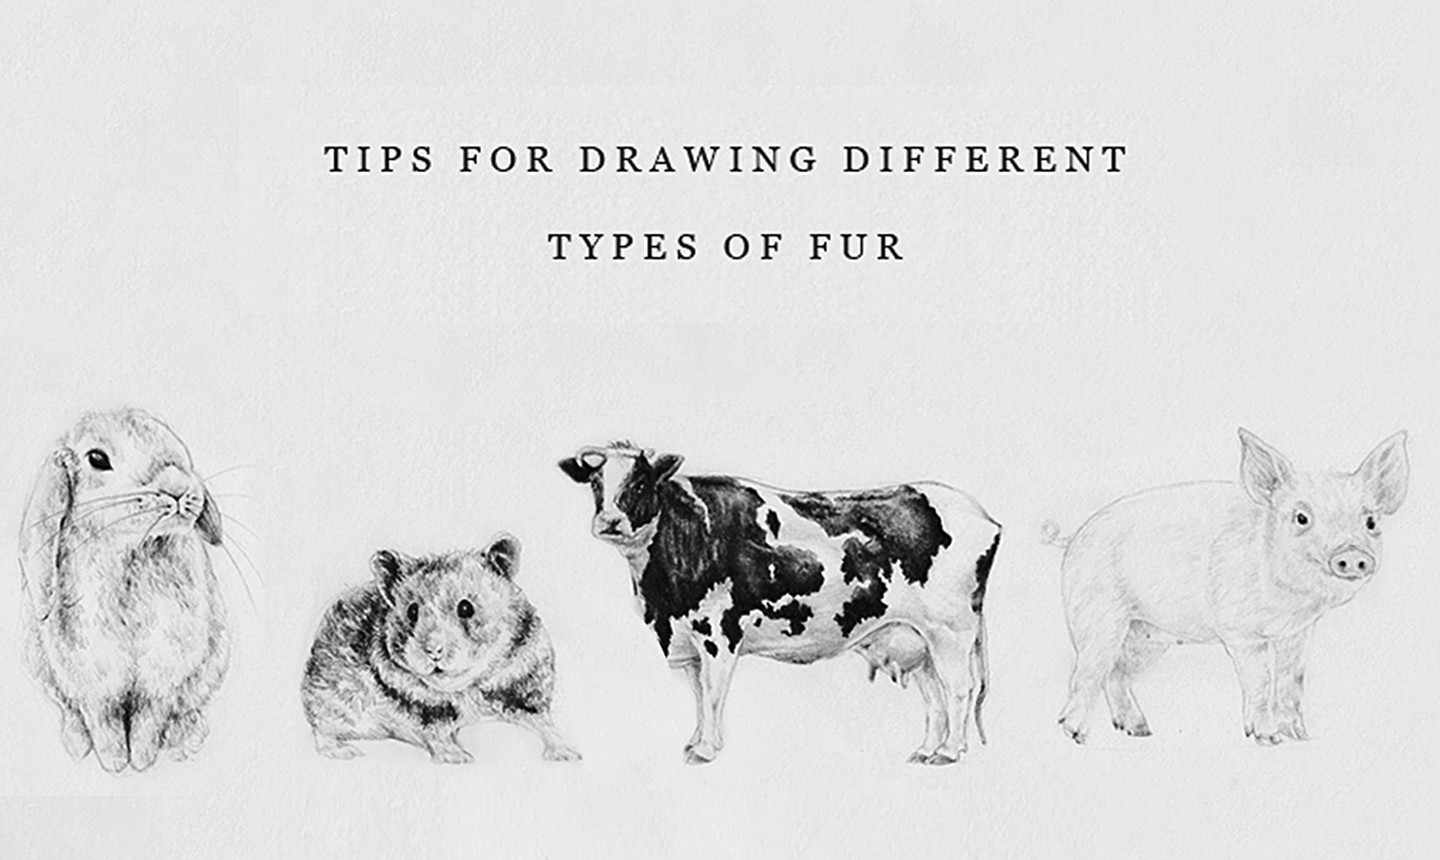
Fur can seem like a very challenging subject to draw given that it presents a plethora of detail to draw. Even hair in general can be very an intimidating thing to draw.
The key to drawing fur is to focus on the fur as a whole and how it is affected by lights and shadows instead of trying to draw every single strand of hair. Doing so will make it easier and faster to depict the fur while still maintaining a realistic look at the same time.
Check out these examples and learn how to draw realistic fur.
The most important thing to consider when drawing fur is the direction of the strands of hair. You don’t need to draw every single hair on the animal. You don’t even need to draw one hair. This is because what you need to do is shade sections of fur in their appropriate direction, and the pencil shading will innately give the impression of hairs. So, forget about trying to draw strands of hair and instead think of it as shading shapes.
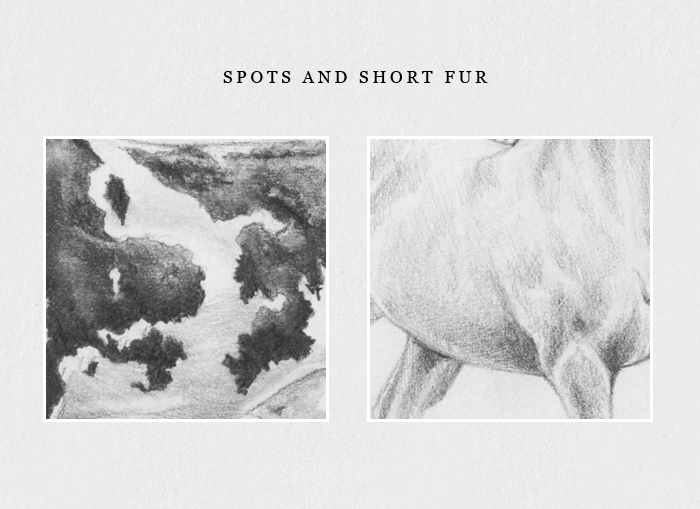
Spots and Short Fur:
How to draw spotted fur:
For spots, it is best to begin by drawing a faint outline of their shape and where they will be located, in order to have a clear sense of proportions before we spend more time developing fine details and shading.
In the case of a cow, for instance: Yes, their spots are black, but you will notice above that there are different variations in the tonal value throughout the black spots. The lighter areas of the spots are where the light hits the cow’s skin and the hair reflects some of it.
Keeping this in mind and applying it while drawing will ensure that your work looks much more realistic than if you were to shade all the spots in just one tone of black. The different tonal values enhance the realism of your drawing, and they also give it more dimension and depth.
How to draw short fur:
In the case of short fur with no spots (like the horse in the second example above), simply shading the areas in shadow will suffice when rendering it.
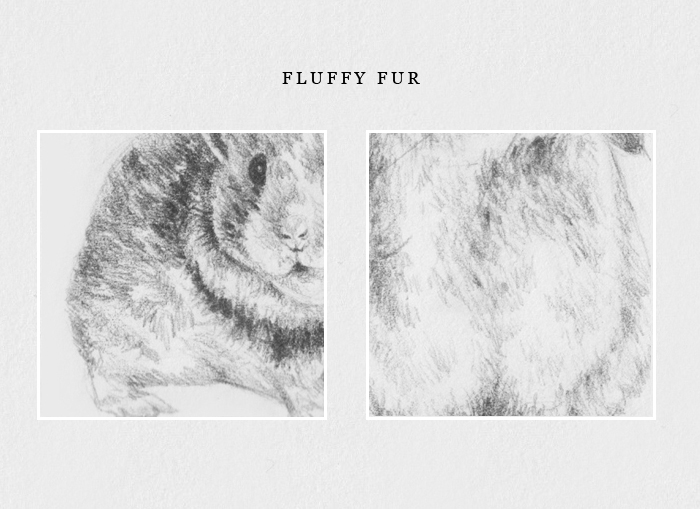
Fluffy Fur:
This type of fur will, most likely, look homogeneous or “flat” in certain areas (like on the white areas on the second close-up above) and there will be few perceivable hairs and strands. The hairs will begin to be more noticeable in areas where the animal is creasing or bending. This is why the fur will look darker where there are folds (for example, the first close-up above). In this case, it is helpful to shade while drawing small lines and “V” shapes to suggest the look of hairs.
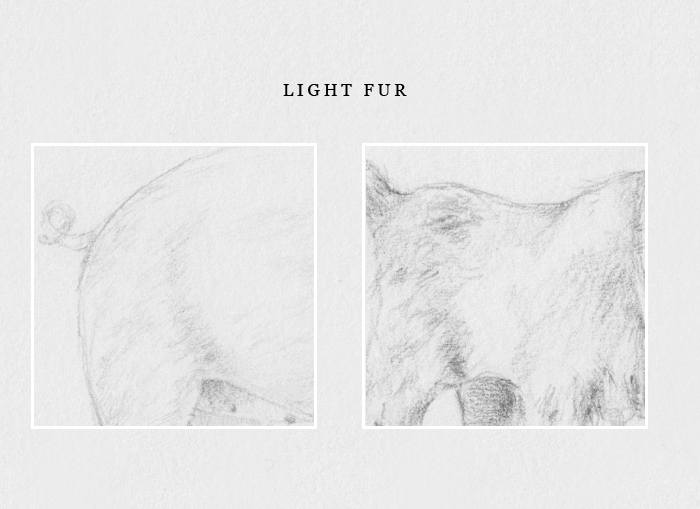
Light Fur:
Many animals have a very thin layer of fur. To realistically depict the animal, you need to create that texture on their skin. As you can see in the examples above, it’s fairly simple to render light fur because it’s barely noticeable. Just some quick and simple shading will give the look of a pig’s skin or a goat’s white fur.
How to Draw Fur
Drawing fur from imagination can be very frustrating. You’ve seen it, you know what it is, but when you try drawing it, you end up with a bunch of straw.
If this is your problem, in this tutorial I will show you how to solve it. First hint? You need to draw what you see, not what you know!
What You Will Need
1. What Is Fur?
With start with some theory. You’ll be able to draw pencil fur much better just by learning these few simple facts!
First, fur is made of hairs that lie one upon another, creating a smooth surface. However, when the surface they lie on bends, they start to clump—the individual hairs are grouped.


This «clumping» can occur in all dimensions, creating either «waves» of hair or small separate clumps.

We can see everything because of contrast between light and shadow. The bigger the clumps, the bigger the shadow between them.

When you draw fur by drawing individual hairs, what you’re really drawing is skin illuminated from below, with hairs blocking the light. That’s why it looks so odd!

So the big secret is: to draw convincing fur with a pencil, you need to draw not the hairs/clumps, but the shadows between them.
In fact, that’s how you should always approach drawing. We draw light and shadow, and nothing more. A single hair can be similar to a simple pencil stroke, but you can’t draw fur by drawing a lot of simple strokes!


2. How to Draw Long Fur
Step 1
Let’s draw a fluffy tail as an example. Imagine its top is slightly bent away from you. Use the HB pencil to draw the basic shape of the tail. Don’t press too hard—we don’t want to see it later.

Step 2
Tilt your pencil and fill the shape with gray. Don’t press too hard to achieve a uniform effect. You can simulate the flow of hair with your strokes, but it’s not necessary.


Step 3
Take the 2B pencil and use the same technique to shade the side of the tail. We need to give it a 3D form.

Step 4
Press harder near the edge to make the shadow gradually darker.

Step 5
Take the HB pencil again and draw «side hair». These curves will define the direction of the fur all over the tail. Remember about that bending on top!

Step 6
Tilt your pencil and turn every hair into a sharp clump. Be gentle!

Step 7
Now the difficult part—we need to draw the shadows between clumps. There are certain «signs» you can use as a base, but you need to try it yourself to understand how it works. Practice on the side for a moment if you’re not sure how to do it.
Use the hair on the side as a guide for direction. The greater the angle, the shorter and wider the shadows should be. Use the 2B pencil for this, and hold it tilted for a more natural flow. If you drew any sharp, thin lines, your eye would mistake them for some stray hair, which would break the effect.

Step 8
Continue by going to the right. The closer to the edge, the narrower and tighter the shadows should be.

Step 9
Keep using the same pencil, but for the other side press harder for a darker shade.

Step 10
Clumps are easy to achieve, and they look quite appealing, but it’s not normal for a smooth surface to be so clumped. Draw some bigger, wider shadows in the lower area to create «waves» (smooth groups of clumps).

Step 11
Take the 4B pencil and draw some tight, dark shadows on the shadowed side. Don’t make them too big!

Step 12
Use it to add some darker shadows to the middle part as well, but do it very subtly. This part doesn’t need a lot of shadows, and the clearer they are, the wetter the tail will look.

Step 13
Take the blending stump or a cotton swab if you don’t have it. Gently blend the clumps, «drawing» over the fur according to its flow.

Step 14
Take the eraser to add some highlights to the illuminated side. If you have a kneader eraser, you can actually draw some hair with it—if not, a normal eraser will do.

Step 15
Time for the mechanical pencil. Use it to add tiny shadows within the clumps (the big clumps are made of smaller clumps, after all). Be very, very careful—too much of it may destroy the effect. Feel free to copy the shapes of the shadows you see in my drawing.

Step 16
Use the same pencil if you want to add details to the lower part, but avoid any bigger shadows here. This part should be smooth and soft!

Step 17
Go back to the top and add the splitting at the ends of the clumps. Remember to draw them using shadows only!

Step 18
Draw single loose hairs on the sides for a fluffier effect. Don’t press too hard!

Step 19
Take a break and then look at your drawing once again from a distance. Turn it upside down, see it in a mirror, and maybe take a photo to get a different perspective.
If you notice something you’d like to change, this is the time to do it! However, don’t be tempted to add more contrast—the darker the shadows, the harder the clumps will look. Soft fur doesn’t have so many clear shadows, because light easily gets through it.

3. How to Draw Short Fur
Step 1
Short fur is based on the same rules as long fur. After all, it doesn’t matter how long the fur is, but how long it is in relation to the surface it lies on. The smaller the surface, the more bending and the more clumps there are. The bigger it is, the more uniform the hair.
Let’s draw the base of a lion’s tail as an example. Again, imagine it bends on top. Draw it with the HB pencil.

Step 2
Tilt the pencil slightly and draw short hair in the middle. Don’t draw in rows, but rather go across and back again for a less artificial effect.

Step 3
Continue on the side, this time drawing them tighter and with a wider angle.

Step 4
Do the same on top, keeping in mind there’s bending here—the fur will look shorter in this area.

Step 5
Do the same on the other side, using a 2B pencil.

Step 6
Time for the shadows! This time they need to be really tiny. First in the middle.

. then on the side. Here they may look more like simple lines.

Step 7
Press harder on the other side to achieve greater contrast.

Step 8
Take the 4B pencil and add some darker hairs right on the side.

Step 9
Take the mechanical pencil and use it to complete the shadows.

Step 10
Use the same pencil to accentuate the little hairs on the side.

Good Job!
As you can see, fur isn’t so hard to draw once you know the rules. You can use this knowledge to draw all kinds of fur now!
Did you enjoy this tutorial? You may like these too:
How to Draw Fur
Introduction: How to Draw Fur
In this tutorial, I will detail the best ways for beginners to draw fur. When I started drawing, I really enjoyed drawing animals, but I did not know how to approach the fine details of fur. Hopefully, this tutorial will help you begin learning how to draw animals!
Supplies
Optional: Tortillon or other blender (cotton swabs, felt, or similar materials work well)
Step 1: Choosing a Reference
First, take a clear, high definition photo of your subject. It is very important to use a clear reference for fine details when drawing. I chose to use this photo of my cat, Oliver, for this tutorial.
Step 2: Draw an Outline
Sketch an outline of your drawing. This doesn’t need to be detailed- but it should mark where changes in fur patterns occur. (I drew a tabby cat, so I marked out the stripes in his fur).
Step 3: Start With Light Marks
After you have your outline finished, you should begin lightly drawing in the fur. Start with a pencil of hardness 4H, 3H or 2H. In my drawing, because I was drawing the fur on my cat’s face, I used very short pencil marks to make the lines. If the animal in your reference photo has longer fur, begin with longer marks. Optional: if you notice that there is a lot of space between your pencil lines, you may want to lightly blend in the marks you have made using a tortillon, or another soft blender (cotton swabs, felt, and cloth blenders work well). Be sure to blend lightly- the pencil marks should still be clearly there. If you choose to blend out your drawing, you may want to go over your pencil marks again afterwards.
Step 4: Start Layering in Details
Next, take a medium-hardness pencil (HB, B or 2B) and begin layering in the details of the fur. In this step, it is important to clearly designate where the fur is darker. The marks should be short and frequent for best results- too sparse of marks won’t create the desired effect.
Step 5: Add the Darkest Layers
Finish by adding the darkest values to your drawing. This should sharply contrast the lightest values, for best results. You may also wish to lightly erase the lighter areas of the drawing to sharpen the contrast. This is best done with a precise eraser- a new cap eraser or a precision eraser would work best.
If you are experienced with drawing with pencil, you may wish to add a layer with ink. This could add a cool effect! I recommend using a very fine tip marker for this, and not a ballpoint or fountain pen.
Step 6: All Done!
Your drawing is all done now!
I hope you found this Instructable helpful. Have fun creating artwork!
Be the First to Share
Did you make this project? Share it with us!
How to Draw and Render Realistic Fur With Pencils and Charcoal
It is hard to find anyone who doesn’t have an affection for an animal of one type or another, but more often than not people will fall for the cutest, most furriest animals there are in the natural world. It is a great challenge for any artist to try and replicate this on paper. Come with me as we explore the methods you can use to draw and render a cute, furry terrier puppy.
What You Will Need
1. Setting Up Your Reference
Step 1
From the off, make sure you have a good quality photograph to work from, as it will be very important for working with later on in this tutorial. You can find the reference we shall be using here from PhotoDune.
Using Adobe Photoshop, open the photograph at a reasonable size. For this tutorial I shall be working a reference that is A4 paper size (11¾ x 8¼ inches).

Step 2
In the View button on the top bar, look for the Show option, and click Grid to show a default grid on your image.

Step 3
This may need adjustment in order to make it easier to draw the image so look for the Preferences option within the Photoshop button and adjust the grid lines to the size you require. For this tutorial we are going on a gridline division of 8 cm by a subdivision of 2 cm.

Step 4
Once your grid is set up correctly, press Shift-Command-4 to take a screenshot and then paste the screen shot on top of your original photo. Using the resize command (Command-T) adjust your image so it matches the canvas size. Then crop the edges with the Crop Tool.
You may want to label your grid axis both across the top and down the side as shown below. I prefer to label mine 1, 2, 3 across the top and A, B, C down the sides. Doing this can help you keep track of your grid and can ensure you do not get lost in the reference.

2. Prepare Your Paper
For this tutorial we will be working on A3 size paper (11¾ x 8¼ inches). If you have a drawing board to hand, secure your paper onto it with tape so that does not slide around as you are drawing. Personally I find a standard smooth Bristol board is best for this type of drawing.

3. Drawing Your Grid
Step 1
Start by measuring out how big you want this drawing to be. You can either work to the exact size of the paper or, as I will be doing for this tutorial, you can work slightly smaller. With your steel ruler, measure out a box whose width is half a centimetre smaller than the size of the paper.

Step 2
Use your ruler to measure out the size of your grid. It would be best to avoid drawing too small a box, as this can complicate the construction of the image. My best advice would be to use a box that is either 1 x 1 inches or larger. For this tutorial I have decided to use a box measuring 1.9 x 1.9 inches exactly.

Step 3
Draw out your grid on the paper using your T-ruler and a sharp 2B pencil with a moderate touch, as you may need to erase these lines later. Remember that pressing too hard on the paper or using too hard a lead can leave unwanted indentations that you may not be able to erase.

Step 4
If you wish to do so, label your grid axis 1, 2, 3 across the top and A, B, C down the sides. Make sure the labelling is identical to the one on the photograph reference.

4. Constructing Your Image
Step 1
For drawing it is best to continue using the 2B pencil. Before starting to draw, be sure to sharpen your pencil, as one of the most common mistakes I see with this type of work is artists using a blunt pencil to draw.
Using the reference, choose a focus point to begin your drawing. Personally, I would choose to start with the puppy’s head as it is a main point of the image and is easy to construct with a simple circle. Use a moderate to light touch with your pencil when drawing, as you may need to erase some lines later on.

Step 2
Continue drawing out basic shapes to define areas of the image. If you have labelled your grid as explained earlier, it should be easy for you to draw these points on the image.

Step 3
Once you have all the basic shapes in place, we now have to fill in the details. At this point, take care when drawing, and be sure to go back to your reference regularly, as a poor drawing at this stage will be reflected when we come to rendering. Clean up any loose lines with your putty eraser and make sure you have a clean image to work with for the next stage.

Step 4
You can now erase your grid lines if you wish to do so before we begin the rendering stage.

5. Begin Rendering Your Image
Step 1
Now that we have the outline of the image, we can begin to fill in the details and create our fur effects. We shall be working from left to right on the paper to avoid smudging the graphite and charcoal, but if you are left-handed you can do the opposite to this.
My best advice to you too at this point is to only work a section at a time and avoid working on too much of the image. If you do work on too much of the image at once, you will find smudging becomes more of a hazard as you fill in the details.
We will be using three methods of applying graphite to the paper with pencils and graphite powder:
Circulism involves rotating your pencil with moderate pressure in a circular motion whilst moving the pencil across the page as shown below. Like hatching, this can be used to build up tone depending on the pressure applied to the paper and how many times you repeat the motions. I use circulism more for darker tones, and it is especially useful for black areas as it gives good coverage on the paper.
Cross-hatching is applied by a series of strokes in a diagonal direction going one way, then repeating the motion in the opposite direction. Levels of tone can be built up in this method by bringing hatchings closer together or repeating the motions time and again. You can also choose to blend the area you have shaded afterwards with a cotton bud or tissue paper if you so wish.
Overlaying involves laying down a light to medium base tone applied using circulism and then on top of this, using a 2B pencil or darker and using medium pressure, stroking the pencil across the paper repeatedly to give the impression of fur. Be sure to note which direction your fur is going before you begin this process. Change to a darker pencil and continue the motions to build up tone.

Step 2
Start by using a small amount of graphite powder on your soft paint brush to lay down a light base tone on the paper. Apply using the circulism method described earlier. Continue reloading your brush with powder and working into the paper. Remember to only cover a limited area of the puppy at this stage.

Step 3
Once the first layer is put down on the paper, take a cotton bud and work over the top of this layer using the circulism method, again with graphite powder picking out darker tones. Be sure to follow your reference at this stage to check where these are.
Continue applying more graphite powder as and where needed to build up tone. At this point check your reference and if your image is not quite matching the reference, additional tone may need to be added. For this I would use a soft lead (either a 5B or a 6B) and use a tight cross-hatching technique. Additional blending with your tissue paper will be needed here.
Step 4
Now we move on to one of the trickier parts of rendering fur: working with charcoal. This can be a messy business (even more so with a soft charcoal stick) but if you are careful you can make it work. As in the previous steps, use the stick to draw in where the black tones might be.

Step 5
Now you blend in the charcoal you have drawn in with another cotton bud. At this point do not worry about fine details—just concentrate on getting your tones right. After you have finished blending the first round of tones together, you may need to go over this layer again as you might find your tones look more grey than black.

Step 6
Now we go from working in black tones to drawing out white tones. Using either of our Tombow detailed erasers, take the edge of the eraser, and using a limited amount of the overlay technique, erase parts of the charcoal and create the effect of lighter hairs in the puppy’s ear.

Step 7
Now you hopefully have your lighter tones sculpted out. We can now go in again with a charcoal pencil and a black coloured pencil and draw in individual hairs both inside the ear and on the edge of it.
As in the previous step, it is very worthwhile taking your time with this one, as concentrating on details like fine hairs will make a massive impact at the end of the drawing. For really fine hairs, it is my best advice to use a sharp black coloured pencil to draw these, and make sure you keep sharpening it regularly.

6. Rendering Lighter Tones, the Head
Step 1
Now we move down the image a little and we begin rendering a section of the puppy’s head. Begin as in the previous section by laying down a graphite powder base. Next, instead of applying compressed charcoal, continue applying graphite to areas of the reference that appear darker. You should be left with a base that we can now work on.

Step 2
We shall now begin using the overlay technique we talked about earlier. Using a sharp 4B, 5B or 6B pencil and with a moderate touch, begin to overlay pencil strokes in the direction the puppy’s fur is going. It is obviously important to pay close attention to your reference to see which direction the fur is actually going.

Step 3
Now take one of your Tombow erasers and, using the edge of the eraser, begin carving out highlights in the puppy’s fur. As in the previous section, if you have done the first steps right this step should be no problem. Just be sure to take care when you erase, and do not go overboard.

Step 4
If you find you have any darker hairs that need touching in, you can use either a 7B or a black coloured pencil to do this. Lighter hairs can be drawn in using a HB, 2B or a 4B mechanical pencil.

7. The Left Side and the Lower Legs
Step 1
Now we continue moving down the body but still working on the left side of the puppy. For this first part of this section we are going to use the same methods we used to render the puppy’s ear. Start off by applying a layer of graphite powder, and then blend it in using a cotton bud or your soft paint brush.

Step 2
Once you have applied your base, fill in any black areas with a layer of charcoal using your soft charcoal stick and then blend this in too using another clean cotton bud.

Step 3
Once you have your charcoal layer down on the paper, take your circular Tombow eraser and, using a light touch and only short strokes, erase the edges of the puppy’s legs.
If you are using the right amount of pressure you will find that you will be left with a light grey tone on the paper. This is ideal, because if you look at your reference the fur of the edge of the puppy’s legs is highlighted, and it is this effect we are looking to achieve in this step.
Finally, using your black colour pencil, draw in any fine details like tufts of hair. Remember not to rush this step, as these tiny details matter.

Step 4
Moving on now to his forelegs, you need to follow the same method we used in previous sections, starting again by laying down a base tone using graphite powder.

Step 5
Returning to the technique of overlaying, using a 4B pencil, begin drawing in the hairs on the puppy’s legs. Use only a moderate touch to build up the layers here, as once this stage is complete we will need to resort to our Tombow erasers to bring out the lighter hairs.

Step 6
Moving on to the darker sections of fur, using a regular or mechanical 6B pencil or darker, touch in darker hairs using the overlay method. For very fine black hairs on the puppy’s feet, it’s best to use your black coloured pencil, although remember to keep it sharpened.

8. Working on the Bridge of the Nose
Step 1
Now we come to another focal part of this image, the bridge of the nose. Start as in previous steps by laying down our graphite base. Because the bridge of the puppy’s nose is quite dark, it might be worth your while working over the base with more graphite powder to darken the tones.

Step 2
After you have laid the base tones with short overlaying strokes, build up your fur layers with a 5B pencil. This is another one of those steps where paying close attention to your reference will pay dividends in the long run.

Step 3
When it comes to working in darker hairs, my best advice would be to use a sharp 7B or black coloured pencil. This section of the image may take a while to build up as the hairs are only short, but it is one of the main focal points on the picture so taking care is essential.
Lighter hairs are few and far between in this part of the image, but any that do need working in are best created using our square Tombow eraser.

9. Working on the Underbody
Step 1
For the lower parts of the puppy’s underbody, it is best to follow the same technique as we have used on his head, applying a layer of charcoal with our soft charcoal stick and then working into it with a cotton bud. After applying the base layer, take your Tombow erasers or putty eraser if you wish and, using a light touch, draw out lighter hairs on the body.

Step 2
Following the overlay technique we have used throughout this tutorial, you should have no problem rendering the fine, dark hairs on the puppy’s underbody. It is best to do this stage with either a 6B mechanical pencil, a sharp 7B regular pencil or a black colour pencil.

10. Back Legs and Adding Lens Blur
Step 1
Now we shall move on to the parts of the puppy which, if you notice in our reference, are slightly out of focus in the shot. To create this we begin as we have done in previous steps by putting down a base layer of graphite powder and then working over the top with our soft charcoal.

Step 2
Next, if you have blended the charcoal, take your square Tombow eraser and begin carving out lighter tones, but only use a light touch to carve out hairs. This is because we do not want to be left with big white spaces—as you will notice in your reference, the hairs on his back legs are not that well highlighted due to being out of focus.

Step 3
To further dull the features, you can either use a cotton bud, soft brush or tissue paper to blend the tones on the puppy’s back legs. For the edges of the legs it will best to use a clean cotton bud or medium blending nub to work on these, using tight circulism with a light touch to blend the edges.
You may need to go over the edges a few times to achieve the right effect and, again, pay close attention to your reference, as this is another one of those points where you may need to work hard but the payoff is more than worth it.
After you have finished blending, you may want to come in with your square Tombow eraser or regular gum eraser to clean up the edges where you have been blending.

11. Creating Floor Shadows
Step 1
Now for a relatively simple part of our process, working on the shadows underneath the puppy. To work on this, take a sharp B pencil and, using light cross-hatching, work in a light tone underneath the puppy. Nearer the back legs it might be worthwhile going over your hatchings again to darken the tones.
For blending, take a piece of tissue paper and, using the circulism method, bring your tones together.

Step 2
Paying close attention to our reference again, you may notice on the floor there is a slight reflection of the puppy’s claws. To simply create this, take your round Tombow eraser and remove a section of tone where the reflection is.

12. Working on the Eyes
Step 1
One of the main focal points of this image is the puppy’s eyes. They are one of the main features that make him so loveable, so it is worthwhile paying very close attention to them.
Start by laying down a layer of graphite using your cotton bud in the highlights of his eye, but only use a light touch at this stage as we may need to erase areas of these as we proceed.
Afterward, take one of your compressed charcoal sticks and with a moderate touch, begin working in the black areas such as the pupils and shadow around the eye. Avoid filling the edges near the highlights for now.

Step 2
Take a clean cotton bud and, using our reference, begin blending the edges of our black areas to give the impression of shadows in the eyes.
As before, you may notice that blending does draw out the charcoal, giving it a “grey” look rather than pure black. To fix this it might be worthwhile taking a charcoal pencil and going over the pupils and other black areas that require a fine touch.

Step 3
Now we move on to the reflections in the eyes and, if you have done the first steps properly, this should be straightforward. It is worth remembering that there are no pure whites in the eyes themselves, and even the so called “white of the eyes” have a little tone in them. The only pure white is for our specular highlights.
So for this step, take an HB or a B pencil and, using light cross-hatching, blend in lighter tones in the iris and then take a small blending nub to blend these together. Any fine details in the iris can be drawn in with a mechanical HB or 2B pencil.
Finally, for the specular highlights in the eye, take your circular Tombow eraser and remove any traces of graphite in this area. Now you should have an eye that will strike any viewer of your work.

13. Working on the Nose
Step 1
Having worked on breathing life into a dog’s soulful eyes, we now move on to another part of a dog which really adds cuteness: his wet nose. For this we begin by placing a few layers of graphite using our cotton buds and circulism application methods to create a good base.

Step 2
Now to begin creating the “wet look” on his nose, take your circular Tombow eraser and begin “tapping” the paper with a light touch to create the pores on his nose. For pores that are quite highly reflective, use a harder touch to remove the graphite.
At this point, take note of your reference closely and do not go crazy in creating pointless effects, a useful tip being “less is more”.

Step 3
Now for the darker tones, using a sharp 6B or 7B pencil, touch in darker pores along what would be the edge of the puppy’s nose. As with the above, be measured in how many pores you wish to put in, and remember to pay close attention to your reference.
For the nostrils, continue using your 6B pencil to fill in shadow areas. For pure blacks, take one of your black colour pencils and work this in using tight circulism. It may be necessary to use your putty eraser for the dull highlights under the nostrils.

14. Finishing Touches
You should now have an image that is more or less finished! At this point I would recommend you go over your work and check it carefully against our reference to make sure you have not missed any details. If you have been careful and have taken your time with this image, hopefully you will find that this is not the case.
To seal your work, you should now spray your drawing with artist’s fixative. This substance prevents any accidental smudging of your drawing when it is in storage or on display.

And at Last We Are Done!
Now you have a cutesy, cuddly drawing that either you or others can treasure for many years to come. Also, you now hopefully have the knowledge to take forward and try drawing and rendering your own pets at home or ones you observe in the natural world.
