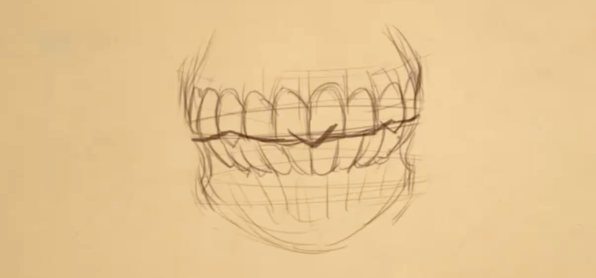
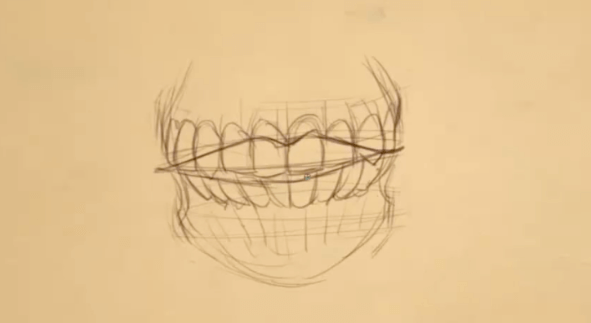
How to draw teeth
How to draw teeth
How to Draw Teeth
Why Learning How to Draw Teeth is so Important
Have you ever drawn a mouth that comes out looking really flat… and you’re not sure what you need to do to give it a more natural feeling? That’s because you haven’t learned everything you need to about the teeth and mouth to draw them convincingly.
In this article, you’ll learn:
This lesson will build on other lessons like how to draw the Mouth, Lips, and Skull.
Establish the Shape and Plane of the Inside of the Mouth
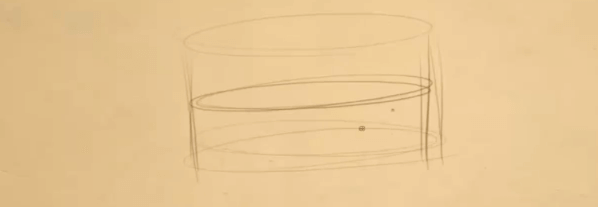
One of the biggest blunders artists commonly stumble upon is the assumption that the front of the face is flat. But if you want to know how to draw teeth, you need to take a closer look at the skull and you will find that the mouth, teeth, and jaw exist on a circular plane, a cylinder. Like a can of tuna – yummy.
(If you don’t believe me, go take a big bite out of a piece of bread to convince yourself… It’s okay I’ll wait!)
Geek Mode: the grouping of the mouth, teeth, and jaw can be referred to as the oral cavity.
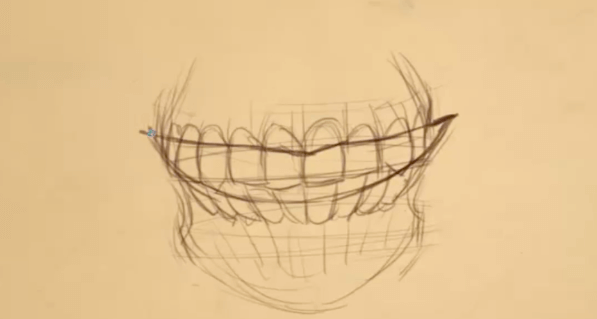
First, draw in three ellipse (or ovals), a top, middle, and bottom, connect them along the side to create the desired ‘tuna-can’ shape. We will be laying the teeth over this little construct.
TIP: Doing a daily exercise where you practice drawing simple shapes such as ovals or cylinders, cubes, and cones will improve your drawing skills and motor functions. Both of which are essential for us artists and helps keep our hands healthy, along with stretches of the hands, figures, and wrists.
Adding Teeth to the Mouth
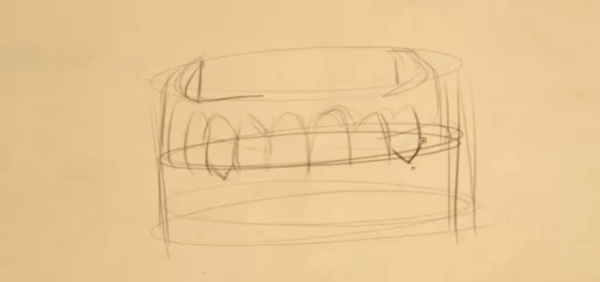
These big bold chompers of ours have about 32 teeth altogether unless you get any removed.
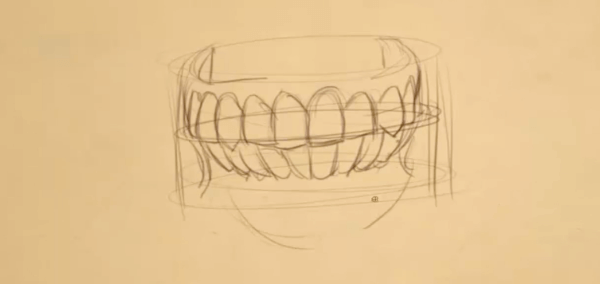
Now, looking at how to draw teeth, the mouth is round and the view will determine the anumber of teeth visible. From this front angle, you will be able to see about 10 teeth on the upper and lower jaw. Notice how the jaw wraps back around the initial ‘tuna-can’ we have already established.
This causes the rest of the teeth to be hidden away from view because they are blocked by other teeth.
TIP: You can practice by drawing the teeth from different points of view. Studies of the skull can be used, or you can gross yourself out by using images of dentures.
Here you can see the final result having filled in the bottom teeth as well with an indication as to where the chin is located. The area directly around the teeth are the gums.
NOTE: For the steps 3 – 6 on how to draw teeth we will be reverting back to step two before moving on. We will be using the basic shape of the cylindrical teeth and draw lips over them.
A Closed Mouth
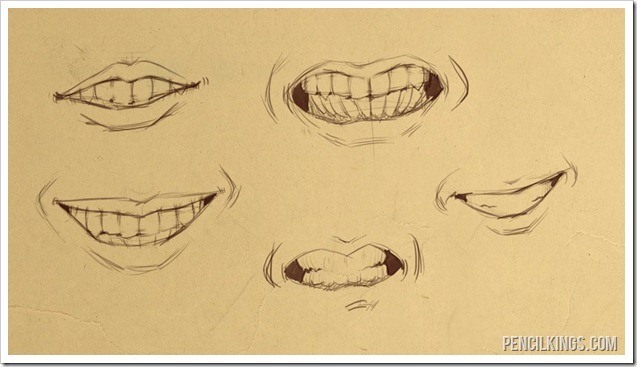
One of the most basic, and commonly used mouth shapes is merely a closed one. We will be exploring a few different examples that will show the range of lip shapes, and how to draw the teeth. When drawing a closed mouth, where the lips meet will be around the same spot as where the teeth meet. So placing the lips is easy; we simply sketch them directly over where the teeth meet.
To clean things up, we have erased the teeth that can’t be seen and because we are exploring a closed mouth, there are no teeth to see.
TIP: The shape of the lips will also exist in the same circular shape as the teeth. To learn how to draw lips you can read our post about drawing lips.
Our last effort is to finish off the mouth by adding the top and lower lip lines. The top lip is usually shaped somewhat like an “M”, while the bottom is just an upward curve. Some people have thick, plump lips, while others can be so slim you can hardly see them. To learn more about drawing male and female lips you can read our post about The Difference Between Male and Female Lips.
An Open Mouth
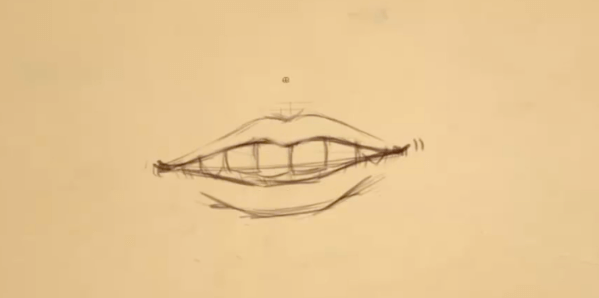
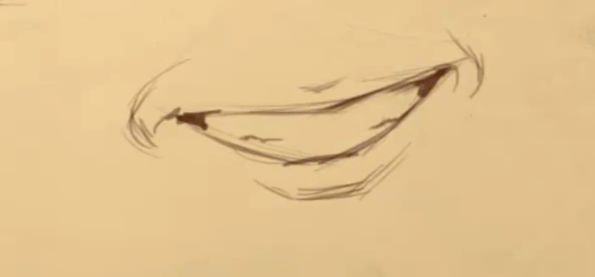
Here we will be exploring the casually opened mouth. The opening of the mouth usually reveals mostly the top teeth. The shape is important because it is easy to create a smiling mouth if you aren’t too careful. Everything is under exaggerated because it needs to seem relaxed.
To keep things tidy, again we have erased away what can not be seen. What is left are about seven upper teeth, and you can’t even really count the lower teeth. We have filled in the upper and lower lip. There is also an indication of a bit of darkness around the edges of the mouth and Geek Mode here: the edges of the mouth are called ‘oral commissures’.
A Smiling Mouth
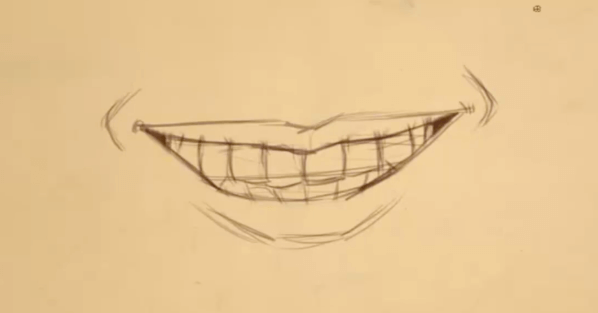
Pushing past the casual open mouth is now the task, we need to pull the lips back and up around the teeth. This is going to expose more teeth, both up on the upper and lower jaw.
Smiles really differ from person to person – how much teeth v.s. gums that they show will vary.
TIP: Playing with different variations will bring more range and believability to your art.
Similarly to our previous steps on how to draw teeth, we have erased the teeth that can not be seen in the example – removing all signs of gums and only revealing a small amount of bottom teeth.
The upper and lower lips have been applied and can be seen stretching out across the teeth and pulling back towards the back teeth. The smile wraps around the cylindrical form accentuating the turn, stretch, and tuna-can shape.
You will also notice that as you smile broadly you will find creases form on both sides of the mouth.
Angry Mouth
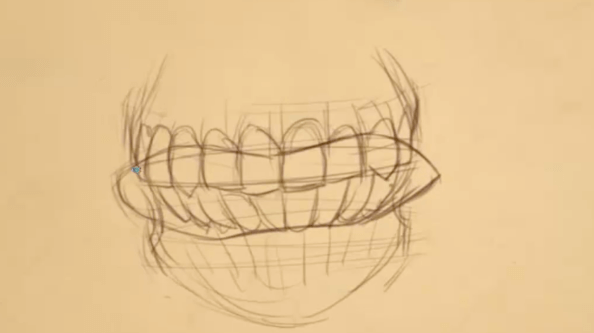
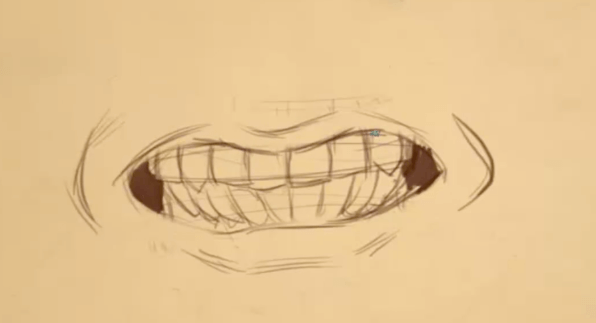
This mouth is usually called an angry mouth like someone is bearing their teeth, but they can be grimacing as well. Someone can also be flinching or waiting for something to happen that is scary or painful and may be accompanied with “breathing through the teeth.”
Try it! Why would you react this way?
Erase the unseen teeth, and add in the shadows seen at the side of the mouth.
Then draw in the lips, which should be quite thin due to all of the stretching they are doing to make this extreme pose.
Lastly, add in some creases on the sides of the mouth where the lips are pulling back into the cheeks and causing the skin to bunch up.
Simplifying the Teeth
Now that we understand the form and function of how to draw teeth we can simplify the process.
Teeth are actually quite a light value compared to any other value you may be using around them, in the mouth or the lips framing them. Because of this, you only need to indicate where the teeth are by focusing not on the teeth, but the shadows cast by them.
This is usually seen in the corners of the mouth like we already know, and the shadow cast by the upper teeth, onto the lower. Due to this, the teeth are hardly ever accentuated and can be left practically unrendered, depending on what you want to accomplish.
ASSIGNMENT:
To practice drawing teeth and different mouth shapes, find references of a range of emotions and practice drawing them. Pay attention to how much teeth you can see depending on the emotion being portrayed.
Now that we know how to draw teeth, using the tuna-can-shaped base, we can easily draw them in. We can also use our new found knowledge to change the mouth expression while keeping the right teeth and gum ratio.
To put this into practice, study the skull from various angles giving the teeth special consideration. Using these studies and photo references of mouths, you can single out the mouth and practice laying the lips in.
Look at both male and female examples, finding their individual features to look at how these expressions change from person to person. Do they show the same ratios or are they different? Noting these differences will give you a range of options in your own work.
How to Draw Cartoon Teeth that are visually appealing
Drawing cartoon teeth: some fun facts before starting sketching!
Step 1
Learn how to draw teeth that will make your dentist jealous! A mouth is composed of 32 teeth. You have the central incisor (2), lateral incisor (between 1 and 2), the canine (1) and three types of molar.
You don’t need to draw the wisdom tooth, unless your character’s mouth is really wide open! When drawing teeth, you might also have to draw the gum (4).
Step 2
Most tooth are made using a basic circle. However, this circle is not perfect. In front of the mouth, the part of the tooth that touches the gum is usually round.
The other end is flat, and sometimes it can be sharp (like the canine, for example). The molars on the back are big and round. This is normal since the teeth in front are made to cut the food while the molars are used to crushed it.
Step 3
For this example, we will draw a simple mouth with sixteen teeth. First, draw four circles to represent the teeth in front of the mouth, near the upper lip. Do the same for the bottom.
Next draw the other circles so that you will have six teeth on top and ten on the bottom. Then, draw a better outline for each tooth. You can add some lines to make the gum more visible.
Step 4
You can draw any kind of teeth that you wish. From a simple design (5) to a more elaborate one (2) to a single tooth (3) it’s really your choice! Just remember to study carefully the outline of a tooth if you want to draw something more realistic. Have fun!
How to draw teeth and lips – 7 easy steps
Hello fellow artists! Wow, it’s been such a long time since I posted a tutorial on RapidFireArt! Sorry for the long hiatus.
Over the next few months I will be posting regularly, so please follow me on Facebook or RFA if you want to see more ‘how to’ articles.
Today, I will be showing you how to draw teeth and lips with pencil in a simple way. Drawing teeth can be a huge struggle for beginners. When I drew teeth for the first time, they looked crooked, dark, and altogether creepy! If you always avoid drawing toothy smiles, this tutorial is just for you!
For this tutorial I used the following materials:
– Blending Stump (with a fine tip)
– 0.5mm HB and 4B Ain lead
– 6B Derwent Graphic Pencil
– Canson Sketch Paper (First time trying this cute travel sized sketch pad. It’s completely different from the Canson Bristol Paper I usually draw on. Blending with this sketch paper is not as easy. I got a lot of tiny blotches here and there. So I spent a bit of time erasing.
How to Draw Realistic Teeth
Step 1: Draw a Hammock Shape

Draw a hammock shape with a vertical line down the middle.
Add 2 diagonal lines on each side and 2 curves about a third or quarter of the way up depending on where you want to position the top and bottom sets of teeth.
Step 2: Draw the lips
Draw the lips by following the outer lines.
Step 3: Draw the teeth
Using HB lead, draw the 2 front teeth and work your way out, alternating from one side to the other in order to keep track of the sizing for each tooth. Do the same for the bottom. Remember not to draw the outlines too dark. You want the lines to be subtle or it will be hard to erase later.
It’s tempting, but try not to make each side mirror images of each other. Each tooth has a unique shape and alignment. They should have slight differences from each other if you want to draw more realistic teeth.
Step 4: Erase all guidelines
Erase all the lines from step 1. Make sure everything looks good before you move on to the next step. Any flaws will be hard to correct after step 5.
Step 5: Shade and blend
Now it’s time to shade everything but the teeth. First, let’s start by using the 4B lead to give the lips and gums some tone. The inner areas of the top and bottom lips should be dark so that they do not blend in with the gums and teeth. Highlight the gum area directly above each tooth and darken the areas in between them. Using a 6B pencil, darken the corners of the mouth and gradually go lighter as you reach the middle to show the tongue.
Now blend everything using a blending stump.
Step 6: Shade each tooth and blend
Shade each tooth one at a time using an HB pencil, leaving certain areas highlighted to give the teeth more shape and make them appear glossy. It is important to use HB lead to prevent yourself from shading darker than you need to. Go over each tooth with a clean blending stump to smooth out the harsh lines. Stay within the lines when you are blending.
UPDATE: If you’re stuck on any step, please watch the video version of this tutorial where I draw the mouth in real time, step-by-step.
Step 7: Touchups
Create a fine point with your kneaded eraser and dab away at highlights to brighten them up. Notice that I made the top set of teeth slightly brighter than the lower set to bring them forward. I can create the reverse effect by making the lower set lighter in value. However, the effect is limited by the placement of each tooth in step 3.
Using a 0.5mm 4B lead, add definition to the edges of each tooth by giving them clean and sharp outlines. Be careful not to loose those clean edges when blending around the teeth. Stay within the lines!
If you enjoyed this tutorial on how to draw a smile with teeth, please share it using the social media buttons below!
If you want to receive a notification when a new tutorial is posted, please follow me on Facebook or subscribe to my newsletter.
More lip tutorials:

Darlene created RFA In 2013 with the goal of sharing simple yet detailed drawing tutorials with other artists on the world wide web. She is a self taught pencil portrait artist and Youtuber.
How to Draw Teeth
Tooth be told, teeth are not easy to draw well.
They are very individualistic and often differ in shape from their counterparts; e.g. two incisors or two canine teeth in the same jaw may look very different from each other.
This means that careful observation, (if you are drawing from a reference), is essential. If you are drawing teeth from your imagination then introduce some imperfections so they don’t end up looking too perfect.
Types of Teeth – Introducing the Players
There are two identical sets of teeth in the mouth – one in the top jaw and one in the bottom. Each set is made up of 5 different types of teeth, not including the wisdom teeth, (which not everybody has).
There are two incisors in the front, which are found on, or close to, the midline of the mouth. They are usually (but not always) the widest teeth.
Next to them are the two slightly narrower lateral incisors, one on each side, followed by the canines. The two canine teeth often tend to be slightly more pointed than their neighbours. They are usually about the same width as their neighbours, the lateral incisors, but not always.
The premolars come next – two on each side of the mouth. They are wider, but because they are further back in the mouth, and because of perspective, (more about that later), they appear narrower and are often partly concealed by the lips. The same applies to the molars, two on each side which complete the set of teeth.
How to Draw the Open Mouth
Important! – Always keep the guidelines very light. Use your 2H pencil very lightly or even better use a pointed blending stick which has graphite on it as a drawing tool.
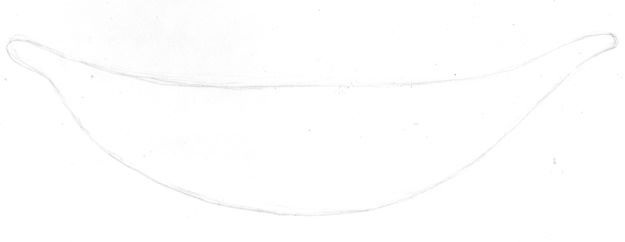
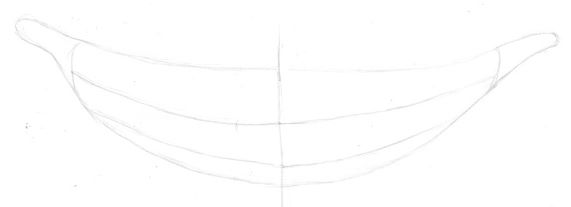
Draw a shape roughly like a very symmetrical banana – about 3 – 5 times as long as it is wide. This will be the part of the mouth between the top and bottom lip. How much of the top and bottom teeth you want to show, will be determined by how wide you make the mouth opening. (If you are drawing from a reference this will be decided for you).
Draw a curved line in each corner of the mouth to show the cheeks inside the mouth.
Divide this banana shape with a curved line roughly in half. This line will be the guideline for the bottom of the top teeth.
Divide the bottom section again about 1/3 up from the bottom with another line; (this will be the guideline for the top of the bottom teeth.
(If you only want to show the top teeth then you can make your banana shape narrower and not divide it at all. The top teeth would then be overlapped by / overlap the bottom lip.)
Divide your drawing in half at the midline with a lightly drawn vertical line.
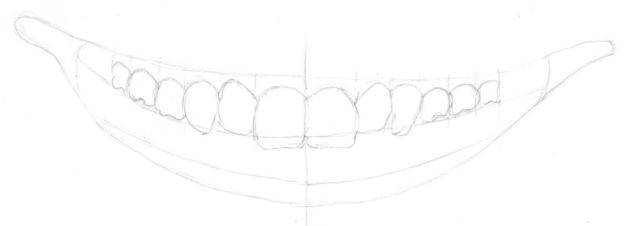
Now draw in the guidelines for the teeth.
Start with the two incisors – one on each side of the midline. Draw two lines parallel to the midline the width you want the incisors to be. Then measure the width for the lateral incisors which should about the same or very slightly narrower. (Once again teeth tend to ignore “shoulds” and do their own thing).
Next draw in the canine followed by the two premolars and molars. The molars and premolars are larger but because of perspective of the mouth, they are often partially hidden behind the other teeth and/or covered by the lips.
Now you have your lines drawn, start drawing in the gums. Use a very light touch and a 2H pencil. If you are drawing from a reference, take careful note of how much gum shows above the top teeth. Some mouths have no gum showing at all because they are covered by the upper lip.
If drawing from imagination, you get to decide how much shows.
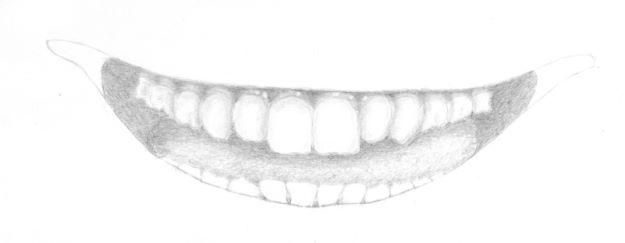
The inward-sloping guideline you drew inside the open mouth area represents the sides of cheeks inside the mouth which are visible when the lips pull back and apart while smiling. (This is not always the case so when drawing from a reference observe carefully). Notice how the values change along this line because of the shadow cast by the upper lip.
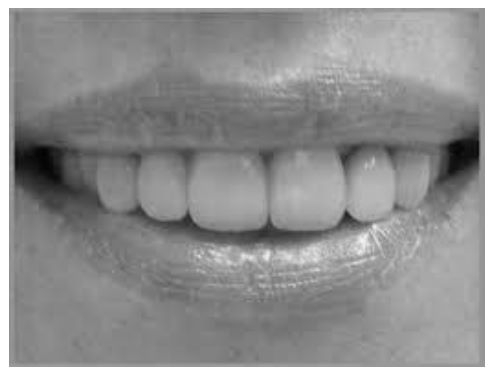
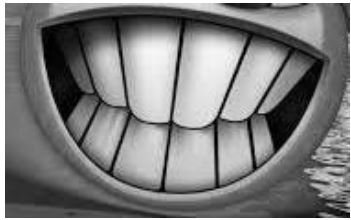
The number of teeth you can actually see in the smiling mouth depends on the particular mouth being drawn. Usually however, the incisors, lateral incisors and canines are visible. Thereafter the number of teeth you can see depends on the curve of the jaw and the width of the smile.
Perspective in Teeth
As discussed in a previous tutorial, (How to draw the mouth), the tooth cylinder is curved around the skull not flat. Therefore when looking head on, the front teeth (incisors) will be closest to the viewer. The rest of the teeth will very slightly curve around the tooth cylinder towards the sides of the mouth and in doing so become partly hidden from view. This most often is the case with the molars and premolars.
Not all tooth cylinders follow the same curve. Some may be sharper and others flatter, which influences how the teeth look in the mouth.
Drawing in the Top Teeth
Very lightly outline the teeth. If you are not copying a reference, remember to make the corners of the teeth rounded – not sharp like piano keys. The edges must be mere suggestions not solid lines. Dark lines between teeth will make your drawing look like a cartoon.
Notice that the teeth may not all be the same length. Some people have long front teeth, others long back teeth and still others long canine teeth. Use your imagination. (If using a reference observe closely).
Your drawing should look something like this:
Drawing the Bottom Teeth
The bottom teeth are generally smaller than the top teeth because the bottom jaw is smaller than the top jaw. The same types of teeth are found in the bottom jaw; and in the same locations.
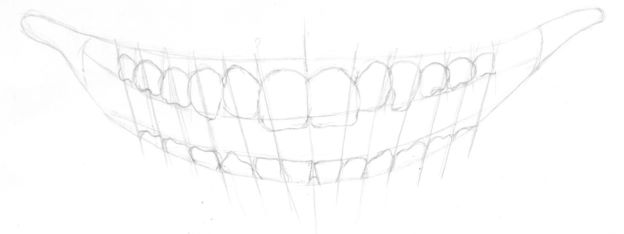
The easiest place to start drawing the guidelines for the bottom teeth is again at the centreline. Often however, the bottom incisors don’t conveniently line up with the midline of the upper jaw incisors. (This may seem a small difference; but it’s one that makes a big difference to the realism of your drawing).
To judge where the guidelines for the bottom teeth should be, use the top teeth as a guide. Start your guideline at about 2/3 the width of the top tooth and slope it down gently to where it meets the bottom lip line. Drawing these guidelines is not an exact science nor is the positioning of teeth. They are merely there to assist so don’t stress.
Draw the bottom teeth using the guidelines as an aid.
Shading the Teeth & Gums
When you shade, start very light and work in layers.
Press very lightly with your pencil. Often just the weight of the pencil is enough.
It’s always easier to go darker then to lighten a too-dark area.
Adjust the values of areas as you go along. Values are relative to each other; i.e. it is more the contrast, (difference between), the values that is important rather than each value alone.
Preserve the tooth of your paper at all costs. Don’t press hard with your pencil which will flatten the tooth of the paper and it won’t be able to accept more graphite if you want to go darker. Also you won’t be able to remove graphite with your putty eraser as easily when you want to go lighter.
When drawing fine detail, use a heavy grade paper (180gsm+) which can take a lot of layers and can withstand erasing better than a thinner paper.
A paper with a smooth surface will give you better results than a rough texture paper when detail is important.
Shading the Gums
Remember:
The gums are almost always darker in value than the teeth.
They are not all the same value. The gums cover the teeth and because each tooth has a roundish shape they cause a slight bulge in the gums. This bulge will be slightly lighter than the surrounding gum because it projects forward and catches more light. This effect will lessen towards the corners of the mouth where there is less light.
The gum line directly under the top lip will be slightly darker because of the shadow cast by the top lip.
Because the gums are normally wet, there will be small bright, hard-edged highlights here and there on the gums as the light reflects off the wet surface.
Shade the gum area very lightly all over with your 2H pencil. The edge between the gums and the teeth will be a hard edge; (clean edge between two values).This edge will be very slightly darker immediately above the tooth the gums above the teeth because the gum curves round to meet the tooth and in so doing moves away from the light.
Now either look at your reference, or decide on the different values in the gums. The edges between the lighter and darker areas are soft edges, (gradual change between values); so there should be no harsh lines, only gentle graduations from light to dark. Use a slightly softer pencil (HB) always with a light pressure to achieve this.
As the teeth curve towards the corners of the mouth they move away from the light and the gums will become overall darker than the gums in the centre of the mouth. These differences are very subtle but are what makes for a realistic drawing.
Besides this slight darkening towards the corners, the gums on one side of the mouth, (the one closest to the light source), will be overall slightly lighter in value than on the side of the mouth which is further from the light source. You can lightly shade over the entire area with an H or HB pencil – once again with very light pressure to achieve this overall darker area.
Instead of shading with a pencil, use powdered graphite and a soft paintbrush to slightly darken larger areas of your drawing. if you don’t have powdered graphite make your own by rubbing an HB pencil against fine sandpaper. Dip your paintbrush in the powder and shake off the excess before applying to your paper.
Drawing Highlights on the Gums
To draw the very small highlights on the gums it’s easier to first finish you’re shading and blending of the gums and then shape a putty/kneadable eraser into a very fine point – like an insect’s antenna – and delicately pick out the highlights. Don’t overdo.
What helps to make the highlights really “pop” is to use the tip of a sharp blending stick which is covered in graphite to gently darken around the highlights you just made. You could also use a pencil – but very lightly, otherwise it may look as if your teeth have measles!
Shading the Teeth
Remember:
Teeth are not white but shades of grey.
Teeth usually have white highlights which help describe their form.
There are no harsh lines between teeth – only shadows. The effects of perspective and light direction apply to the teeth as well i.e., teeth towards the edges of the mouth are darker. (Golden Rule – the further from the light the darker it gets).
The top of the teeth, which lies under the shadow of the upper lip is darker.
Teeth are usually not flat. Instead they have rounded forms and even undulating forms as in the molars. The way to indicate this form is with very subtle shading. The edges of the teeth will be ever so slightly darker in value than the centre. And indent in the tooth’s surface will be shown by a soft shadow. (No hard edges).
The bottom edges of the teeth are sharp/clean edges because they separate the teeth from mouth cavity behind.
Except for the incisors, teeth overlap each other very slightly. This can be shown by shading and line.
There are also highlights on the teeth that can be pulled out using a kneaded/ putty eraser. Their shape is usually longer than the highlights on the gum because of the shape of the teeth. Again darken around the edges of the highlight to get that extra “pop”.
Shading the Mouth Cavity & Tongue
Behind the teeth lies the mouth cavity. Little light gets in, so the shadow will be very dark.
Adjust your guidelines at the corners of the mouth to indicate the two lips meeting at the sides.
The mouth cavity contains the tongue which protrudes and is closer to the light and thus lighter in value than the surrounding cavity. Look carefully for where the tongue begins and shade accordingly. (It will be lighter than the mouth cavity but darker than the teeth).
When shading the tongue use small, random, circular overlapping strokes which imitate the actual texture of the tongue. Build up in layers. Lightly does it once again.
The tongue is also rounded not flat so shade the tongue to show this.
Drawing the Lips
Drawing open, smiling lips has some differences from closed lips which we describe in detail in the tutorial on How to draw the mouth.
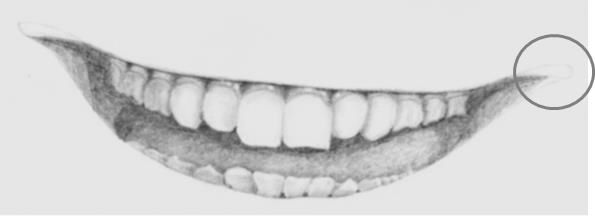
As the lips, especially the top lip is pulled sideways by the muscles surrounding the mouth to form a smile, the lip is stretched and the Cupid’s bow in the top lip becomes shallower. Often a shadow appears behind the bow as the latter is pulled slightly forward and upwards towards the light.
The form lines which run from the centre of the lips towards the top and bottom edges also flatten out and may even run horizontally in places especially on the top lip.
These changes are less marked in the lower lip however because it is usually not as stretched as the top lip.
As the lips are also often moist, there are often highlights visible.
Your drawing should now be looking something like this:
How To Draw Teeth For BEGINNERS EASY Tutorial
10:30 13.82 MB 195K
How To Draw Teeth Teeth Drawing Cartoon Step By Step Guides Easy Drawing With Pen
03:26 4.52 MB 104.7K
How To Draw A Tooth Step By Step Tooth Drawing Easy
42 943.36 KB 85.6K
How To Draw Teeth Teeth Drawingtutorial
26 583.98 KB 25.4M
How To Draw Teeth Simple And Easy Tutorial Howtodraw Drawing
25 561.52 KB 3.3K
Dental Draw Anatomic Tooth Dens Molars Mandibular Lower Jaw Tutorial
09:27 12.44 MB 4.4K
How To Draw Teeth From ANY Angle
14:41 19.32 MB 139.9K
How To DRAW A TOOTH Easy Step By Step
How I Draw Teeth
18 404.30 KB 439.9K
How To Draw Teeth Step By Step
01:29 1.95 MB 43.5K
How To Draw Teeth
02:47 3.66 MB 113.5K
How To Draw Teeth For BEGINNERS Easy
08:10 10.75 MB 309
How To Draw Teeth Easy Drawing Step By Step
33 741.21 KB 609
How To Draw Teeth
02:36 3.42 MB 272
How To Draw Teeth And Lips Realistically Samy Portraits
24:00 31.59 MB 23.5K
HOW TO DRAW A CUTE TOOTH
04:02 5.31 MB 37.6K
How To Draw Skulls
25:44 33.87 MB 564.1K
How To Draw Structure Of A Tooth Tooth Structure
09:38 12.68 MB 69.7K
Dental Draw Anatomic Tooth Morphology Dens Incisivus Medialis Tutorial With Explanation
13:27 17.70 MB 4.4K
How To Draw Teeth A Smile
11:51 15.60 MB 15.5K
How To Draw Teeth Shorts Drawing Simple Tutorial Teeth Satisfyingasmr Youtubeshorts Viral
How To Draw A Tooth Easy And Simple Step By Step Guide Howtodraw Drawing
34 763.67 KB 1.9K
How To Draw Teeth Shorts Drawing Easydrawing Tutorial Teeth Youtubeshorts Shortsfeed Trending
Smile Lips Sketch For Beginners EASY WAY TO DRAW SMILE LIPS
05:38 7.41 MB 438.4K
How To Draw Lips Using Pencil For Beginners
05:38 7.41 MB 1.9M
How To Draw A Smile With Teeth
39:14 51.63 MB 182.8K
Easy Step By Step Diagram Of Tooth How To Draw The Structure Of Tooth Easily Tooth Diagram
01:21 1.78 MB 55.5K
How To Draw Teeth Anatomy
21:00 27.64 MB 145.6K
How To Draw And Labeled A Tooth
08:19 10.95 MB 7.7K
TUTORIAL DENTAL TOOTH DRAWING Helen Do
04:31 5.94 MB 2.1K
How To Draw Cute Easy Tooth Step By Step Draw Art
31 696.29 KB 2.2K
How To Draw A Smiling Tooth Holding A Toothbrush Easy Drawing Tutorial
05:46 7.59 MB 1.3K
How To Draw Teeth For Beginners Step By Step Drawing Tutorial
05:05 6.69 MB 462
How To Draw Teeth Teeth Easy Drawing For Beginners Shorts
Pencil Drawing Do S And Dont S How To Draw Realistic Lips And Teeth Step By Step Narrated
08:02 10.57 MB 64.4K
Teeth Drawing Easy Teeth Drawing Tutorial
05:16 6.93 MB 149
How To Draw Simple Toothbrush Toothpaste Teeth Drawing Draw Painting I Chill How To Draw
How To Draw A Teeth For Kids Teeth Easy Draw Tutorial
How To Draw Realistic Lips طريقة سهلة لرسم الفم Art Creative Shorts
36 808.59 KB 118.7K
How To Draw A Teeth And Tooth Paste Easy Step By Step Simple Drawing And Coloring Tutorial Lesson
02:05 2.74 MB 1.1K
HOW TO DRAW REALISTIC LIPS AND TEETH FOR BEGINNERS
10:52 14.30 MB 19.5K
How To Draw Teeth And Toothpaste For Kids Art For Kids
16 359.38 KB 3.9K
Drawing Of Human Teeth Step By Step In Easy Way Teethdrawing
06:25 8.44 MB 171
Stop Drawing People Who Smile Like Maniacs Pls Letslearnhowtodraw Tutorial Art
How To Draw An Eye Shorts
35 786.13 KB 5.6M
HOW TO DRAW TEETH AND LIPS Step By Step I Drawing A Smile Using Pencils EASY TUTORIAL
14:05 18.53 MB 268
How To Draw Lips And Teeth Step By Step Tutorial Lip Drawing Tutorial Easy Method
11:59 15.77 MB 21.5K
How To Draw A Mouth Sketch Step By Step Open Mouth Lips Outline Drawing For Beginners
02:18 3.03 MB 15K
How To Draw Teeth
After Watching This You Will Be The God Of Drawing Lips JULIA GISELLA Shorts
25 561.52 KB 1.5M
Для вашего поискового запроса How To Draw Teeth For Beginners Easy Tutorial Step By Step мы нашли 50 песен, соответствующие вашему запросу. Теперь мы рекомендуем загрузить первый результат How To Draw Teeth For BEGINNERS EASY Tutorial который загружен Silvie Mahdal размером 13.82 MB, длительностью 10 мин и 30 сек и битрейтом 192 Kbps.
Слушают сейчас
How To Draw Teeth For Beginners Easy Tutorial Step By Step
Иранские Чтецы Корана
Лучшие Голы В Футболе 2019
Ace Of Base Living In Danger Metall Cover
Best Riverdale Instagram Edits
По Телевизору Сказали
Юрий Соснин 2019
Две Девушки Поют По Татарский
Я Забиваю Сваю Песня Строителей Крымского Моста
Зиёда Жонли Ижро Ziyoda Jonli Ijro
You Are Idiot Hahahaha Meme
Шавкат Мургпарвар 117
Mafia Rus Cover Vocaloid
Сичқон Мучали Ҳақида Sichqon Muchali Haqida
Memories Conan Gray Speed Up
Ariana Grande Side To Side Slowed
Звук Старого Модема
Будильник Для Арми
50 Cent Armenian Style
Pop Corn Bloom Vase Official Music Video
Girl In Red I Wanna Be Your Girlfriend Speed Up Reverb
Ludwig Van Beethoven Leonore Overture No 3 Full
Yulduz Usmonova Muhabbat Premyera 2021
Все Хиты Шансона 2020 Сборник Лучших Песен Все Самое Новое И Лучшее Топ 40
Федерико Феллини Pitched Version
П И Чайковский Осень Октябрь Tchaikovsky The Seasons October
Сектор Газа Лирика Phonk Remix
Milen Большой Сборник Песен
Шансон В Дорогу 2022 Дальнобойные Хиты Душевные Песни Для Дальней Дороги Шоферской Сборник 12
Bts Louder Than Bombs Filtered Acapella Ver
Полная Версия Xxuligan Massvvna
Nekruz Mamadamonov Pashni Некруз Мамадамонов
Топ Шазам 2022 Самое Популярное Хиты 2022 Русская Музыка 2022 Лучшие Песни 2022
Gulinur Eng Sara Qo Shiqlar To Plami 2022 3
