How to grow tomatoes
How to grow tomatoes
How to Grow Tomatoes
If you’ve never had tomatoes fresh from the garden, you’re definitely missing out. These homegrown garden delights are more succulent than grocery store tomatoes and packed full of goodness. Discover how to grow tomatoes of all types in your backyard or on your patio, and reap their benefits throughout the growing season.
Tomato plants are one of the easiest garden vegetables to grow. However, it may surprise you to learn that they are technically a fruit.
These sweet and juicy fruits are packed full of antioxidants, including lycopene and vitamin C, and may even reduce heart disease and cancer. Tomatoes are not a one size fits all type of garden treat.
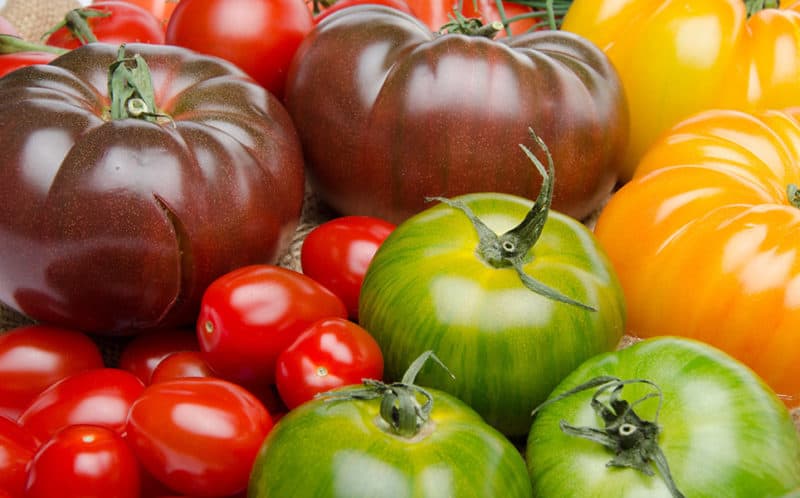
There are many different varieties, from small grape and cherry tomatoes, perfect for salads, to large heirloom beefsteak tomatoes, ideal for slicing on sandwiches. They also grow in many colors, from red, yellow, and orange, to brown, pink, and even purple.
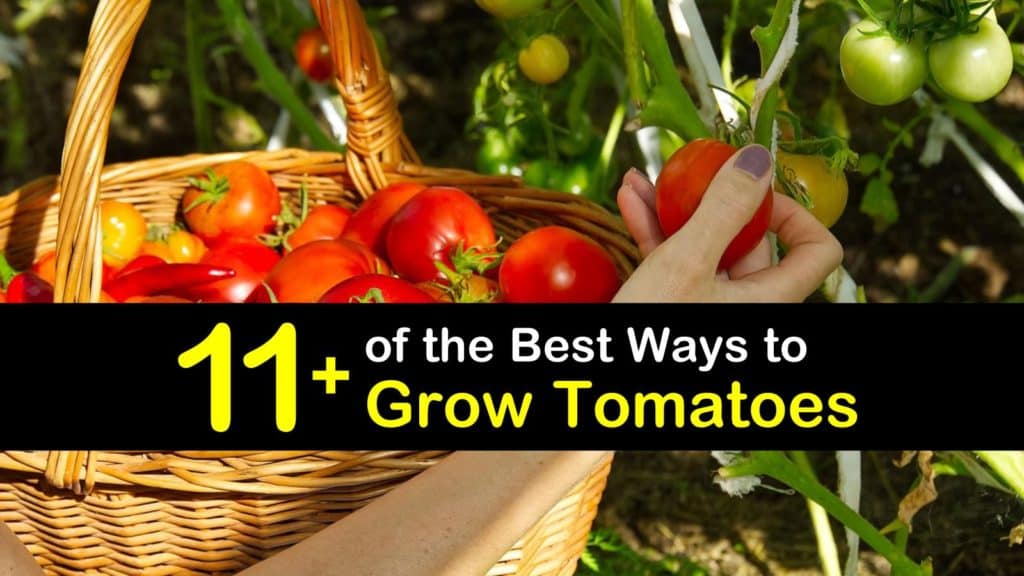
How to Grow and Maintain Tomatoes
Growing tomatoes seem daunting if you’ve never taken the opportunity to grow them before. However, these plants are easy growers and only require a bit of maintenance to thrive.
What are tomatoes? We’ll explain the different types, their growing requirements, how to grow them from seed and plant, and how to maintain them through the season.
Things to Know Before Growing Tomatoes
Before taking a stroll through your local garden center, there are a few things to know when it comes to growing tomatoes.
There are so many tomato varieties, it’s easy to get confused as to which type is the one to grow, and understanding what they need is essential to healthy growth and production.
Garden Tomatoes
There are two main tomato types, indeterminate and determinate. Determinate tomatoes grow to an average height of about two to three feet and then set tomatoes to ripen, while indeterminate tomatoes continue growing taller while producing fruit until the first frost.
There are also many varieties, ranging in size and color. Some of the most popular are cherry tomatoes that are small and round and grape tomatoes that tiny and oblong.
What are Roma tomatoes? Roma or plum tomatoes are ideal for making sauces, beefsteak tomatoes are perfect for slicing on burgers, and heirlooms which are non-hybrids and useful for seed-saving.
How long does it take to grow tomatoes? It depends on the type and whether you start them from seeds or plants.
Tomato seeds take about five to ten days to germinate, six to eight weeks before you transplant them, and about four months for the entire growing process.
Growing young plants in the garden is faster, and they produce fruits about 50 to 80 days after planting, depending on the type. The same applies when you grow tomatoes in a greenhouse or a container indoors or out.
Best Way to Grow Tomatoes from Seed
There are two ways to grow tomatoes, and these include planting young plants or seeds. If you opt to try your hand at seeding them, the best way to grow tomatoes from seed is to start them indoors first.
Planting Tomato Seeds
The way to grow Roma tomatoes and other types is basically the same. Begin the seeds approximately six weeks before the final frost, as one of the ways to grow cherry tomatoes or full-sized varieties. Fill a starter tray with an even amount of seed starting soil. Open the packet of seeds, place two to three seeds into each compartment and cover them with about a quarter-inch of dirt.
Spray the surface with water and set the tray in a warm area. The seeds need a room temperature of 70 to 75°F to germinate, so consider covering them with plastic wrap to retain warmth and moisture.
Water them daily to prevent the soil from drying out and check the tray daily. Remove the plastic wrap as soon as you see the plants sprouting, and move them to a sunny spot or use a grow light.
How to Grow Tomatoes by Transplanting Seedlings
After you plant seeds and give them the care they need to grow, tomato seedlings often need transplanting into a larger pot before it’s time to move them outdoors. Or, growing tomatoes indoors is also possible in larger pots. This is an essential step to prevent them from getting pot bound.
Transplanting Seedlings
For the way to grow beefsteak tomatoes or smaller types, pour a small amount of potting mix into a four-inch pot and set it aside. Use a pencil or utensil to lift the seedling out of the tray, being careful not to damage the stem, and put it into the new pot.
Pour more dirt into the container to fill it and press it down lightly. Water the plant and use a water-soluble fertilizer to feed your seedlings regularly.
Ways to Grow Tomatoes in a Container Garden
If you do not have a spacious backyard or enough area to grow a garden, growing tomatoes in containers is a great option. They are vegetables that grow well in pots. All that is needed is your plant of choice, the right kind of soil, and a decent-sized pot.
Container Tomatoes
Once the last frost is over, it’s time to plant tomatoes outside. To grow tomatoes in a bucket, fill a five-gallon bucket or a two-foot container with high-quality potting soil. Take your tomato plant and remove the bottom sets of leaves.
Dig a large hole in the middle and place the plant deeply into the center so that most of the plant is below dirt-level. Fill the rest of the pot with soil and pat it down gently to enable the plant to produce roots along the stem and give it a robust root system.
When growing tomatoes in pots, set the container in an area where it receives about six to eight hours of full sun daily. Position a tomato cage in the pot for staking and water the plant thoroughly.
If you would rather have your tomatoes as a houseplant, that’s possible, too. It’s easy to grow cherry tomatoes indoors as long as they get enough light and water.
Growing Tomato Plants in a Vegetable Garden
The best way to grow tomatoes if you have space is in a vegetable garden. However, there is more to understand than merely placing your plants into the ground. Tomatoes require good soil and prefer growing alongside companion plants.
Tomato Plant Gardening
Prepare your garden with the proper garden soil and dig a hole for each plant that is twice the root ball’s size. How far apart to plant tomatoes is about two feet to allow the roots room to spread.
Sprinkle organic matter or compost into the bottom of each hole and place them into the hole up to its topmost set of leaves. Fill each hole with garden soil and pat it down gently.
Spread a layer of mulch beneath the plants to retain moisture and prevent weed growth, and water them right after planting.
If you plant your tomatoes in a garden with other veggies, some improve the health of tomatoes while others inhibit and stunt their growth. Plant your tomatoes near parsley, garlic, and basil, and avoid growing them beside fennel, cabbage, and broccoli.
Choosing the Right Medium for Growing Tomato Plants
There are many different soil types, including sandy, clay, peat, silt, loam, and chalk, and growing tomatoes in the wrong kind of dirt results in an unhealthy plant with poor production.
Tomato Soil
While tomatoes are not particularly fussy about the soil they grow in, some soil types are better than others. They do great in well-drained, loamy soil that has a pH of 5.8 to 7.0.
The best way to plant tomato plants is to combine a few inches of aged animal manure or organic compost into the soil’s top part before planting your tomatoes for ideal results.
Taking Care of Your Tomato Plants
Tomatoes require daily attention after you plant them to ensure they remain healthy and strong. Give them the right amount of water, sunshine, and nutrients, and your plants reward you with a fantastic harvest at the end of the season.
Tomato Plant Care
First and foremost, these plants require a lot of sunshine to flourish. Growing them in the shade does not produce good results, so finding an area where they get no less than six hours of sunshine each day is the way to go.
It’s also important to ensure that there is no danger of frost when you plant them outdoors to prevent them from damage.
Water your plants daily as needed, especially during the dry season, and don’t forget to spread mulch beneath them since mulching helps retain moisture. If your tomatoes are growing in pots, they need more watering than in the garden because containers dry out faster.
Tomato plants are heavy feeders and need fertilizer when you plant them in the garden or pot. After they start growing fruit, give them light fertilizer once every two weeks until the first frost.
How to Prevent Tomato Plant Diseases and Disorders
There are many plant fungal diseases and disorders, and tomato plants are no exception. Take charge of tomato problems and solutions so you can address any issue that comes up.
Understanding what ails your plant and which diseases of tomatoes you are dealing with are key to fixing the problem before it gets out of hand and destroys your garden.
It’s also important to watch out for pests like the tomato hornworm and aphids. Learn what to plant next to tomato plants to deter these creatures and ensure a bountiful crop at harvest time.
Healthy Tomato Plants
Several diseases cause disorders in tomato plants. The most common are blossom end rot, fusarium wilt, septoria leaf spot, and late blight. You may wonder why are tomato plant leaves curling or have other issues. Luckily, there are ways to prevent and deal with these problems.
Always water your plants in the morning at ground level and avoid overwatering them to prevent disease. To help eliminate brown spots on tomato leaves, keep your garden tools clean by disinfecting them regularly, and cut away infected leaves immediately.
Pruning Your Plants for Optimal Results
Tomato plants are not often what we think about when it comes to pruning, and it is not necessary. However, clipping away excess leaves and branches prevents the plant from getting too bushy and focuses more energy on the fruits.
Tomato Pruning
Begin by removing the flowers until the plant is about twelve to eighteen inches tall to encourage a strong root system. The next step is to prune the leafy suckers or side shoots.
These are little shoots that form at the axel where the leaf stem attaches to the main stem, and removing them allows for faster development of fruit.
How to Get Rid of Garden Pests on Your Tomato Plants
Pests and insects are a gardener’s worst enemy, especially if you grow your plants organically. Insects easily take out entire plants if you let them, and it’s vital to eliminate them as soon as you notice bugs on tomato plants.
Natural Tomato Pest Control
Aphids, slugs, snails, whiteflies, and tomato hornworms are common pests on tomato plants. These insects damage the leaves, stems, and fruits and often take out an entire garden if you don’t eradicate them right away.
Pluck off visible bugs by hand and submerge them in soapy water or use insecticidal soap. Another natural way to keep aphids off tomato plants is to sprinkle diatomaceous earth around the plant to kill them.
Mix dish soap and water in a spray bottle for a homemade bug spray for tomato plants to keep pests away and kill the ones already there.
When and How to Harvest Tomatoes
Now that you know how to take care of a tomato plant, tend to your garden each day, make sure the plants are healthy, well-watered and fed, and bug-free, it’s time to prepare for the harvest.
Harvesting Tomatoes
Tomatoes spend most of their time as a firm, green fruit while growing on the stem or vine. If you are trying to grow green tomatoes, you can pick them when they reach the appropriate size. But, as they ripen, they turn to their mature color of red, orange, yellow, or burgundy.
Check them for firmness, and clip them from the stem with garden shears at their peak moment of color or right before they change entirely to ensure they do not lose flavor. Remove the ripe fruits and carefully place them into a basket to prevent bruising them.
When do tomatoes go bad? If you have a good tomato harvest, take steps to preserve your fruit. You can freeze, can, or make sauce with your tomatoes to enjoy their flavor all year.
Choose several different ways to preserve garden tomatoes. You can even give some as gifts for those who aren’t into gardening.
How to Save Tomato Seeds for Next Season
Your local garden center is not the only place to get tomato seeds. Saving seeds from this year’s crop is relatively simple and a great way to regrow your favorite tomatoes during the next growing season. You can also grow cucumbers from seeds, as well as many other veggie favorites.
Harvesting Tomato Seeds
Unlike many other plant seeds, tomato seeds are inside a gel-like sack of growth inhibitors, so the process of collecting seeds is a bit different. First, choose the best-looking tomatoes from your bunch, and slice them in half from the stem down to the blossom end.
Scoop the seeds out and put them into a jar, and refrigerate the remaining fruit for eating. Pour a cup of water into the Mason jar, cover it with a paper towel, and set it in a warm and safe place to ferment for two to four days.
As the seeds ferment, there is a foul odor and a layer of mold on the top. While this is unpleasant, it is a normal part of the process. Once the seeds settle to the bottom of the liquid in the jar, they are ready for separation.
Remove the mold covering from the top and discard it. Pour the seed mixture into a colander and rinse the seeds well under cool, running water to clean them and wash away pulp and mold.
Spread them on a paper plate and place them in a dry, warm spot until they are completely dried before pouring them into an envelope for storage.
While there are a few steps to take to keep your plants safe from garden pests and ensure they flourish, tomatoes are one of the easiest plants to grow. The most challenging thing is deciding what to do with all those tomatoes at the end of the growing season.
Knowing how to grow tomatoes means that you get to enjoy the tastiest and juiciest tomatoes on your burgers and in your salads, so why not share our tomato growing guide with your circle of friends and family on Facebook and Pinterest?
Growing Tomatoes: Best Varieties, Planting Guide, Care, Problems, and Harvest
Jennifer is a full-time homesteader who started her journey in the foothills of North Carolina in 2010. Currently, she spends her days gardening, caring for her orchard and vineyard, raising chickens, ducks, goats, and bees. Jennifer is an avid canner who provides almost all food for her family needs. She enjoys working on DIY remodeling projects to bring beauty to her homestead in her spare times.
If you buy an item via links on this page, we may earn a commission. Our editorial content is not influenced by commissions. Read the full disclosure.
A homegrown tomato is a revelation. If you have a friend who says they hate tomatoes, try giving them one still sun-warmed that has been growing in your garden. Chances are, they’ll change their tune.
However, as tasty as they are, tomatoes often come with some problems. They can be fussy plants that you have to treat right if you want a bountiful harvest.
The key to a happy tomato garden is choosing the right varieties, giving them a solid foundation, and knowing how to care for them. If trouble comes, this article will also help you figure out how to deal with it.
Best Tomato Varieties
Picking the right tomato can feel downright overwhelming at times. There are so many varieties to choose from.
There are seven main types, each with dozens of varieties. They include cherry, beefsteak, grape, cocktail, Roma, green, or heirloom. You can read more about the different types in our guide to get a better idea of each.
That isn’t even all of them. There are other less popular varieties as well, including paste, yellow, and pear tomatoes.
With all the options out there, how do you pick the right one? Here’s what to look for:
Disease Resistance
The first thing to consider is the plant’s resistance to disease. Check the label of the plant or seed packet. Right next to the name of the plant, you’ll see a letter in parenthesis.
Diseases like verticillium will have a V in parenthesis, which means that the plant is resistant to verticillium wilt. Other common diseases you will see on the packaging are Fusarium wilt (F); Root-knot Nematode (N); Tobacco Mosaic Virus (T); and Alternaria (A).
I recommend doing a little research` to see what soil-based diseases are most common in your area and choose varieties that are resistant to them. That way, you’ll have fewer headaches this growing season.
Determinate vs. Indeterminate
There are two types of growth patterns in tomatoes. The first is determinate growth. Determinate means that the plant grows to a set height and width, flowers, and then spends its time ripening the fruit.
If you’re planning on growing tomatoes in planters, then determinate varieties are a smart option.
An indeterminate variety is one where the plant continues to grow all season up until frost, at which point it dies. Since these varieties never stop spreading taller and wider, they require staking and cages to help support them.
Growing Time
The third thing you should take into account when picking a tomato variety is the time it takes for the fruit to mature. Some tomato plants – like Fourth of July – have growing seasons as short as 50 days.
If you live in the north where summer can be a little late and winter can sneak up early, then you might need to choose one of these varieties so you can get the maximum amount of fruit from your plants.
However, if you live in the south (like me), then you have a longer growing season. You can plant a tomato that takes up to 90 days to start producing, like beefsteak tomatoes.
Fruit Characteristics
Finally, the last thing you need to take into consideration when choosing your tomato variety is the fruit characteristics. How big will the fruit get? What will it taste like?
If you’re looking to grow tomatoes for sandwiches, then you won’t want cherry tomatoes. However, if you are looking to make a sauce or salsa, then a Roma or cherry tomato might work just fine for you.
For instance, I love to grow persimmon tomatoes to make yellow tomato sauce. It not only tastes good but it looks gorgeous in a jar, too.
Planting Tomatoes
We have a large garden and usually grow about 2-3 flats of tomatoes. If you’re looking to have a few tomatoes on hand for sandwiches, then you shouldn’t need more than 2-3 plants. But if you’re looking to preserve tomatoes or make sauces, then you might want to grow more.
Growing Zones
Tomatoes grow in zones 2-10.
Sun Requirements
Tomatoes require full sun, with more than 6 hours per day in the northern regions.
Soil Requirements
Tomatoes like rich, well-draining, loamy soil with a pH between 6.0 and 6.8.
Starting from Seed
Start seeds indoors 6 to 8 weeks before the last frost date. You can use this seed-starting calculator to know exactly when you should begin growing your seeds for your location.
Seed starting containers make the job easier. You can use seed trays or foil lasagna trays with holes poked in the bottom. The seed starting trays make things a little easier, but I also understand what it means to grow your food on a tight budget, so the foil trays work too.
Place a solid tray under the flat of seeds because this is how you’ll water them. If you purchase grow trays, they usually come as part of the set-up. If not, use a large foil tray instead.
Use a tomato-specific seed starting mix to fill your trays. Drop 1-2 seeds in each cell of the tray – or every few inches in a lasagna tray – and gently cover them up.
Sprinkle cinnamon lightly over the soil. It helps deter fungus that likes to grow on top of the soil and can harm seedlings.
Place the flat of seeds on a solid tray under grow lights. I prefer shop lights because they work the same but are much cheaper to buy and run.
Never water seeds from the top during the germination process. Add water to the trays and allow the seeds to soak it up from the bottom. Mist the seeds with a spray bottle to keep them moist.
You know the seeds are ready for water when the tray underneath them is dry. That way, you never risk overwatering your seedlings.
Transplanting
Harden seedlings off for at least two weeks before planting. You can do this in a greenhouse or you can move them outside for longer periods of time each day.
Transplant them after the last frost date, when the soil is warm, and the seedlings are 3 to 4 inches tall.
Spacing
Give 2 feet between each plant and each row. Plant transplants 8-12 inches deep.
Caring for Your Tomatoes
Starting tomatoes is the easy part. After you’ve planted them, the challenge begins.
First, keep dirt off of the stems of the tomatoes. By keeping their stems clean, you are lessening their chance at picking up diseases.
Watering
Water generously, at least 2 inches per week during the summer.
Because tomatoes are disease-prone, it’s vital to water from the ground and avoid overhead irrigation. You can use soaker hoses to water your plants effectively.
Fertilizing
Give tomatoes a weekly feed with a liquid tomato fertilizer.
Staking
If you’re growing indeterminate varieties, you’ll need to stake or cage your tomatoes to support them and keep the fruit off of the ground.
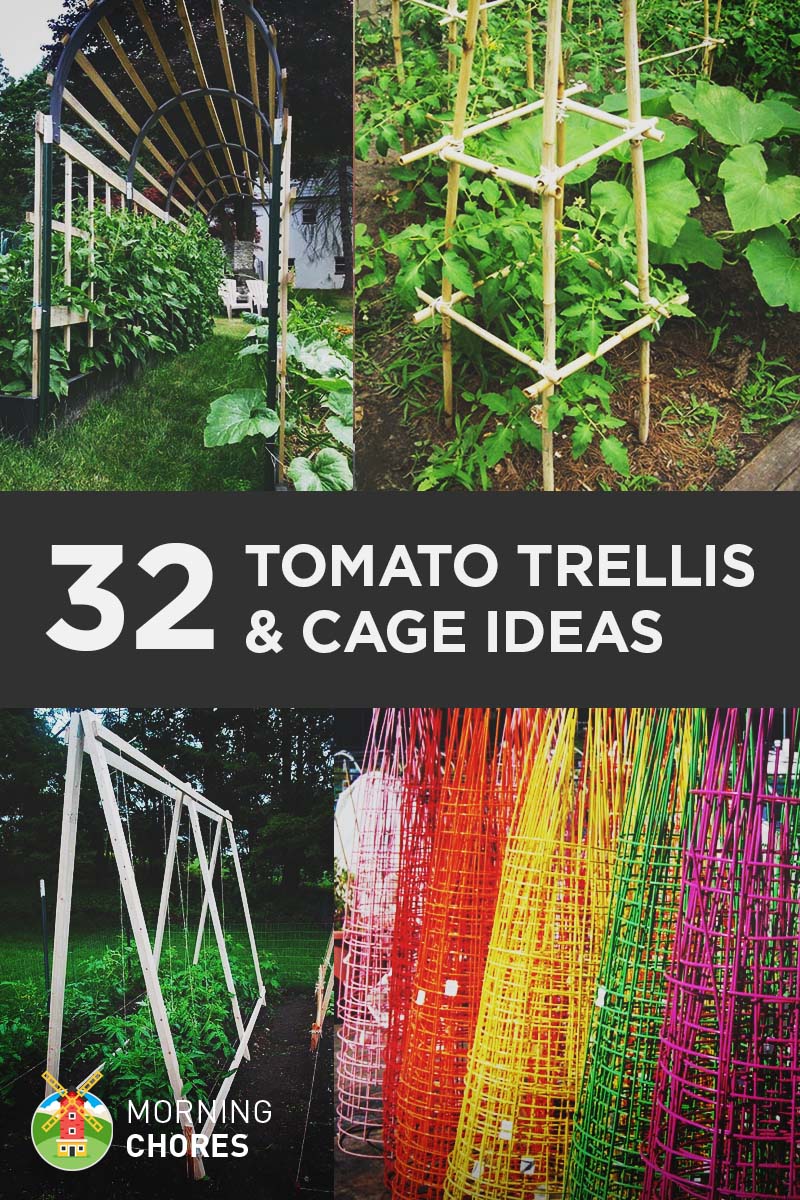
Staking is key to avoiding disease and to maximizing your harvest. Check out our guide for a bunch of unique tomato cage and trellis ideas that will add a little character to your garden.
Extra Tips On Growing Tomatoes
Some gardeners like to add a teaspoon of Epsom salt to the base of each plant because they say it makes the tomatoes taste sweeter.
I personally prefer the acidity of the tomato, so I don’t want it to be super sweet, so I don’t do this. But I know many people that do, and they claim it works. You can always experiment in your garden and see what works for you.
Problems and Solutions to Growing Tomatoes
When growing tomatoes, the biggest issue are the numerous diseases and pests that bother them.
Don’t be deterred. Most tomato issues are fixable by using ground irrigation, giving proper nutrition, and keeping the fruit and parts of the plant off of the ground.
To keep bugs away, we planted marigolds or onion starts next to each tomato plant. I also use natural repellents, and I keep guinea fowl.
I have to say, keeping guinea fowl has honestly been the best investment we have ever made in our garden. They cost little to raise and add such humor to our farm.
Aphids
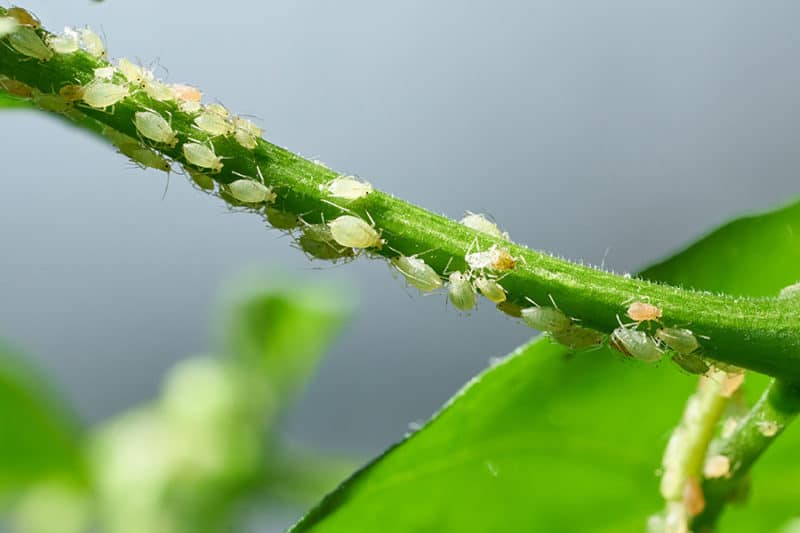
Aphids love tomatoes. You can tackle them with insecticides. If you prefer to stick with a more natural route, you can make your own organic bug repellent. We also have a whole guide dedicated to dealing with these little pests.
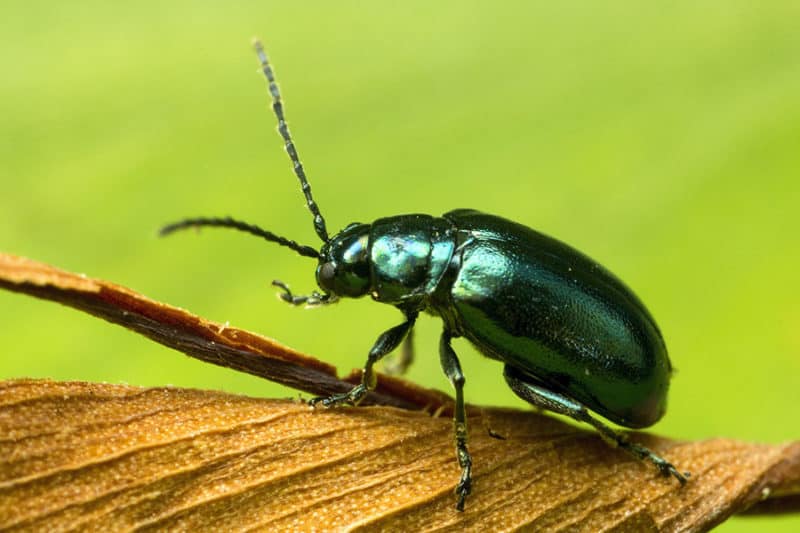
Flea Beetles
Flea beetles are tiny little beetles that hop around like fleas, which is where they get their name. Not only can they chew through leaves and stunt growth, but they spread disease as well.
Get rid of them using neem oil or insecticides. You can also sprinkle diatomaceous earth around your tomatoes and put sticky traps throughout the garden.
Prevent them using row covers and by encouraging beneficial nematodes.
Tomato Hornworm
Sooner or later, almost every tomato grower deals with these green menaces. They’re voracious eaters and one hornworm moth can have multiple generations each year.
The caterpillars are about 5-inches long with a horn-like growth on their rear end.
Start by handpicking them off your plants and feed them to your chickens or drown them in soapy water. If that doesn’t work, use the organic pesticide Bt.
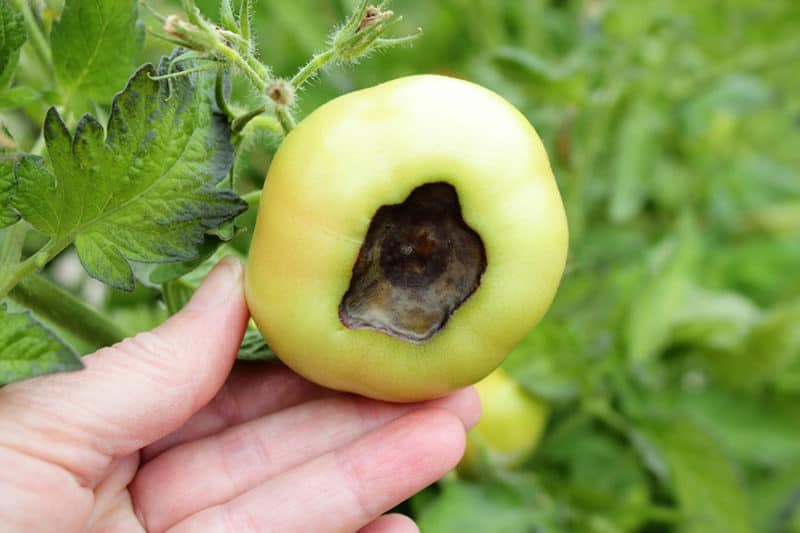
Blossom End Rot
We have this every year in my garden, so I’ve learned lots of tricks for dealing with it.
As it ripens, the fruit turns back on the bottom and begins to rot from the bottom up. It’s difficult to save any fruit that has blossom end rot.
The best way to fix this problem is to make sure you fertilize about once a month. Strike the right balance between nitrogen and calcium when fertilizing.
Also, providing even soil moisture seems to play a large role in things as well. We’ve switched to soaker hoses and so far are seeing great results.
Add 1 tablespoon of powdered milk to the base of each plant during the early part of the season before this problem develops – kind of like vaccination for tomatoes.
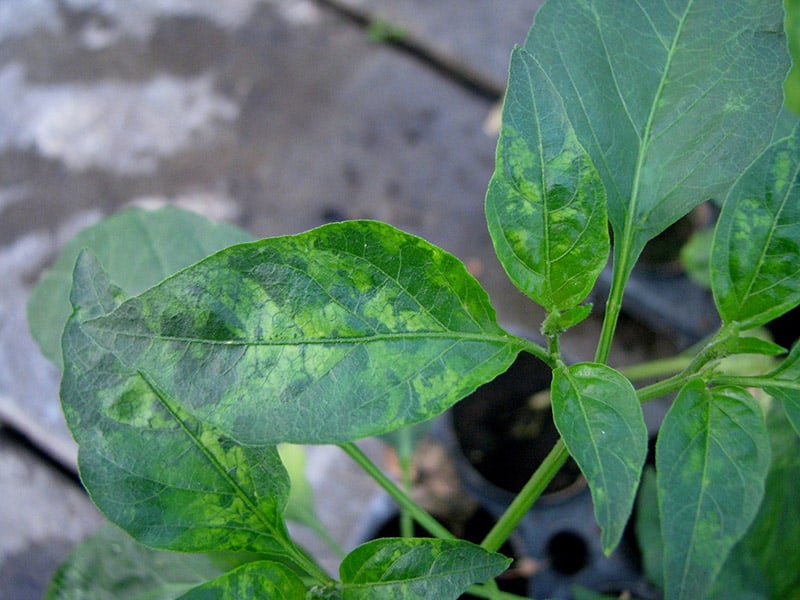
Tobacco Mosaic Virus
You know you have this when your tomatoes become yellow and green spotted. They may develop brown patches on them as well. Leaves will develop a lighter green mottled pattern. There’s no cure, so prevention is best.
Clean your hands and tools between plants when working in the garden. Keep your garden weed free and rotate your crops each year. Remove and discard any infected plants.
If you’re a smoker, be sure to wash your hands thoroughly before touching your tomato plants and don’t carry tobacco products into the garden.
Also, be sure not to plant where any infected tomato or tobacco plants were planted previously. Bugs can carry this disease, so keep them at bay. I recommend looking for a variety of tomato that is resistant to this disease, as well.
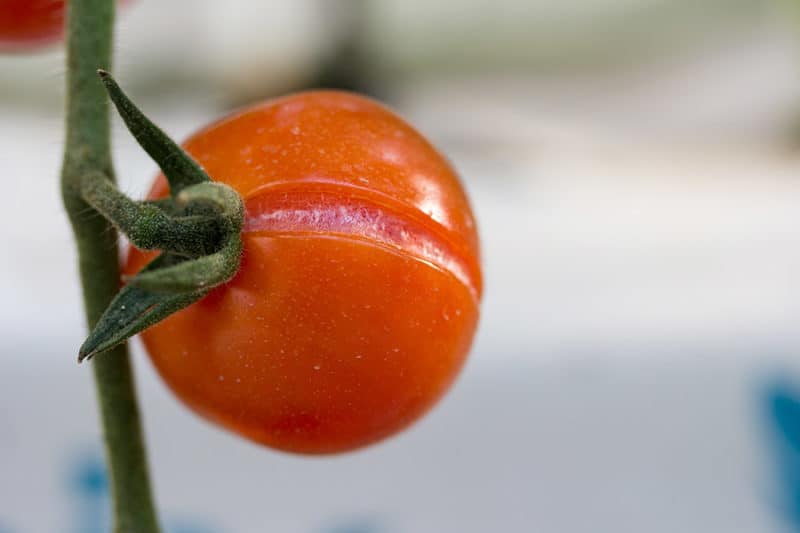
Radial Cracking
This is another disease we battle with most years. You know you have it when the top of the tomato begins to crack and split.
Some of the tomatoes are still salvageable, but it’s a pain nonetheless.
The best thing you can do is to select varieties that don’t suffer from this problem. The tough part about that is that some of the favorites are prone to this. I’ve found it common in most larger varieties.
You can also prevent this by avoiding large changes in moisture levels by using soaker irrigation and providing plenty of mulch around plants.
Sour Rot
Sour rot causes your tomatoes to crack and erupt with a white, scummy fungus. Yes, I’ve dealt with this one, too.
The best thing you can do is to not wet the surface of the tomatoes by watering at the base. Be sure to stake your tomatoes properly to keep the fruit off of the soil.
Verticillium Wilt
Verticillium causes older leaves on the tomato plant to turn yellow and brown. They’ll eventually wilt. This happens mainly during colder weather.
The only way to prevent this from happening is buying a variety of plant that is resistant to it.
Early Blight
If your tomatoes contract this disease, the fruit will appear with dark and leathery lesions on the skin near the stem.
Early blight can be prevented with fungicide spray and by rotating your crops.
Alternaria
Plants infected with Alternaria have gray sunken spots on them.
Be careful not to damage your plant when pruning. Also, water by ground irrigation instead of using sprinklers.
Root Knot
This disease is hard to stop because it starts underground. You’ll know you have this if you’re properly feeding your plants, but they still seem sluggish. Then, when you go to pull them up, you see that the root is literally tied in a knot and has multiple growths on it.
The best ways to prevent this are by proper crop rotation and also to plant tomatoes with a trap crop. A common trap crop is Elbon cereal rye. It helps limit nematode production.
The Best And Worst Companion Plants For Tomatoes
The best companion crops for tomatoes include:
Leaf lettuce is a great companion plant for tomatoes because it serves as a living mulch. You can plant leaf lettuce all between the tomatoes, and it will help hold moisture for the plants.
The worst companion crops for tomatoes are:
Planting pepper plants and tomatoes together is a big negative. The reason is cross-pollination. It will completely ruin the taste of your tomatoes. So be sure you always put a few rows between them if planting them in the same garden.
How To Properly Store Your Tomato Harvest
Knowing when to harvest and how to store your tomatoes is the final element to having a successful growing season.
I like to harvest tomatoes when they are red but not overly ripe unless I’m going to eat them immediately. The reason I like them to be not too ripe is that they will turn to mush by the time I’m ready to use them otherwise.
To harvest, pull them from the plant when you think they’re at the right stage of ripeness for your needs. If they are tough to remove, it could mean that they’re a little underripe. If they fall right off in your hand, they’re ready to eat right away.
Once you bring them into the house, wipe the dirt off of them. Then store them in a cool, dry, and dark location so they won’t ripen too fast or mold. I usually store mine on a corner kitchen shelf upside down.
I do this because a tomato is usually less ripe at the top than the bottom. Letting them rest where the stem used to be helps to stop the molding process of the tomato.
You can store your tomatoes in the fridge if you wish. I personally don’t like their taste after refrigeration, so I don’t. If you need to store them for longer than a few days then refrigeration is a great option.
If you’d like to cut up your tomatoes in advance, be sure only to cut what you’ll eat in less than a week’s time. Store them in airtight containers in the refrigerator.
Tomato Recipes For Your Homegrown Tomatoes
After you’ve put in all of the hard work of growing your tomatoes, it’s time to dig in. Here are some ideas on how to enjoy your harvest.
1. Tomato Sauce
Everyone knows fresh tomato sauce tastes excellent on pasta. Here is a fantastic tomato sauce recipe that will be sure to satisfy your taste buds.
2. Salsa
My family and I are salsa people. We love it! It’s great on eggs, to dip chips in, on top of burgers with melted cheese, and so much more. Here is a recipe that will show you how to make and can salsa.
3. Tomato Soup
My kids love tomato soup. The only problem is, I don’t love the canned taste from the store-bought kind – nor do I love the preservatives. After making and canning your own tomato soup, you’ll never look back. You can’t beat that fresh tomato taste in the dead of winter.
4. Crushed Tomatoes
This is what I do with most of my tomato harvest. Why? Because I am a soup girl, especially in winter. I could live off of the stuff.
Crushed tomatoes go well in homemade chili, homemade vegetable soup, black bean soup, and my favorite, slow cooker chicken tortilla soup.
5. Tomato Juice
I am not a huge fan of tomato juice, but my husband is. He can open a jar and drink it in one sitting. So if you are like him, then you’ll love making your own homemade tomato juice.
For those that are like me, tomato juice is a nice addition to homemade soups, as well. This recipe will help you in the making and canning process.
Now You’re Ready to Start Growing Tomatoes
Tomatoes may not be the easiest crop in the garden, but it certainly one of the most rewarding. Whether you nibble on them fresh from the vine or use them to make soups in the dead of winter, tomatoes are a must-have. Be sure to tell us your favorite recipe and let us know if you have any tips.
Top 10 Tomato Growing Tips
The Spruce / K. Dave
Growing tomatoes is often the impetus for starting a vegetable garden, and every tomato lover dreams of growing the ultimate tomato: firm but juicy, sweet but tangy, aromatic, and blemish-free.
Unfortunately, there are few vegetables that are prone to more problems than tomatoes. The trick to growing great-tasting tomatoes is to choose the best varieties, start the plants off right, and control problems before they happen. Start here with some time-tested tomato growing tips to ensure your tomato bragging rights this year.
8 Things You Can Do To Get More Tomatoes This Year
Don’t Crowd Tomato Seedlings
» data-caption=»» data-expand=»300″ data-tracking-container=»true» />
The Spruce / K. Dave
If you are starting tomatoes from seed, give the seedlings plenty of room to branch out. Yes, that means thinning the seedlings to one strong plant per cell or small pot. Snip the weaker, smaller seedlings in favor of the best grower. Crowded conditions inhibit their growth, which stresses them and leads to disease later on. Transplant tomato seedlings into their own 4-inch pots shortly after they get their first set of true leaves.
Provide Lots of Light
» data-caption=»» data-expand=»300″ data-tracking-container=»true» />
The Spruce / K. Dave
Tomato seedlings need strong, direct light. Days are short during winter, so even placing them near a sunny window may not provide them with sufficient natural light. Unless you are growing them in a greenhouse, your best option is to use some type of artificial plant lighting for 14 to 18 hours every day.
To ensure the tomato plants grow stocky, not spindly, keep the young plants only a couple of inches from fluorescent grow lights. You will need to raise the lights (or lower the plants) as the seedlings grow. When you’re ready to plant them outside, choose the sunniest part of your vegetable garden as their location.
Turn a Fan On
» data-caption=»» data-expand=»300″ data-tracking-container=»true» />
s0ulsurfing/Jason Swain/Getty Images
Tomato plants need to move and sway in the breeze to develop strong stems. That happens naturally outdoors, but if you start your seedlings inside, you need to provide some type of air circulation. Create a breeze by turning a fan on them for five to 10 minutes, twice a day. That small amount of time will make a big difference.
Another option is to ruffle the tomato plants by gently rubbing your hand back and forth across their tops for a few minutes, several times a day. It’s a bit more effort, but their wonderful tomato scent will rub off on you as a bonus.
Preheat the Garden Soil
» data-caption=»» data-expand=»300″ data-tracking-container=»true» />
The Spruce / K. Dave
Tomatoes love heat. They won’t really start to grow until both the soil and air temperatures remain warm. You can speed things up in the soil by covering the planting area with black or red plastic a couple of weeks before you intend to plant. Those extra degrees of soil warmth will translate into earlier tomatoes.
You can lift the plastic before you plant, but some research contends that red plastic mulch has the added benefit of increasing your tomato yield.
Bury the Stems
» data-caption=»» data-expand=»300″ data-tracking-container=»true» />
The Spruce / K. Dave
Plant your tomato plants deeper than they come in the pot, all the way up to the top few leaves. When planted this way, tomatoes are able to develop roots all along their stems. And more roots make for a stronger plant.
You can either dig a deep hole or simply dig a shallow trench and lay the plant sideways. It will quickly straighten itself up and grow toward the sun. Just be careful not to drive your tomato stake or cage into the buried stem.
Mulch Tomatoes After the Soil Has Warmed
» data-caption=»» data-expand=»300″ data-tracking-container=»true» />
The Spruce / K. Dave
If you are not going to leave plastic on the soil, hold off on putting down mulch until after the ground has had a chance to warm up. Although mulching conserves water and prevents the soil and soilborne diseases from splashing up on the plants, if you put it down too early, it will also shade and cool the soil. Because tomatoes love heat, allow the sun to warm the soil in the spring. After temperatures remain warm, both during the day and at night, you can add a layer of mulch to retain moisture.
Remove the Bottom Leaves
» data-caption=»» data-expand=»300″ data-tracking-container=»true» />
The Spruce / K. Dave
After your tomato plants reach about 3 feet tall, remove the leaves from the bottom foot of the stem. These are the oldest leaves, and they are usually the first leaves to develop fungus problems. As the plants fill out, the bottom leaves get the least amount of sun and airflow. Because these leaves sit close to the ground, soilborne pathogens can easily splash up onto them. Removing them helps prevent fungal diseases from taking hold. Spraying weekly with compost tea also seems to be effective at warding off fungal diseases.
Pinch and Prune for More Tomatoes
» data-caption=»» data-expand=»300″ data-tracking-container=»true» />
The Spruce / Marie Iannotti
Pinch and remove suckers that develop in the crotch joint of two branches. They won’t bear fruit and will take energy away from the rest of the plant.
However, go easy on pruning the rest of the plant. You can thin out a few leaves to allow the sun to reach the ripening fruit, but it’s the leaves that are photosynthesizing and creating the sugars that give flavor to your tomatoes. Fewer leaves will mean fewer sweet tomatoes.
Water Regularly
» data-caption=»» data-expand=»300″ data-tracking-container=»true» />
The Spruce / K. Dave
Water deeply and regularly while the fruits are developing. Irregular watering—missing a week and trying to make up for it—leads to blossom end rot (a calcium deficiency) and cracking and splitting. The rule of thumb is to ensure your plants get at least 1 inch of water per week, but during hot, dry spells, they may need more. If your plants start to look wilted for most of the day, give them a drink.
After the fruit begins to ripen, you can ease up on the watering. Lessening the water will coax the plant into concentrating its sugars, for better flavor. Use your judgment. Don’t withhold water so much that the plants continually wilt and become stressed or they will drop their blossoms and possibly their fruit.
Getting Your Tomato Plants to Set Tomatoes
» data-caption=»» data-expand=»300″ data-tracking-container=»true» />
The Spruce / K. Dave
Tomatoes’ ripening is pretty much at the mercy of the weather, but sometimes we can help things along. Pinching off the tips of the main stems in early summer will encourage indeterminate tomatoes (those with fruit available continuously) to start putting their energy into flowering.
Indeterminate tomatoes like to grow tall before they start setting fruits, so don’t be alarmed if your tomato plants aren’t flowering for their first month or two. Pinching is also a handy trick toward the end of the summer when you want the last tomatoes to hurry up and ripen.
It shouldn’t be a problem getting determinate tomatoes (those that ripen all at once) to set fruit unless weather conditions are unfavorable and cause a condition aptly named «blossom drop.»
How to grow tomatoes
Find out how to grow tomatoes, with advice on sowing, growing and harvesting, in our Grow Guide.
Published: Tuesday, 7 April, 2020 at 8:01 am


:max_bytes(150000):strip_icc()/Marie131-2_fn-A2-2-Web-5b6edc9a46e0fb00509cde8b.jpg)
:max_bytes(150000):strip_icc()/headshots_FINAL_julie-thompson-adolf-4060bdd452de446fbd5d1bf9e1d737a1.png)
:max_bytes(150000):strip_icc()/top-tomato-growing-tips-1402587-11-c6d6161716fd448fbca41715bbffb1d9.jpg)


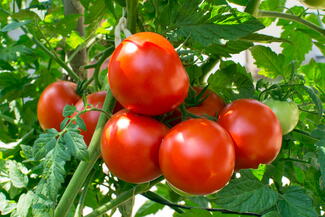
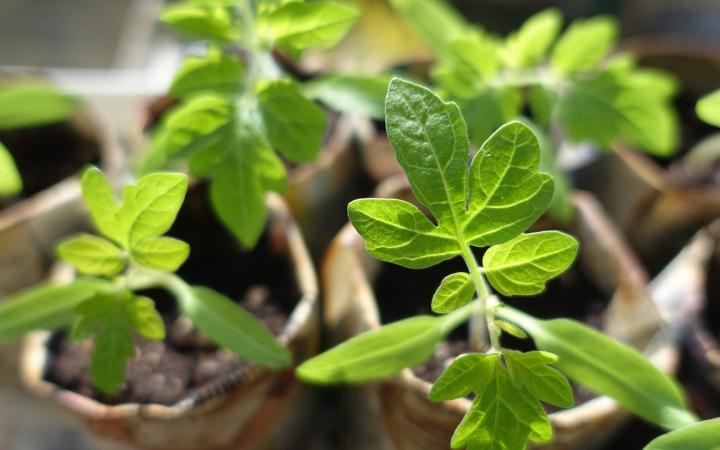

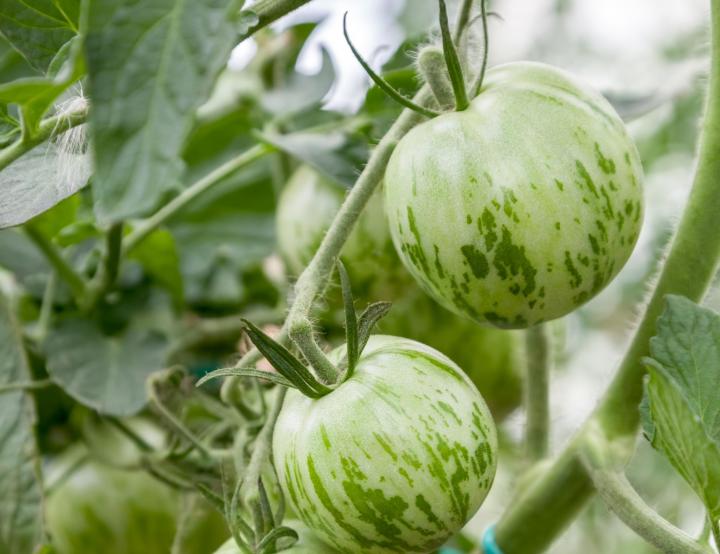 Image: Tomatoes aren’t only red! Featured here is the flavorful heirloom ‘Green Zebra,’ a high-yielding indeterminate plant. Credit: VZ aitsev/GettyImages
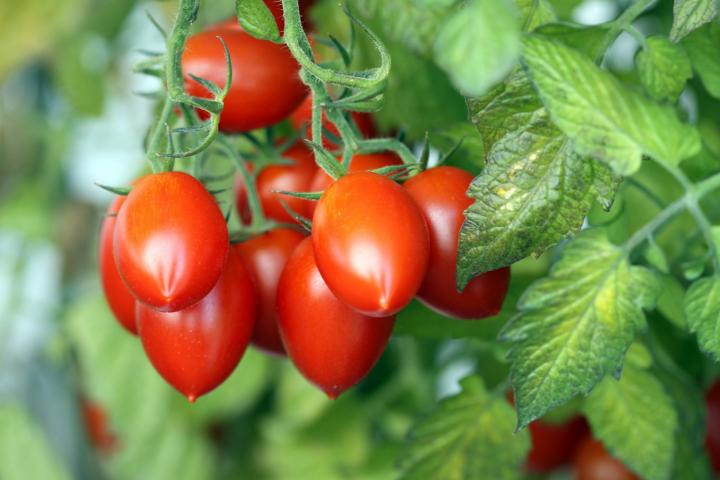 Image: Roma tomatoes. Credit: Ben185/Getty
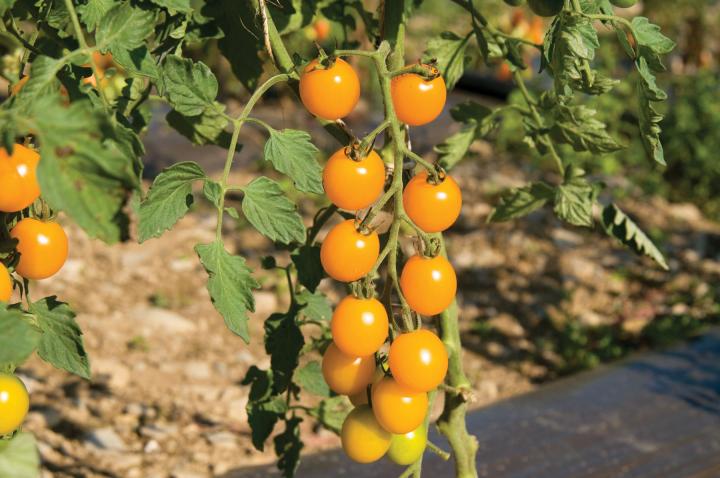 Image: Cherry tomatoes (‘Yellow Mini F1 ’). Credit: Johnny Seeds.
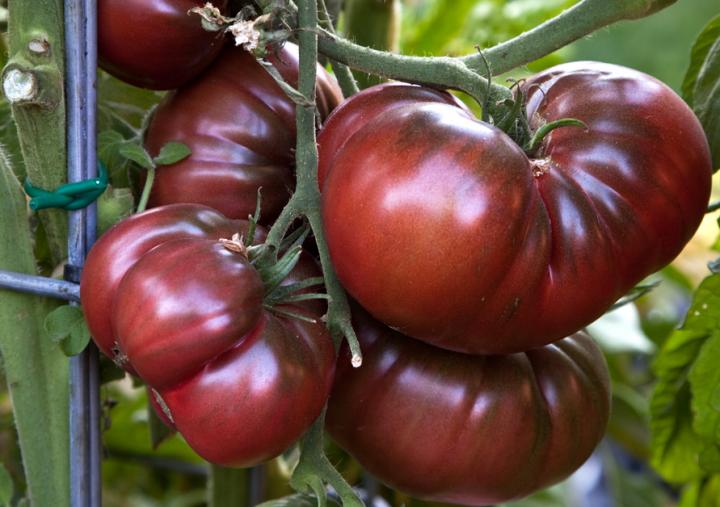 Image: Black Krim heirloom beefsteak tomato. 80 days; indeterminate; wonderfully rich flavor. Credit: Park Seed.