How to make a fire
How to make a fire
How to Make a Fire
Knowing how to make a fire is a quintessential survival skill. It provides invaluable heat and light and can enable water purification, cook food, warm a survival shelter, and repel insects and animals. Fire can even save a life by preventing or aiding in recovery from hypothermia.
Wet climates, such as the Pacific Northwest coast, provide challenging environments for fire skills. Mastering how to make a fire in wet climates gives you valuable tools to be able create fire anywhere. In all areas, particularly dry environments, it is essential to also learn and follow wildfire prevention.
There are a number of keys for success in learning how to make a fire including site selection, preparation, materials, design, mental attitude, safety & ethics, and of course practice!
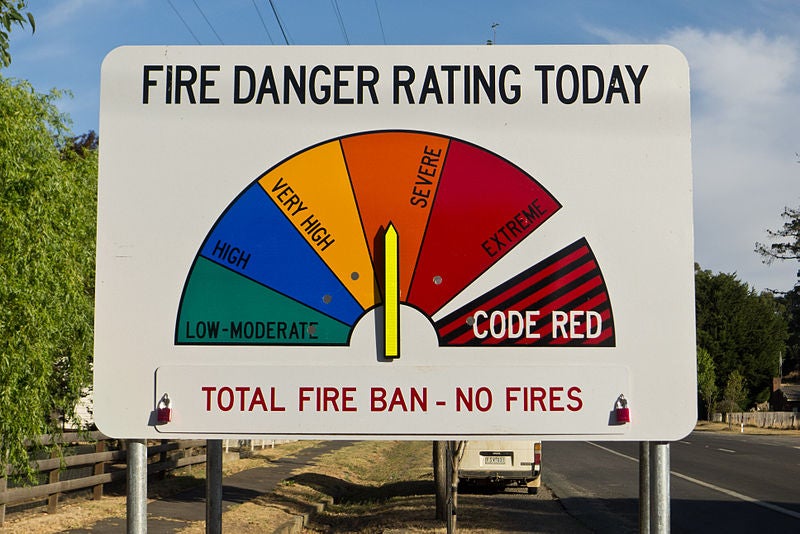
Before starting a fire, make sure you are in an area where it is safe and ethical to do so—pay attention to burn bans or high fire risk that result from dry weather or strong winds. Ensure that fires are permitted and follow safety guidelines which are described later in this article.
First you need to select a spot and prepare the area for your fire. At sites with prepared firepits make sure you choose one that is downwind and at least 15 feet from your tent and gear (so that embers don’t float onto your tent or equipment, burning holes in them or worse, catching them on fire).
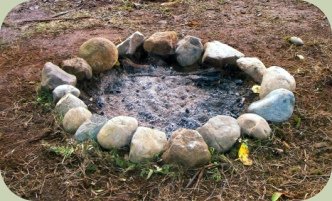
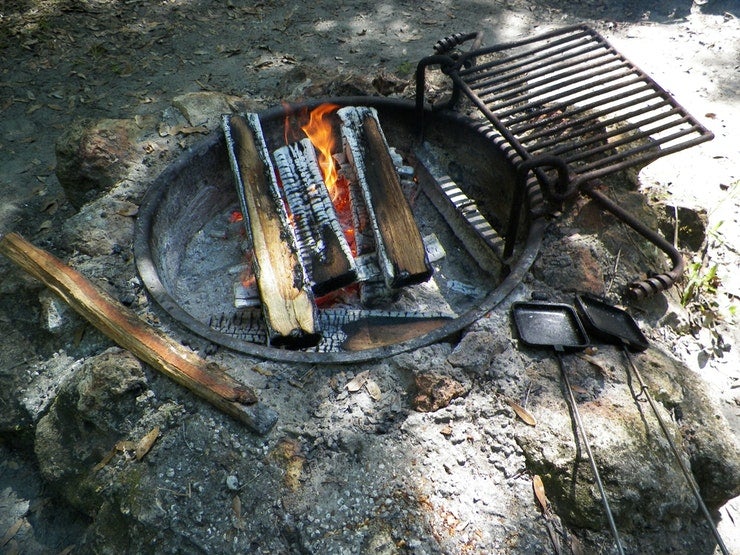
The spot should be void of grass, plants or debris and should have a ring of rocks surrounding it. The area surrounding the fire ring should also be free of debris. In drier areas, clear a 10-foot diameter around the fire site. Remove any burnables close by. Avoid overhead tree limbs as well as underground roots that could catch on fire.
In areas without pre-existing fire rings, dig a shallow pit and circle it with rocks. In these areas, fire safety is even more crucial.
You will need a fire starter, tinder, small kindling, large kindling, and fuelwood. Each is described below:
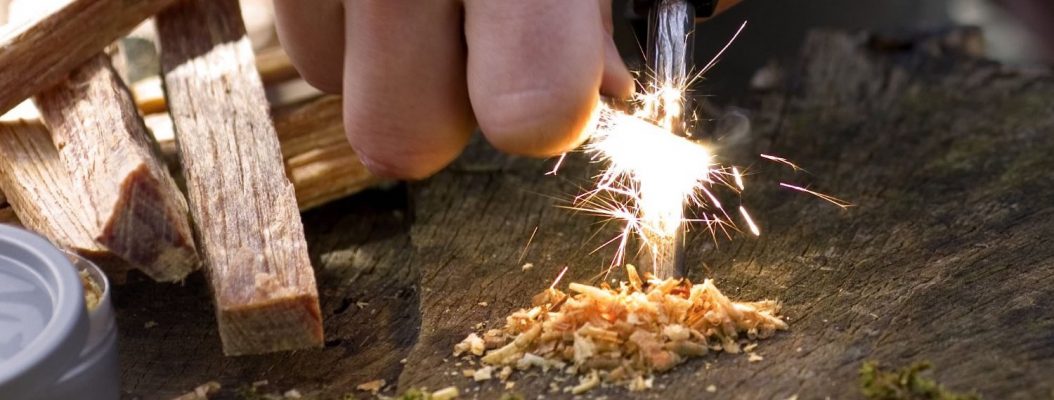
You will need a method to light your fire. In a survival situation, make sure you have something you reliably know how to use such as a lighter or matches (waterproof ones help). If you are experienced, you can also use flint and steel, a magnifying glass, or a friction fire kit such as a bow drill or hand drill. You can read our evaluation of more fire starters.
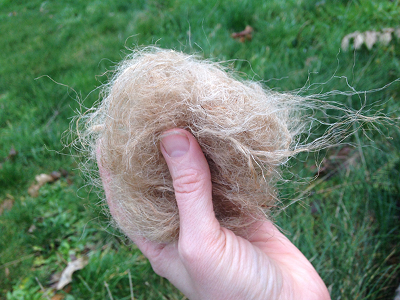
Tinder is highly-flammable material. It needs to catch fire quickly and hold the flame long enough to allow other materials to start burning. It’s a good idea to keep a protected dry tinder bundle in your survival kit or backpack.
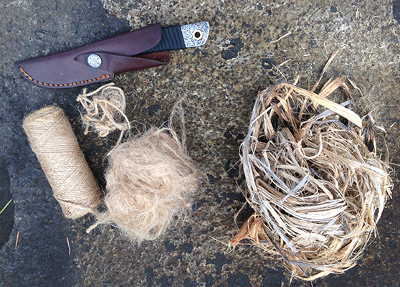
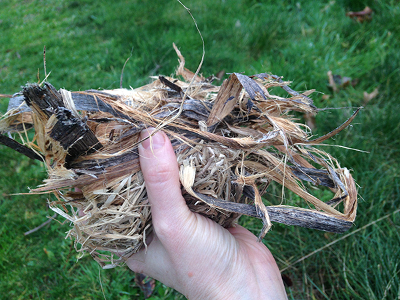
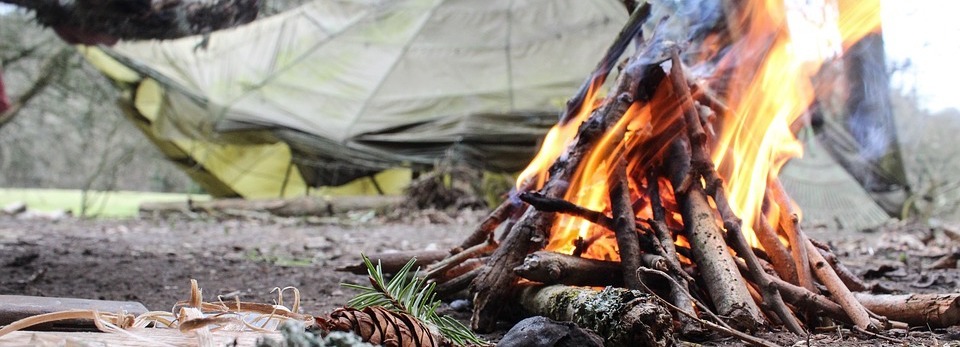
Homemade Tinder – This can be made from pieces of jute twine. Simply unravel short pieces and fluff them up to make an excellent tinder resource (pictured above). You can also use dryer lint, cotton balls that had been soaked in warmed petroleum jelly, or very fine wood shavings.
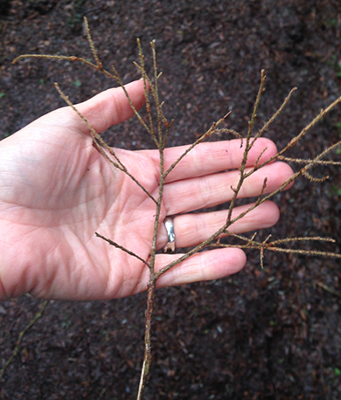
Small Kindling (also known as «thin and whispies», 1-2 millimeters thick) – When tinder ignites, it will need to catch onto something larger but still small. Very thin, dry brittle twigs will help the flame grow. The lower branches of evergreen conifer trees often have attached dead or dying branches that are very thin and brittle (only about 1-2 millimeters thick). Test them by breaking some off. If they snap, they will burn well. If they bend, they are too green to catch easily. Some species of hardwoods also have good small kindling. Collect a good pile of these.
FREE Mini Survival Guide: «Thriving in the Outdoors»
In this 9-page guide, you’ll discover keys to starting a fire, building a shelter, purifying water, finding water. and many more life-saving skills.
Get your FREE copy now by signing up to our list.
Discover more.
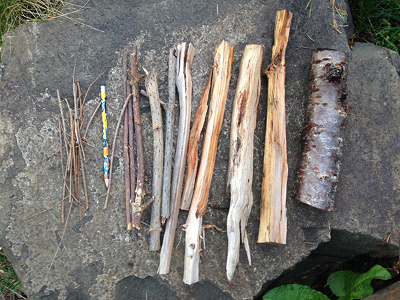
Larger Kindling (branches 1/8-1/2” diameter and about a foot long) – Small kindling catches fire well but will burn out quickly. You also need thicker kindling. In dry areas you may be able to collect from the ground. In the wet Northwest, you may need to pull sticks from dead or dying trees or cut small pieces from dry logs using a small hatchet or fixed blade survival knife. Small pieces of cardboard and larger wood shavings can make good kindling. Igniting easily, kindling also sustains enough heat and flame to light the fuel materials.
Conifer Softwoods: Conifers (cone-bearing evergreens) have softer woods. They will burn quicker and hotter and will pop and crackle more as they have more resin. Examples of conifer softwoods include Douglas Fir, Pines, Cedars, Hemlocks, and Spruces.
Hardwoods: Hardwoods take longer to start burning but burn longer. Examples of hardwoods include Oaks, Maples, Madrone, Ashes, Beeches, Hickory, and Black Locust.
Even in wet conditions, you can still find materials dry enough for burning. Materials from live trees and plants don’t burn well and damage the landscape. The best materials will be found on standing dead wood from snags (dead or dying trees, but not ones that are punky and decayed). Downed trees can have good dead branches that are off the potentially wet ground. Wood should be brittle. Twigs and sticks should snap.
In wet conditions, protect your drier gathered materials from taking on more moisture from the wet ground and rain from above. This can be accomplished by placing materials inside a jacket or plastic bag or between tarps or inside a shelter while you are preparing for the fire.
Collect a large pile of kindling and fuelwood and begin constructing your fire structure before you attempt to light it or start a friction fire coal. It would be extremely disappointing and potentially dangerous in a survival situation to start your fire before your materials are ready. If there is more than one person, work as a team—one person to collect and one to build the fire. You can also take turns tending the fire once started.
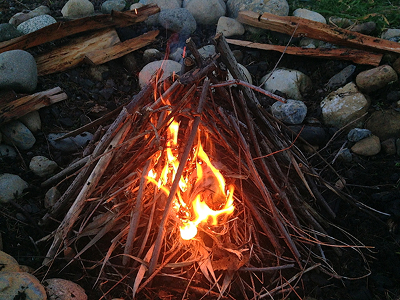
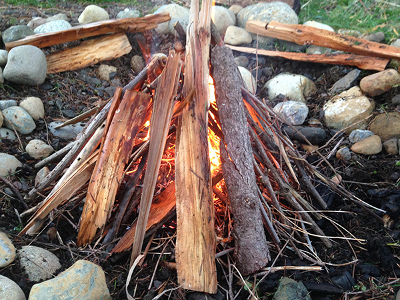
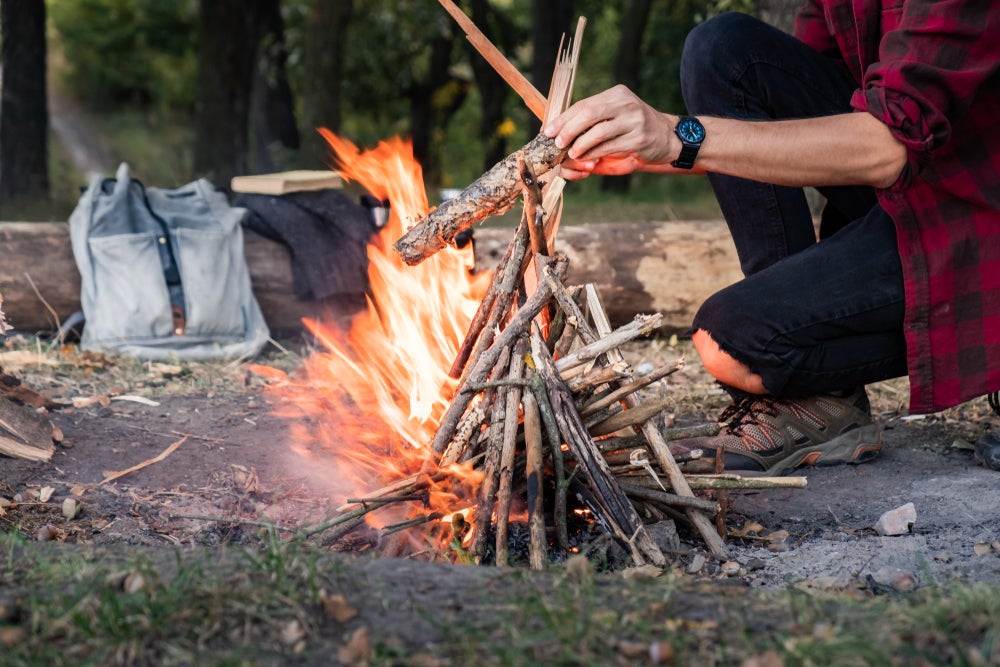
There are several designs for fires such as the log cabin, lean-to, and the cross. For survival fires, I like the fire tipi design. If built well, they catch quickly and provide a lot of heat and light. If the ground is wet, lay some kindling at the bottom of the fire pit to elevate your fire off the ground a bit. Start making a small mound of thin and whispies in the middle of the fire pit. Create a small opening in the side of the thin and whispy pile as a place for the tinder bundle once lit. Overlay your small kindling into a tipi shape around the mound. Make sure the tipi structure feels strong and balanced to avoid tipping over from weight or wind. Start adding a few pieces of larger kindling and small fuel around the tipi keeping the small opening accessible.
Now you can light your fire. If you are lighting by match or lighter, you can place the tinder bundle in the opening and light it while blocking the wind. If you are starting by friction fire, be close to the tipi and place the lit tinder bundle into the tipi opening once the tinder bundle is flaming.
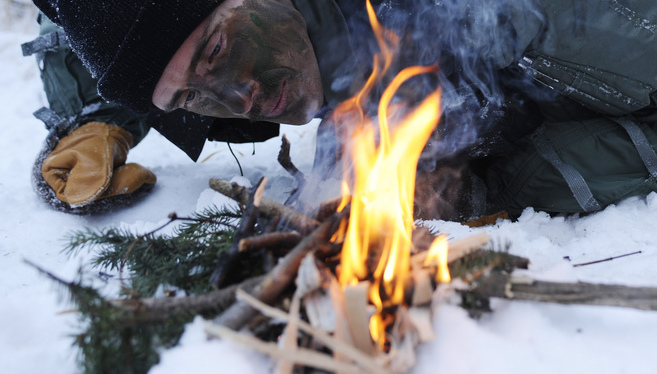
Let the flame grow and feed the fire with some air by blowing on it. Fire needs air flow! Start building up the tipi with more kindling and fuel slowly, avoid placing materials right on top of the tipi or adding too much material too quickly—it may collapse or get smothered.
Fire needs tending. Never leave a fire unattended since it could very quickly spread or die out. After you have a good fire going, keep wood close but not too close. You can dry out wetter wood around the rim, but monitor carefully so they don’t catch fire prematurely. Add larger pieces of dry wood as you go. If you are not alone, you can take turns tending the fire.
This is rarely talked about but attitude can make all the difference for determining success or failure. Making a fire can be challenging in stressful conditions. Like many wilderness survival skills, fire making can be highly mental. Being grounded and relaxed with a clear mind will help you be successful. Challenging conditions can humble even an experienced survival expert. Find ways to warm your hands before starting since you may be cold. Cold hands lose dexterity and can lengthen the process. Practicing in different conditions will help you stay calm in the event of really needing fire for survival.
Every year wildfires are started by campfires in inappropriate locations, embers carried by wind, or campfires not put out completely. Fire safety is even more important than being able to start a fire. To extinguish a fire completely, allow wood to burn to ash completely. Douse it with water, dirt or sand (depending on if water is available) and drown all the embers, not just the red ones. Pour water until all hissing sounds stop. Stir ashes and embers with a shovel or fire tending stick (just make sure it doesn’t re-ignite). Scrape the sticks and logs to remove any embers. Stir until everything is cold to the touch. Never bury a fire. It could keep smoldering and catch roots on fire.
If the area has burn bans or high fire risks, choose alternative methods of heat and cooking. However, never cook with a stove in your tent! Carbon monoxide poisoning is a leading cause of death in the backcountry from stoves in tents.
Be highly conscientious when making fires in or around survival debris shelters. Without proper venting, there is potential of smoke inhalation and debris shelters can catch on fire!
-Place unused firewood upwind, away from the fire
-Keep a bucket of water and/or shovel nearby
-Roots can catch on fire underground. Don’t build fire on areas where there are roots, particularly in dry conditions. Even if your fire is out, it could still catch on fire underground.
-Keep your fire to a manageable size
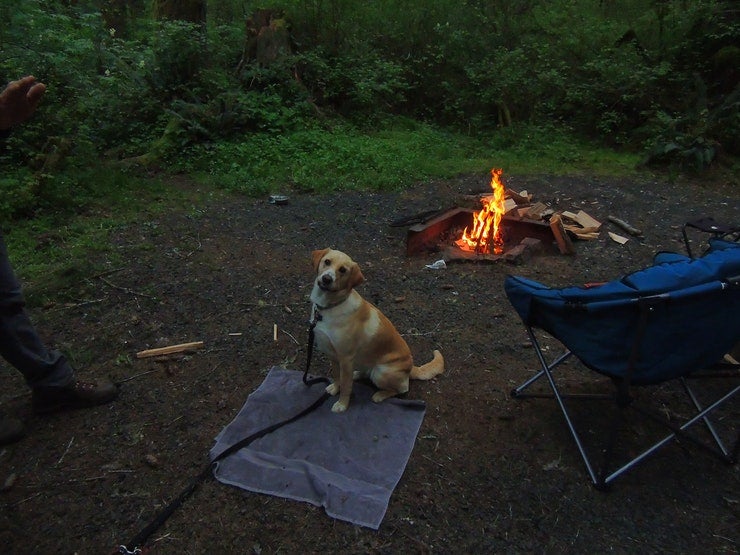
-Make sure children and pets are supervised
-Never leave your campfire unattended
-Never cut live trees or branches from live trees
-Don’t burn dangerous things! (aerosol cans, pressurized containers, glass, aluminum cans)
-Put out fires thoroughly when leaving the site and pack out your waste!
-First practice making a fire in a safe environment with easy conditions.
After you master that, challenge yourself by:
-Making a fire using only one match.
-Making a fire in five minutes.
-Making a fire in wet conditions.
-Learn how to start a fire using a bow drill.
With all of these elements in mind, go out and practice! Remember to keep practicing, and to make sure to put safety first. When you are done with your fire, always be sure to douse them with water and stir the water into the ash and coals to guarantee it is fully out.
Good luck and enjoy practicing how to make a fire!
By the way, if you enjoyed this article then you’ll love our survival mini guide. You’ll discover six key strategies to staying alive in the outdoors plus often-overlooked survival tips. We’re currently giving away free copies here.
Additional Resources on How to Make a Fire:
About the Author: Heather Swift is an experienced naturalist, teacher, and ethnobotanist. She teaches about plants at Alderleaf. Learn more about Heather Swift.
Is The Essential Wilderness Survival Skills Course Right for You? Take the «Online Survival Training Readiness» Quiz
See for yourself if this eye-opening course is a good fit for you. It takes just a few minutes! Get your Survival Training Readiness Score Now!
Grow Your Outdoor Skills! Get monthly updates on new wilderness skills articles, upcoming courses, and special opportunities. Join the free Alderleaf eNews and as a bonus you’ll get a copy of our mini survival guide:
The Campfire Guide: How to Make a Fire Perfectly, Every Single Time.
The ability to create and control fire was a big moment in human history. Building a campfire and using it to cook allowed mankind to survive in colder climates, protect themselves against predators, and consume different foods. Today, making a fire is still essential to our survival in the outdoors. And boy do we love gathering around a campfire.
The Campfire Guide: How to Make a Fire Perfectly, Every Single Time
In this guide, we’ll teach you how to make a fire, including what type of wood to use, what structures to build, how to ignite the fire, how to keep the fire burning, and how to stay safe. PLUS, expert campers weigh in with their top tips on how to build a campfire.
How to Make a Fire Safely
Always check if campfires are permitted. Whether or not you know how to build a campfire, you should already know that they can spark uncontrolled fires and cause devastation. Some campgrounds or parks do not permit campfires at all, or forbid them during the dry season. It takes just one ember to cause a forest fire, so never build them if there’s a fire ban. Check with the local ranger station, camp host, or a park visitor center for information on fire bans and fire safety.
Check for branches and dry bush. Before you light your fire, check to see if there are any piles of dry brush or wood nearby. Never build a campfire too close to a wooden structure or under trees with low-hanging branches.
Always build your campfire in a fire pit or ring, when available. Placing stones in a ring or using a dedicated fire pit helps contain the fire and keep it safe. Building it on sand or gravel is better and less damaging than on soil.
Never leave a fire unattended. Pour water onto the campfire and sift the ashes to extinguish the fire before you leave. There should be no glowing embers.
Choosing the Best Firewood to Burn
When it comes to choosing the best firewood to burn, the drier your wood the better. Wet wood tends to smoke and can be very challenging to ignite. To make a fire, you’ll need three different types of wood:
Tinder: Tiny pieces of wood, dried moss, dried leaves, or needles which are used to start the fire.
Kindling: Small pieces of chopped wood or small sticks to help shape the fire.
Fuel: This is where the bulk of the fire’s energy comes from; larger pieces of wood or logs to sustain the fire for a long time.
The best place to buy or gather firewood is near the park itself, as this tends to come from the region (and lessens the risk of you spreading any infectious bugs or diseases from other regions). Check with the park ranger in advance before bringing wood in. Wood pallets and planks used in construction are often coated in toxic chemicals that are not meant to be burned. Some even have a fireproofing agent.
Many campgrounds offer firewood onsite.
In the backcountry, you’ll want to collect fallen branches from the ground. Do not cut live branches — this will damage the tree and they’re too wet to burn, anyways. Go for fallen branches that are about three inches in diameter or thinner.
Four Different Ways to Make a Fire
There are four ways to build a campfire. You want your wood to be piled close enough for a concentration of heat, but you also need enough space for oxygen to enter the fire (so that the fire can burn and breathe). Every campfire should have a structure — this is much more efficient than simply chucking wood onto the floor and crossing your fingers that it will burn.
Whichever style you choose, remember to start your fire with tinder (the thinnest, most brittle pieces), followed by kindling. Once the tinder is lit, continue to add kindling to keep it lit. Once you have a hearty blaze on the kindling, you can add fuel to keep it going. If you add fuel (the big logs) too soon, you’ll extinguish your fire.
How to make a Parallel Fire (log cabin):
Parallel fires have a similar structure to Jenga — minus the middle pieces. Place two pieces of firewood parallel to one another and a small pile of tinder and kindling between them. Then, place two more pieces of firewood on top of the base logs perpendicular, forming a small wall. Add one more perpendicular layer. Then, ignite the center of the pile and continue adding firewood as the fire grows.
Making the Platform Fire:
Platform campfires have a solid and sturdy base and are built similarly to parallel style campfires. First, take four pieces of roughly uniform pieces of firewood and lay them down alongside one another. Then, add three pieces of firewood on top of the base perpendicular. Then, add two pieces of firewood perpendicular to that layer. Place a small pile of tinder and kindling on top of the base and ignite.
How to Start a Star Fire:
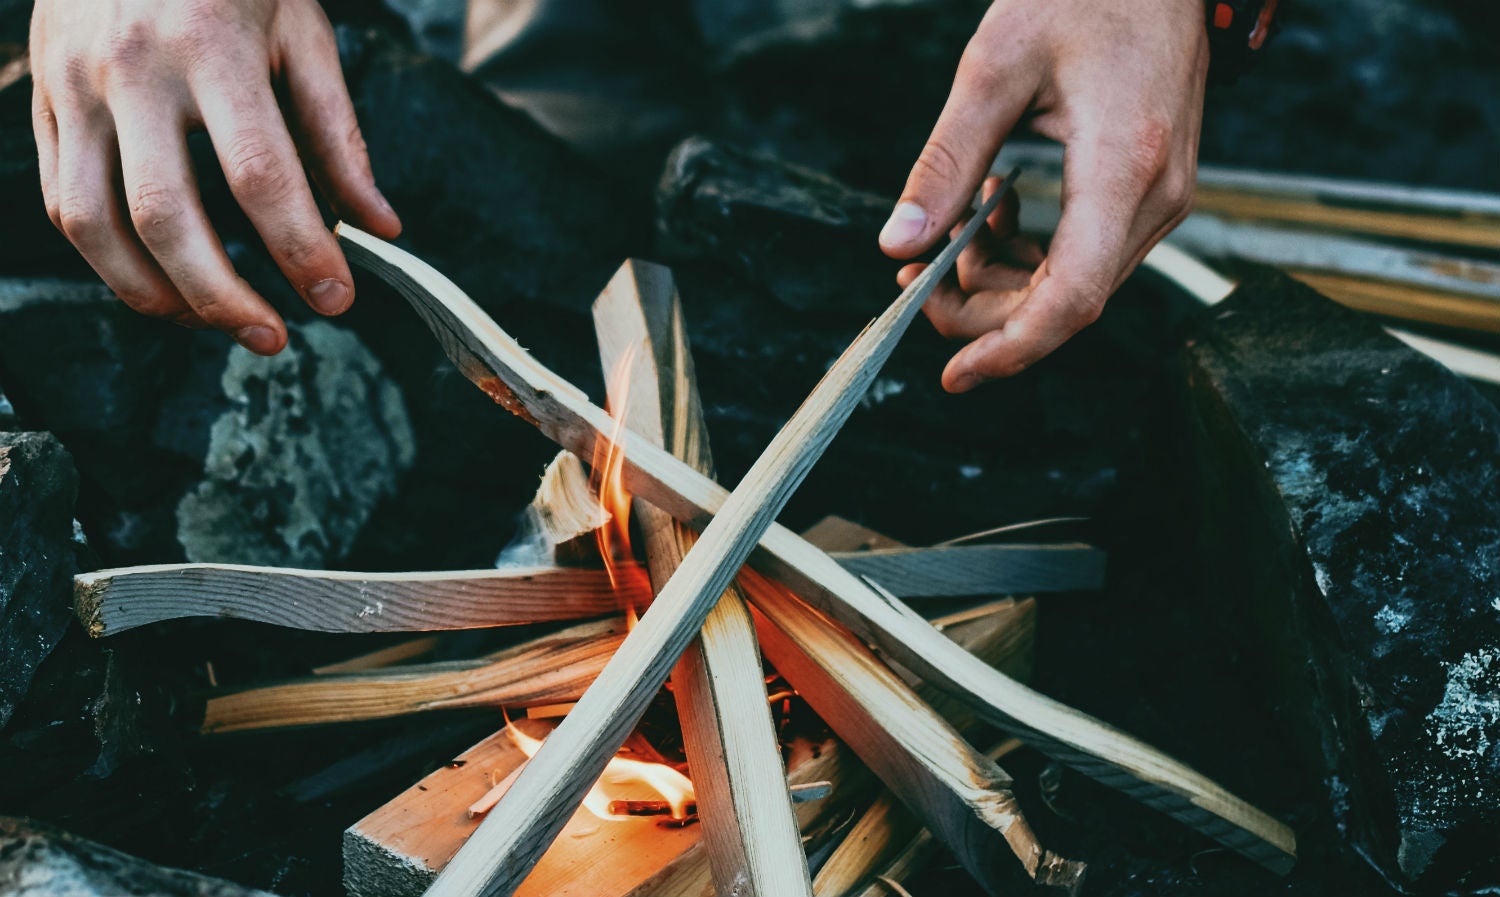
Criss-cross pieces of kindling over your tinder to make this starburst shaped campfire. It’s like a teepeee, but in a pile rather than standing upright.
Building a Campfire using the Teepee Method:
Lean sticks together in a circle that comes together in the center, forming a cone or teepee. Inside the cone, place a small clump of tinder. Light the tinder. Place more firewood vertically around the teepee to sustain the fire.
If you aren’t sure which style of fire to choose, consider that teepees are especially good for cooking while the star and log cabin styles are better for long-lasting fires.
How to Start a Fire
When making a fire, If you try to burn a large piece of firewood directly, you’ll likely just scorch it and fail. First, you need to create a small pile of tinder to use as a starter. Using waterproof matches or a lighter, ignite the tinder and blow gently onto the flame. Add more kindling and firewood onto the fire as it builds.
Birch tree bark and cattail fluff are two things you might be able to find at your campsite that are easy to ignite for starting a fire. You might also consider bringing drier lint or cotton balls from home, which also work great.
How to keep the campfire burning
Image from The Dyrt Ranger Miranda Michelle O.
As the fire burns, slowly add firewood to the pile of burning firewood. If you add too many at once, you risk smothering the fire and it could go out too quickly.
Don’t use your campfire as a trash bin. Only burn pure paper and wood — and keep in mind that many pieces of paper (like box wrappers) are coated in plastic. Cans, plastic, and pieces of aluminum foil belong in the recycling bin or trash can.
Related Reading:
How to Enjoy a Responsible Beach Bonfire
The Dyrt Rangers Share Expert Tips on How to Build a Campfire
The Dyrt Rangers are elite members of our camping community, who have won our camping contests by reviewing campgrounds on The Dyrt. You, too, can become a Ranger by reviewing campgrounds on The Dyrt.
We asked them for advice on how to make a fire:
Image from The Dyrt Ranger Morgan W.
Katie Keil Has a Clever Method to Make Fire
“I pack cotton balls soaked in oil to use as a fire starter! I always have the materials laying around so I don’t have to run to the store for supplies, and it’s a sure-fire (pun intended) way of getting a fire going. My biggest suggestion, however, is to always bring back-up supplies because you never know what all will go wrong until it does.” — The Dyrt Ranger Katie Keil
Image from The Dyrt Ranger Tj B.
Tinder is More Useful as a Firestarter than a Phone Application
“I save my toilet paper rolls and stuff them with dryer lint. After I create a base of logs in a triangle, around the toilet paper tubes, where each long log is propped up on its neighbor. Then, I top the tubes with kindling, and then some thumb-thick sticks. From there I pray it works because usually my kid is cranky by that point, I’m ready to eat my hand, and the sun is setting.” — The Dyrt Ranger Jennifer Smutek
“Make sure you tinder is dry…so very important.” — The Dyrt Ranger Jeanene Arrington Fisher
Image from The Dyrt Ranger Rob B.
“Quickfire packets are the bomb! Waterproof, up to 10 min of burn time. Otherwise, i make my own from sawdust, wax and cardboard egg cartons!” — The Dyrt Ranger Amy Godwin
Image from The Dyrt camper Jeanene A.
“A snack size bag of chips. Any kind as long as they have grease in them (not baked). Works EVERYTIME.” — The Dyrt Ranger Paula Kimball Wells
Image from The Dyrt Camper Julie P.
Derek Recommends Planning your Campfire in Advance
“The most important part of a campfire is selecting the right style. Know how to make a; Tipi, Log Cabin, Platform, and Lean-To. Each style has its strengths and weaknesses. Knowing each one will help you cook, get a flame going in the rain, and stay warm. Once you know what type of campfire to use worry about kindling, ignition, and the fuel source.” — The Dyrt Ranger Derek Bilte
Learning How to Make a Fire is Invaluable Knowledge
Whether you’re just getting started in the camping world or you’re a veteran outdoors aficionado, learning how to build a campfire is a skill every camper should learn. After you’ve finished, be sure to clean your fire up and put it out completely (cool to the touch.) Just remember, people are rarely paid to start a fire, but Firefighters are paid (sometimes not) every day to put them out.
Looking for more information about campfires? Check out our Magazine for fire related articles, tips, tricks, and more.
How to Make a Fire
Introduction: How to Make a Fire
There are several ways in which one can make a fire, in this Instructable I will demonstrate the basic steps.
WARNING: Fire can and will burn you if not used properly, don’t be stupid and use caution when having a fire.
If you like this instructable please vote for it in the burning questions round 6 contest.
Step 1: Fire Methods.
As I have already stated you can build a fire numerous ways. You can build a traditional teepee style fire, a log cabin style fire, or a lean too. And you can choose to light it with a match, flint and steel, steel wool and a 9v battery, fire bow drill, the classic magnifying glass/glasses, or another method.
Step 2: Traditional Tepee Fire
You’re going to want to start by gathering a fire starter, such as dry grass, cattails, or pocket lint. NEVER use paper or dry leaves in a fire, they the hot ash will rise out of the fire and can start a forest fire. Now you can gather your firewood to start get kindling, which is branches that are no larger in thickness then your pinky finger, then collect tinder which are branches no thicker then 1 1/2 inches in diameter, lastly gather your fuel which are big logs. Once you have a large wood pile you can start building you’re tepee, start by making sure you have a clearly marked fire ring, this is very simple to do just clear out leaves and other flammable objects and make sure your fire ring is clearly marked by raised ground or stones.
Place your fire starter in the middle of the ring Stick a sick into the ground and lean others around it and the fire starter once you have built the tepee with kindiling and tinder keep adding tinder to the fire until you have a nice bed of coals and then you can add fuel.
** Make sure all your wood is dry. h
Step 3: Log Cabin Style Fire.
Follow step 2 by gathering your materials and building a fire ring.
Place 2 sticks on the ground length wise and then 2 more on top of the width wise so the is a square in the middle, place your fire starter in the square and keep building the sticks up by placing them 2 by 2. then light and gradually place tinder on top of the fire until you have a nice bed of coals then you may put fuel on.
Step 4: Lean Too Style Fire.
Follow step 2 by gathering the materials and building the fire ring.
This type of fire is the easiest to build, all you need to do is place a rock in the middle of the fire ring and put the fire starter next to it then lean tinder and kindling against it. Then gradually add tinder until you have a nice bed of coals and then you can add fuel.
Step 5: Lighting a Fire With a Match.
Are you serious, you just strike the match. Make sure to use your hand to shield it from the wind but don’t touch the flame.
Step 6: Flint and Steel.
You can buy flint and steel at most camping stores and department stores. To use flint and steel hold the steel at and angle facing your fire starter and strike down with the flint the sparks will eventually light the fire starter.
Step 7: 9v Battery and Steel Wool.
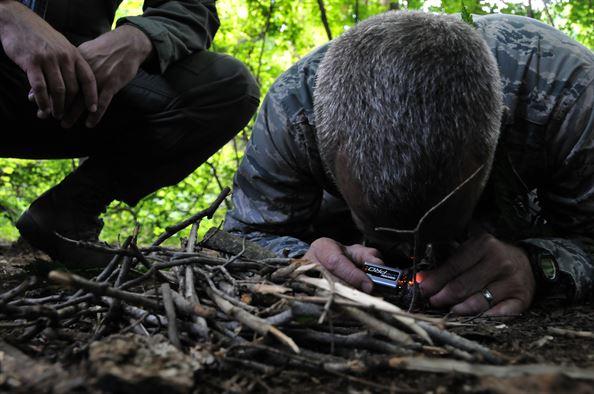
All you need is a 9v battery and steel wool (No duh!). Just press the hook up end of the battery on to the wool, the steel wool acts like shorted out wires and automatically ignites.
Step 8: Fire Bow Drill.
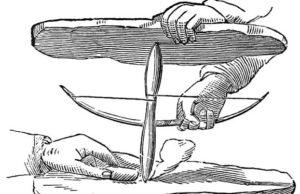
too construct a fire bow drill you need a piece of string, a curved stick, a straight stick, a flat piece of wood, a stone, and a knife.
First you tie one end of the string to one end of the curved stick and then loop it around the middle of the straight stick and tie it at the other end. Then sharpen one end of the straight stick and cut a v shape in the side of the flat piece of wood. Lastly carve out a hole in the wood right below the v and make sure it doesn’t break through the other side of the wood. Then you take the flat piece of wood and place it hole your fire starter and put the pointed stick into the hole. Place the stone on the other end of the pointed stick and with your other hand move the bow (curved stick) back and forth. Once you get a few embers in the hole then knock them onto the fire starter and blow until you get a flame.
Step 9: Magnifying Glass.
Hold the magnifying glass over the fire starter so that the beam is concentrated on it and wait until it catches fire this takes a very steady hand.
Step 10: Putting a Fire Out
There are many ways to put a fire out, the most successful way I’ve used is to gradually pour water on to the coals and then stir them around. this helps to conserve water. You can also bury a fire with dirt to smother it, or just pour a bunch of water on it at once. always remember to kick logs over and make sure all the embers under them are put out.
Step 11: Tips.
If it has just rained and all of the wood is wet you can use a knife to peel off the outer layer because the inside will be dry. If you have no fire starter available you can use shavings from a whittled stick you can also use birch bark (Do not peel bark off the trees it can kill them use bark that has already fallen off or from a dead tree only.) If your fire starts to die down you can put more wood on it and use a lid to fan it or just blow into it. too make a really smokey fire for signaling you can use pine needles.
How to Make Fire: 11 Ways to Make Fire without Matches
After reading this, you will be able to make a fire using anything
Do you know how to make a fire with a battery and a chewing gum packet? How about starting a fire with a zip-lock bag? Just how easy is it, when you’re trapped with no supplies, to start a fire without matches? We look at what you need to make a fire, how to build a fire, and 11 interesting ways to start a fire without a lighter.
Fire starting is one of the very basic needs of survival. It was the first thing I learned when I was a boy scout many years ago. Since then I have trialed several ways on how to make a fire, but the fun part isn’t the actual building of the fire, it is knowing how to light a fire, of which several ways are much easier than others.
When I am outdoors, it might seem like an easy venture to light a fire with matches or a lighter, but for me, I enjoy trying to light a campfire without matches, as not only is it fun to attempt, but if you were ever without matches, it would be nice to have been through the process of starting a fire before, rather than just relying on what actors do in Hollywood movies.
There are some reasons we need to know how to make a fire, and how to light a fire. Primarily, with a fire, you can have warmth, boiled and clean water, cooked food, light, and signal for help. These are just some of the reasons why the fire making skill is on the top list of things you need to know to survive in the wild.
For preppers, outdoor survival is an important skill as you never know when you are in an emergency and need to survive outdoors and in the wild. In that ideal scenario, a box of waterproof matches, some nice dry wood, and a bit of dry grass would make the perfect fire, but we don’t always have that, especially the first bit, matches. And what if you were in a damp environment like the jungle floor or wintery snow-covered landscape? Your wood will be wet, you might be without matches, and you’re probably going to freeze to death.
It is in survival circumstances like these that we need to know how to start a fire with:
But first, let’s take a look at what we need and how we can construct the fire so that once we have our initial spark from one of the above methods, we can light our bigger fire.
What you need to start a fire
Before we look at the 11 ways of how to start a fire, we need to know how to make a fire by selecting the right fuel, such as wood or anything else we can get our cold hands on.
When it comes to making a fire in the wilderness, there are three essential elements that we need to make the fire:
Without these three things, you will not get a fire going no matter how hard you try. The first one, heat, can be easily produced by the flame of a lighter or match, a ferrocerium rod also known commonly as fire steel, by the combination of certain chemicals such as glycerol and potassium permanganate, or perhaps by friction.
In an urban environment where there are not so many trees, we could use a lot of other accelerants for a roaring fire, but in the woods, we need three types of materials:
Tinder – Tinder is a dry material that ignites with very little heat. When the tinder is dry, all it takes is a spark to catch it alight. We use the tinder in a fire as a fuel to ignite less-flammable material like wood. You can’t just hold a log up to a match and expect it to catch alight, the fire needs the tinder to substantiate the intensity and effect of the fire.
So how do you make tinder for a fire? There are several sources of tinder such as:
Kindling – Kindling is what we add to the tinder to give a fire a more solid form. Because kindling is such an accelerant, it will only last for a short amount of time. Essentially tinder is the initial start and then kindling is the next necessary ingredient.
It is very easy to gather as it is small sticks and twigs. These need to be dry. Any wood the same thickness as a finger is suitable for tinder. An effective way to make tinder if you are in a damp area is to find a larger piece of wood and break it with rocks or larger pieces of wood. The inside of this wood is dry and will be suitable if turned towards the inside facing the tinder of your fire.
Fuel – Once we have started a fire, we need fuel to keep the fire going. Everything much thicker than tinder or kindling that burns for longer is a good source of fuel. Often fuel is in the form of thick logs. If you don’t have an ax to cut these down try looking for a dead or fallen log and dragging it over your fire. Once you have enough kindling you can effectively use your fire to cut the long piece of wood into multiple pieces giving yourself more fuel.
Whichever method we choose to use, these three ingredients are necessary for the formation of a good fire. Dry tinder much always be used in all of these circumstances to catch the initial spark and form into fuel for the kindling to catch alight.
What you should know about firewood
Once you have your firesteel you will need to collect your fuel, this is where our stealth fire starts – long before we strike a spark or coax our first flame into life, and we can reduce our impact by carefully selecting appropriate firewood for a concealed fire.
Think about what you need your fire for – To reduce your impact as you collect firewood, decide beforehand what you want your fire for unless you have an inadequate shelter or sleeping arrangements you won’t need the fire to warm you at night so you will probably just be purifying water or cooking. These kinds of jobs don’t take long so there is no need to spend hours collecting fuel and stacking it up ready for your fire. If you do it’s a sure sign that you have been there and might be planning to return.
Boiling (if you can) is better than flame cooking – Also remember that boiling food is quick, especially if you cut what you are cooking small, and this means you only need to use one cooking pot rather than having to spend time whittling a cooking spit and other camp kitchen items. Boiled food also retains all the fat and juices rather than it dripping into the fire so you will get a lot more goodness from a boiled squirrel or rabbit than you might from one which you have roasted on the fire. Remember the time and effort it has taken to catch your game in the wild and this will be an important consideration.
Boil over the flame, not embers – Picking your cooking method carefully relates to fuel. To boil something over the campfire, the quickest way is to suspend your cooking pot over the flames, not in the embers. It sounds obvious but so many people are used to cooking on a barbeque nowadays that flames are often overlooked as the stage of the fire that we want to get past to produce embers. Yes, cooking on embers is great and if you don’t have a cooking pot you might have no choice but to roast something on the fire on a spit or produce a bed of embers which you can lay food directly on, or bury it in embers to cook it. However to get a decent bed of embers your fire needs to burn for quite some time and you will need a lot of fuel, also there is a lot more to clean away from a large bed of embers than there is from a small twig fire.
The type of firewood for a stealth fire – Small twigs and sticks are the best type of fuel for what you want for a quick, low impact, fire. Find large bundles of dry twigs, snap them off as you go rather than collecting them all in the same place, especially if you are trying to remain unnoticed, as a single tree with all the low hanging dead twigs broken off is a sure sign that someone has been gathering firewood. The finest of these twigs should be no thicker than a matchstick and will be the best fuel that will catch the flame from your tinder, which might be dry grass or birch bark. Collect twigs up to the size of a pencil or as thick as your little finger. A good armful of twigs this size will easily boil a liter pot of water very quickly.
Don’t balance your cooking pot on rocks or logs around the fire as this will leave tell-tale and unsightly scorch marks on them. Instead, drive a forked stick into the ground and loop the handle of your cookpot over the end of a long stick that rests on the fork. The opposite end of the stick can be pushed into the ground or weighted with a log or rock. Once you are done with your improvised camp kitchen you can burn the sticks, take them with you, or scatter them in the woods and the ten to twenty minutes it takes you to boil up your rabbit and wild vegetables will not have marked the ground enough to leave a lasting scar after you scrub out the char marks with your foot and scatter some dirt and leaves around. This can leave very little sign of any campfire being made which is great for concealment practices.
If you are concerned about the amount of smoke your fire produces, make sure you are collecting and burning only the very driest of fuel and remove the bark from the larger twigs. Moisture gets trapped in the bark and bark smokes much more than wood. This will now produce less smoke as you burn it and a hotter fire as the heat will not be used to boil off the remaining moisture in the bark.
(Oxygen) Making sure your fire gets air – As for the oxygen, it is a no-brainer that fires need it to burn properly. However, when a fire does not have enough air getting to it, it will cause the fire to create more smoke. Usually, this is fine for a fire, but because we are trying to make a concealed fire, we need it to have plenty of circulation to eradicate that smoke cloud. If the fire starts to die out and smolder it will begin to smoke more so when you want flames to keep the fire stoked up with fuel and blow on it or waft it with your hat to keep the air moving to it and keep it hot.
How to make a fire teepee
Now that we have our essentials for what we need to make a fire: tinder, kindling, and fuel, we need to know how to build the fire so that it can turn into a self-sustaining campfire without us having to blow on it. After it’s done, all we have to do is fuel it up.
Start with the bird’s nest – For every one of the ways below on how to start a fire, you need to make sure that your tinder is in a bird’s nest shape (featured image) and catch any spark in the concave part of the nest. There is no point going to all of the efforts of rubbing two sticks together if you’re not going to catch the little ember or spark that it causes.
Blowing the spark into a flame – Once the spark is in there you need to blow gently onto the ember and it will create a flame in the tinder. You now have a fire. Before you start any fire-making method you should have your kindling set up in a tee-pee (tent) method with a small opening for your bird’s nest. Once the bird’s nest has a sustainable flame, you should be putting it straight into the kindling with the fuel logs on standby.
Damp or wet areas – If you are doing this in a damp, jungle-like area, or you are working in a snow-covered environment you should keep the bird’s nest suspended in your hands while you are working on creating a fire. Once you have bird’s nest alight I would call this a sustainable flame as it is one that will last on a damp flooring. Once you have that bird’s nest alight, you can then use it in the main fire tee-pee.
Three types of smokeless survival fires
One of the most important things to remember about having a smokeless fire is that you need to keep the fire burning properly. Smoke is the product of incomplete combustion.
These three methods each use the must-haves for survival fire making that we mentioned above. They rely on optimal oxygen feeds and they use very small sticks and fuel to ensure that they burn quickly and with little or no smoke. When we are making a fire, the way we design it is called a ‘fire lay’. A lay is a way we arrange our fire, each fire lay is unique and may serve different purposes.
1. The ‘upside-down’ fire method – To ensure complete combustion and reduce smoke something else you can do is build an ‘upside-down fire’ where you arrange your main fuel and then build your fire on top of it, you will need a lot of fine tinder and kindling to get a fire like this to catch the main fuel but once it does, the fire burning down through the fuel will burn off the smoke produced as the smoke will have to pass up through the flames.
2. A small teepee of twigs – This is by far the most common approach to campfires and survival fires that we see. If you have ever made a fire, it is more likely you would have used this method than any other. The tepee method is a great way to start a fire and also an excellent way to quickly boil your water or food.
As these small twig tepee fires burn quickly and hot it is easy to hide their remnants and they don’t leave much of an obvious sign after you are finished with them. There are other fire lays which you might need to be aware of which may not be as easy to hide but which might be vital in very cold conditions or if you need to make use of very large timber without having an ax or saw to process your fuel. Long log fires and star fire lays are where larger logs are arranged in a star shape and slowly pushed into a central fire as they burn. This saves the energy of processing wood that is relatively large and couldn’t be dismantled quickly, or if you don’t have an ax and want to essentially ‘cut’ the log in half by burning through it.
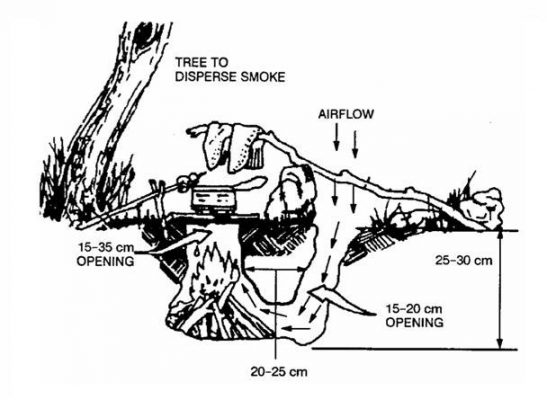
3. Dakota fire hole – The Dakota fire hole is a very important type of survival fire. It is one that is regularly taught in military survival schools across the world and my opinion is the best smokeless fire you can make. Not only is the Dakota fire hole a good way to produce a hidden fire that doesn’t cast too much light or smoke, but it is simple to construct, and as the name suggests it requires a bit of digging which keeps its remains hidden.
How to make a Dakota fire hole – In a survival scenario with limited equipment, making a Dakota fire hole is very straightforward. You simply need to dig a pit with a sharpened stick. You will need to dig two holes about a foot apart and then carefully tunnel between them. In one pit, which you should make slightly larger; two feet deep and large enough across to build a fire that will suit your cooking pot, you will build your fire, the other doesn’t need to be quite as big and will provide the air supply to your fire. As the fire burns, air will be sucked through the other hole you have made and will keep the fire burning hot. Not only are these fires very efficient but they are very easy to conceal once you are finished as they can just be filled in again.
Below is a video from one of our favorite Youtube survivalists Alfie, on the Dakota fire hole, and is a great instructional.
11 Ways to start a fire without matches
Now that we know what we need to make a fire with the type of wood we need, and a great way to build the base for a good fire, let’s look at some alternative ways to start a fire without using matches or a lighter. This list is broken down into three main sections, which include the traditional primitive fire-making methods, using sunlight to make a fire, and then some of the more interesting ways to start a fire that you might not have heard of.
1. Flint and steel
Flint is a family of stone. A flintstone is not a cartoon, it’s either quartz, chert, obsidian, agate, jasper, and a few other less common ones. Essentially, what you want is a stone that is harder than steel. If you’re in upper Canada you’re in luck as they are very common in those areas, but for everywhere else it shouldn’t be too hard to find.
If you can’t identify any of those types of rock, just grab some of the different variations around you and try them out against the metal you have or a steel knife.
Step 1: Move the stone against the knife in a shaving motion – it will cause sparks. These sparks are small splinters of steel being ‘shaved’ off and are heated by the friction of the shave. If you have a piece of dry fabric dry wrapping it around the stone, it will catch the spark and start warming. Having rotten wood is also a great way to catch the spark that comes from steel.
Step 2: Shave the sparks into the rotten wood, fabric, or tinder bird’s nest.
Step 3: Place the wool, wood in the bird’s nest, and gently blow until you have a sustainable flame.
Step 4: Place the nest in the kindling tee-pee, you now have a fire.
2. How to start a fire with sticks (Fire plow)
You have probably always wanted to know how to start a fire with sticks? It’s an essential survival skill known as a fire plow. Fire plows are manually hard work but are a very simple and thorough way of fire starting. The fire here is originating from the friction caused between two bits of wood. The primary concern here is having dry wood, without it you’re going to be stuffed as the friction between the wood is meant to light the wooden dust particles that gather in the plow.
Step 1: Get a large piece of wood as a plow board. Ideally, this would be a log that has been split longways down the middle. If you are in damp environments a fresh piece of wood split in the middle can also be used as it will be dry.
Step 2: Make a divot in the middle of the wood longways down the plow. This will be the path that your stick will run on.
Step 3: Get a firm stick and run it repeatedly through the groove made in step 2. Make sure the stick has a blunt end which you can make by using a rock to blunt the tip of the stick.
Step 4: Once you have run this enough tilt the plow so that the wooden dust is at the end of your divot, the friction you make from the stick running along the divot will hit the wooden dust causing an ember.
Step 5: once you see a little ember or two, blow gently to get the dust alight and place some tinder on it as well.
Step 6: Once you have a sustainable flame place nest in the kindling tee-pee, you now have a fire.
3. Start a fire with a bow and drill
This method is another way to start a fire with sticks and quite similar to the last, however, a little more bush engineering goes into the formation of this contraption. This method is a level above the last one because it involves a piece of string, twine, or other naturally forming rope to make the bow. Shoelaces could be used for this too.
Step 1: Make a bow – it should be 30 inches or 60-70cm long. It should have a little bit of flexibility but it should not be pulled like a bow. It should be more of a slight flex in the wood. Notch your string/cord onto the bow but loose enough so that you can wrap the excess in the middle around your drill.
Step 2: Get a drill – it should be thumb thickness of softwood like cedar. Make sure the drilled wood is dry. The drill should be about 8 inches long and should be blunt round on one end and blunt on the other.
Step 3: Get a fire plank. This would be the same as the one used in the fire plow above. Make a V shape notch in the middle of the plank. At the tip of the V make a small hole for the drill. The pointy end of the drill should sit in the hole, not go through to the other side. This is where the drill will sit and the wood dust will catch around it.
Step 4: Find a rock to hold on top of the drill. Ideally, it would be a stone with a concave cup-like section to hold the drill in place as it drills the plank. You could also use the knot of a branch or bone to hold it in place.
Step 5: Place bird’s nest of tinder under the plank to catch the ember when it forms.
Step 6: Wrap the cord around the drill once and start moving the bow left and right while holding the top. Use a small bit of pressure on the top while doing this. There should eventually be some smoke coming from the dust collected.
Step 7: When the sawdust pile is smoking, gently lift the drill out of place and put a slight amount of tinder on the dust and gently blow into a flame. Add the sustainable flame to the bird’s nest. You have a fire.
4. How to start a fire with a two-man friction drill
For the bow drill, two people are better than one. Team up with someone and do the same but easier.
Step 1: instead of using a bow wrap the cord once around the drill and pull the left side first the right. The drill should rotate.
Step 2: Have your partner apply downward pressure to the top of the drill.
Step 3: When the sawdust pile is smoking, gently lift the drill out of place and put a slight amount of tinder on the dust and gently blow into a flame. Add the sustainable flame to the bird’s nest. You have a fire.
Methods that use sunlight for a fire
Sunlight is one of the alternative ways to make a fire without a lighter or matches that have been around for a long time. It can only be done in areas that have a strong amount of sunlight and essentially works to start a fire with a magnifying item, whether that be glass, a plastic bag with water, or a way to concentrate the sunlight, such as a soda can. If you are in an area with strong sunlight, this is the best way to start a fire.
5. How to start a fire with a soda can
I haven’t personally tried this but I like the idea of it.
Step 1: Shine smoothen the underside of a can with clay
Step 2: The bottom of the can directly towards the sun
Step 3: Place your kindling cloth, rotten wood, or charcoal cloth on the point where the sun is reflecting at its strongest from the can. This should be the smallest point of light.
Step 4: Gently blow into a flame. Add the sustainable flame to the bird’s nest. You have a fire.
6. How to start a fire with a magnifying glass
You might have done this as a kid with a magnifying glass, it’s quite easy to do and it has been a cause of some bushfires from broken glass on the side of the road.
Step 1: Get a flashlight lens or other clear glass
Step 2: Concentrate the sun’s power onto your tinder, charcoal cloth, or other starters.
Step 3: Once you see smoke, gently blow into a flame. Add the sustainable flame to the bird’s nest. You have a fire.
The Interesting Ways To Light A Fire Without Matches
These are some of the more innovative ways of fire making that some of you might not know about. Some of these I only just found out about while writing this post, and am happy to say that I have them in my repertoire of survival knowledge. I hope you enjoy them just as much.
7. How to start a fire with a bottle of water
Easy. The same as above but you want to make sure the bottle is clean and the water is clear. Repeat the steps above.
You have a fire.
8. How to start a fire with a sandwich bag
This one is the same idea as the bottle – but it looks a little bit cooler and sometimes you just don’t have a water bottle with you.
Repeat the steps from the magnifying, but with water in the bag.
You have a fire.
9. How to start a fire with a battery and steel wool
With old phones that have a removable battery, you can use the battery’s electrical charge on steel wool to cause embers.
Step 1: Remove the battery from the phone
Step2: Gently rub the battery against steel wool until red embers appear in the wool
Step 3: apply tinder, blow gently, you now have a fire.
10. How to start a fire with a battery and tin foil
This is a pretty neat hack to know and became popular in an American women’s prison Netflix series called Orange Is The New Black. It was a regular activity for the women of the show to light their cigarettes with a piece of chewing gum wrapper and a battery. I tried it, and yes, it works.
Step 1: The chewing gum wrapper has to be a foil metallic one. Cut it so it makes the figure 8 almost, with both ends being bigger than the middle section.
Step 2: Attach the ends of the wrapper to each end of the battery.
Step 3: The joining of the paper will create a circuit between the two.
Step 4: The paper will set alight. You have a fire.
11. How to start a fire with a 9V Battery and Steel Wool
This is very similar to the phone battery method except it saves you the loss of a mobile phone battery.
The best thing about this type of fire is that you can do this in wet conditions with wet steel wool.
Step 1: Get steel wool and 9v battery
Step 2: Rub steel wool onto ends of 9v battery
Step 3: Place steel wool in the bird’s nest. You now have a fire.
I had a lot of fun putting this list together and trying out some of these just at home. Give them a go and let me know if you found them difficult. While this was more of a fun post, there is a serious side to this, and that is that there are various ways you can provide yourself with the necessary warmth of a fire when it comes to survival as well as signaling for help.
On most occasions, you would have your bug-out bag or a survival kit with the necessities. In that kit, you should have some sort of fire starter. While there are these various ways you should have a fire flint stick like this. They are cheap, useful and in one strike your bird’s nest alight and you have a fire.
When you are in a survival mode, your body needs to conserve energy as you are on foot with low foods and energy and a lot of these methods (except for the makeshift lighter electrical ones or sun-powered ways) use quite some energy. This is why it is imperative to have a back-up fire starter in your kit.
Remember when making a survival fire
There is an inherent danger in making fire, handling knives and axes, and many other survival tasks, but another danger to be aware of is the danger of wildfire if you do not manage your fire responsibly.
Make sure that your fire is built away from other fire risks such as dead dry trees, or on beds of pine needles or peat soil. From an environmental perspective fires created by your carelessness can have a devastating impact on the wildlife and ecosystem of an area, not to mention the irony of making your survival situation worse if you manage to destroy all your equipment or are killed in a wildfire of your own making.
This is also another reason why low impact fires are great, especially the in-ground Dakota fire hole, as they are not open fires and are small and underground, so are less likely to catch onto any neighboring shrub or bush. Just make sure that you are in a clear or clear as possible area.
Extinguishing your fire
Once you are finished with your fire remember that you will need to dispose of the ashes and unburned material to reduce your impact on the environment as to reduce the signs you leave behind for any possible followers. If stealth and evasion are the goals, to make sure putting out your fire is as discreet as possible your first aim should be to burn the fire out completely if you have time. If you do need to quickly extinguish it remember that dumping water on it will cause a big rush or steam and smoke. To avoid that, dump soil on it instead or as your fire is probably small scrub it out with your foot or a stick and move the smoldering remnants away from each other, small fuel like the twigs you are using will cool very quickly and you can then dispose of the scorched twigs and ash.
Once your fire is extinguished and well concealed, you can move on safe in the knowledge that only the most skilled of trackers will be able to tell you have been there and that you were not spotted by using one of these smokeless fire-making methods.
How to Make a Fire in 5 Simple Steps [Picture & Video Guide]
The flicker of the flames, the crackle of the embers, and the comfort and safety it can provide – there’s something innately primordial about knowing how to make a fire.
But, if watching Survivor (huge fan!) has taught me one thing, it’s that people can either make fire or they can’t – there is really no middle ground.
So, whether it’s a final-four fire making challenge, or a campfire in the backcountry, building, starting and maintaining a fire is a very useful skill to possess.
In this step-by-step guide, you will learn how to turn pieces of chopped wood and a single flame into a raging, 3-alarm blaze quickly and easily. You’ll be roasting hotdogs and marshmallows or signalling a rescue plane in no time!
Supplies and Tools
To build a fire, you’ll need a few essential things:
1. Firewood
Dry firewood is best as long as it’s not rotting. If the outside is wet, chances are the inside is still dry.
2. Hatchet or Axe
Any hatchet or axe will do. Just make sure it has a good edge. I usually carry a small hatchet with me when camping.
It’s compact, light-weight and makes chopping large pieces easy. Here’s an Amazon link to a similar hatchet I use (13″ wood chopping hatchet).
3. Knife
You can use a small pocket knife or a burly survival knife – it doesn’t matter, as long as it’s sharp!
I use my trusty Camillus BushCrafter knife. The blade is full tang, the grip is literally bullet-proof, and the edge is razor sharp. Here’s an Amazon link if you’re interested (Camillus BushCrafter 4″ blade knife)
4. Matches / Lighter
Don’t leave home without matches or a working lighter! It’ll be SIGNIFICANTLY more difficult to start a fire with friction or sunlight.
I tend to carry a box of waterproof matches and a backup butane lighter on most trips.
A majority of the time, you’ll be picking up a bundle of firewood before heading to your campsite. The wood pieces by themselves are far to large to start a fire with. Some “smart” people just douse them in gasoline and then light them on fire, a.k.a. the Burning Man method of fire making!
For non-pyromaniacs, chances are you won’t have a jerry-can of gasoline laying around so, you’ll need to process the large pieces of firewood down into smaller diameter sticks. The smaller and thinner the sticks, the greater their flammability.
Follow these steps:
Take each split half and repeat the process until the split pieces are roughly 1 to 2 inches in diameter.
Pro tip: Use another piece of wood as a hammer to strike the axe head through the log.
Once you have a pile of 1 to 2 inch sticks, you’ll want to take a few pieces and, using your knife, shave them into “feather” sticks. These shavings can be paper thin and can take a flame and ignite very easily!
Follow these steps:
Repeat the process around the stick, creating more and more wood curls. If any shavings break off, save and set them aside. Once a stick has a substantial amount of shavings, repeat the process for another stick.
Pro tip: Keep feather sticks and any shavings dry. They tend to absorb moisture easily since they are paper-thin.
Before striking a match, you’ll need to build a suitable wood base that will protect and grow your fire.
The key to a good base is a layered approach: Dry, highly flammable shavings at the bottom, thin sticks to catch and hold the flames on top, and larger pieces stacked around to maintain the fire long-term.
There are many different fire base shapes you can build, but the two most popular are the teepee or log cabin kind. A teepee shape exposes more wood surface area and promotes air to be drawn into the fire. A log cabin is more stable and better for windy situations. I prefer a combined approach, building a log cabin around a teepee.
Follow these steps:
Pro tip: To further protect your fire from high winds, stack large rocks or pieces of wood on the wind-ward side of the fire base.
Once the base is ready, it’s time to add the flame!
Follow these steps:
Move and reposition the larger pieces so that the fire can eventually spread to them. If you need to add smaller pieces to maintain the fire, add them near the base of the fire. That way it can heat and spread the flames to the larger pieces.
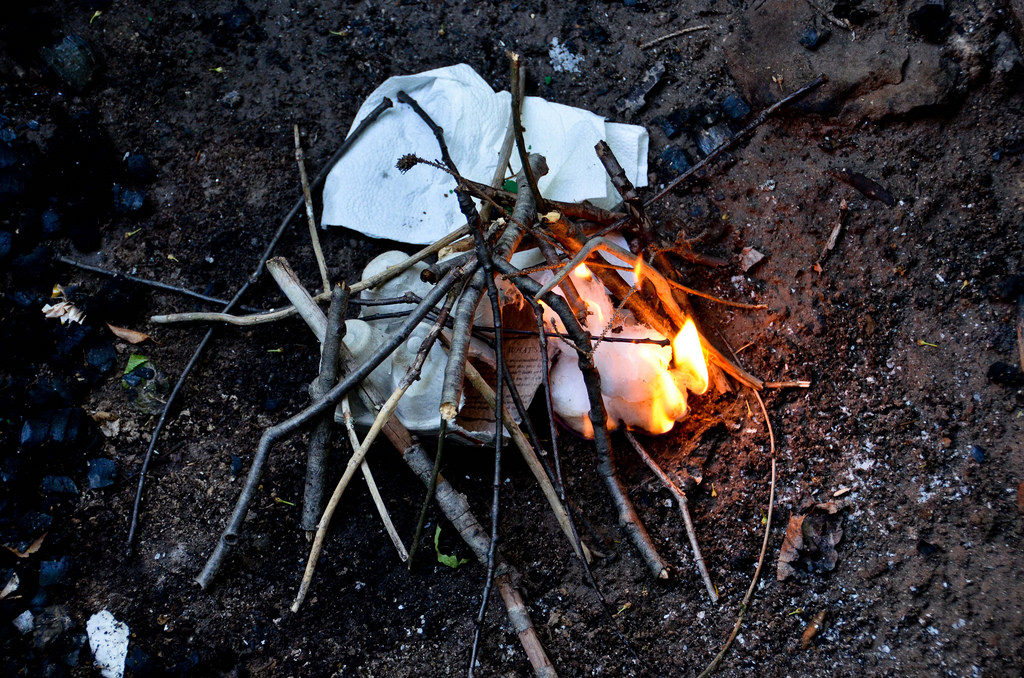
Pro tip: If you have paper packaging or even toilet paper, crumple it up and place it at the very base of the fire and use it to take the initial flame from the match or lighter.
A roaring fire will gobble up lots of wood but there are a few things you can do to maintain a long-lasting fire without torching all of your firewood.
Follow these steps:
Chop and prepare wood of different sizes regularly to have ample firewood ready should you need it.
Pro tip: Be extra cautious when blowing into the fire! Too hard will cause the embers to fly all over the place, and too slow won’t be enough oxygen. Make sure you take your time inhaling and exhaling, and try not to breath in smoke. A lot of people get light-headed because they exhaust themselves or inhale smoke during the process, and there’s a potential of falling into the fire.
