How to use vim
How to use vim
VIM for beginners
Like any developer, you are constantly developing. You are learning new technologies by reading books, watching online lessons, attending some courses, and so on and so forth. You know that if you stop learning, you become uncompetitive. But have you ever thought about your performance? How do you improve that? If you don’t know how to answer than welcome under the cut.
Level 0 — Сonquer The Fear
Touch typing
This post is not about touch typing. Nevertheless, this is the first answer to the question above. To understand the rest of this article you have to manage touch typing.
VIM Intro
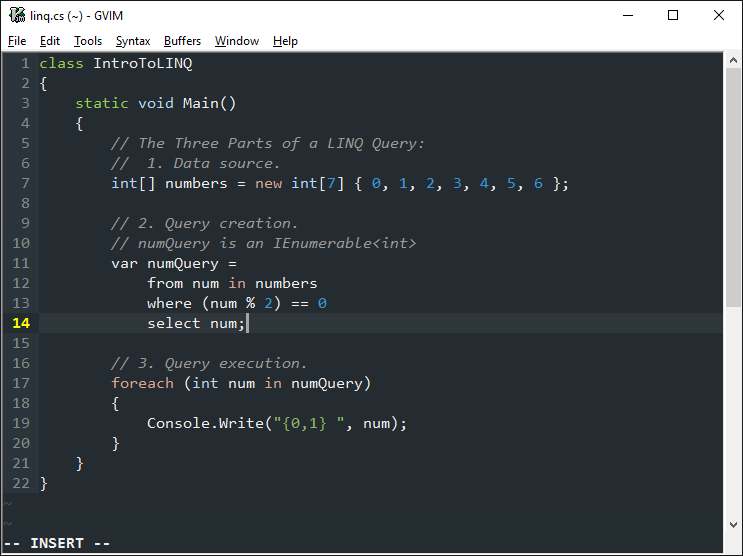
In this post, I will tell you how to improve your coding speed, how to navigate in code faster and how to get rid of your computer mouse. We will talk about VIM (the best text editor known to the human kind). In unskilful hands, it is just an awkward text editor, and no one knows how to exit from it. But actually, it is highly configurable text editor (or plugin to almost any IDE) which is built to allow you to manage your code in the most efficient way. VIM is not just a text editor. Not to seem crazy, but imagine that you do not code, you speak with a computer. So your coding process may be built in the following monologue:
But if you want to dance, you have to pay the piper. To «speak» with VIM you have to learn the language which has its own nouns, verbs, adjectives, etc. That is why VIM does not have shortcuts, it has sentences (e.g. change inner tag). When you learn the basics of this language you will be able to combine your own sentences depending on what you are going to do. Afterwhile you will understand that you don’t need your mouse anymore.
It is not easy to start learning this language because all its components should become your habit. And it is a painful challenge to yourself which can take at least 2 weeks, so think twice before you start. But if you overcome it, you will open a new world of your code managing.
The primary benefit of quick data entry is not the time saved in data entry per second, but the increased chance that your hands can keep up with your brain.
Level 1 — Survive
The most distinctive feature of VIM is that it has modes. We can define the main four of them:
Also, you have to learn basic navigation which works in a normal mode. Forget about arrows because they are slow to work with. When you are typing, your fingers are usually placed in the middle of your keyboard. Left hand on asdf and right hand on jkl;. And usually, you are navigating in your code up/down and rarely left/right (later we will speak about navigation within the line). So navigation in VIM is the following:
To get used to the basic movement you can play VIM Adventures game. Actually, this is all you have to know to get started. So, install vim plugin on your favorite IDE and practice. Keep in mind, it is gonna be hard.
Level 2 — Confidence
Ok, you decided to learn VIM and this is awesome. Let’s make sure you are doing it right. Your fingers got used to hjkl navigation and you also know how to change modes from one to another. If it is true, so you are ready.
Getting insert mode
You know you can enter this mode by pressing i on a keyboard. Let’s think that i stands for insert as insert text before the cursor. You can also press a which stands for append as append text after the cursor. It is easy to intensify these commands by changing the case, so the result would be the following: I inserts text before the first non-blank in the line and A appends text at the end of the current line.
To make your future work more pleasant you have to know command o which appends a new blank line after the current and O which does the same but before the current line.
These are the most often used insert mode-switching commands in VIM. If you adjust to hjkl navigation it will take a couple of days to get used to these commands. The more you sweat in training, the less you bleed in war.
Normal mode
Before we start to learn VIM language we should also improve our navigation skills. In this question command f (stands for find) will help us. This command is used to navigate within the current line. You type f and a letter to which you want to move the cursor. fP moves the cursor from the current position to the first occurrence of letter P. You can power up this command to F which does the same but changes the search direction.
VIM language
Now it is the time to become a crazy geek. You should «speak» with VIM in the normal mode. Firstly, let’s consider some constructions of VIM language:
Verbs:
Adverbs:
Pay attention that these commands may work by itself not as you expect. Moreover, when you create a VIM sentence, it should be sufficient and all constructions should be on their place, otherwise, you will get another result. Now let’s create some easy VIM sentences as an example:
To expand your VIM language right now I suggest you learn new VIM construction — number modifier. Let’s consider the following code:
And you want to remove all code inside <> of foo function. Using number modifier it is easy to do. Just type 2ci< — change inside curly braces 2 times.
Number modifier works not only in sentences but it works almost everywhere:
Be persistent
As you learn VIM you will find some new language constructions and expand your VIM language. Day by day it would be easier to «speak» with VIM. All the commands and language constructions are tightly coupled and created to maximize your performance, and it is proved by more than 20 years of VIM existence.
Level 3 — Mastering
You are on the way to become a VIM master. As you may found, this is not so easy to learn VIM. When you feel the power in your hands using VIM, you will want something more and this is what this part about. All topics are discovered superficially in order to let you decide what you want.
VIM is not an IDE
Yeah, VIM is not an IDE despite that you can setup it to perform almost all IDE functions. I am sure you won’t leave your favorite Visual Studio or WebStorm and that is why I prepared the list of plugins for your IDE and not only.
Still, you have to keep in mind that the maximum performance can be achieved by using just VIM. Basically, it is suitable for small js/html/css projects, editing configuration files or just as a replacement of your notepad++ 🙂
VIM plugins
VIM has thousands of plugins for any caprice. Here you can find almost everything you want from file explorer and git integration to the build systems.
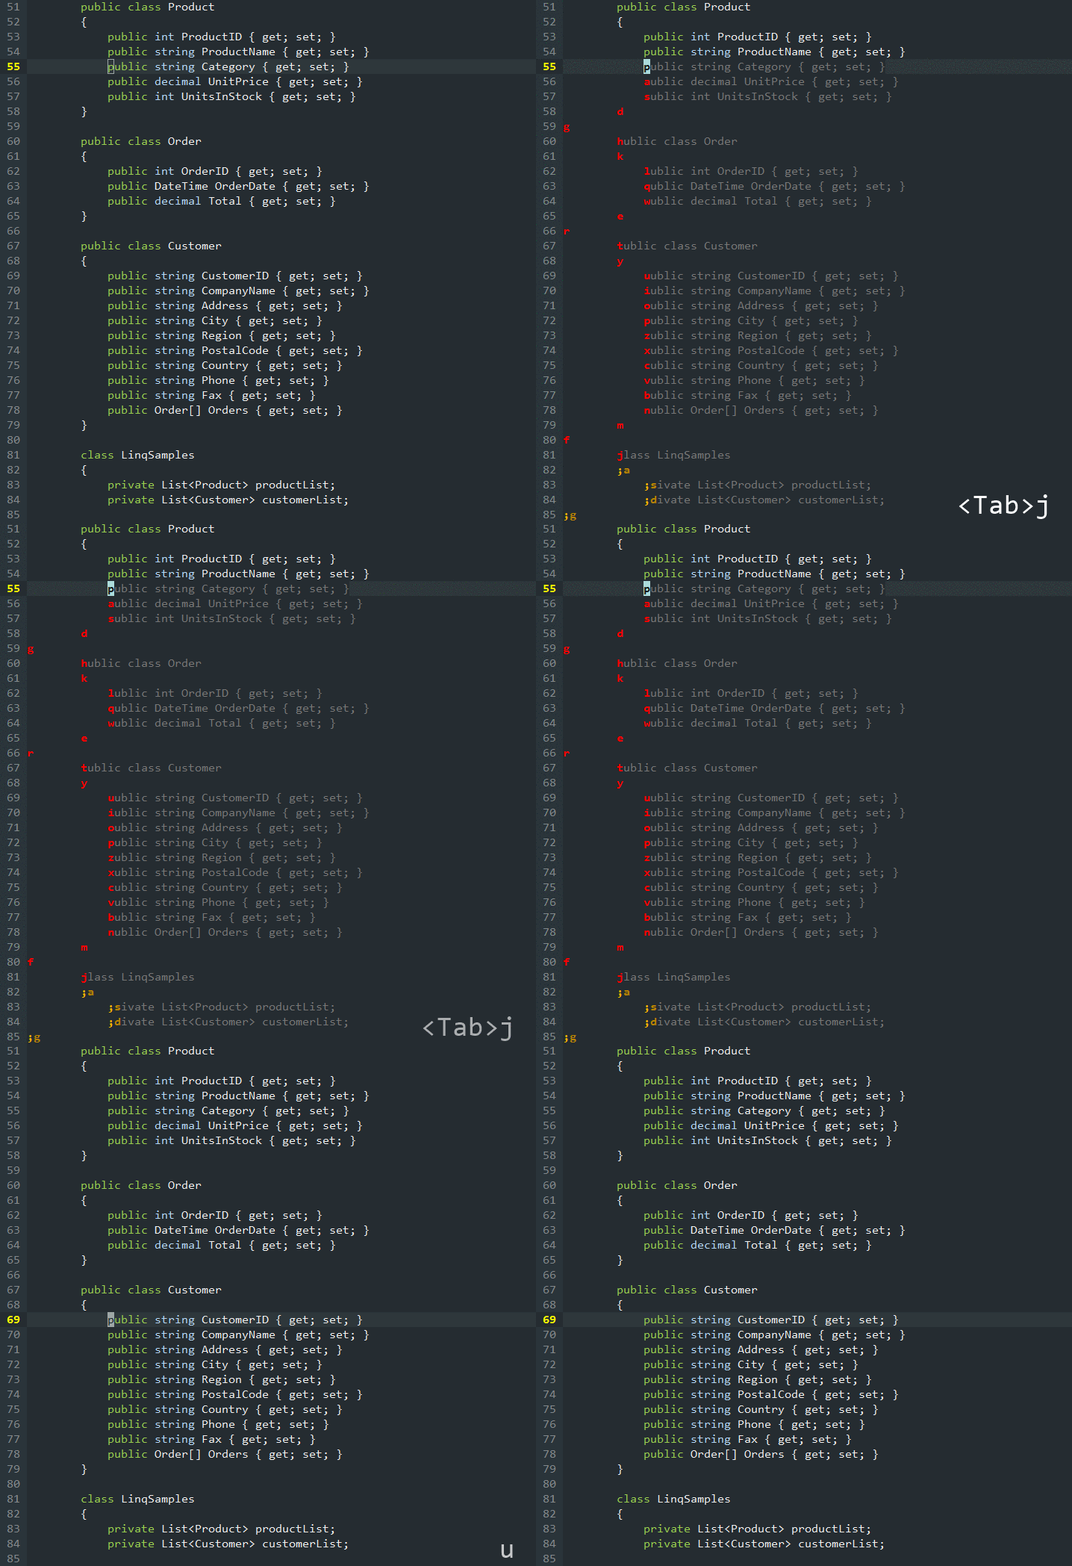
One of my favorite plugins is EasyMotion. It was created to speed up your navigation in VIM. EasyMotion is very sophisticated and deeply integrated within VIM philosophy. For example, if you just want to navigate to a specific line behind the current one, you can do this by pressing j key several times. In comparison, with EasyMotion you can press leader key (in my case TAB ) and j to highlight all the lines behind with different letters. All that has left to do is to press the letter which represents the line you need.
In my case, I pressed TAB key and ju to navigate to the appropriate line. It was the easiest example and as usual, in the world of VIM, you can craft almost any command according to your needs.
Mappings
This feature I decided to consider separately. You may think about mapping as key bindings for all modes. That is to say, you can bind some pattern to perform some actions in different modes.
You can map everything you want to do and this will save your time in future. Read more about mapping here.
VIM features
There are a lot of things to learn in VIM besides the features mentioned above. You definitely should pay attention to the following list:
They may exist in other development tools, but this is VIM. Day by day you will wonder how brilliant all these things are constructed. Check it out to make sure.
Configuration
Getting started with Vim: The basics
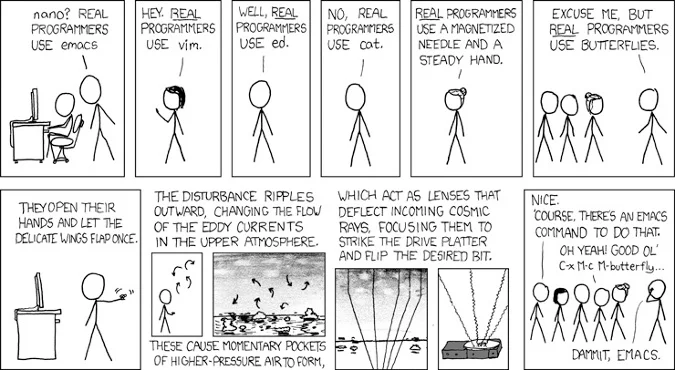
I remember the very first time I encountered Vim. I was a university student, and the computers in the computer science department’s lab were installed with Ubuntu Linux. While I had been exposed to different Linux variations (like RHEL) even before my college years (Red Hat sold its CDs at Best Buy!), this was the first time I needed to use the Linux operating system regularly, because my classes required me to do so. Once I started using Linux, like many others before and after me, I began to feel like a «real programmer.»
Real Programmers, by xkcd
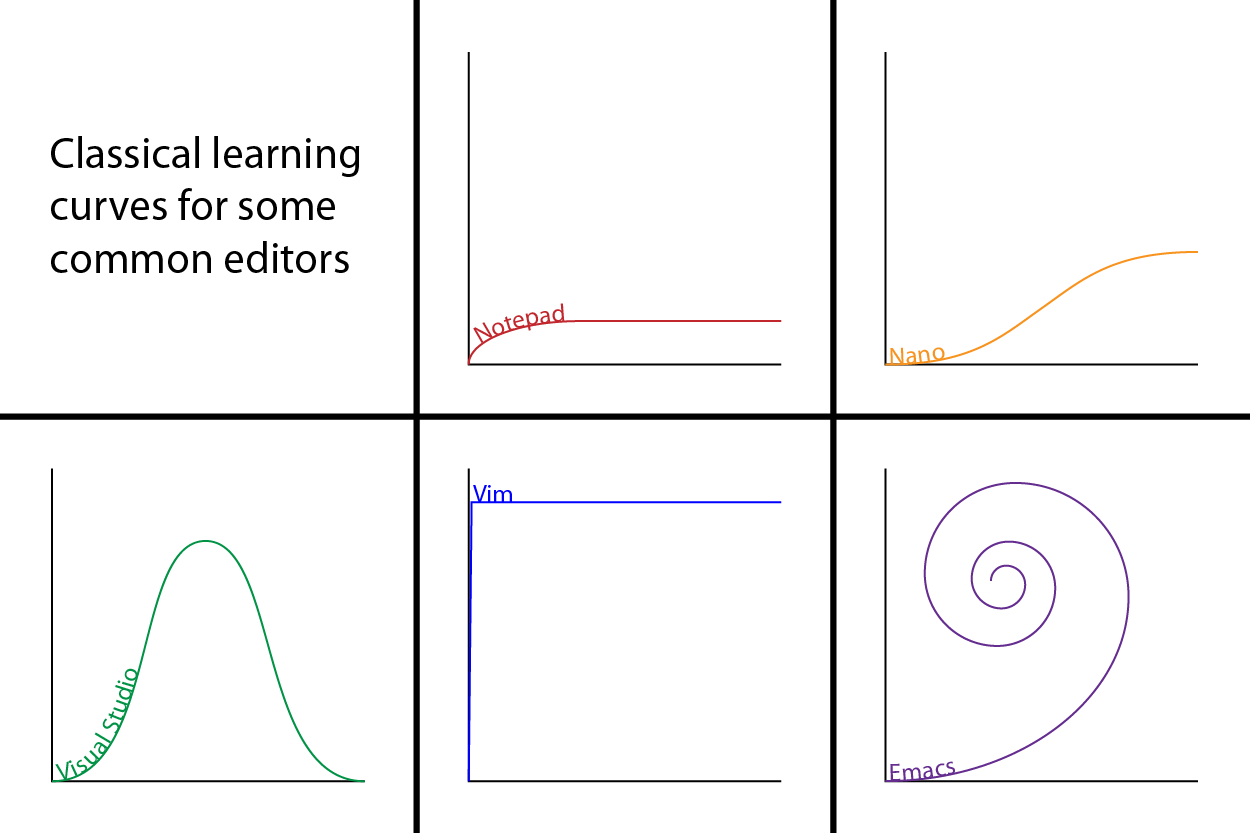
Students could use a graphical text editor like Kate, which was installed on the lab computers by default. For students who could use the shell but weren’t used to the console-based editor, the popular choice was Nano, which provided good interactive menus and an experience similar to Windows’ graphical text editor.
I used Nano sometimes, but I heard awesome things about Vi/Vim and Emacs and really wanted to give them a try (mainly because they looked cool, and I was also curious to see what was so great about them). Using Vim for the first time scared me—I did not want to mess anything up! But once I got the hang of it, things became much easier and I could appreciate the editor’s powerful capabilities. As for Emacs, well, I sort of gave up, but I’m happy I stuck with Vim.
In this article, I will walk through Vim (based on my personal experience) just enough so you can get by with it as an editor on a Linux system. This will neither make you an expert nor even scratch the surface of many of Vim’s powerful capabilities. But the starting point always matters, and I want to make the beginning experience as easy as possible, and you can explore the rest on your own.
Step 0: Open a console window
Before jumping into Vim, you need to do a little preparation. Open a console terminal from your Linux operating system. (Since Vim is also available on MacOS, Mac users can use these instructions, also.)
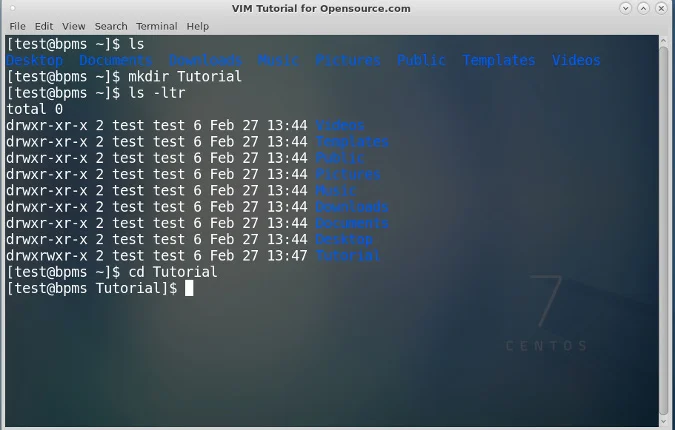
Once a terminal window is up, type the ls command to list the current directory. Then, type mkdir Tutorial to create a new directory called Tutorial. Go inside the directory by typing cd Tutorial.
That’s it for preparation. Now it’s time to move on to the fun part—starting to use Vim.
Step 1: Create and close a Vim file without saving
Remember when I said I was scared to use Vim at first? Well, the scary part was thinking, «what if I change an existing file and mess things up?» After all, several computer science assignments required me to work on existing files by modifying them. I wanted to know: How can I open and close a file without saving my changes?
Hello, Vim! Now, here is a very important concept in Vim, possibly the most important to remember: Vim has multiple modes. Here are three you need to know to do Vim basics:
| Mode | Description |
|---|---|
| Normal | Default; for navigation and simple editing |
| Insert | For explicitly inserting and modifying text |
| Command Line | For operations like saving, exiting, etc. |
Vim has other modes, like Visual, Select, and Ex-Mode, but Normal, Insert, and Command Line modes are good enough for us.
You are now in Normal mode. If you have text, you can move around with your arrow keys or other navigation keystrokes (which you will see later). To make sure you are in Normal mode, simply hit the Esc (Escape) key.
Tip: Esc switches to Normal mode. Even though you are already in Normal mode, hit Esc just for practice’s sake.
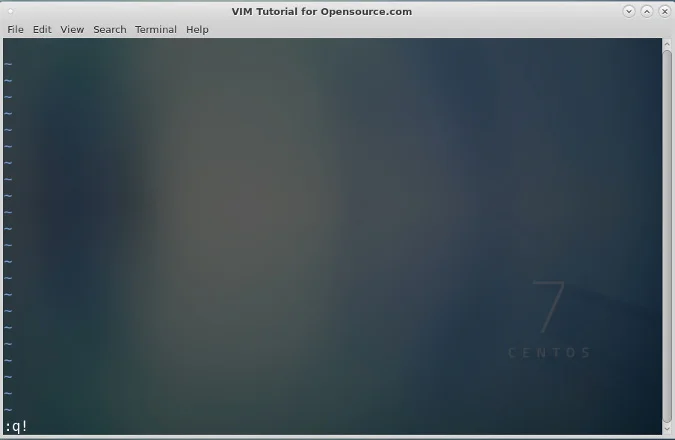
Now, this will be interesting. Press : (the colon key) followed by q! (i.e., :q!). Your screen will look like this:
Pressing the colon in Normal mode switches Vim to Command Line mode, and the :q! command quits the Vim editor without saving. In other words, you are abandoning all changes. You can also use ZQ; choose whichever option is more convenient.
Once you hit Enter, you should no longer be in Vim. Repeat the exercise a few times, just to get the hang of it. Once you’ve done that, move on to the next section to learn how to make a change to this file.
Step 2: Make and save modifications in Vim
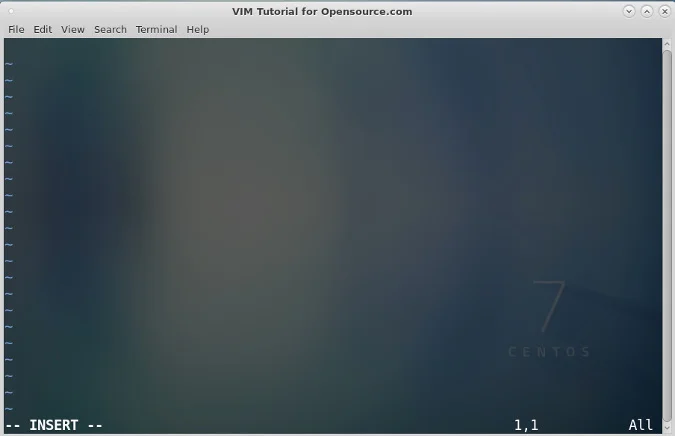
Reopen the file by typing vim HelloWorld.java and pressing the Enter key. Insert mode is where you can make changes to a file. First, hit Esc to make sure you are in Normal mode, then press i to go into Insert mode. (Yes, that is the letter i.)
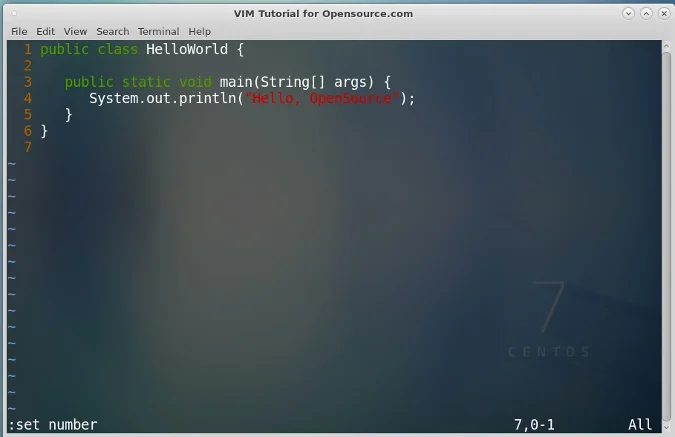
Type some Java code. You can type anything you want, but here is an example for you to follow. Your screen will look like this:
Very pretty! Notice how the text is highlighted in Java syntax highlight colors. Because you started the file in Java, Vim will detect the syntax color.
Now you know how to enter text using Insert mode and save the file using :x! or :wq.
Step 3: Basic navigation in Vim
While you can always use your friendly Up, Down, Left, and Right arrow buttons to move around a file, that would be very difficult in a large file with almost countless lines. It’s also helpful to be able to be able to jump around within a line. Although Vim has a ton of awesome navigation features, the first one I want to show you is how to go to a specific line.
Voila! You see line numbers on the left side of each line.
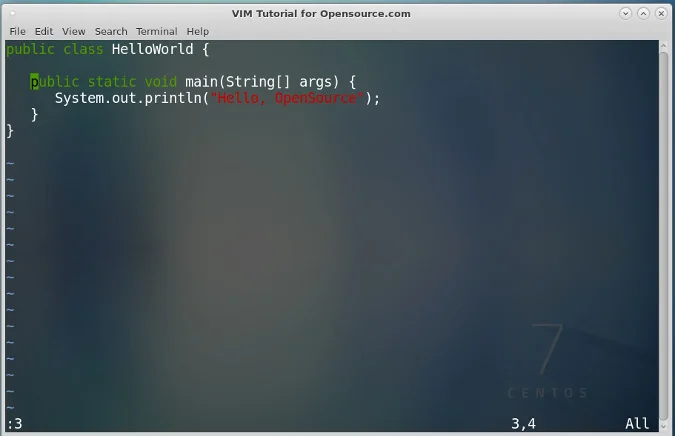
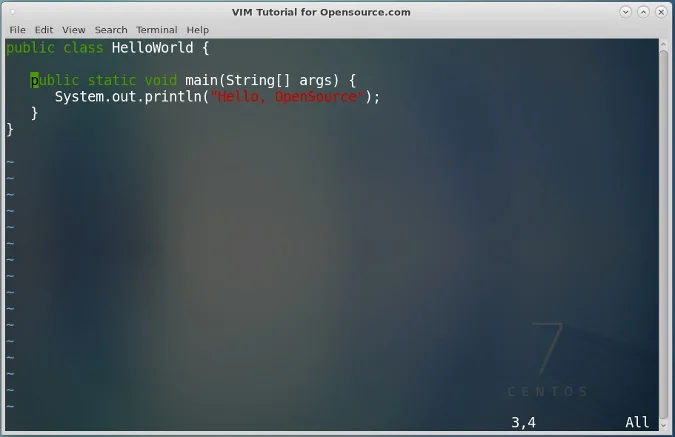
Now move to line 3.
But imagine a scenario where you are dealing with a file that is 1,000 lines long and you want to go to the end of the file. How do you get there? Make sure you are in Normal mode, then type :$ and press Enter.
You will be on the last line!
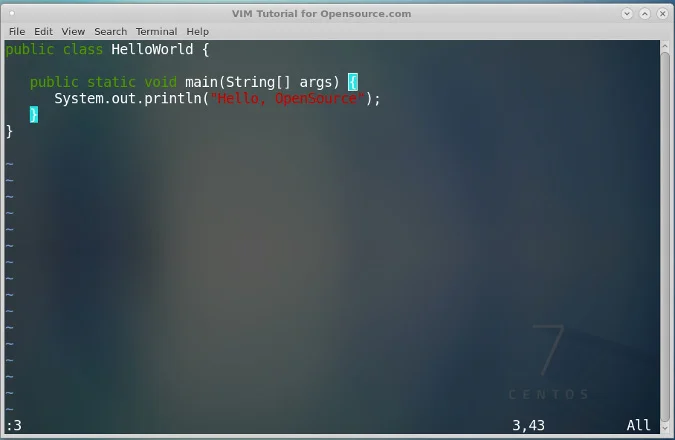
Now that you know how to jump among the lines, as a bonus, let’s learn how to move to the end of a line. Make sure you are on a line with some text, like line 3, and type $.
You’re now at the last character on the line. In this example, the open curly brace is highlighted to show where your cursor moved to, and the closing curly brace is highlighted because it is the opening curly brace’s matching character.
That’s it for basic navigation in Vim. Wait, don’t exit the file, though. Let’s move to basic editing in Vim. Feel free to grab a cup of coffee or tea, though.
Step 4: Basic editing in Vim
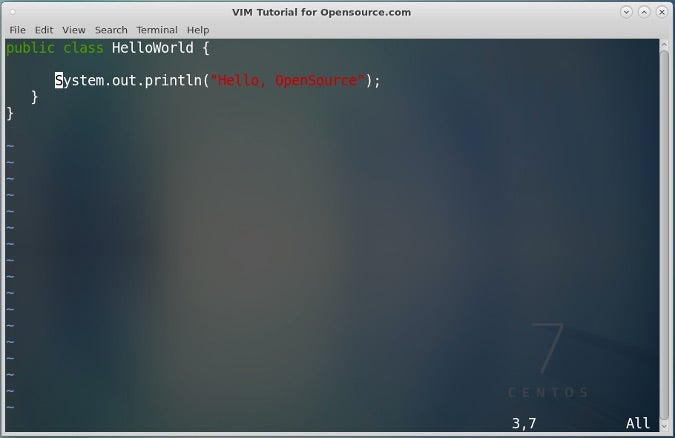
Now that you know how to navigate around a file by hopping onto the line you want, you can use that skill to do some basic editing in Vim. Switch to Insert mode. (Remember how to do that, by hitting the i key?) Sure, you can edit by using the keyboard to delete or insert characters, but Vim offers much quicker ways to edit files.
That’s the delete command. Don’t fear! Hit u and you will see the deleted line recovered. Whew. This is the undo command.
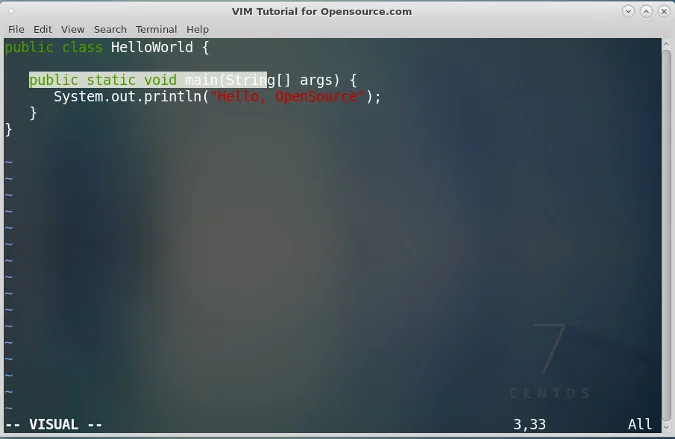
The next lesson is learning how to copy and paste text, but first, you need to learn how to highlight text in Vim. Press v and move your Left and Right arrow buttons to select and deselect text. This feature is also very useful when you are showing code to others and want to identify the code you want them to see.
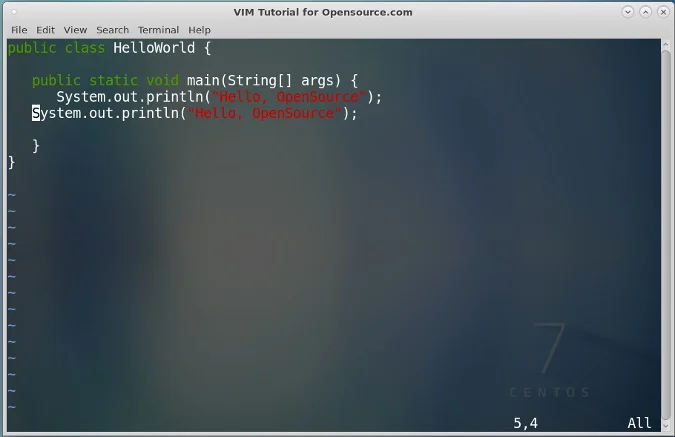
Move to line 4, where it says System.out.println(«Hello, Opensource»);. Highlight all of line 4. Done? OK, while line 4 is still highlighted, press y. This is called yank mode, and it will copy the text to the clipboard. Next, create a new line underneath by entering o. Note that this will put you into Insert mode. Get out of Insert mode by pressing Esc, then hit p, which stands for paste. This will paste the copied text from line 3 to line 4.
As an exercise, repeat these steps but also modify the text on your newly created lines. Also, make sure the lines are aligned well.
Hint: You need to switch back and forth between Insert mode and Command Line mode to accomplish this task.
Once you are finished, save the file with the x! command. That’s all for basic editing in Vim.
Step 5: Basic searching in Vim
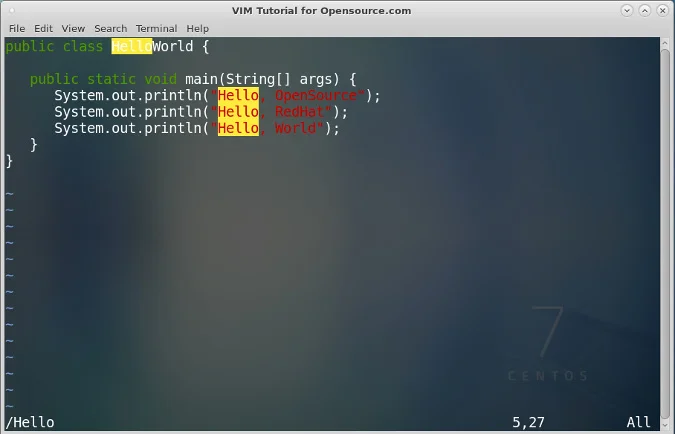
Imagine your team lead wants you to change a text string in a project. How can you do that quickly? You might want to search for the line using a certain keyword.
However, a keyword can appear more than once, and this may not be the one you want. So, how do you navigate around to find the next match? You simply press the n key, which stands for next. Make sure that you aren’t in Insert mode when you do this!
Bonus step: Use split mode in Vim
That pretty much covers all the Vim basics. But, as a bonus, I want to show you a cool Vim feature called split mode.
Get out of HelloWorld.java and create a new file. In a terminal window, type vim GoodBye.java and hit Enter to create a new file named GoodBye.java.
Enter any text you want; I decided to type «Goodbye.» Save the file. (Remember you can use :x! or :wq in Command Line mode.)
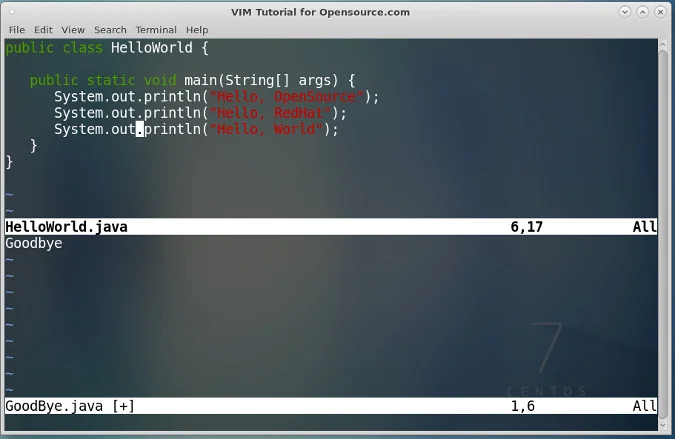
In Command Line mode, type :split HelloWorld.java, and see what happens.
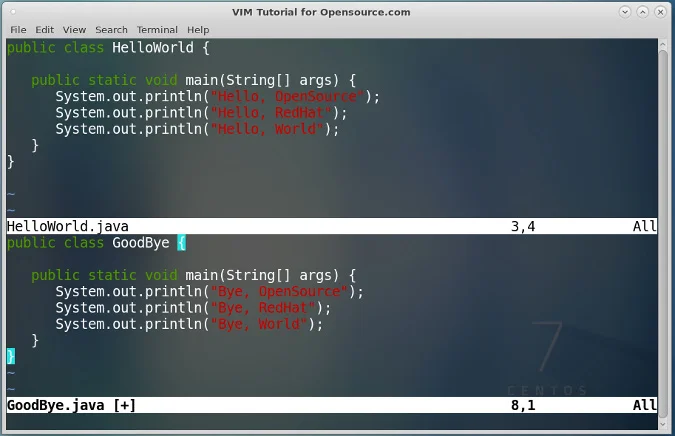
Wow! Look at that! The split command created horizontally divided windows with HelloWorld.java above and GoodBye.java below. How can you switch between the windows? Hold Control (on a Mac) or CTRL (on a PC) then hit ww (i.e., w twice in succession).
As a final exercise, try to edit GoodBye.java to match the screen below by copying and pasting from HelloWorld.java.
Save both files, and you are done!
TIP 2: You can open more than two files by calling as many additional split or vsplit commands as you want. Try it and see how it looks.
Vim cheat sheet
In this article, you learned how to use Vim just enough to get by for work or a project. But this is just the beginning of your journey to unlock Vim’s powerful capabilities. Be sure to check out other great tutorials and tips on Opensource.com.
To make things a little easier, I’ve summarized everything you’ve learned into a handy cheat sheet.
Как пользоваться текстовым редактором vim
Опытные пользователи Linux часто используют терминал, потому что так можно намного быстрее выполнить необходимые действия. Во время настройки системы нам довольно часто приходится редактировать различные файлы. Это могут быть настройки программ, какие-нибудь данные или обычные текстовые файлы.
В операционной системе Linux есть несколько текстовых редакторов, которые работают в терминале. Чаще всего новички используют редактор nano, но если вы заметили на нашем сайте во всех статьях используется текстовый редактор vi. Nano неудобный, и недостаточно функционален. Я сознательно не пишу в своих статьях о nano. Есть намного лучший текстовый редактор, это редактор vi. Здесь поддерживается быстрое перемещение по тексту, удобное редактирование, команды для изменения настроек работы, выполнение команд терминала из редактора, а также плагины для расширения функциональности. Но он немного сложный для новичков и очень непривычный.
В этой статье мы рассмотрим как пользоваться vim, рассмотрим основы работы с этим редактором, а также его основные команды.
Минимальные основы
Перед тем как идти дальше я бы посоветовал вам пройти курс обучения встроенный в редакторе. Выполнение всех обучающих заданий займет 25-30 минут. Но после того как вы освоите все что там написано, эта статья поможет вам закрепить материал. Дело в том, что команд и сочетаний клавиш у vim очень много и запомнить их все без практики невозможно. Для запуска обучения наберите:
Но делать это сейчас необязательно, в этой статье есть вся необходимая базовая информация и после ее прочтения вы уже сможете уверенно пользоваться vim, а обучение пройти чуть позже.
Как использовать редактор Vim
Начнем мы, как обычно с запуска программы, а также опций, которые ей можно передать. Синтаксис Vim очень прост:
$ vim опции имя_файла
$ vi опции имя_файла
Простой запуск vim без указания имени файла приведет к созданию пустого файла. А теперь давайте рассмотрим основные опции запуска:
Круто, правда? Но это только начало. Опции ничего по сравнению с командами редактора.
Командный режим Vim
В командном режиме вы можете перемещаться по редактируемому тексту и выполнять действия над ним с помощью буквенных клавиш. Именно этот режим открывается по умолчанию при старте редактора. Здесь вы будете использовать краткие команды, перед которыми может устанавливаться номер, чтобы повторить команду несколько раз. Для начинающих может быть поначалу очень запутанно то, что в командном режиме символы интерпретируются как команды.
Для перемещения используются такие команды:
Можете запустить редактор и поэкспериментировать, чтобы было легче понять как это работает. Если перед тем как нажать кнопку буквы нажать цифру, то эта команда будет повторена несколько раз. Например, 3j переведет курсор на три строки вверх.
Для переключения в режим редактирования используются такие команды:
К этим командам тоже применимы символы повторения. Поэкспериментируйте, можно получить интересный и не совсем ожиданный результат.
Более сложные команды редактирования текста. Вы можете править текст не только в обычном режиме, но и в командном с помощью команд. Для этого применяются такие команды:
Кроме этих команд, есть еще несколько полезных, которые мы не можем не рассмотреть:
С основными командами разобрались. Но у нас есть еще командная строка Vim, которая сама по себе тоже представляет огромный интерес.
Командная строка Vim
Со всеми основами разобрались, и вы теперь использование vim не будет казаться вам таким сложным. Но это еще далеко не все, этот мощный редактор может еще очень многое. Дальше мы рассмотрим несколько примеров использования vim, чтобы вам было легче справиться с новой программой.
Редактирование файла в Vim
Несмотря на то, что из всего вышесказанного можно понять как это делается рассмотрим еще раз. Чтобы открыть файл выполните:
Затем, если вы не хотите пока использовать возможности командного режима просто нажмите i, чтобы перейти в режим редактирования. Здесь вы можете редактировать файл так же, как и в nano. После того как завершите нажмите Esc, чтобы перейти в командный режим и наберите :wq. Записать и выйти. Все, готово.
Поиск и замена в Vim
Довольно часто нам нужно найти определенную последовательность в тексте. Текстовый редактор Vim умеет это делать.
Во-первых, если нужно найти символ в строке, нажмите f и наберите нужный символ, курсор будет перемещен к его позиции.
Для замены будет использоваться немного другая конструкция:
Двоеточие запускает командную оболочку с командой s для замены. Символ % означает что обрабатывать нужно весь файл, а g значит, что нужно обработать все найденные строки, а не только первую. Чтобы программа спрашивала перед каждой заменой можно добавить в конец строки опцию c.
Одновременное редактирование нескольких файлов
Чтобы открыть несколько файлов, просто передайте их в параметры при запуске программы:
vim файл1 файл2 файл3
Редактор vim linux откроет первый файл, для переключения ко второму используйте команду :n, чтобы вернутся назад :N.
С помощью команды :buffers вы можете посмотреть все открытые файлы, а командой :buffer 3 переключится на третий файл.
Буфер обмена Vim
Текстовый редактор Vim имеет свой буфер обмена. Например, вам нужно скопировать в четыре строки и вставить их в другое место программы, для этого выполните такую последовательность действий:
Также можно использовать выделение vim, чтобы скопировать строки. Выделите текст с помощью v, а затем нажмите y, чтобы скопировать.
Кириллица в Vim
Кириллица в Vim работает превосходно. Но есть одно но, когда включена кириллица в системе, все команды vim не работают, им и не нужно работать, они же не приспособлены для кириллицы.
Но переключать каждый раз раскладку, когда работаете в командном режиме тоже не очень удобно, поэтому открываем файл
/.vimrc и добавляем туда такие строки:
set keymap=russian-jcukenwin
set iminsert=0
set imsearch=0
Теперь раскладка клавиатуры в командном режиме переключается по Ctrl+^ и все команды работают.
Выводы
В этой статье мы рассмотрели как пользоваться текстовым редактором vim. Это еще далеко не все его возможности, но теперь вы можете уверенно обращаться с редактором и забыть о nano. Более подробно о настройке Vim читайте тут. А вы уже пользуетесь Vim? Или другим редактором? Напишите в комментариях!
Еще немного информации по использованию Vim можно почерпнуть из видео:
How to use vim editor – Complete Guide
This post will help us to know how we can use a vim editor for editing different files.
Comparison of Vim with Nano editor
Nano editor is the default editor in the Linux distributions whereas the Vim editor is mostly pre-installed in some distributions of Linux. There are some features on the basis of which it is more popular than nano and those features are:
| Vim Editor | Nano Editor |
|---|---|
| It is slightly complex for a beginner | It is simple to understand for a beginner |
| Supports programming languages | Does not support programming languages |
| It is a mode-based | It is modeless |
| Improved version of Vi editor | Improved version of Pico editor |
| Advanced editor with many tools | Simple editor |
Modes of Vim
Vim has two different types of modes, as
Command-line mode : When you open any file with vim, you are in the command mode by default. In command mode, you can perform different tasks by using the commands for example to delete a line, to copy the line, and to navigate the cursor in any specified position of the file. If for any reason you are not in the command mode, simply press the ESC key, to enter in the command mode.
Insert mode : To insert something, you have to choose the insert mode, for this purpose, simply press the I key to enter the insert mode. In this mode, you can write anything and can add anything to the file. Once you are done by inserting, press ESC key from keyboard and switch insert mode to command-line mode.
Installation of Vim
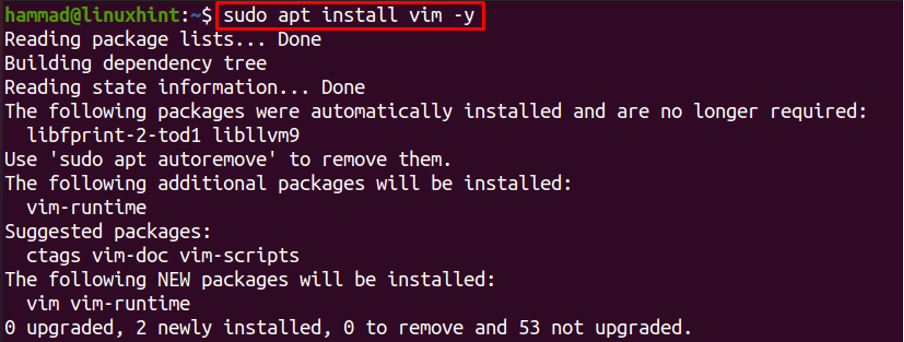
In some of the distributions of Linux, vim is pre-installed but if it is not installed by default you can install it by two different methods either using the apt command or from the snap utility store. To find out, vim is installed by default or does not execute the following command in the terminal.
The output is showing it is not installed, so we will first install it using the apt command.
To install it from the snap utility store, first, install snap utility.
Now installing the vim editor by the snap utility store.
Vim commands
Vim has been installed in the Linux distribution. Now we will go ahead and learn about the commands in Vim. It has more than 1000 commands to perform different tasks efficiently. Different types of commands are explained with examples.
Basic Commands
Some basic commands of Vim editor are
Open a file : You can open a file with the vim editor by using the keyword “vim”. For understanding, we want to open a file, named file.txt using vim editor.
The file has been opened in the vim editor.
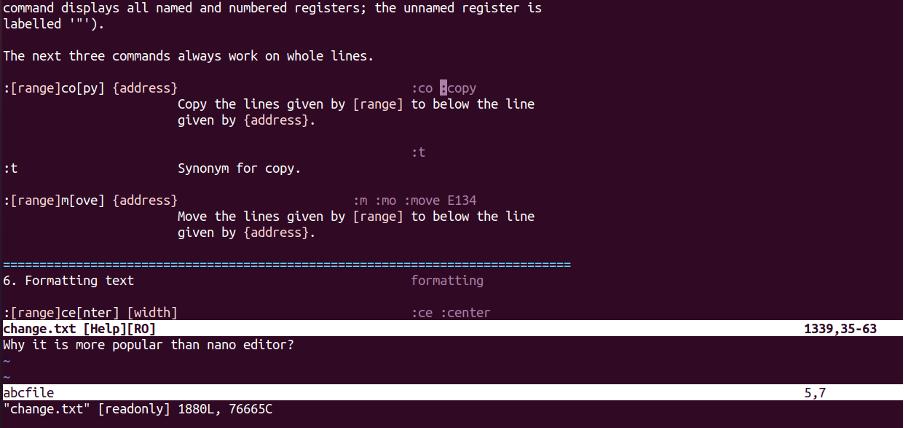
Help command : If you need any type of help regarding any command, type :help [command keyword] in the command mode, the list of the help will be displayed. For example, we find help regarding the “copy” command.
The output will be displaying a file containing all the relevant help regarding the keyword “copy”.
Open a code file : Now if you want to open any other file, you can open it by typing :e [file name] in the command mode. For understanding, we will open a file, named, code2.php using “:e code2.php”.
The specified file will be open as output.
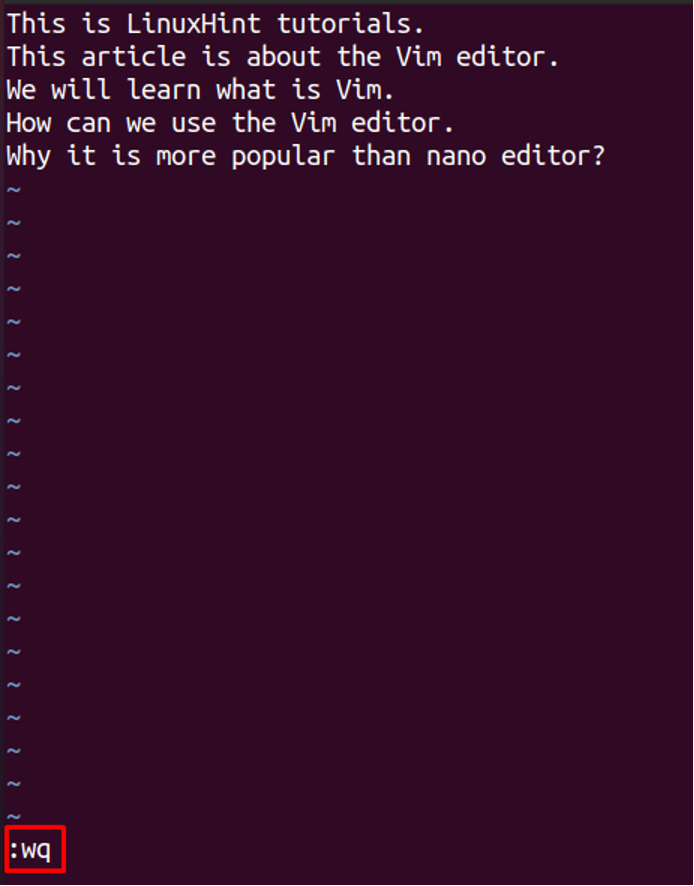
Quit vim without saving a file : We can exit the editor without saving the changes we have done, by typing :qa or :q! and then press ENTER key. For example, we quit the file:
After hitting the ENTER, you will be back to the terminal.
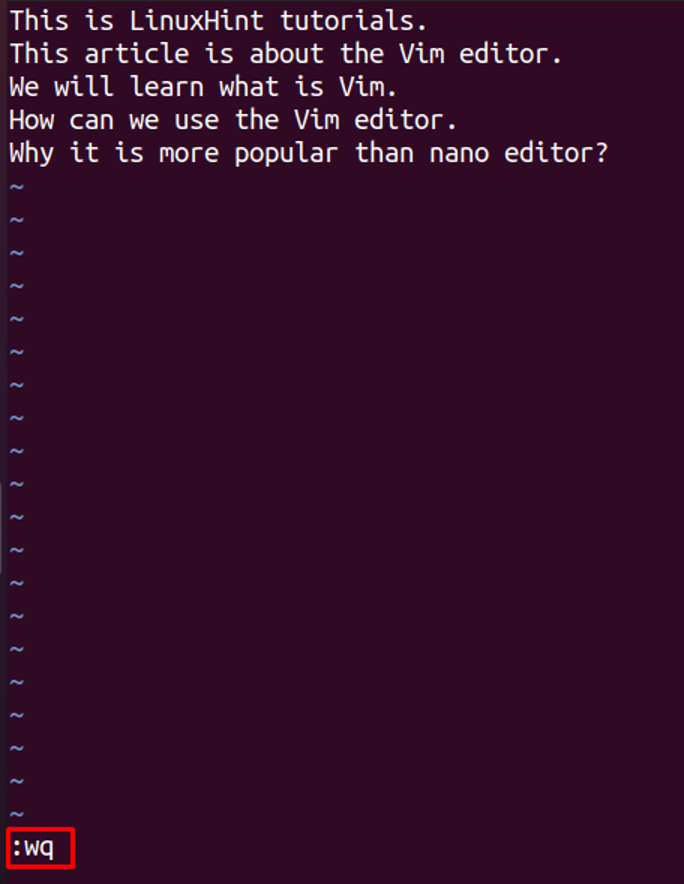
Quit vim by saving the files : We can quit the file by saving it. To do so type :wq and press ENTER.
Save the file : While working if we want to save the changes, we can do it by typing :w and hitting the ENTER key.
Save a file by renaming : We can save a file by renaming it by typing “:w [file name]”:
Cursor navigation commands
In vim editor, there is no use of the mouse as the cursor is moved with the help of keys. We will discuss some keys and shortcuts to navigate in the vim editor. There is a list of keys and their purposes, use them by pressing semicolon “:” and then the specific key.
| Commands | Actions |
|---|---|
| h | To move the cursor to the left position |
| l | To move the cursor to the right position |
| j | To move the cursor to the down position |
| k | To move the cursor to the up position |
| M | To move the cursor directly to the middle of the screen |
| L | To move the cursor directly to the bottom of the screen |
| H | To move the cursor directly to the top of the screen |
| e | Places the cursor at the end of the word |
| b | Places the cursor at the start position of the previous word |
| w | Places the cursor at the start position of the next word |
| $ | Places the cursor at the end position of the line |
| 0 | Places the cursor at the start position of the line |
| > | Takes the cursor to the start position of the next block or next paragraph |
| < | Takes the cursor to the start position of the previous block or previous paragraph |
| ) | Moves the cursor directly to the start position of the next sentence |
| ( | Moves the cursor directly to the start position of the previous sentence |
| G | Places the cursor at the end of the file |
| gg | Places the cursor at the start of the file |
| # | To go on a specific line, type the number of lines next to # |
| CTRL + b | Moves the cursor to one page back |
| CTRL + f | Moves the cursor to one page forward |
Editing commands
If we want to edit the text, first go to the insert mode by pressing the “I/i” key, then type the text. For editing purposes, there are some commands which can help in editing like copy, paste, delete and undo commands. We can discuss all these commands:
Copy commands : In vim, the copy word is derived from the word “yank” so it will use copy commands with a representation of yw.
| Commands | Actions |
|---|---|
| yy | It is used to copy a line |
| yw | It is used to copy a word |
| y$ | It is used to copy from the present position of the cursor to the end of the line |
Paste command : In vim, the copied text can be pasted by simply typing “p” after the semi-colon.
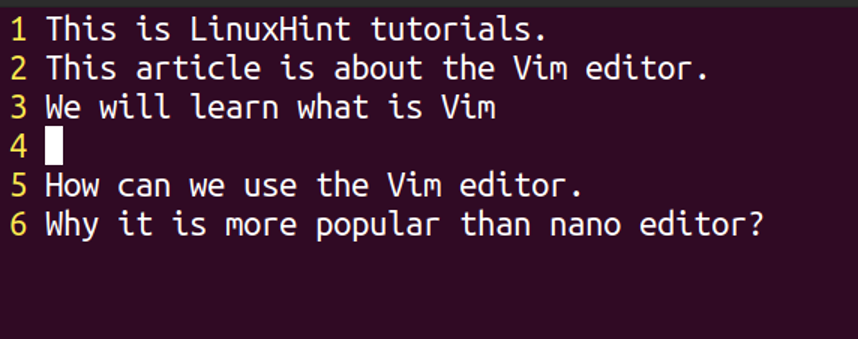
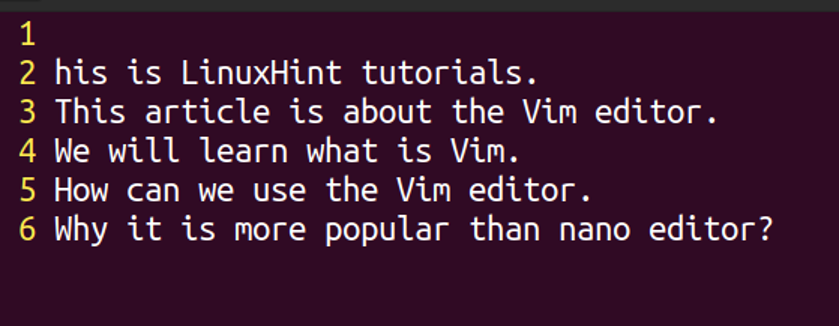
Undo command : In vim, if mistakenly or unintentionally any action has been performed, we can undo that action by typing “u” after the semi-colon. We made a blank line in the text as shown in the image below:
Now we will press the “u” key, by entering the command mode, by pressing ESC key after semicolon”:”,
Redo command : To redo any action in the vim, type “r” in the command mode (command mode can be opened by pressing ESC key after typing semicolon)
Delete commands : For the deletion of words or sentences, we use the commands described in the table.
| Commands | Actions |
|---|---|
| dd | To delete a line |
| d | To delete the selected portion of a line |
| dw | To delete a word |
| D | To delete a line from the present position of the cursor to the end of the line |
| dG | To delete a line from the present position of the cursor to the end of the file |
| dgg | To delete a line from the present position of the cursor to the start of the file |
On pressing dd, the entire line has been deleted. For example, we open a file, named file.txt.
Now we will press dd in the command mode.
On pressing dw, “is” word has been deleted. For example, our cursor is on the word “is” in the first line.
On pressing D, the line is deleted from the cursor position:
On pressing dG, deleted all the lines from the starting position of the cursor:
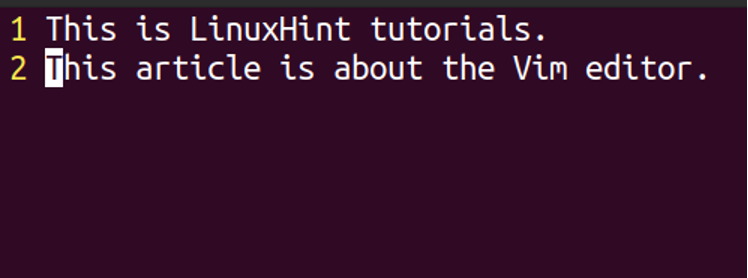
On pressing dgg, previous lines from the cursor has been deleted:
The output, will be
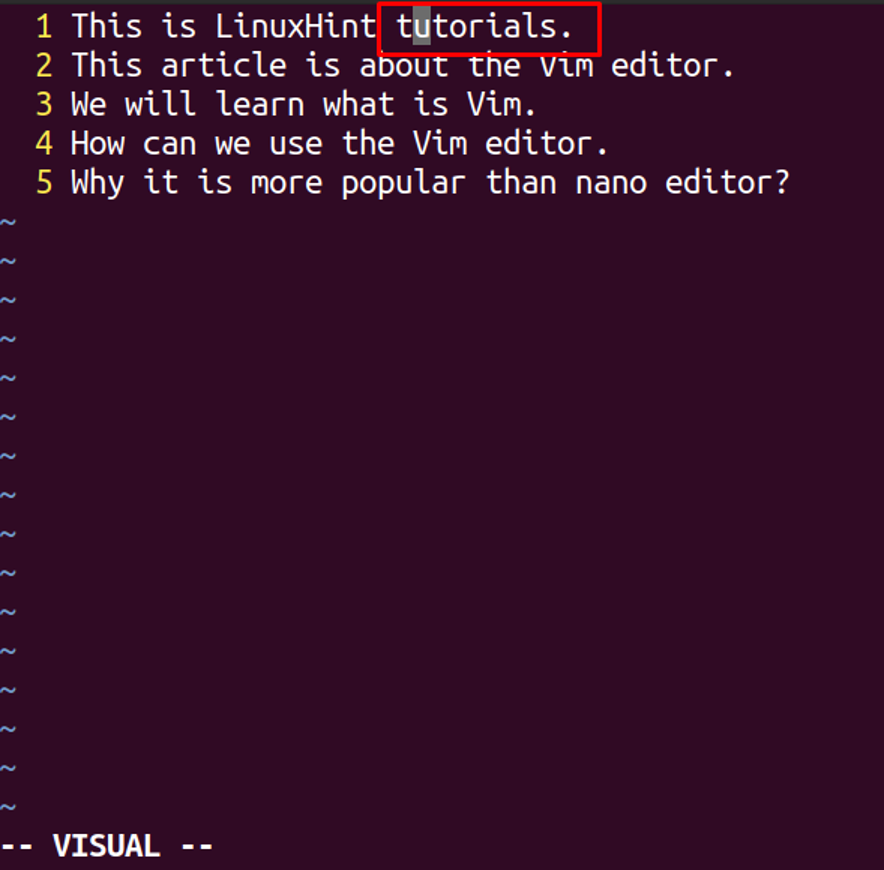
Selection commands : For the selection or highlighting of the text, the following commands are used.
| Commands | Actions |
|---|---|
| v | To highlight a character |
| V | To highlight a line |
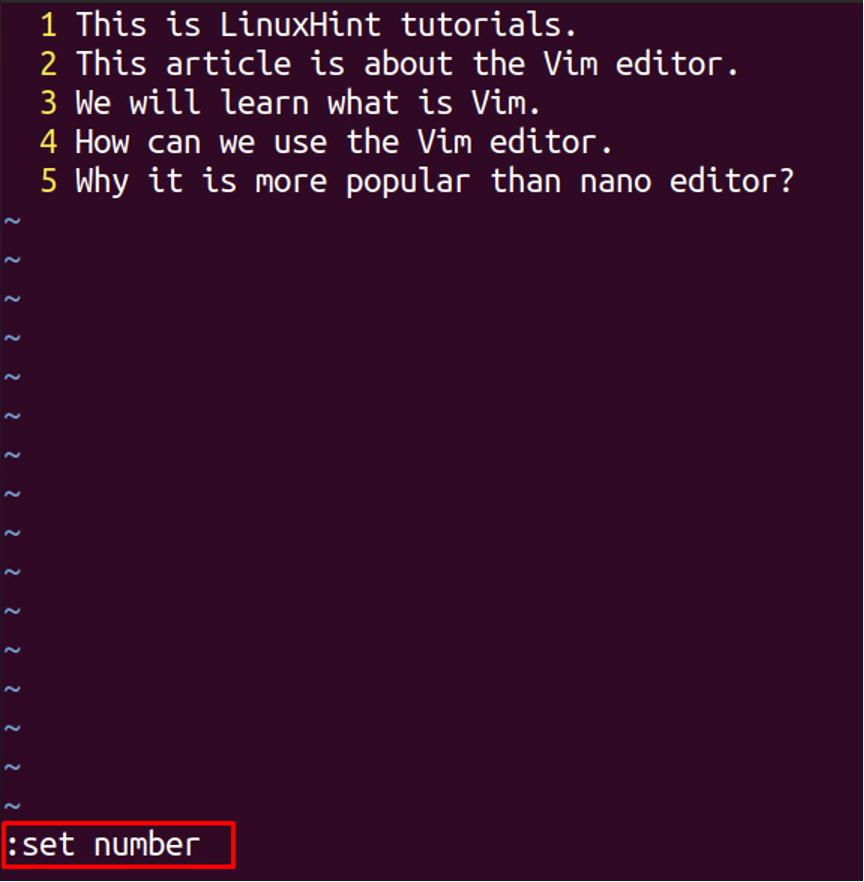
Show number against lines
Showing the numbers with every line, make it easy for us to determine which line we are and on which line we have to go for editing. To display the numbers along with the lines of text we can use any of the commands displayed in the table.
| :set number |
| :set nu! |
| :set number! |
Searching commands
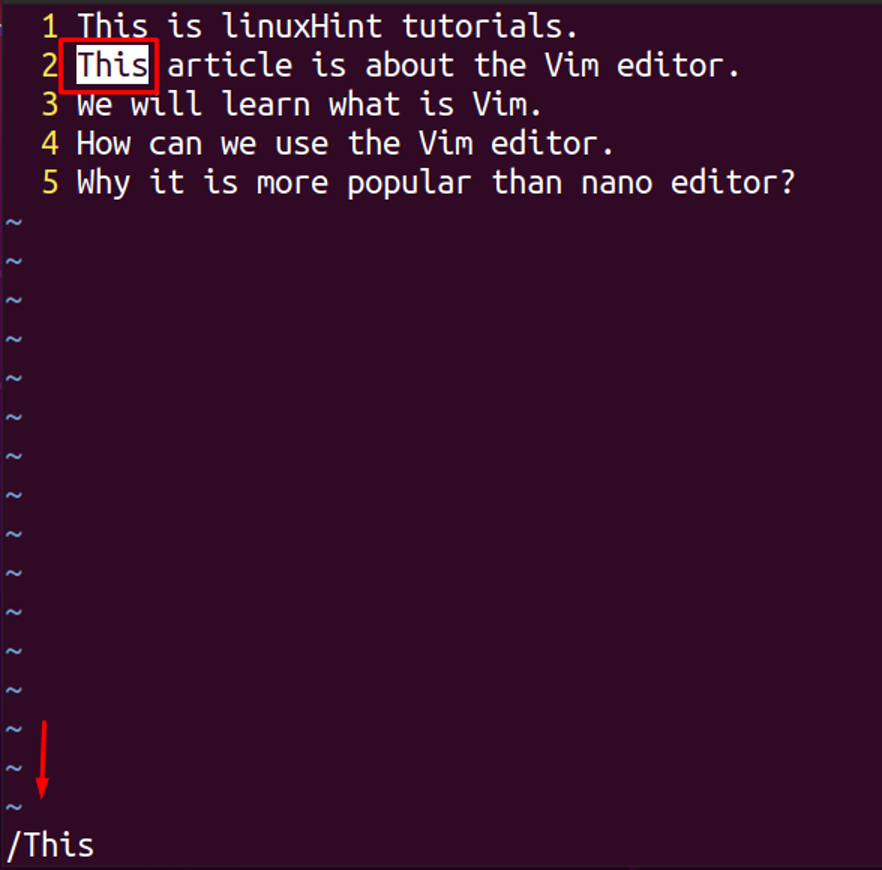
We can search specific words in vim also like the other editors. The commands for searching are:
| Command | Actions |
|---|---|
| / [enter the word ] | Finds out the entered word from the entire file |
| ? [enter the word] | To search previous text from the entered word |
| n | To search your word again in any direction |
| N | To search the word again in the opposite direction |
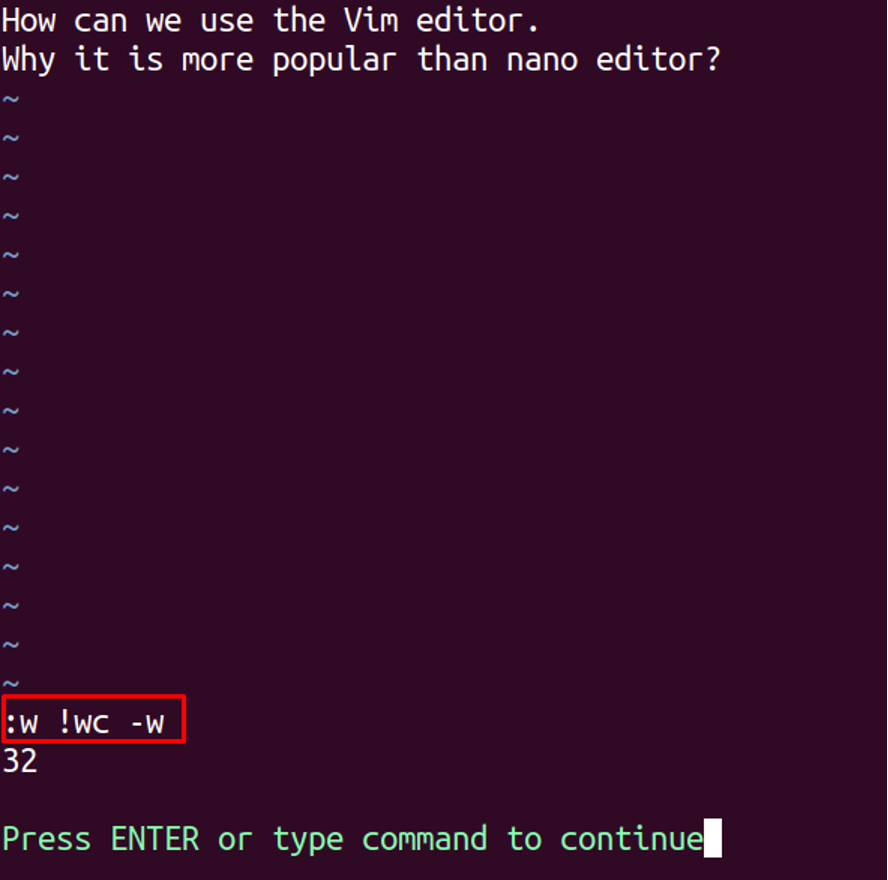
Word count commands
Like other editors, we can also count the words and characters in vim. For this, there are two ways, pressing g and then CTRL + G.
Compare files
We can compare two files in vim. The general syntax of the command will be
For explanation, we compare two files, file.txt and newfile using the vimdiff command.
The output is showing differences like in the first line, letter “l” in first file is in upper case while in other file it is in lower cas and the last two lines are missing in the second file.
Conclusion
Vim editor is the command-line editor, which is much more versatile as it contains all the functions which are needed by the beginner as well as an expert and is popular for its different features. It is the advanced form of the Vi editor and it can be used to open programming files of different languages. In this article, we have discussed the installation and different commands of the vim editor which is used to handle the vim editor. We also tried our best to explain the use of commands with the help of examples.
About the author
Hammad Zahid
I’m an Engineering graduate and my passion for IT has brought me to Linux. Now here I’m learning and sharing my knowledge with the world.
Как освоить Vim?
Осваивать Vim — это, пожалуй, страшно. Или, точнее, очень страшно. Речь идёт об изучении совершенно необычного подхода к редактированию кода, не говоря уже о работе с простым текстом. Многие несправедливо обвиняют тех, кто выбирает Vim, в том, что они впустую тратят время.
Я со всей уверенностью могу заявить о том, что Vim позволил мне повысить эффективность в деле написания программ. Работать стало удобнее (ниже я расскажу об этом более подробно). Я никому не хочу навязывать Vim, но очень рекомендую освоить этот редактор всем, кто занимается программированием, работает в сфере Data Science, в общем — тем, кто так или иначе пишет и редактирует некий код.
Если вам очень хочется узнать о том, стоит ли вам использовать Vim, и о том, кто и для чего им реально пользуется — взгляните на этот материал (кстати, не позвольте его названию, «Не пользуйтесь Vim», ввести себя в заблуждение). Ещё можете посмотреть это видео, которое, кстати, подготовил сам Люк Смит.
А теперь, учитывая всё вышесказанное, предлагаю поговорить о том, что такое, на самом деле, Vim!
Что такое Vim?
Отвечая на этот вопрос, я хочу ещё раз повторить то, что было сказано в самом начале статьи: «Vim — это редактор, реализующий совершенно необычный подход к редактированию кода, не говоря уже о работе с простым текстом».
В Vim имеется несколько «режимов работы», переключение между ними приводит к изменению функционала клавиатурных клавиш (например, клавиша W в режиме вставки, что неудивительно, позволяет ввести букву w, а вот в нормальном режиме она позволяет перемещать курсор вперёд на одно слово). При таком подходе клавиатура используется и для ввода символов, и для перемещения по тексту. Другими словами — при работе в Vim не нужна мышь.
Это очень хорошо в тех случаях, когда нужно постоянно «переключаться» между редактированием и просмотром кода. Обычно программисты именно так и работают. Если вы раньше никогда не пользовались Vim для работы с программным кодом, то вы даже не замечаете того, как много времени тратится на то, чтобы снять руку с клавиатуры и потянуться к мыши (или к трекпаду), затем — на то, чтобы переместить курсор туда, куда нужно, и наконец на то, чтобы вернуть руку на клавиатуру и приступить к вводу текста (в общем — тратится очень много времени).
Конечно, на то, чтобы привыкнуть к Vim, нужно некоторое время. И это — не прямая замена какой-нибудь IDE или редактора вроде VS Code. Но можно сказать, что Vim позволяет тому, кто умеет им пользоваться, значительно ускорить работу с кодом. Кроме того, интересно то, что его более простым аналогом является Vi — стандартный текстовый редактор большинства Unix-подобных систем, работающий в терминале.
Как научиться работать в Vim?
▍1. Используйте vimtutor
▍2. Постоянно пользуйтесь Vim
Используйте Vim как можно чаще. Нужно просмотреть текстовый файл? Запустите Vim. Хотите что-то по-быстрому изменить в Python-скрипте? Примените Vim. Делаете какие-то заметки? Делайте их с помощью Vim. В общем, полагаю, вы меня поняли. И каждый раз, когда работаете в Vim, всегда задавайтесь вопросом о том, какова наиболее эффективная последовательность нажатий на клавиши (то есть — наиболее короткая последовательность), позволяющая решить текущую задачу.
И попутно постарайтесь сократить использование мыши.
▍3. Интегрируйте с Vim всё что сможете
Используйте клавиатурные привязки Vim везде, где это возможно. Начните делать всё, что сможете, «в стиле Vim». Например, если вы пользуетесь браузером, основанным на Chromium (Chrome, Brave, Edge), или браузером Firefox, подумайте об установке расширения Vimium, которое позволяет пользоваться в браузере клавиатурными сокращениями Vim, отвечающими за перемещение по документу (H, J, K, L и так далее).
Если вы пользуетесь для работы с кодом некоей IDE — найдите плагин или расширение для добавления Vim-привязок в соответствующую среду. Например, пользователи PyCharm (или любой IDE от JetBrains) могут воспользоваться ideavim. А пользователи VS Code (в 2021 году этот инструмент уже ближе к IDE, чем к обычным текстовым редакторам) могут прибегнуть к расширению VSCodeVim.
В Jupyterlab можно включить привязки Vim для встроенного текстового редактора путём установки jupyterlab-vim, что позволит полностью эмулировать Vim в ячейках блокнотов.
Постарайтесь органично интегрировать Vim в свою рабочую среду и несколько недель поработайте по-новому. Я могу говорить о том, что после нескольких VSCode-сессий в стиле Vim мне стало гораздо удобнее пользоваться этим редактором. А ещё — я очень рад избавлению от мыши!
▍4. Перенастройте клавишу Caps Lock (но это необязательно)
Самая бесполезная клавиша, расположенная в самом лучшем месте клавиатуры. Именно так можно охарактеризовать клавишу Caps Lock. Поэтому советую превратить Caps Lock в Escape. Если вы интересуетесь Vim, то уже должны знать о том, что клавиша Escape используется в Vim для переключения режимов. Я очень советую тем, кто стремится к максимальной эффективности, воспользоваться вышеописанной модификацией.
Пользователи Windows и WSL могут использовать uncap — программу, которая превращает клавишу Caps Lock в Escape.
Пользователям macOS в плане переназначения клавиш повезло — они могут решить эту задачу, прибегнув к системным настройкам.
▍5. Глубже изучите Vim
После того, как вы привыкнете к Vim и немного его освоите, придёт время для более глубокого освоения этого редактора ради дальнейшего повышения эффективности своего труда. Ниже я, основываясь на собственном опыте, привожу список самых полезных (и, пожалуй, уникальных для Vim) команд, применимых в нормальном режиме работы:
Итоги
Вероятно, сейчас вы уже достаточно хорошо освоили Vim и значительно повысили свою скорость работы с кодом. И вы наконец сможете похвастаться перед пользователями Reddit или перед коллегами своими отточенными навыками редактирования текстов, когда в ходе работы вам не приходится убирать руки с основной части клавиатуры. Когда вы достигнете подобного уровня, вы можете развиваться в сфере Vim и дальше. Например — в следующих направлениях:

