How to work with clay with children
How to work with clay with children
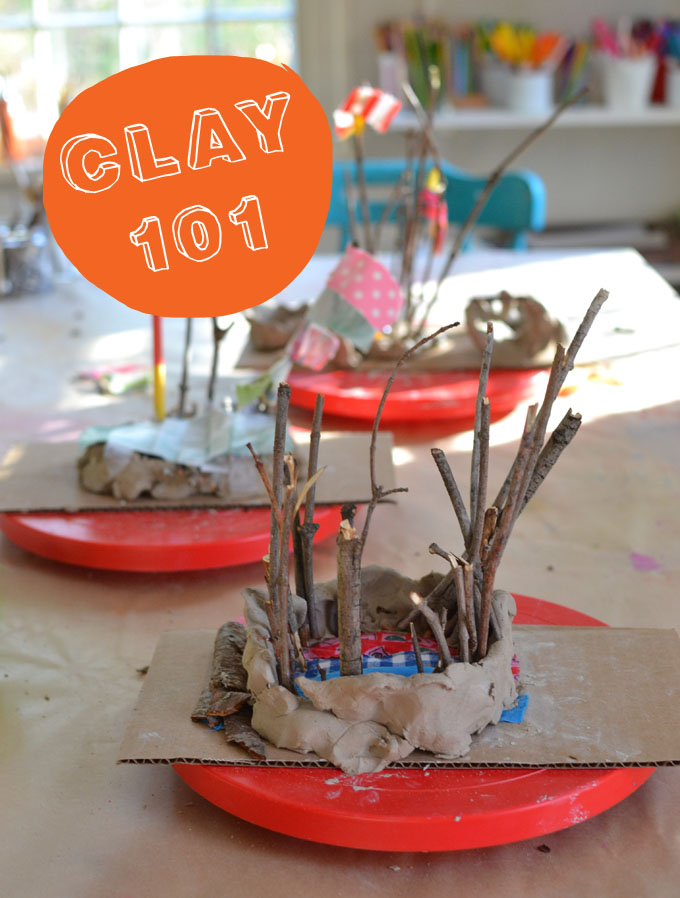
Clay 101: Clay Exploration with Young Children
There are six art forms that I strive to introduce my art students to while they are in my classes: drawing, painting, printmaking, collage, construction, and clay. Of all these six, I think children get the most excited about clay. Their response is so visceral, they instinctively jump and clap with joy! Clay exploration with young children is all about experiencing the material – cold, squishy, sticky – no instructions are needed. It’s the perfect process art experience.
One note about the clay, I am not an expert on what type of clay to order, I do think they all work about the same. I have a link to what I ordered, but you can easily just grab some at the art store. Clay is different from using play dough. Clay is from the earth, has a cold feel to it and an earthy smell. You can build more intricate things and the weight allows for taller structures. We love play dough and make it often, but clay is a whole different experience.
[ I am a participant in the Amazon Services LLC Associates Program, an affiliate advertising program designed to provide a means for us to earn small fees at no cost to you by linking to Amazon.com and affiliated sites. ]
Materials needed for Clay Exploration:
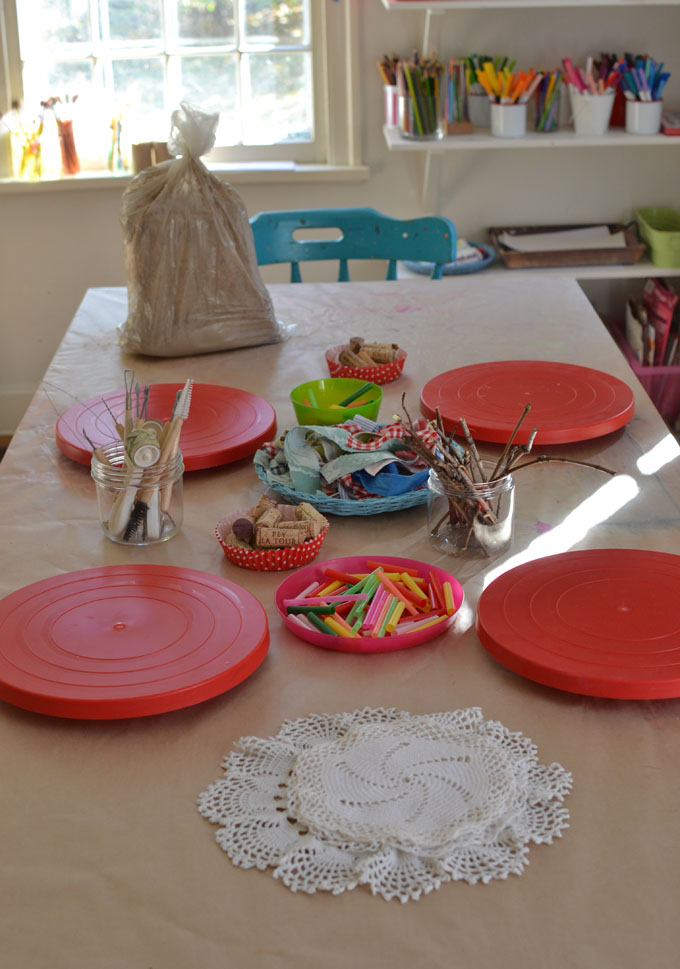
Clay (I think we bought the 25 pound bag, but that lasted me many classes with 6 kids)
Any other materials that you can poke or push into the clay, such as corks, straws, twigs, beads, fabric scraps, and lace doilies (from the thrift store, but you can get some on Amazon)
Lazy Susan from IKEA (I cannot for the life of me remember where I got those red ones), or better yet – a clay board made especially for working with clay
How to set up for Clay Exploration:
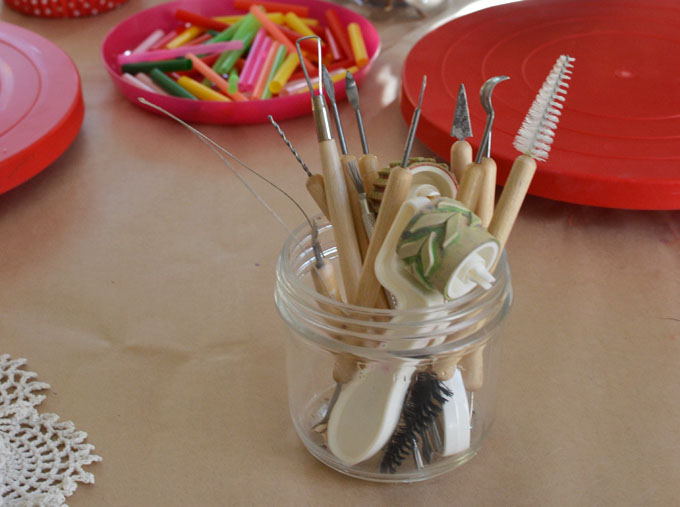
1. Set up the table by giving every child some space and board to work on. (We used cardboard and the turntables, but since then I have purchased the proper clay boards.) Set the tools and materials in the center.
2. Give each child a chunk of clay. They LOVE using the wire cutter. When they are little, you can have them help. I had to eventually put it away for this group because it became and obsession and they couldn’t stop!
3. No other instructions needed, just let them explore!
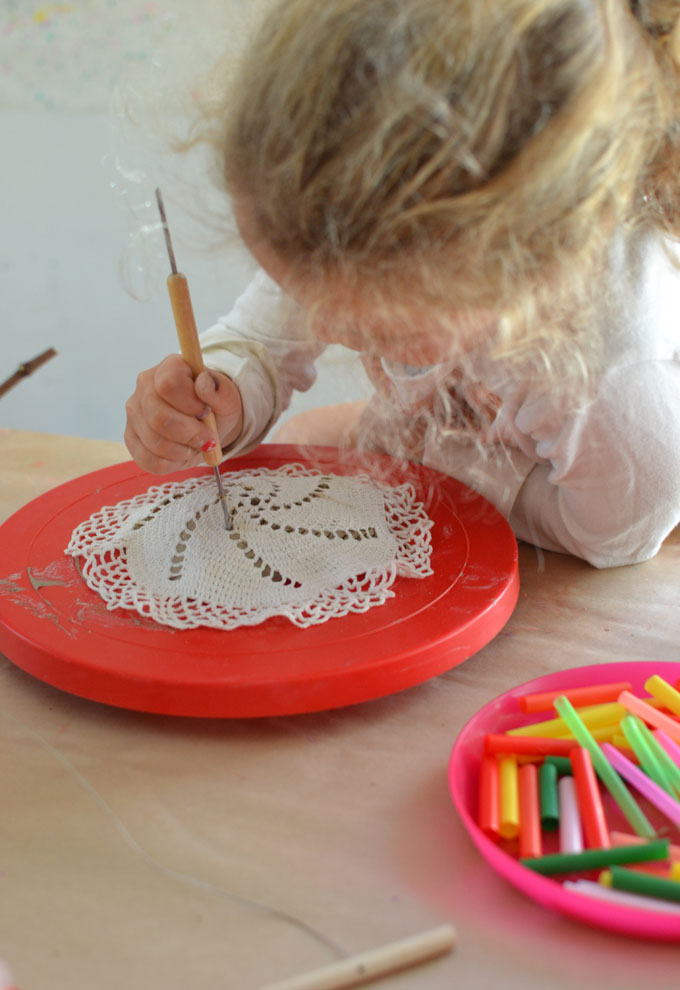
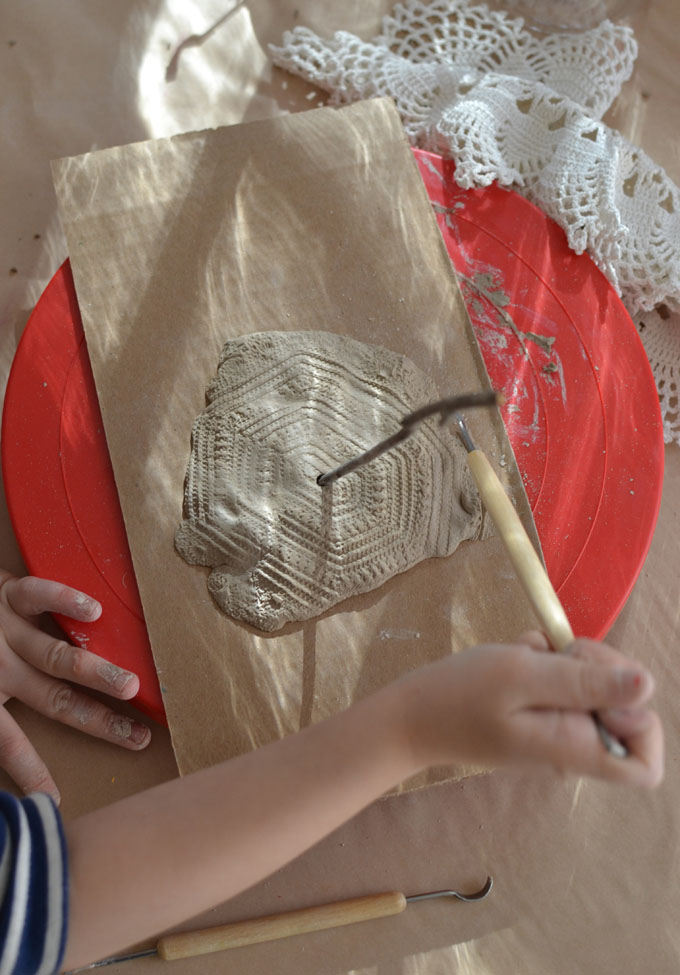
They can use tools to poke holes into the clay…
They will experiment with making patterns on the clay…
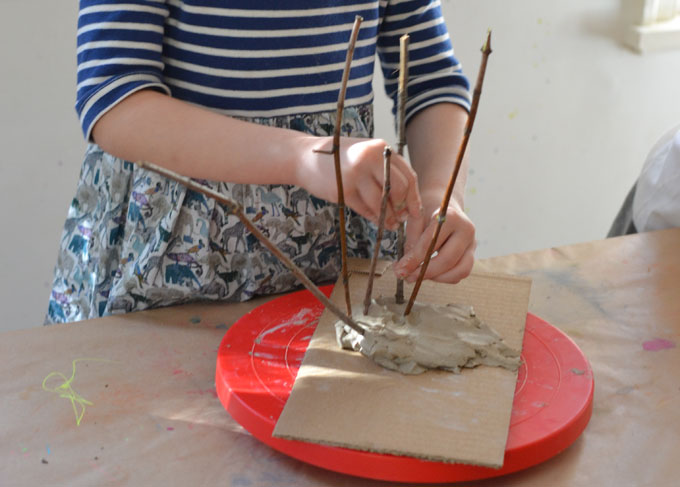
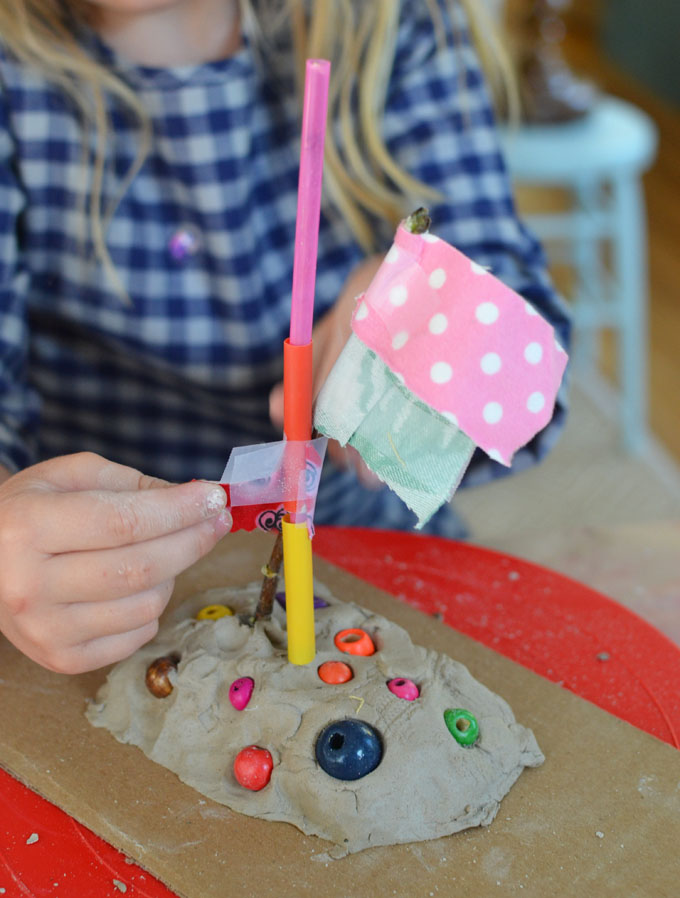
They will discover how they can stick things into the clay and the object will stay upright…
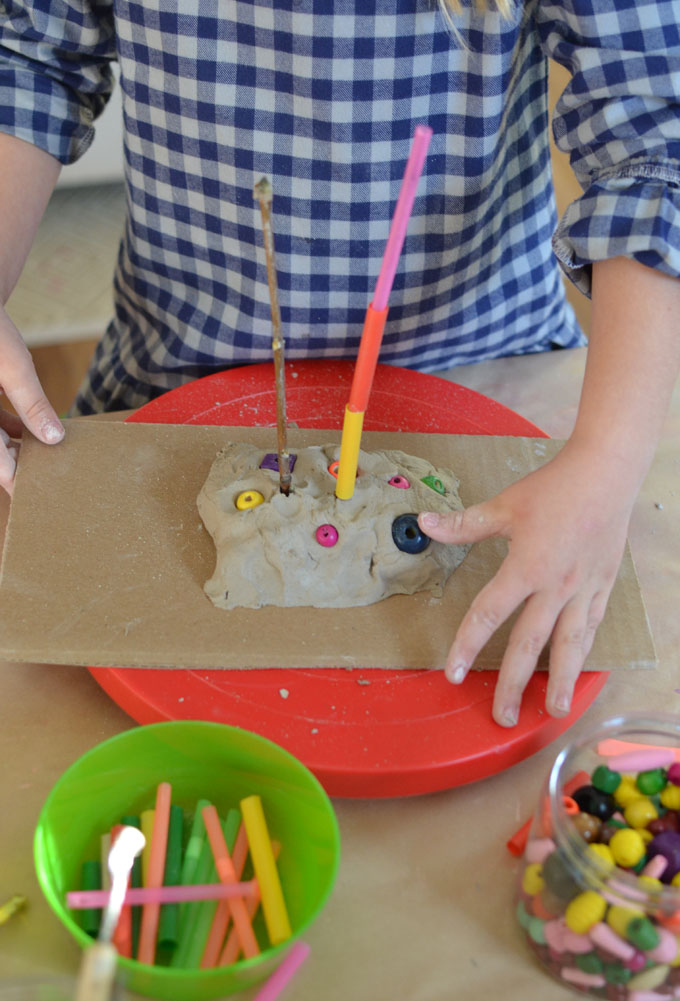
They can push in beads, and stack straws on a stick…
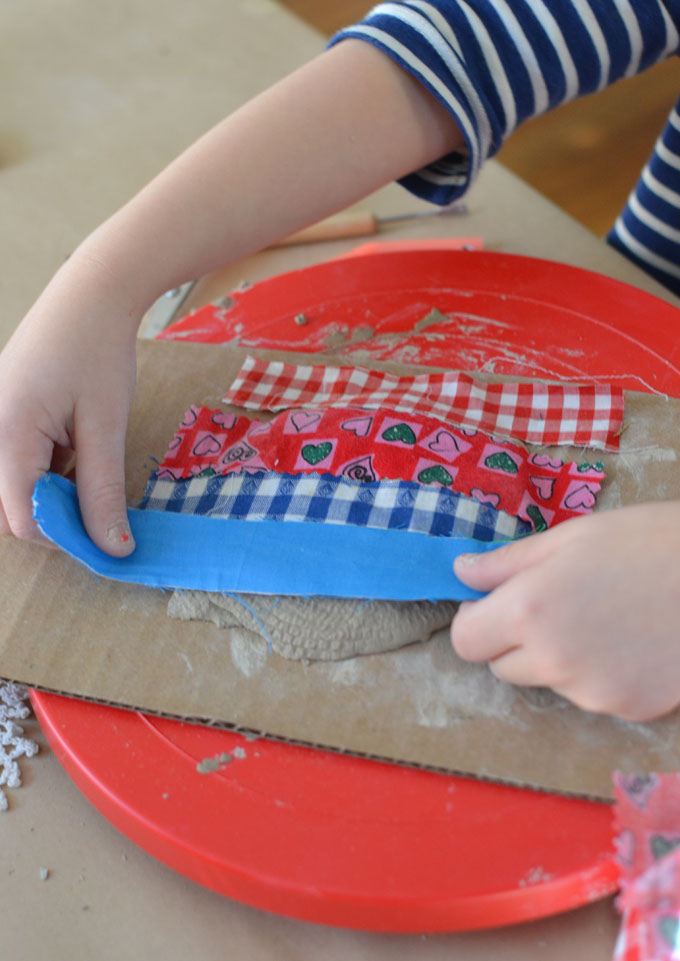
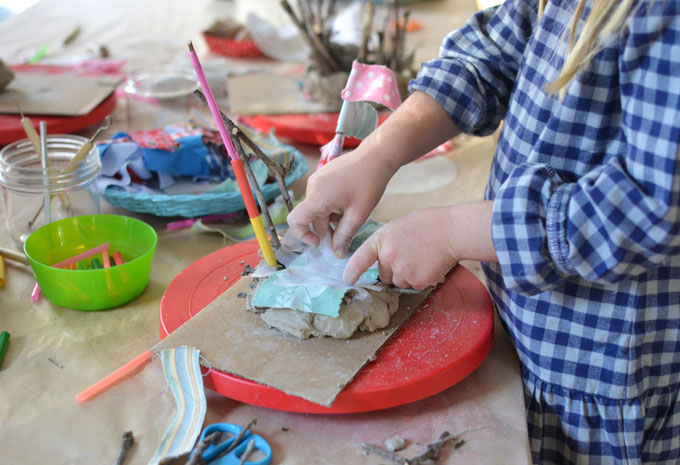
They can cover their clay and push on it through fabric….
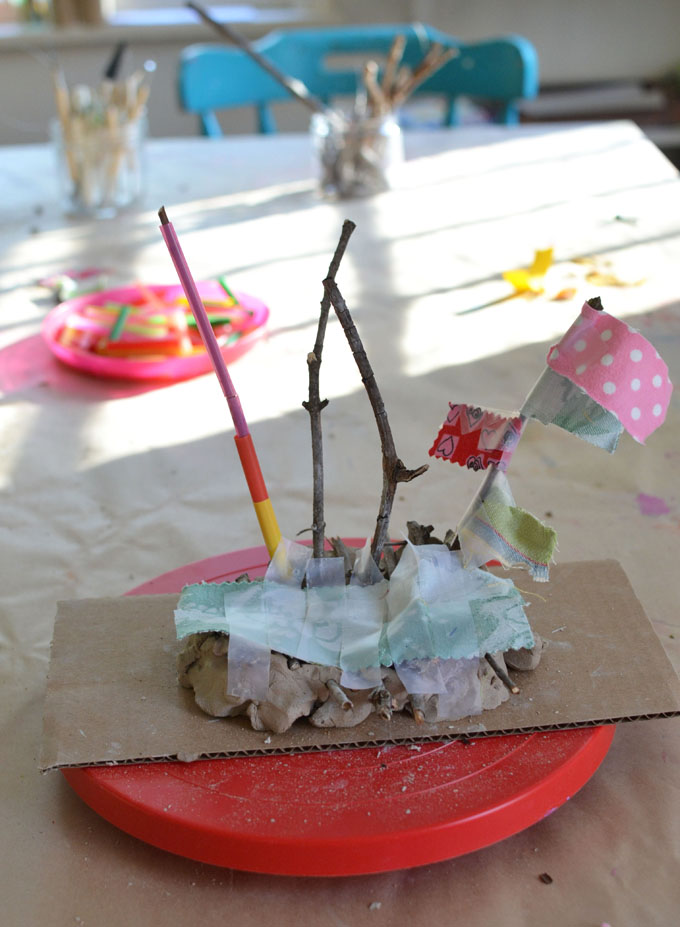
They can find other things on the art shelves, like tape, and turn their experiment into something more concrete, like a boat…
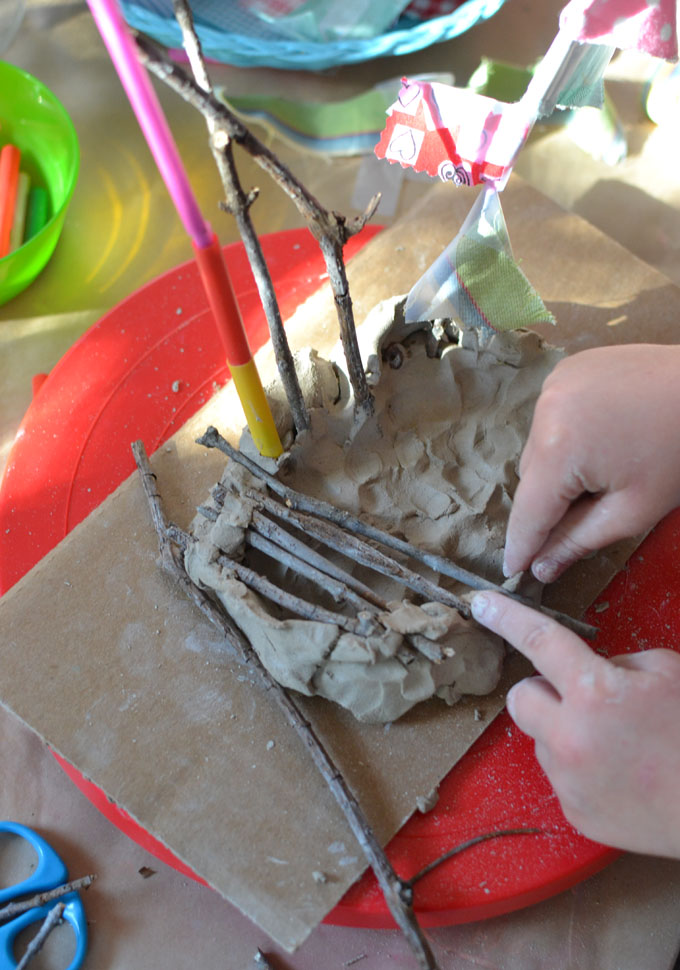
They can build a bridge with twigs…
They can pull off smaller pieces and create more detail…
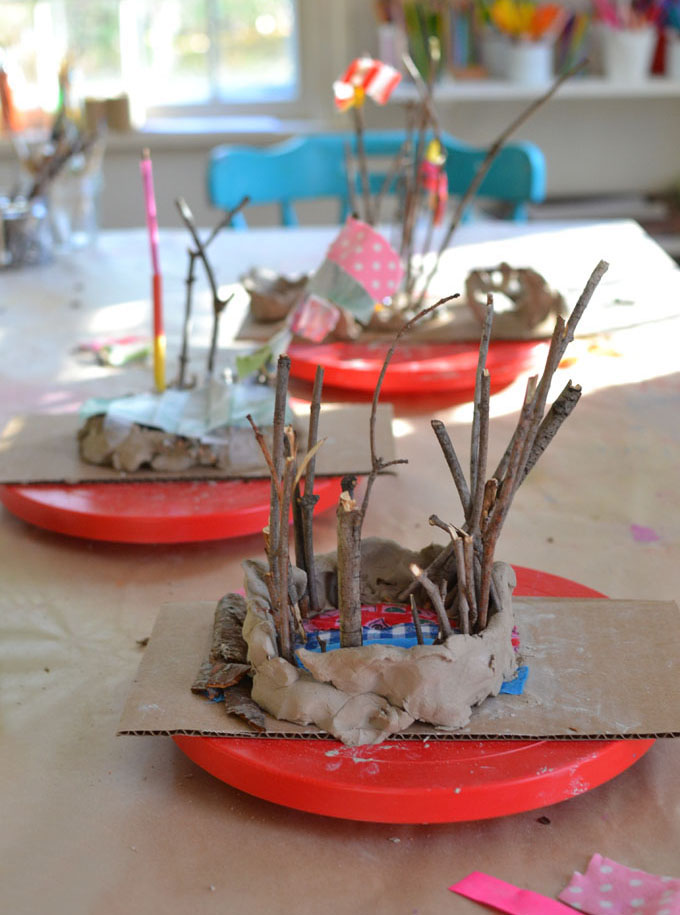
They can rework and rebuild and play and create until class is over and then they can stand back and look at their work and declare, “It’s finished.”
These clay pieces dried for a week, turning a light gray color. I’ve read on other blogs that you can add a sealant to them so they don’t crack and get brittle.
Once they have explored the clay well enough, you can start teaching them some techniques, like coil pots, pinch pots, and hand building. Visit my friend Samara’s blog Purple Twig for lots more structured clay classes with kids. She has a kiln in her studio so she’s at a whole different level. Her students make SUCH amazing things.
What Can Kids Make With Clay? 18 Clay Ideas for Children
Affiliate Disclaimer
As an Amazon Associate I earn from qualifying purchases. It helps me keep the website going. Thank you for your support.
You may have one of those crafty, artistic children who likes to make things all the time. Or perhaps you have a long school vacation stretching out in front of you. Either way, if you have been wondering what can kids do with clay, you are in the right place. Here are some great ideas clay ideas for kids to keep little fingers busy.
Kids can make a range of amazing things with clay. Depending on age and ability, children can make anything from pinch pots to portrait sculptures. Some clay ideas for kids are very simple, involving just clay and imagination. Other clay projects involve equipment like a potter’s wheel or a kiln.
There are lots of things that kids can make with clay. Their ability to follow suggestions and learn new skills will depend upon their age. However, what is most important is that they are having fun.
It’s a good idea to remember that when you are young, making a mess is an important part of learning. And, mess is fun! After all, clay is basically just mud, so be prepared to get muddy.
Adapt your expectations according to how old your child is, and focus on letting them have fun. So, without further ado, here are some clay ideas for children…
What Can Kids Make With Clay? Fun Clay Ideas
Don’t have time to read through all these clay ideas for children? Simply click on the relevant link below to take you to a particular clay project for kids:
With most of these ideas, you can either use air-dry clay or pottery clay that can be fired.
TOP TIPS – Before You Start
It is best to get your kid to work directly onto a board or tray. That way you can easily lift it out of the way once they are finished. When the clay has dried it will come away from the tray easily. The tray will clean up easily with soap and water.
Depending on the clay idea for kids that you choose, here are some things that you might need.
Things You Might Need
What Can Kids Make with Clay – Idea 1
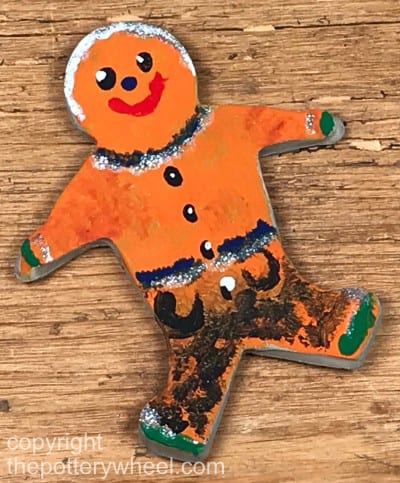
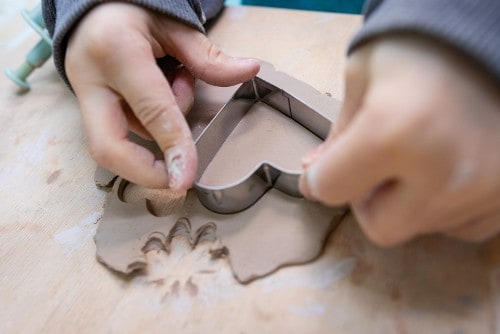
Cookie Cutter Gingerbread Men
Children love this one because most children love gingerbread men. It’s one of the best ways of introducing young children to clay because you’re using a template they already know.
The easiest way to make a gingerbread man from clay is to roll out your clay with a roller. Don’t roll it too thin, as you will struggle to get it out of the cutter. A good thickness is about 1/3 of an inch.
Using a gingerbread man cookie cutter, press down on the clay, as you would biscuit mix. Depending on the clay you’re using, you may need to press down quite firmly on the clay with the cutter. So, if your child is very young, you may need to help.
Once the cutter is touching the surface of the table, give the cutter a wiggle. This will loosen off the excess clay, which you can then peel away easily.
Carefully press the gingerbread man from the cookie cutter. Don’t worry if his hands go a bit wonky when he comes out. You can reshape these easily once he’s on the table.
If you are using air-dry clay, it’s best to leave these for 2 or 3 days to dry out. Some people paint clay when it’s wet and let the clay dry out with the clay. But I think it’s best to leave it to dry first if you can. Clay tends to shrink when it’s drying, so ideally it should have shrunk before you paint.
Also, it’s likely to be darker when wet. So, you’ll get a better idea of the paint color when the clay is dry.
What Can Kids Make with Clay – Idea 2
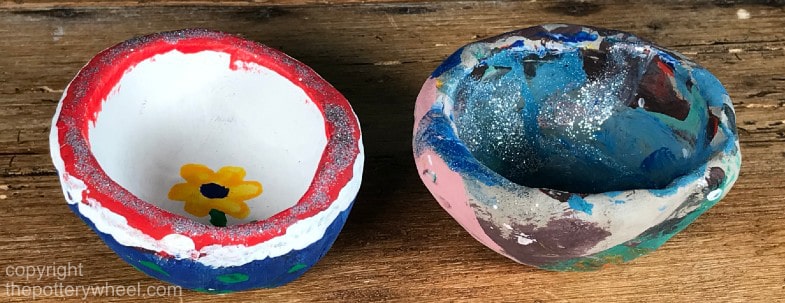
Pinch Pots
Pinch pots are a really fun idea for what kids can make with clay. They are great because making a ‘real clay pot’ can boost a child’s confidence no end. With a little help from an adult, a pinch pot can be made at any age.
Pinch pots are simple to make, and you don’t need a potter’s wheel. Here is how it is done:
Take a lump of clay big enough to sit comfortably in the palm of your kid’s hand. Roll the clay into a ball. You can roll it against the table or palm to palm. Once it’s in a smooth ball, press your thumb slowly but firmly into the middle of the clay. Press until you can just begin to feel the thumb with the palm of your opposite hand.
Then you can open up the walls of the pot. Do this is by gently pinching the pot with the side of your thumb and forefinger. This pinching motion is a bit challenging for little hands, but it is great for developing coordination and muscle strength.
Once the pot has been shaped, you can tap the rim and base gently on the table. This will create a flat bottom for the pot to sit on. And will even out the rim to create a neat finish.
One option for decorating the pot is to melt some marbles in it. This is possible if you are using pottery clay and the pot is going to be fired in a kiln. To find out more about melting marbles in clay pots, check out my article here.
However, if you are using air-dry clay, when the clay has dried the pinch pot is ready to be painted with whatever designs appeal! Here is a short video on how to make a pinch pot with a young child.
What Can Kids Make with Clay – Idea 3
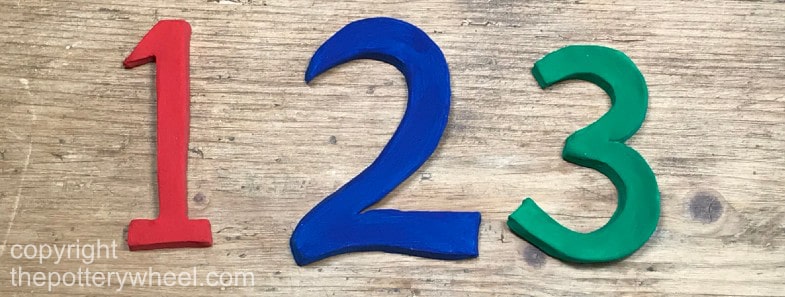
Clay Letters and Numbers
Clay letters and numbers are great if your kid is just learning literacy and numeracy. They really have to think about the shapes of letters and numbers. And you can make balls of clay to help them understand what the numbers really mean.
There are a number of ways you can do this. Either you can start by rolling out a slab of clay with a rolling pin. Roll it about ½ thick, so that when they are dry you can prop them up if you want.
Depending on the age of your child, you can mark out on the clay where they need to cut. A good idea is to draw a series of dots on the clay for them to follow. This is good for their motor skills. Then your child can use a safe kid’s ‘knife’ to cut out the shapes of the letters.
Once the letters are dried your child can, of course, paint them any color they like. This is such a versatile activity for kids to do with clay. Some of the things that you can do with the letters or numbers after they are finished are:
What Can Kids Make with Clay – Idea 4
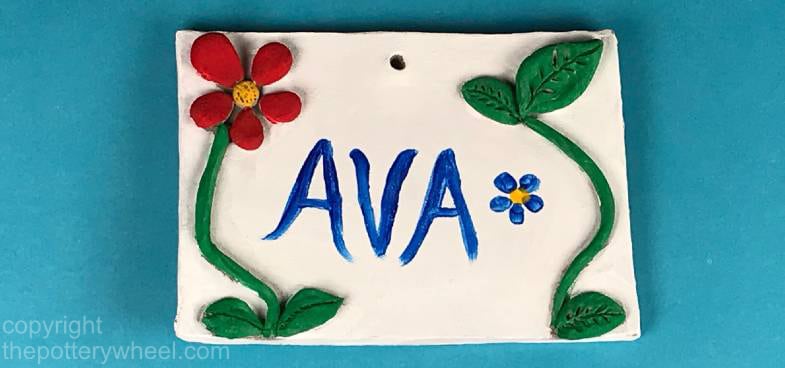
Bedroom Door Name Plate
One variation of the letters and numbers idea is to help your kid make a door plaque. As you probably know, children can be quite territorial. They love to have a nameplate on their bedroom door, particularly if they have made it themselves!
You can make a nameplate by rolling out a slab of clay. If your child can cut the slab into a shape that they like. This can be whatever appeals to them – a car, a flower, a dog. Or, if they are very young, you can simply help them cut out a rectangle.
You can blend the letters onto the slab when the clay is still wet. Or you can wait until the clay is dry and glue the letters onto the plaque. It’s easier to get a good fit between the plaque and letters if you stick them together when wet. However, this is a bit fiddly, so gluing the dry clay may work better for younger children.
Once the letters are dry and in place, the letters and plaque can be painted. Painting the letters in a bright color will make the name pop. Kids love this pottery project.
What Can Kids Make with Clay – Idea 5
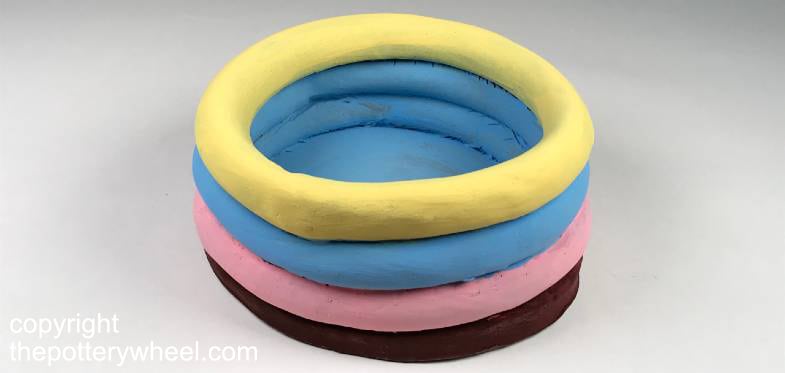
Coil Pots for Kids
Coil pots are one of the oldest ways of making pottery. There is a long tradition of making coil pots in pottery that your kid can easily join!
The easiest way to make a coil pot is to start by making a flat base. You can do this by rolling a small ball of clay and then flattening it out. It can be flattened with a roller or by squashing it with the palm of your hand.
Once you have your base, then roll out some thin sausage-like coils with the palm of your hand. It’s best to make these about the thickness of your pinky finger. This size is easy to pick up and work with, but fine enough to make a nice pot shape.
Wet the edge of the clay base with a bit of water on your finger. Also, wet the edge of the coil a little. Then gently but firmly press the coil down onto the edge of the base. You can repeat this process for a number of coils.
Often potters will blend the clay on the inside of the pot together to make the coils stick together more. You can see a video on how to do this here. If your child is a bit older and has the dexterity, you can help them to do this.
But if they are a little young, just wiggle the coils a little on top of each other. This should help them stick together enough to paint them once they are dry.
What Can Kids Make with Clay – Idea 6
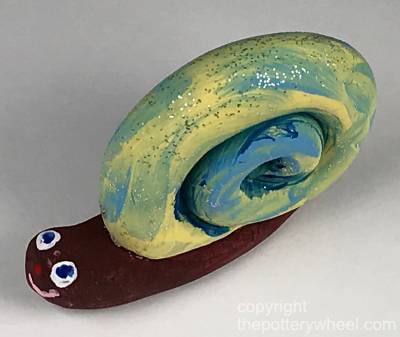
Clay Snail
Whilst we are on the subject of clay coils, it seems like a good time to talk about clay snails. This is a really cute clay project for kids. And it can be adapted to suit the child’s age and ability.
First, start off by rolling a coil of clay. A tip when you are making coils is to twist the clay a little before you roll it on the table. Clay has a habit of flattening out as you roll it. If you twist the ends, so it’s like a pastry twist, it stops the clay roll from flattening out.
Once you have made your clay coil, roll it into a snail shell shape. Next, make a little sausage shape for the body and head. If your child is older, you can teach them to make the head a little wider than the tail.
Join the coil shell to the sausage body. Clay can come apart if it is simply pressed together. You can make sure you have a good join is to score the surface of the clay with a fork. Then dab a bit of water on the scored surface before you press the two surfaces together. You will probably need to help your child a bit with this.
Wait for the clay to dry and then paint your snail. It’s nice to capture the facial features of the snail.
What Can Kids Make with Clay – Idea 7
A Potter’s Wheel for Kids
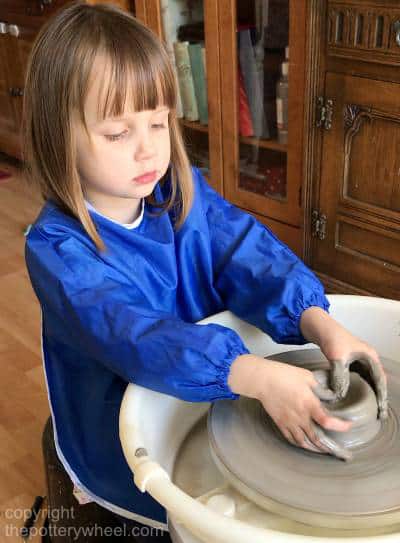
I’m hesitant to say that ‘all kids love a potter’s wheel’, but I have never met one that does not! What is not to like. A potter’s wheel involves spinning, clay and excitement. It’s difficult to imagine why a child would not like pottery on a wheel.
It is a strange thing, but they also seem to have a good instinct for what they need to do. The first time my daughter had a go on the wheel, she simply sat down and got on with it. She was 3!
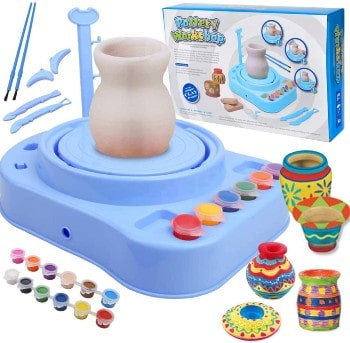
You can buy pottery wheels that are specially made for children.
These are a fun, economical option. And they don’t take up a lot of space in your home.
Many of them, like this one, comes with some clay as well. So you are good to go as soon as it arrives.
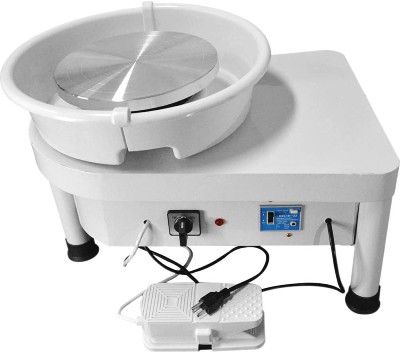
However, there are adult versions of wheels that are good for children too. Quite a few potter’s wheels are made to sit on a tabletop. So, with the right chair, they can be a good size for kids. Other adult wheels have very short legs and are a perfect height for children.
This is the potter’s wheel that I use. It is quite compact, so it’s a good option if you don’t have a lot of space. My 3 year old uses this wheel quite happily. Even so, it works well and is pretty strong for its size.
What Can Kids Make with Clay – Idea 8
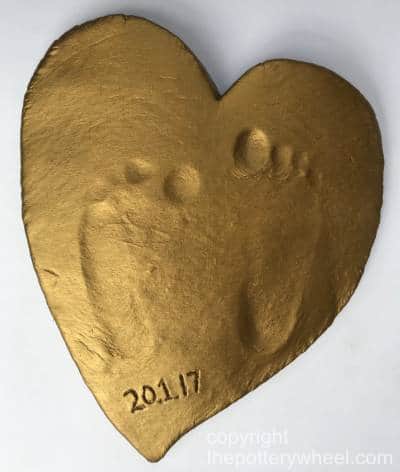
Hand and Foot Prints In Clay
Making hand and footprints in clay is fun for your kid and a nice memento for you too.
To make hand and footprints, roll out a slab of clay. Make sure that your clay is quite soft, otherwise, you won’t get a good impression. You can soften air dry clay easily by adding a little water and rolling the water in with your hands.
Try to make the surface of the clay as smooth as you can. The easiest way to do this is by gently dragging the edge of a credit card over the surface.
Once you have a nice smooth surface, ask your kid to put their foot or hand onto the clay. They will need to press down quite firmly to get a good impression. You can do this activity with younger children too. However, you will need to hold their foot or hand against the clay and gently press it into the clay.
After you have made the impression, make sure to wash their hands and feet. Most air-dry clay is non-toxic, but it’s best to get rid of any residue on their skin. If only to protect your carpets!
A nice touch is to scratch the date the impression was made into the clay surface too.
What Can Kids Make with Clay – Idea 9
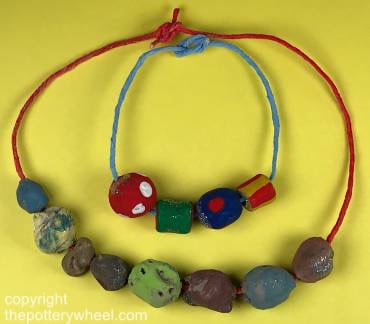
Necklace Beads
To make clay necklace or bracelet beads, divide a ball of clay into small portions of clay. Something about the size of a grape is a good quantity. Roll, squash, or pat the small balls of clay into whatever shape you like.
When the clay is still soft, take a knitting needle or cocktail stick and poke a hole through the bead. If you are using something narrow to poke, you may need to wiggle it around a bit. This will widen the hole and allow you to pass string through when the clay has dried.
Once dried, you can paint and decorate the beads as you like. Remember to seal your paint with varnish or a craft sealant when it is dried. This will prevent it from coming off on clothes or skin if you wear the beads.
What Can Kids Make with Clay – Idea 10
Christmas Tree Decorations
You can make Christmas tree decorations out of any of the traditional festive shapes. Simple shapes that work well are stars, bells, and angels. You can make these freehand, or use a cookie-cutter.
We used an angel cookie cutter here. Once the clay was dry, we painted in poster paint and sprinkled glitter directly on the wet paint. You can add whatever glittery sparkling decorations you have in your craft box.
Remember to poke a little hole in the top part of the clay when it is wet. This will allow you to hang it from the tree when the time comes.
What Can Kids Make with Clay – Idea 11
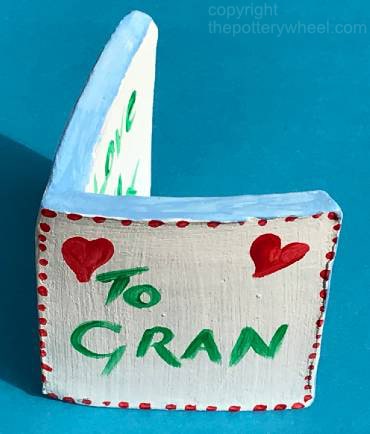
A Clay Greeting Card
The thing about greeting cards is that they normally get thrown away or recycled after a few days. This is such a waste. It’s not great for the environment and the sentiment behind the card is lost too.
One solution to this is to make a clay greeting card, like this….
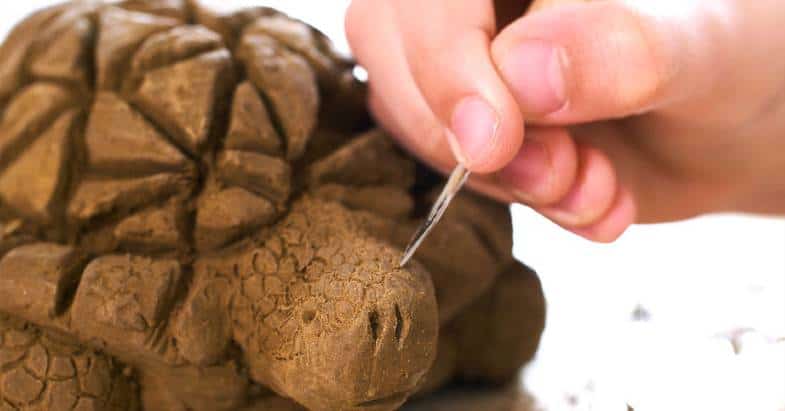
Simply roll out a slab of clay, around ¼ inch thick. Using a ruler and a craft knife or needle tool, cut out two square shapes of equal size. Using a fork or the knife, gently score one side of a square. Add some water to the scored side, to make it a little mushy.
Then score the thin strip of surface that the edge is going to join with. Add a little water to that section too. This process creates a gluey substance called slip, which is good for joining clay. When the surface of the two sections you are going to join are both gluey, you can press them together. Do this gently but firmly and wipe off any wet clay that squeezes out from between the two surfaces.
Tidy up the edges of the card gently with your finger. Then set the card aside carefully to dry. Once it is dry you can paint and decorate it as you like. And you can write a message on the card that will keep treasured rather than trashed!
What Can Kids Make with Clay – Idea 12
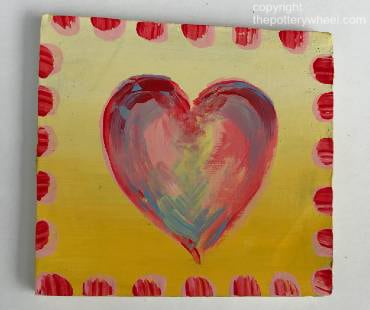
Make A Wall Tile
You may or may not want to incorporate your child’s clay tile into your home décor. But either way, a clay tile is a very simple way to keep a kid occupied with clay.
Simply roll out a slab of clay, and cut out a square shape with a craft cutter or needle tool. Allow the clay to dry and then let your child paint whatever design they choose on the tile. Honestly, this is one of my daughter’s favorite things to do. Sometimes the simplest things are the most entertaining for them.
And they do make a lovely keepsake. I have even framed a couple of her tiles and have hung them in the hallway.
What Can Kids Make with Clay – Idea 13
Clay Animal Figurines
Your child can make animal figurines out of potter’s clay, air dry clay, or polymer clay. Each material has a different look and finish.
Polymer clay is already brightly colored, so it won’t need painting afterward. All you need to do is bake it in the oven after your kid has finished their modeling.
The good thing about polymer is that it is very tough. It can survive being dropped and bashed around by enthusiastic little hands.
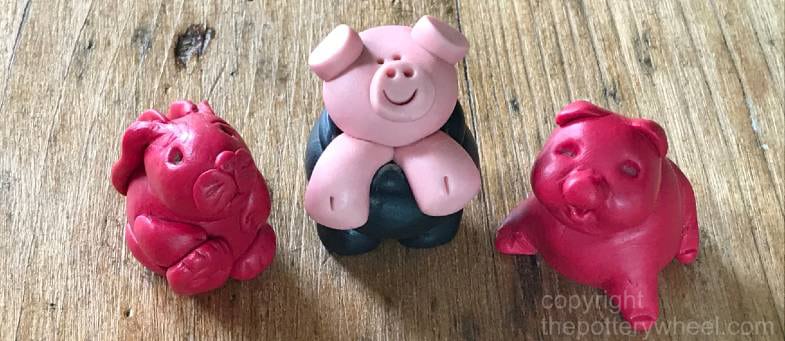
Here are a few little figures that I made out of polymer clay when I was 12 for my dad. I’m not going to tell you how long ago that was! Amazingly, they have survived over the years. And actually, it’s really nice for me to have them now to remember my dad by.
Alternatively, if your kid prefers to get squish fingers with clay, you can also make animal figurines out of clay. Air-dry clay or potters clay that can be fired is fine for these little pieces.
What Can Kids Make with Clay – Idea 14
Make Your Favorite Cartoon Character
A nice variation on the subject of modeling animals is for your child to make their favorite cartoon character. This is probably one for children that are a bit older. If your kid is very crafty, then they may manage when they are in primary school. However, I’d say that this is probably one for children that are 10 years or over.
Capturing a likeness is a bit of a skill. Having said that, young children are passionate about their TV heroes. So even if their model looks nothing like their favorite character, it really doesn’t matter.
What Can Kids Make with Clay – Idea 15
Fridge Magnets
Fridge magnets are cute and when crafted by your child they can make nice gifts for relatives. They can either be simple figurines or objects, or you can make letters and numbers to go on the fridge.
There is normally quite a bit of traffic in and out of a fridge. So, I’d recommend either using polymer clay which goes rock hard in the oven. Or if you have access to a kiln, you could use pottery clay that goes hard when it’s fired.
If you only have access to air dry clay, that’s fine. Just use a decent magnet and stick it high up on the fridge out of reach of little fingers. You can buy small self-adhesive magnets that are perfect for the job.
Remember to keep the clay object relatively small or the adhesive won’t be sufficient. And the magnet won’t be strong enough to support it. Small light clay objects work best for this project.
What Can Kids Make with Clay – Idea 16
Garden Sculpture for Kids
This fun clay project for kids is great fun. They can either go down the traditional garden gnome route or make any kind of object they like. Wildlife is a really lovely subject, some ideas are birds, hedgehogs or rabbits. They will nestle nicely in the garden all year round.
If you are struggling to find a firing service near you, check out this article for some ideas. There is usually a potter or ceramics supplier nearby who can help you out. All you need to do is take your pottery along to their studio and they will fire it for you.
What Can Kids Make with Clay – Idea 17
Plant Pot Painting
Some kids, young toddlers, in particular, get a bit grossed out by sticky hands. You may have a little one who does not want to put their hands in messy clay.
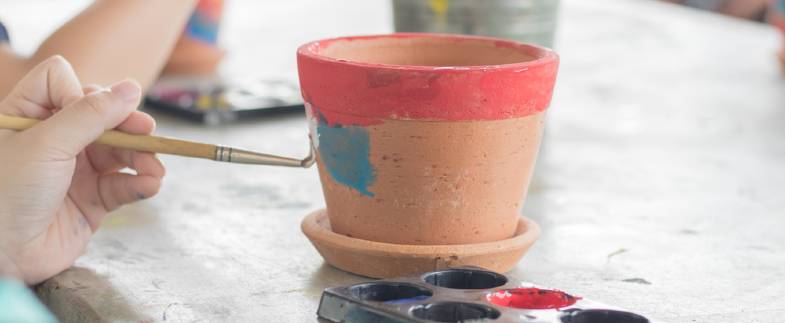
If that’s the case, then a fun option is to paint a ready-made plant pot. You can buy plant pots that are specially made for crafting purposes. Or you can simply get a few from a local garden supplier.
Acrylic paints are water-resistant when they dry. So, they are a good option if you are planning to use the plant pot once it is finished.
If you are putting the pot outdoors, then it might be an idea to seal the paint to preserve it. You can preserve acrylic paint with clear varnish or craft paint sealant.
What Can Kids Make with Clay – Idea 18
Making a Clay Face / Portrait
My background is as a portrait sculptor, so I will admit to having a bias in favor of this project.
Nevertheless making a clay face has got to be one of the most fun clay projects for children. Here are some reasons this is such a great exercise for kids:
Your kid can either do a self-portrait or a portrait of someone else. When they are younger, simply getting the eyes, nose, and mouth in the right order is a great achievement.
As they get a little older, it’s amazing to see how much of someone’s character they can capture. Just don’t expect to be flattered!
Final Thoughts
These are just a few great clay ideas for kids. If you are wondering what can kids make with clay, the answer is that the sky’s the limit. How adept children are at modeling clay will depend on their age. Regardless of skill, clay can be incredible fun. My main tip would be to let go of expectations of what your kid should be making. The main focus should be on having fun.
CLAY AND DOUGH CRAFTS FOR KIDS: Find out how to make your own Clay, Play Dough, Salt Dough, etc Arts and Crafts creations with the following instructions, patterns, and activities for children, toddlers, teens, and preschoolers
Below you will find many Dough and Clay activities crafts ideas and projects for kids. Find out how to make your own Clay, Play Dough, Salt Dough, etc Arts and Crafts creations with the following instructions, patterns, and activities for children
HELPFUL HINTS ON WATER-BASED CLAY
1. Clay can be kept in a crock or a galvanized container. The clay should be covered with a damp cloth so that it will remain moist and pliable.
2. Scrape of dry clay may be reconditioned by soaking them in a container of water (making). Drain the excess water off and stir the liquid clay until it is smooth. Impurities may be removed by running the liquid clay (slip) through a cloth or strainer.
3. Clay cannot be «baked in an oven»; it must be «fired in a kiln» at a temperature of at least 1500 degrees Fahrenheit.
4. If you do not have a kiln, the dry pieces may be painted and shellaced.
5. Details (handles, eyes, nose, ears, etc.) which are added to pots or figures must be made of wet clay and must be of the same consistency as the piece of clay to which they are added. These additional parts should be applied with slip (liquid clay) and «welded» firmly to the piece.
6. If the clay is free of air bubbles and if you have a kiln, the dry clay pieces may be fired and glazed.
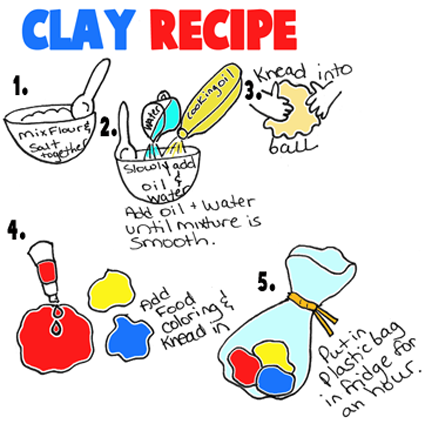
A Recipe for Play Dough / Clay
4 cups of flour
1 cup of salt
2 tbsp cooking oil
1 1/2 cups water
food coloring
Mix the flour and salt together in a bowl. Then add oil and water together until the mixture is smooth. Then knead the dough into a ball, as illustrated above. Next separate the clay into a few different balls and then add different color food coloring in each ball and knead the color into each ball. Then put the clay into a plastic bag and refridgerate for an hour. Then go ahead and play with your clay / play dough.
Basics of Making Objects with Clay
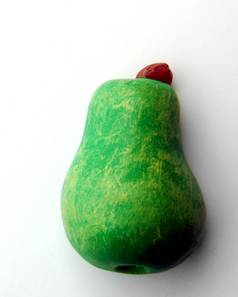
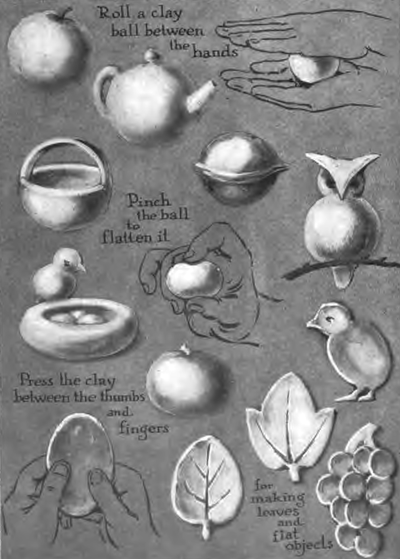
You can make so many cool things out of clay. Use the above pictures to learn how to make some really col objects and animals. Start off by rolling the clay between the palms of your hands. You will get a ball from this process. You can make things like fruit, owls, birds, nut shells, and tea pots fromt his shape. Then try pinching the clay to get objects such as the baby’s chick’s oval body. You would pinch the clay and then push the clay inwards for the birds nest. Press the clay between your thumbs and fingers to flatten it out to make objects such as grapes, and leaves. Play with the clay to figure out even more techniques and methods of sculpting.
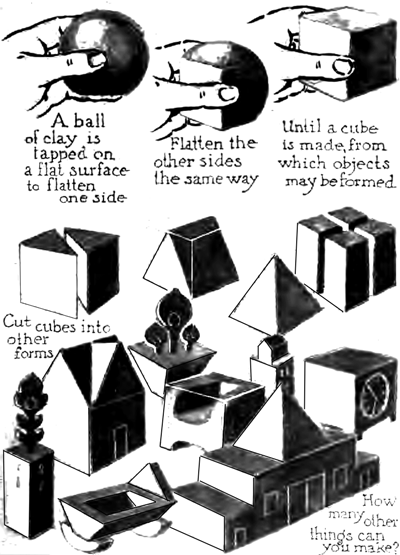
Making Objects with a Ball of Clay
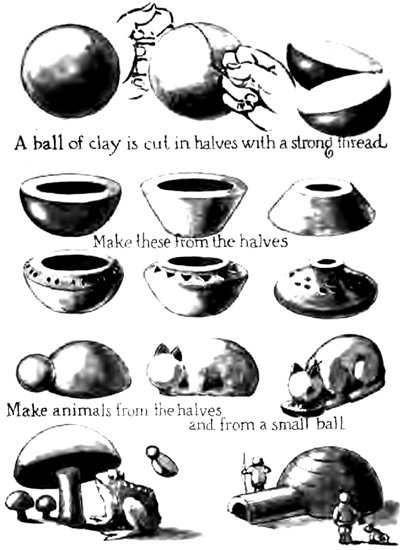
Clay is an amazing material to work with. Young and old people alike can make amazing forms with clay. The above illustrations will show you how to make different objects with a ball of clay. such as pottery, an igloo, and a mushroom, and a cat. Follow the instructions and diagrams above to make some neat forms. And most importantly. have fun.
Look at the illustrations above to learn how to make a cube from clay. You basically just take a ball of clay and flatten on all sides by following the instructions above. Now you can make many objects from those cubes.
Techniques Kids Can Use For Making Clay Vases and Jars
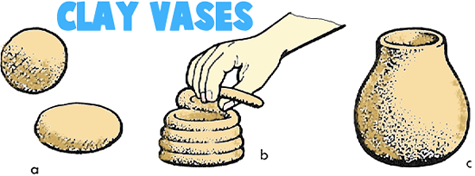
You will need enough clay for a medium size jar or vase (not plastic type if permanency is desired), plastic or oilcloth table covering, molding tool such as popsicle stick. Lay out table covering. Prepare clay by kneading it and then throwing it hard on the table covering several times to break up any air bubbles. Roll a piece of clay into a ball and then flatten like pancake to make the bottom of the jar (sketch a). From the rest of the clay make long rolls or coils of equal thickness. Build up sides of the jar by winding the coils on top of each other around the edge of the base until the desired height and shape is obtained (sketch b). Then gently smooth inside and outside with moistened fingers. A design can be carved into the clay with molding tools. Lay aside to dry (cover with a damp cloth for the first 24 hours if pottery clay has been used).
Sculpting and Molding Animals and Creatures Out of Clay
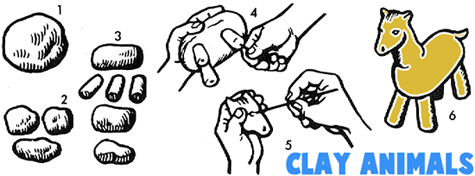
You will need ready-prepared modeling clay or the variety which can be mixed with water (from your hobby store); poster paints; brush; newspapers; and toothpicks Children will enjoy making animals out of clay. Spread newspapers on table and make animals as directed. When dry, paint with poster paints. Simple instructions for making animals are as follows: (1) Knead the clay and roll it into large balls. (2) Break it into smaller pieces. (3) Mold into shapes of legs and bodies. (4) Put together to form animals. (Toothpicks may be stuck through the legs and into bodies to hold animals together.) (5) Use toothpicks to draw in features. (6) Allow to dry.
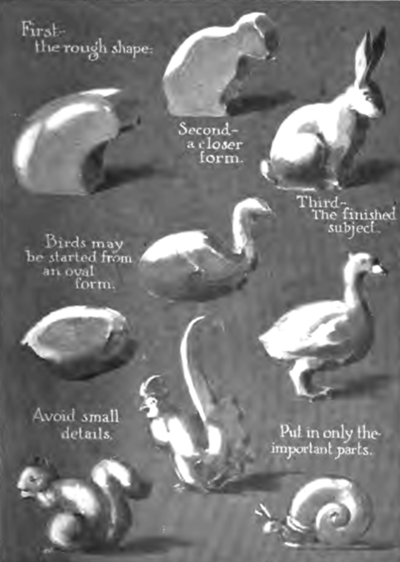
Another Way to Make Animals Out of the Clay
Learn how to mold or sculpt animals such as bunny rabbits, ducks, roosteers, squirrels,a nd snails out of clay by looking at the illustrations above.
Clay Beads Bracelets or Necklaces
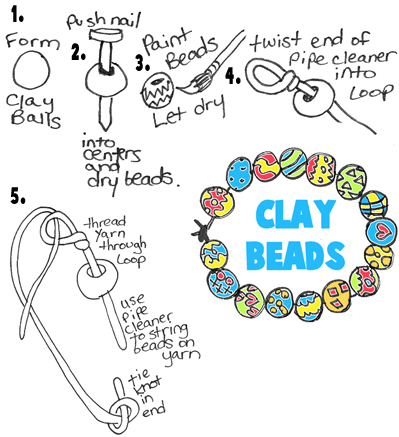
These clay beads turn out beautifully. Buy some self drying clay. Then form small clay balls by rolling the clay back and forth in your palms. Then get a nail and poke a hole in each clay ball. Make sure that when you take the nail out of the clay that the hole doesn’t close back up. When the beads have completely dried, use acrylic paints (or other craft Paints) to decorate the beads as you see in the picture above. Get creative with it. After the paint has dried, you can start making jewelry from them, such as a braclet or a necklace. Get elastic, wire, string, or other item to string the beads onto. If you need a needle, but don’t have one, you can use a pipe cleaner twisted into a loop to thread the string or cord onto in order to string the beads on. Take a look at the descriptive illustrations above to see how to do this. Tie the necklace or bracelet closed when you are done.
Pressing Handprints in Clay
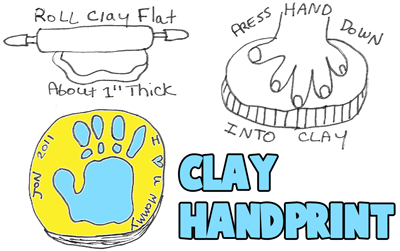
Simple in concept, but an amazing present to make for Mom or Dad. Just roll out that clay as flat as can be. shove your hand into the clay. let it dry. then paint. That is all there is to it. Now your handprint can last forever.
Make Clay Ducks for a Magnetic Pond
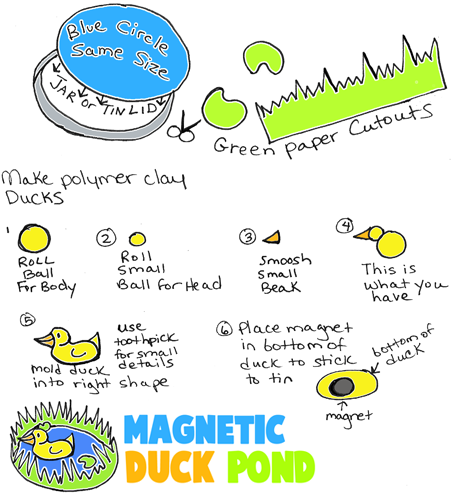
To make the ducks, roll a yellow piece of clay into a ball by rotating it back and forth in between your palms. Make a smaller ball too for the face and head. Press an orange piece of clay into a beak and attach to the duck’s head. Smoosh yellow clay into the back tail feathers. Use a toothpick and carve details into the duck. Turn over the duck’s body and stick the magnet into the bottom of the duck. Let the clay completely dry. To make the pond, use a tin lid, trace a circle with the tin lid. Glue the blue circle into the tin’s lid. Cut out grass and lilly pads. and glue the lilly pads donw on the duck pond. Cut out the grass and attach around the tin. When al is dry, you can play with your duck pond.
How to Make Salt Clay Art Pictures
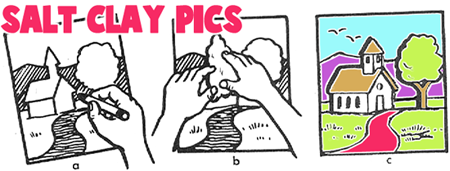
Materials Needed are as follows : a piece of white cardboard (from laundry, suit-boxes, etc.) ; pencil; crayons; shellac; brushes; water colors; and salt clay. Draw a freehand picture on the cardboard in pencil (lightly). Color with crayons except area to be covered with salt clay (sketch a). Shellac picture and allow to dry. While picture is drying, mix salt clay. Mold onto picture in places desired (sketch b). When dry (about 2 days), paint with water colors.
More Clay and Play Dough Crafts


Home |Contact Us | Artists Helping Children’s Privacy Policy |
All website design, text, graphics, selection and arrangement thereof, and software are the copyrighted works of AllFreelance, © Copyright 2000v- 2018
One of the most exciting dimensions of teaching the visual arts education papers that I coordinate for early childhood teacher trainees at Victoria University of Wellington (New Zealand) is getting the students to use clay for their own art making. Often it is the very first time these adult students have used clay so they find it a little bit daunting. However, after their initial explorations with the medium they usually get very excited by what they create and, through their own process, start to see lots of possibilities for using clay with young children.
Whilst the students need to create an individual piece of work for their assignment, there is usually a lot of chatter and sharing of ideas as they proceed. One of my students remarked, when she was reflecting about using the medium with young children, “I think clay is a great way to get people talking … I found that I was talking a lot with the other students around me about what we were creating. Clay is a modelling tool so I think it allows children to … express their thoughts and ideas with others at the table” (D Pilay, 20 May 2014).
This student’s observation of how working with clay facilitated the sharing of ideas and thoughts is certainly something I have often observed when working with young children in an early childhood environment. From many anecdotal observations of children using clay I feel strongly that, apart from teaching young children the physical skills required to use the medium successfully to create three dimensional artworks, using clay gives children another language for expressing their thoughts, ideas and emerging working theories about their world (Ministry of Education, 1996). In other words, helping them to make their thinking and learning visible (Project Zero and Reggio Children) through another valuable art medium.
It has also been my observation that the ability to make something solid that has a ‘back’, ‘sides’, ‘front’, ‘underneath’ or ‘inside’ seems to motivate young children to use clay to create objects that interest them. The technical problem-solving that is required for complex clay pieces provides stimulating and creative challenges for children. As children work to solve technical problems with clay they often collaborate, sharing their skills and knowledge with each other. However, teachers also need to work alongside children in order to scaffold some of these developing skills.
Whilst there is no concrete research evidence that I have found to support my anecdotal observations, I do think that clay is a medium that seems to attract boys to engage in this form of art-making. I have also seen how much toddlers enjoy using clay and delight in its sensory and tactile qualities, enjoying interchanges with teachers as they use it.
It is really important to have clay available regularly so children learn how to master the skills and techniques over time (Kolbe, 2007). One-off experiences, in my view, do not give children the opportunity to extend and deepen their skills, or experiment with new ideas using this material.
To conclude, in a world where there is growing concern about sustainability and using our resources wisely and well, using clay can connect children to an important natural resource that has been used for the creation of art objects by human beings for thousands of years. The ability to reuse and recycle clay is an important benefit of using this art medium with young children.
Lisa Terreni is Senior Lecturer at the Victoria University of Wellington’s Faculty of Education, teaching in the early childhood education degree programmes.
References:
Recommended web link to articles and videos:
Art Major & Minor
About
By its nature, the visual and fine arts attract creative people and practicing artists who strive to carve out their own niche. That’s why the Goshen College art major offers you a variety of concentrations to choose from, including art entrepreneurship, studio art, visual arts education (K-12), pre-architecture, and art administration.
The Art Department at Goshen College has a long tradition of preparing higher education students for successful careers in visual and graphic design, or for top art schools. One of the great things about our art program courses is that you can pursue both majors and minors in art studies. This allows you to explore your creative interests while also preparing for a career in another area of expertise. With our well-rounded curriculum, you too can make your mark in the visual arts.
Choose your path to a career in the visual arts
In addition to comprehensive classes, art majors will a find number of extra-curricular opportunities to spark their creativity, like the three-week Arts in London class. Create and display created works, study the artistic achievements of cultures and institutions old and new, sell compositions at student art sales, or apply new ideas and skills to set designs and costumes for a theater production. Students can also enroll in the distinctive art entrepreneurship program that combines developing one’s artistic focus and learning how to open a small business.
Graduate with the skills you need for your dream career
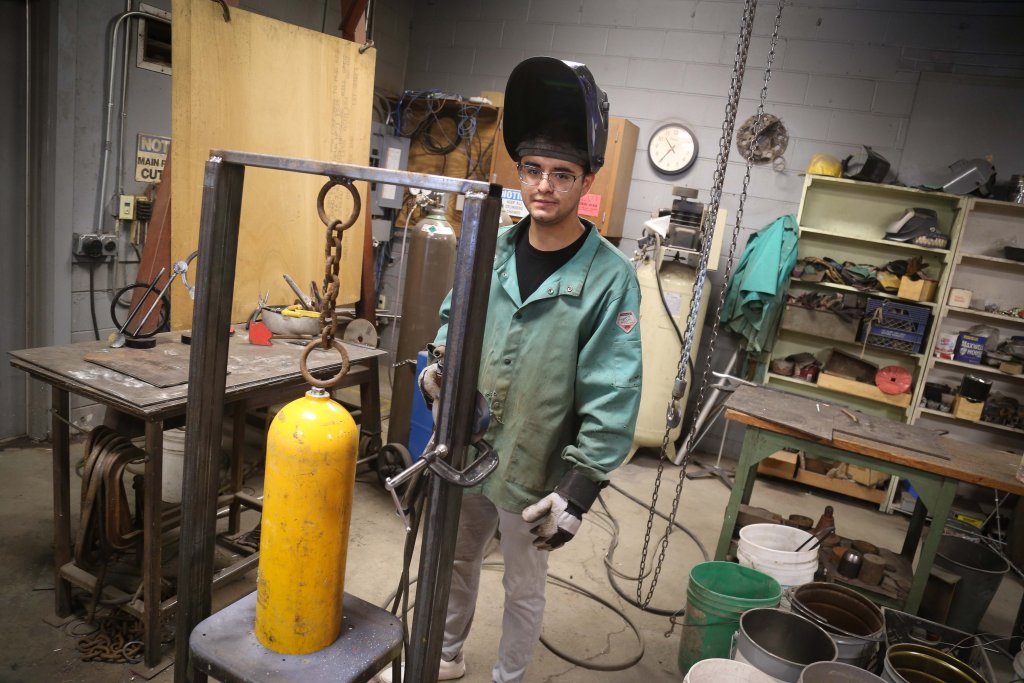
Today, Goshen College art graduates pursue careers as graphic designers, teachers, architects, ceramists, professors, jewelers, and business owners across the globe. But before they can find their creative niche in the art industry, the years students spend studying in Goshen College’s art program will take them behind the potter’s wheel, behind the welding mask, teaching in a classroom, and mounting their own senior art exhibitions. Upon graduation, students will have the creative and practical skills to seek an imaginative, rewarding career.
Get started today!
Find out more about an exciting career path in the visual arts with a degree from Goshen College. Fill out the form below for more information about class offerings, academics, admissions, student body, other degree programs, financial aid options, and more.
News & Events
Senior artwork on display at Goshen College
The Senior Art Exhibit is divided into two parts. The first portion is on display now until April 4, and the second exhibition goes from April 10 to April 24. A combined graduation exhibit will also be held the week of April 26.
Maria Witmer-Rich ’96: Watercolor art is chemist’s counterpoint
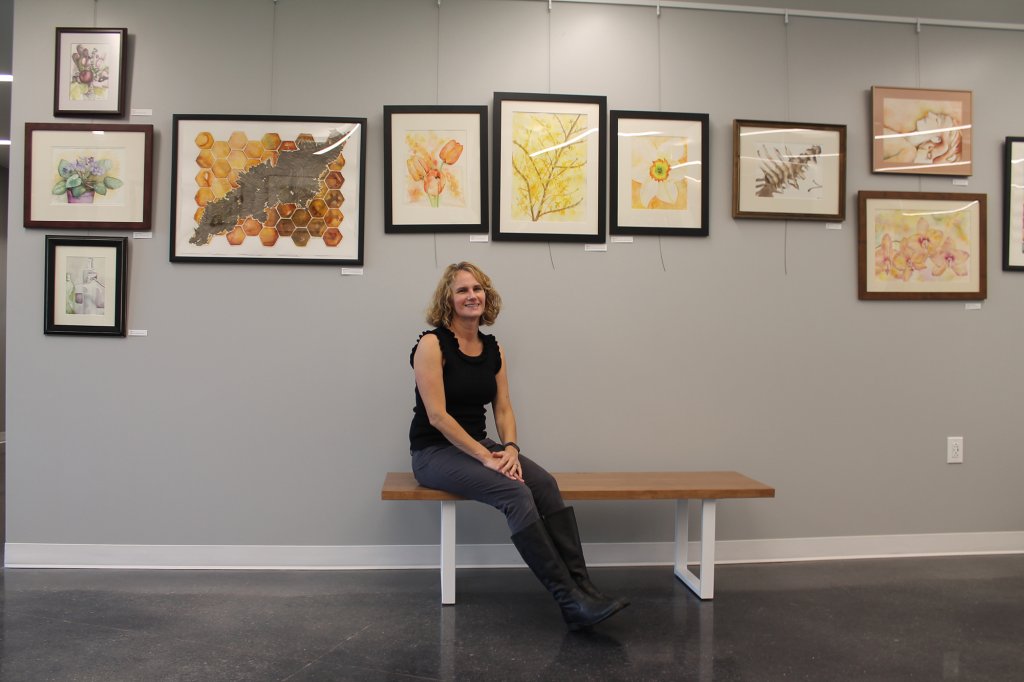
Maria Witmer-Rich ’96 connects art and science and is equally at home in the chemistry lab as she is in the painting studio.
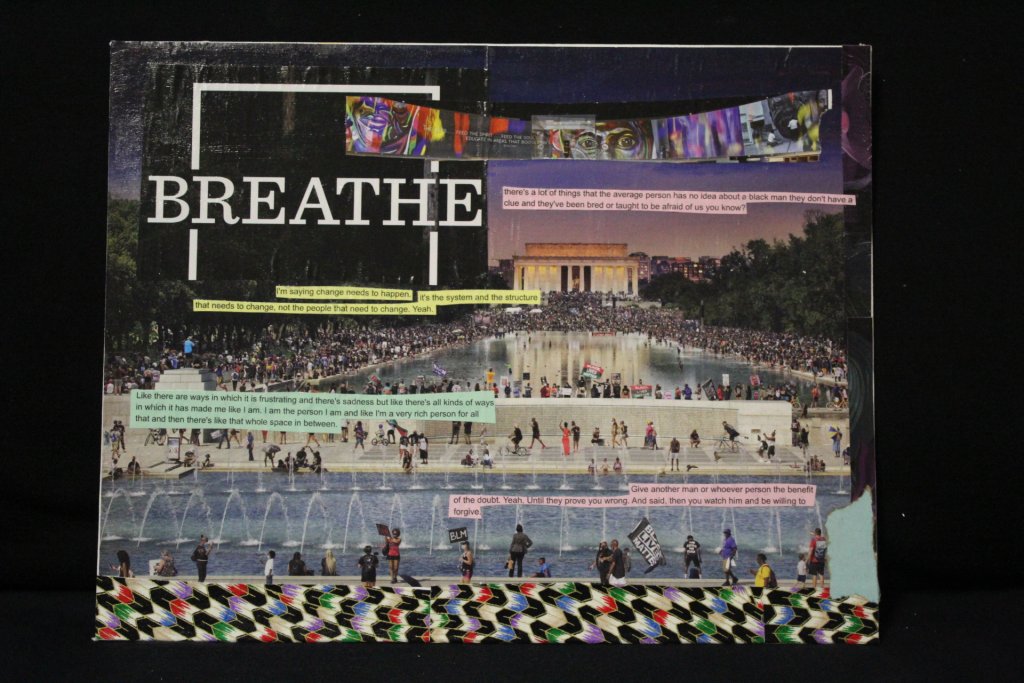
Winners announced in MLK Voices of the Movement Art Competition
Winners of Goshen College’s first annual Voices of the Movement Arts Competition were announced during the college’s King Celebration on Monday, Jan. 17, 2022. This competition was open to Goshen College and Elkhart County high school students.
Follow the Art Department on Facebook to learn more about opportunities at Goshen College and connect with alumni.
Stats
Art concentrations to choose from
of art alumni agreed that art professors are genuinely interested in their students
of art alumni are employed within one year of graduation
Learn more about Goshen College’s exceptional academic outcomes and national rankings.
Students & Alumni
Sarah Lopez Ramirez ’24
Sarah Lopez Ramirez ’24, a film production major who is also minoring in art, chose Goshen for the hands-on experience opportunities, such as with FiveCore Media.
Caleb Longenecker Fox ’15
Caleb Longenecker Fox studied Art and Molecular Biology/Biochemistry, and is now earning his master’s degree in business administration through the college’s collaborative MBA program.
Matt Thomas ’12
Matt Thomas studied sculpture, and used this experience to start his own business, Elko Hardwoods, which makes high-end furniture from locally-sourced trees.
Ben Friesen ’05
Ben Friesen ’05, of Oakland, California, uses his theater background to teach Origami.
Anna Mast ’08
Anna Mast, owner of Anna’s Bread, a local cafe and bakery nestled cozily in the Goshen Farmers Market, shares about her journey with baking and entrepreneurship in Goshen.
Dona Park ’17
Dona Park was an art and interdisciplinary double major from Abbotsford, British Columbia.
