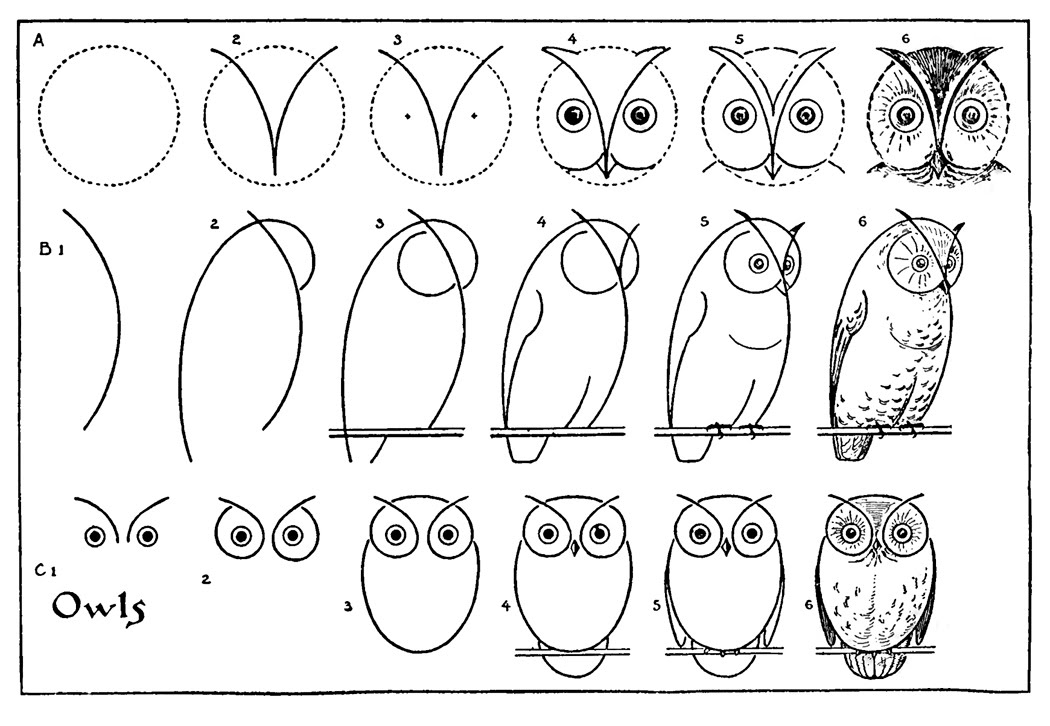
How to draw an owl
How to draw an owl
How to Draw an Owl
By Mark Horton Last Updated: August 7, 2022
Today we will learn how to draw an owl. Owls are quite interesting creatures. They have an unusual color of feathers and big eyes – this fact should interest you as an artist. Let`s have a look at beautiful pictures of these birds and learn how to draw an owl.
Reference Owl Pictures
If you want to depict something beautiful and realistic, you should find an appropriate nature to avoid blunders. Let`s look at the photos like examples and get inspiration.
These photos show how beautiful the feathers of these birds are decorated by nature.
And here are the great drawings of owls:
Materials for Painting
In order to get a good sketch. It is enough to have a sheet of paper, graphite pencil, and a desire to paint. Your work will be more interesting if you use:
If you know how to use ink and pen, you can create a very beautiful drawing of an owl. Also, you can get a good effect if you color the patterns on feathers with a black felt pen.
How to Draw an Owl Step by Step
The big amount of owl`s feathers hide the structure features of this bird. The silhouette of an owl can be inscribed into quite simple shapes.
Let`s complicate our task a little bit, try to depict an owl at several angles, and learn how to paint its portrait, legs, wings, and feathers.
owls drawing in pencil
Direction Shape and Silhouette
You should start from the line, which will designate the direction of the bird`s body and its pose, and mark the silhouette with a simple geometric shape.
Do not neglect the line — it will help to create a symmetrical drawing of an owl and the bird`s body will keep the balance. Build the shape starting from the line.
After we have located the bird on a sheet of paper, we should improve the image a bit and make the silhouette and the parts of the body clearer. Let`s improve the shape of the head, wings, tail and add legs.
The main distinctive features of the owls in comparison with other species of birds are the big round eyes, small flat but sharp nib. To mark the eyes and a nib properly, you should draw a vertical line bisecting the head. Then mark the scopes for eyes with two horizontal lines.
It is quite easy to depict claws, especially if you are painting an owl sitting on a branch. Usually, we see only three front claws, the middle one is a bit bigger than the others. Actually, there are four claws — the one is protruded back and helps the bird catch and hold the take.
Wings and Tail
So let`s come over to the next stage of our lesson on how to draw a realistic owl and draw wings and tails.
how to draw an owl
The tail is very similar to a fan: all the feathers are of the same shape and size and are neatly colored. The wings do not have any special features except the beautiful patterns; there are the biggest and strongest feathers on the tips and the small – on the corpus.
How to Draw an Owl
An owl is a symbol of wisdom and mystery. Aren’t these birds gorgeous?
But drawing an owl may seem overwhelming: it ‘s hard to decide where to start and how to find the right proportions. In this tutorial, I’ll show you an easy way to draw an owl with a graphite pencil and ink liners.
We’ll also consider the principles of layering ink hatches, and observe how to create a beautiful effect of fading in our artwork.
As a result, we’ll get an impressive nature-inspired drawing!
You may also be interested in this great article:


What You Will Need
1. How to Draw an Owl With a Graphite Pencil
Step 1
I draw a vertical core line that divides the future owl’s figure into halves; it will be our reference point for the measurements. Then I mark the side borders of the bird’s head and body.
It is useful to follow the principles of symmetry when you are drawing animals. Just keep in mind that there is nothing perfectly symmetrical in the natural world.

Step 2
I draw the rough shapes of the head and body, using light pencil lines.

Step 3
The eyes are located on a line that is slightly below the central point of the owl’s head. The core line helps me to measure the equal distance.
The interval between the eyes is close to the width of one eye.

Step 4
I draw a rough shape of the beak. It looks similar to a triangle with two rounded corners.

Step 5
I add the prominent shapes that resemble stylized ears (the ear tufts).

Step 6
I draw the pupils and add the divergent lines of feathers above the eyes.

Step 7
I refine the feathery pattern on the owl’s face, also known as the facial disc.

Step 8
I draw the smaller details of the beak and the ear tufts.

Step 9
I add the wings to the body.

Step 10
I draw the framework of the feet.
The feet have four fingers each, but the back fingers hide behind; they help the bird to take up a stable position.

Step 11
I add the hooked claws and refine the shapes of the fingers.

Step 12
I draw the contours of the tree using varying, organic lines.

Step 13
I add three groups of leaves. They will make the composition more interesting.

Step 14
I add the groups of pencil hatches to mark the pattern of the owl’s feathering.

2. How to Create Layers of Hatching With Ink
Step 1
In this part of the tutorial, we’ll pay particular attention to the hatching techniques.
Creating layers of hatches is an excellent way to make an illusion of texture, increase the contrast and accentuate the three-dimensional look of the objects in the drawing.
Here is a sample of the inclined hatching, made with the 0.1 ink liner; this will be our base.

Step 2
I add a new layer of hatching with the 0.05 liner. The lines can overlap the existing hatches, or they can be located in the gaps between them.
The lines of different widths combined in one drawing always look attractive.

Step 3
With the 0.05 liner, I add the rounded cross-hatches. You are not limited by the number of hatching layers!

Step 4
With the 0.3 liner, I apply horizontal hatches. As you can see, the more layers of lines I use, the more contrasting and intense my sample becomes.

3. How to Draw an Owl With Ink Liners
Step 1
With the 0.3 ink liner, I mark the dark sports of the feathering.

Step 2
I continue to add the groups of short lines, using the 0.3 liner.

Step 3
With the 0.3 liner, I draw the pupils. The eyes become dark and contrasting.
I also mark the shadows in the plumage.

Step 4
I add the thin hatches, using the 0.05 ink liner. The lines go from the center of the bird’s face to its sides.

Step 5
I mark the outer circles in the eyes, using the 0.05 liner.
Small dots and short hatches help me to accentuate the eyes without oversaturating the artwork.

Step 6
I work on the feathering, using the 0.05 ink liner. I place new hatches in the gaps between the existing ones.

Step 7
With the 0.3 liner, I make the contours of the owl’s feet and outline the tree.

Step 8
I draw the pattern of the bark, using the 0.3 liner. I also add groups of hatches to create shadows.

Step 9
I draw the leaves with the 0.1 ink liner. I use thin, light lines so that the leaves won’t distract the viewers’ attention from the owl.
I also add some hatching to the tree to make it look more three-dimensional.

Step 10
I add short hatches to the sides of the bird’s fingers and strengthen the shadow near the feet. We get an instant three-dimensional look!
I also add more hatches to the owl’s body, using the 0.1 ink liner.

Step 11
I increase the contrast in my drawing. With the 0.1 liner, I add groups of hatches, paying special attention to the sides of the bird, and mark the contours.

Step 12
I work on the owl’s head, making it more realistic. With the 0.05 ink liner, I accentuate the facial disk with an additional layer of hatching.

Step 13
I accentuate the shadow under the bird’s beak, using the 0.05 liner. I also add short hatches to the sides of the beak.

Step 14
I add a layer of the cross-hatching to the owl’s body, using the 0.05 ink liner.

Step 15
With the 0.3 liner, I create the dark accents in the feathering.

Step 16
I increase the contrast in the lower part of the drawing and strengthen the shadows there, using the 0.1 liner.

Step 17
I apply the cross-hatching to the tree, using the 0.1 liner.

Step 18
With the 0.05 liner, I add one more layer of hatching to the bark.
As a final touch, I emphasize the contour of the branch with a wider line.

Your Artwork Is Complete!
Congratulations, you’ve finished the drawing! I hope you enjoyed both the process and the result. Please share your artwork in the comments!
I wish you much joy and success in mastering ink techniques!
How to Draw an Owl – Step by Step Instructions
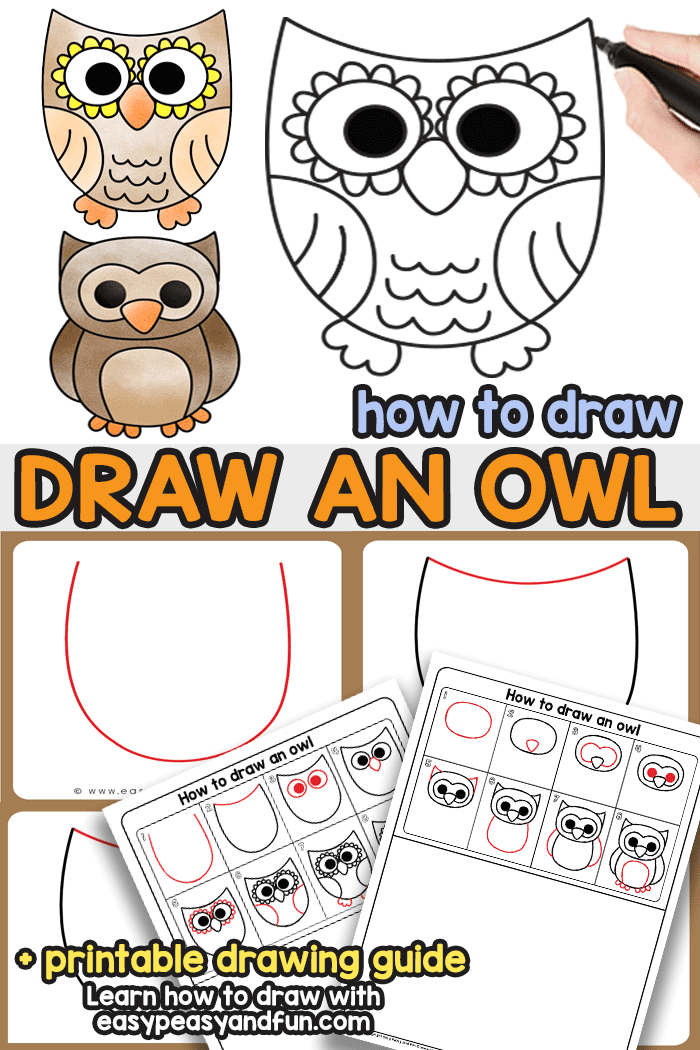
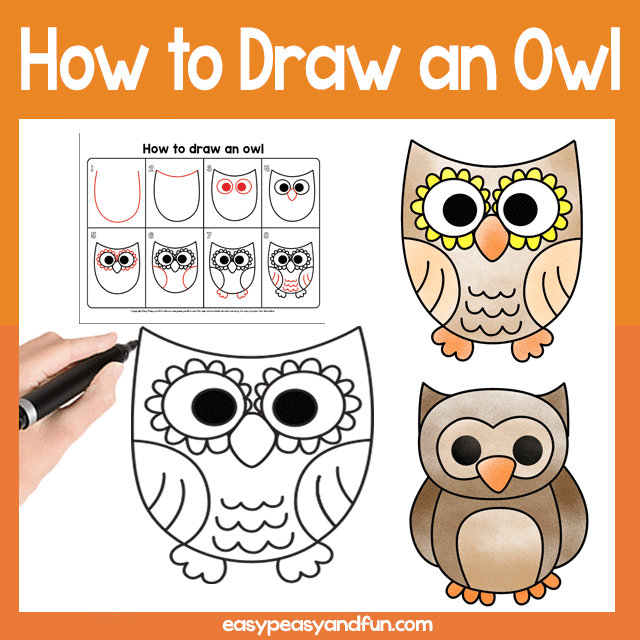
This time we are not only showing you one, but two easy how to draw an owl step by step tutorials. Both owl guided drawing instructions are really simple, with the first one you will be drawing a more cartoon like owl, while the second one will guide you to drawing a more realistic looking owl (but still an insanely easy one).
Want more? Browse our other guided drawing lessons.
*this post contains affiliate links*
Owls trully are beautiful, and a wonderful bird to draw during fall season. With this nocturnal bird, we couldn’t just have one tutorial, as there are many ways you can draw one – so we are sharing two. One of a more whimsy looking owl that will shine when done with different colors and one that’s more realistic looking but still really easy to draw.
How to Draw an Owl Step by Step
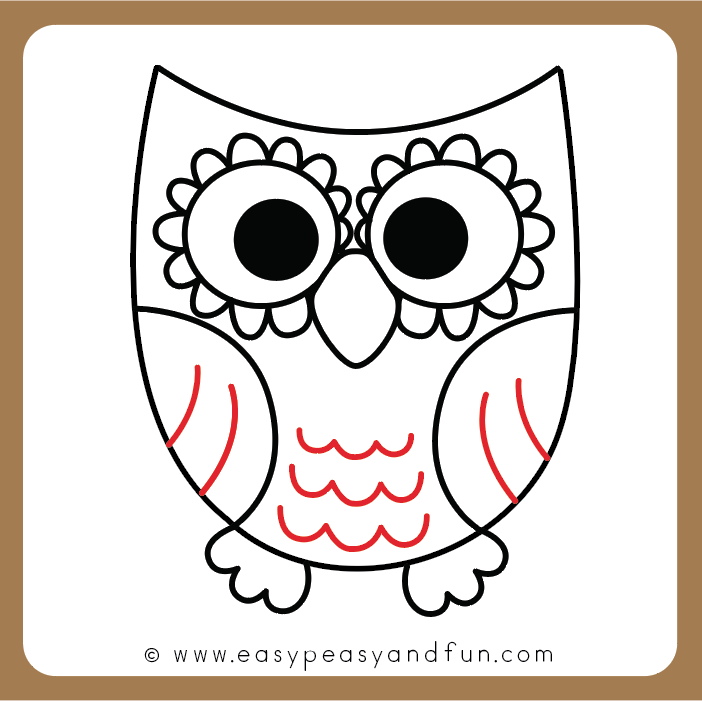
Version 1: How to Draw a Simple Cartoon Owl
Step 1
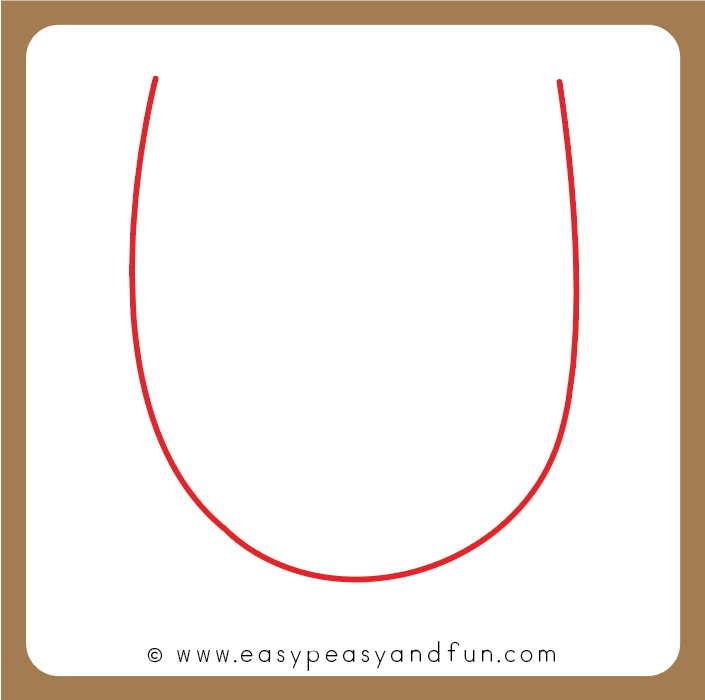
Start by drawing a slightly chubby U shape.
Step 2
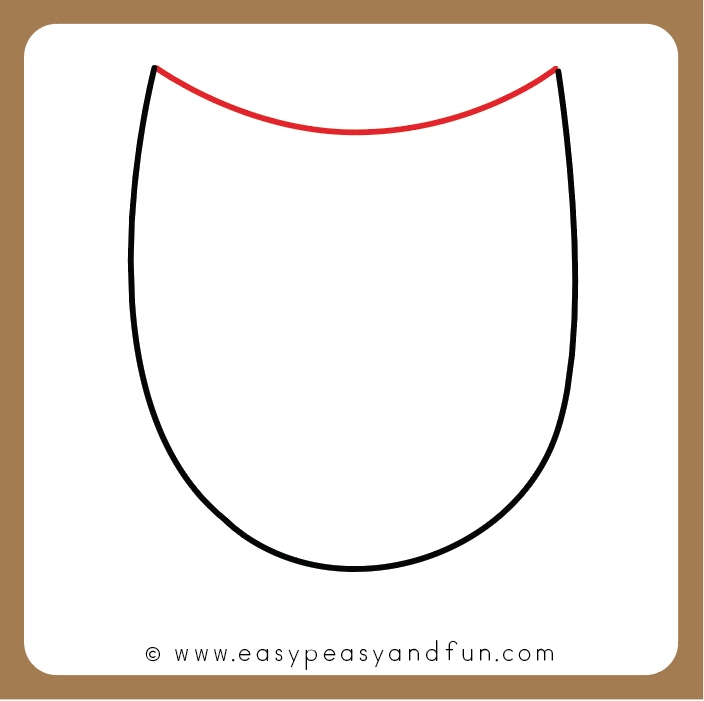
Connect the end points of the U shape with a curved “valley”.
Step 3
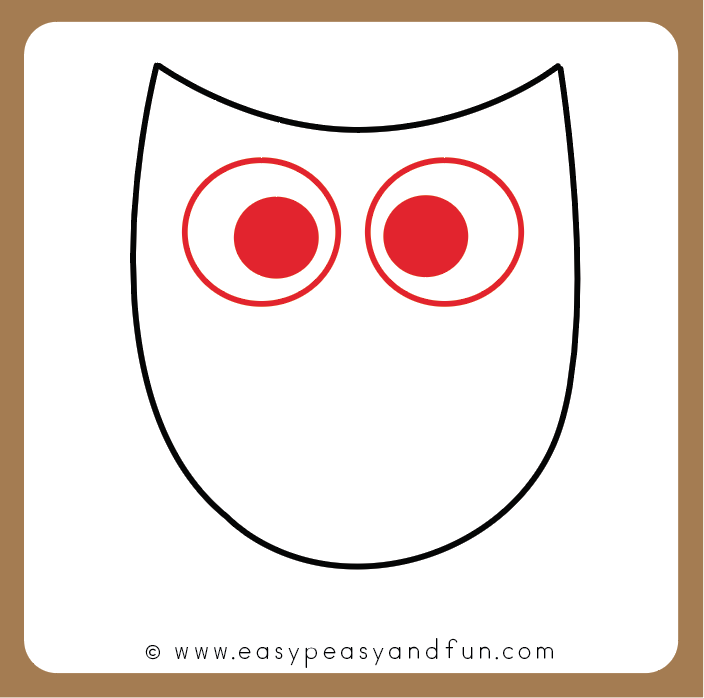
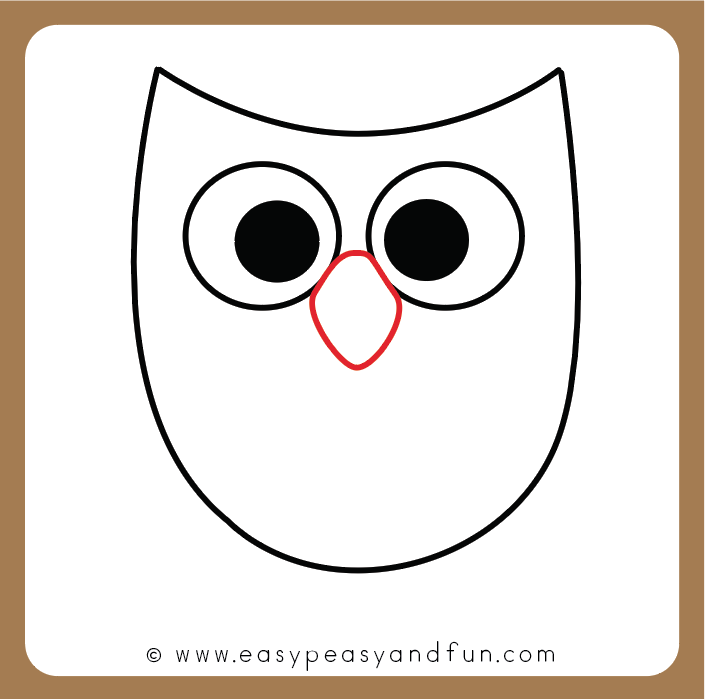
Draw the eyes. Start with the outside circles and then draw another circle inside the first one.
Step 4
Draw a beak between the eyes.
Step 5
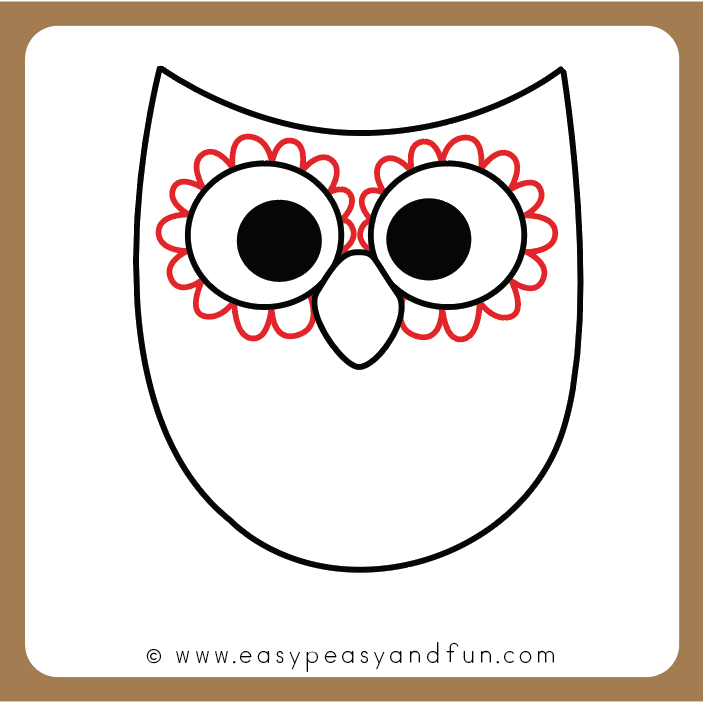
Add details around the eyes – small arches that go around both eyes (younger kids can skip this step).
Step 6
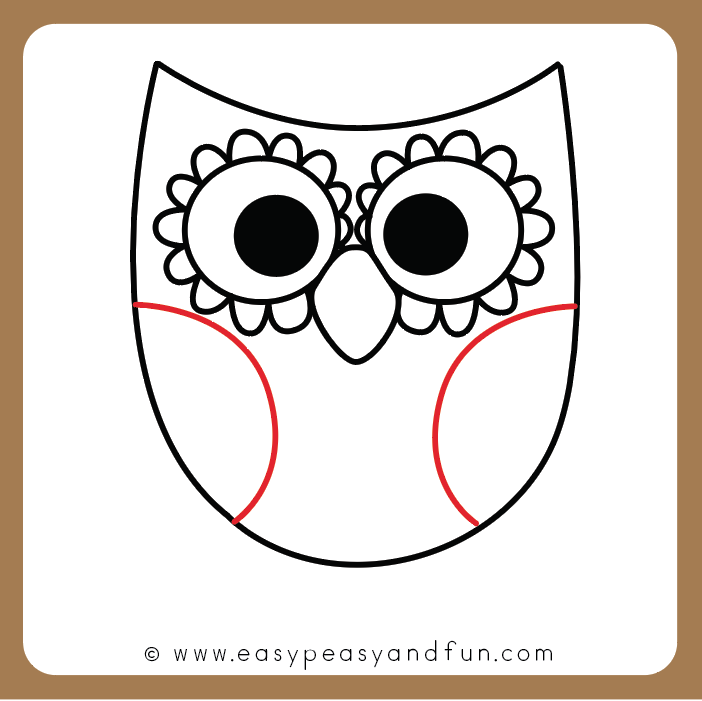
Draw two curved lines for the wings.
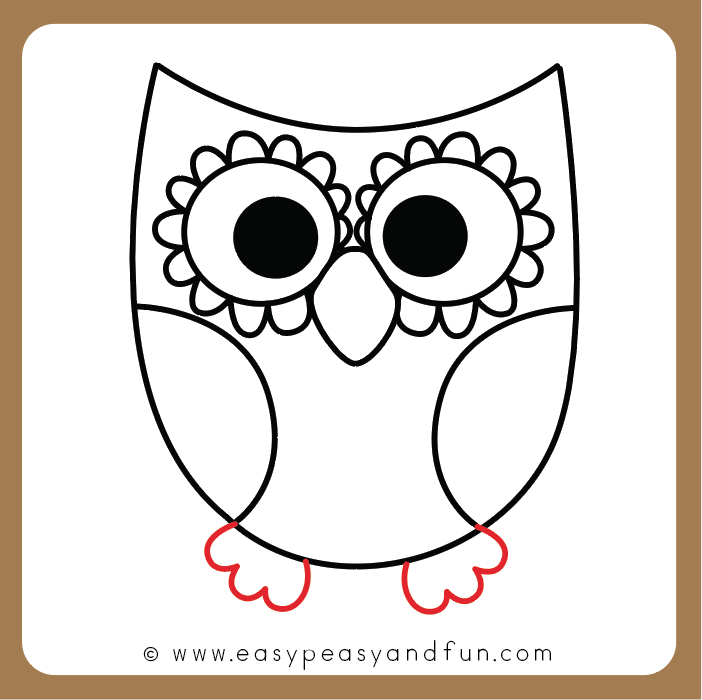
Step 7
Step 8
Draw in details on the owl’s belly and on it’s wings.
Step 9
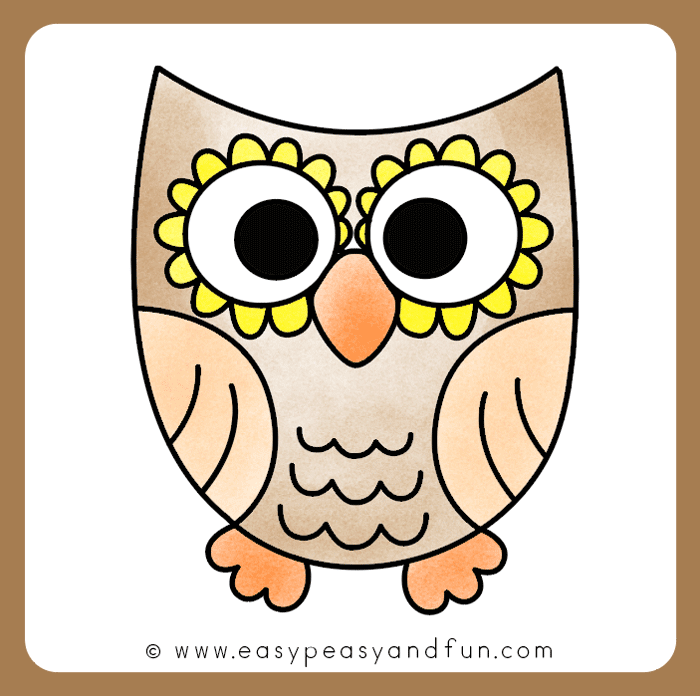
You have just learned how to draw an owl. Color your owl drawing.
Version 2: How to Draw an Easy, More Realistic Owl
Step 1
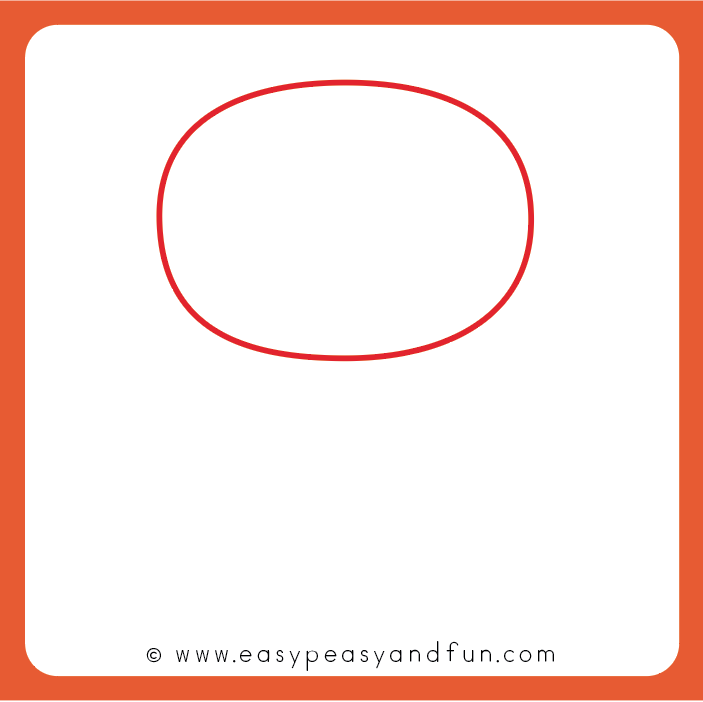
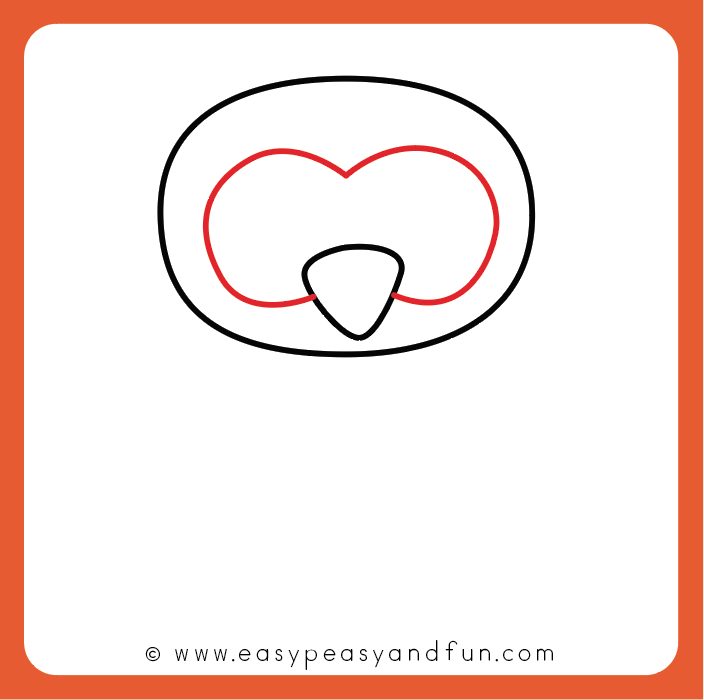
Start by drawing an oval shape for the owl’s head.
Step 2
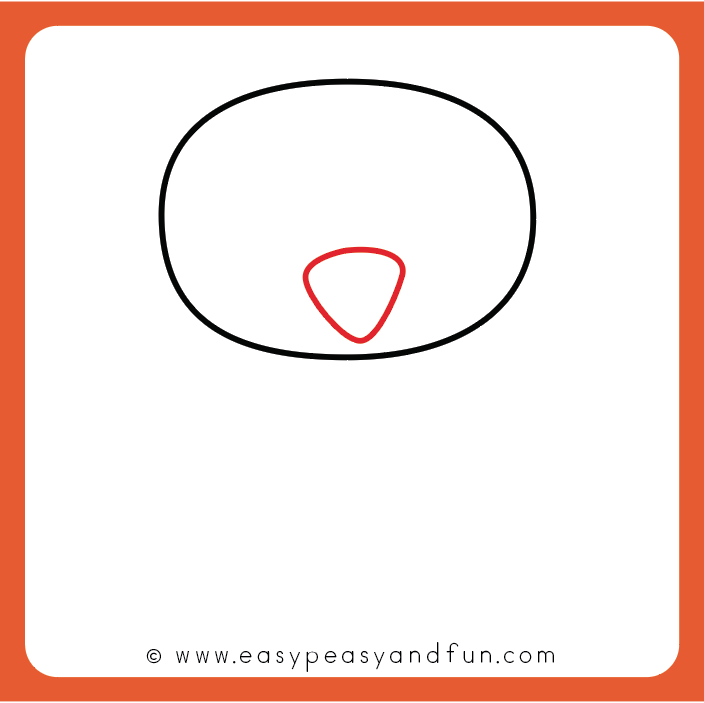
Draw a beak on the lower half of the oval shape.
Step 3
Draw another oval or “flat heart” shape starting from the beak.
Step 4
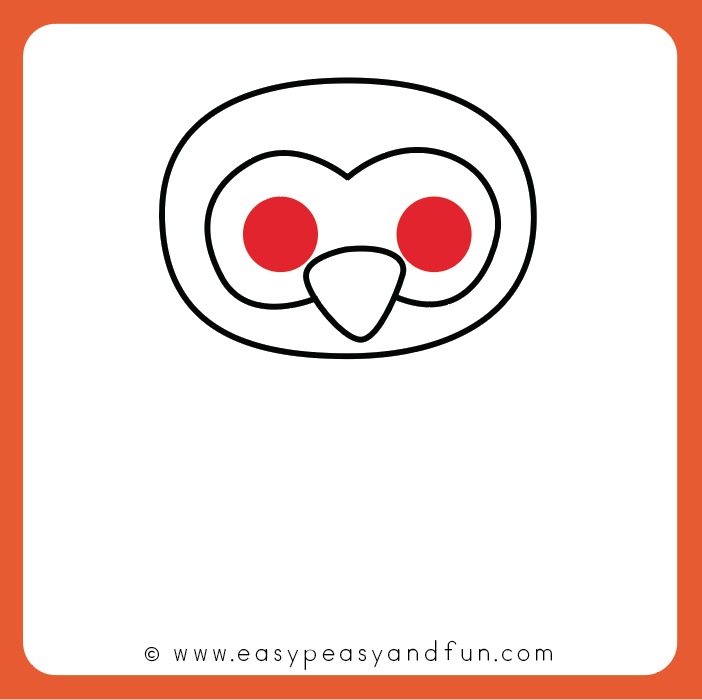
Draw two big black circles (or other color) for the owl’s eyes.
Step 5
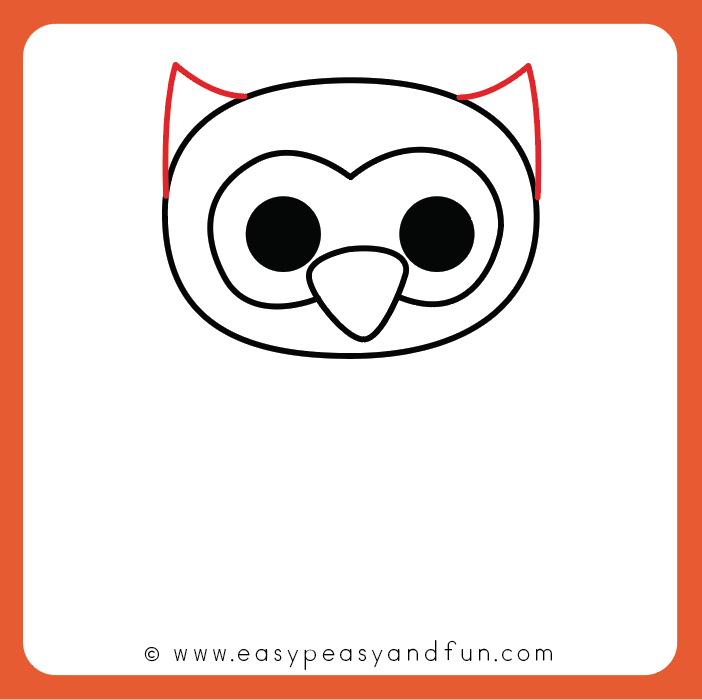
Continue with drawing two triangular shapes on top of the owl’s head to make the owl’s “ears” – feathers.
Step 6
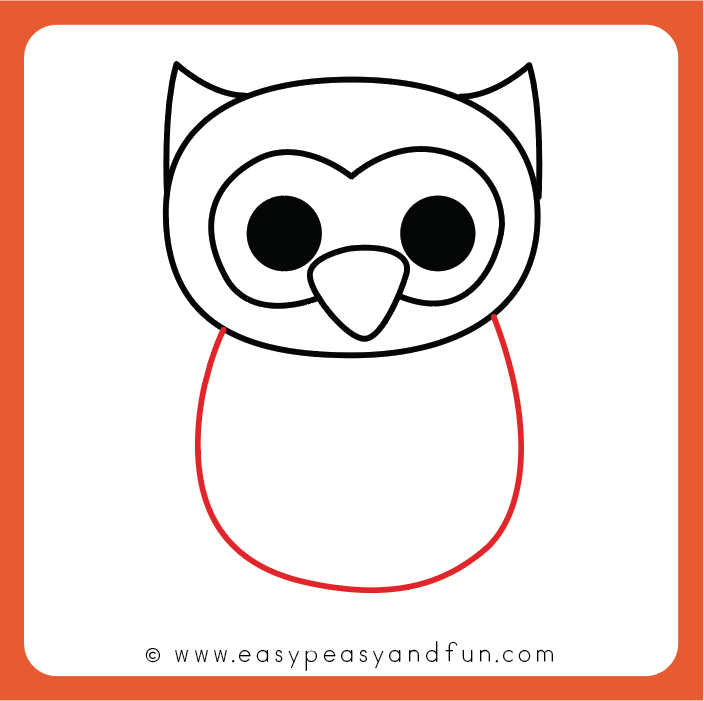
U shape bellow the head will make the body.
Step 7
Two curved lines on the side complete the wings.
Step 8
Last touches – draw feet and an inverted U shape inside the body to add detail to owl’s body.
Step 9
All done! You’ve learned how to draw a simple more realistic looking owl. All that is left is to color your owl drawing.
Become a Member and Get Printable Owl Drawing Guide
This printable is available in our members area. Become a member and gain aces to our growing collection of educational and crafty printables.
Why become a member:
Related Posts
Grab your pencils or your markers as you will learn how to draw a sheep…
Learn how to draw a bat with our super easy to follow step by step…
Simply follow this easy how to draw a fox step by step tutorial and you…
Excited to learn a new thing you can draw? This time we are showing you…
Learn how to draw an elephant with our easy to follow step by step drawing…
Who doesn’t want to learn how to draw! Grab our step by step drawing for…
About Us
How to Draw an Owl Step by Step
This tutorial shows an easy way to draw a cartoon horned owl in nine steps. It provides simple examples and quick instructions to go along with them.
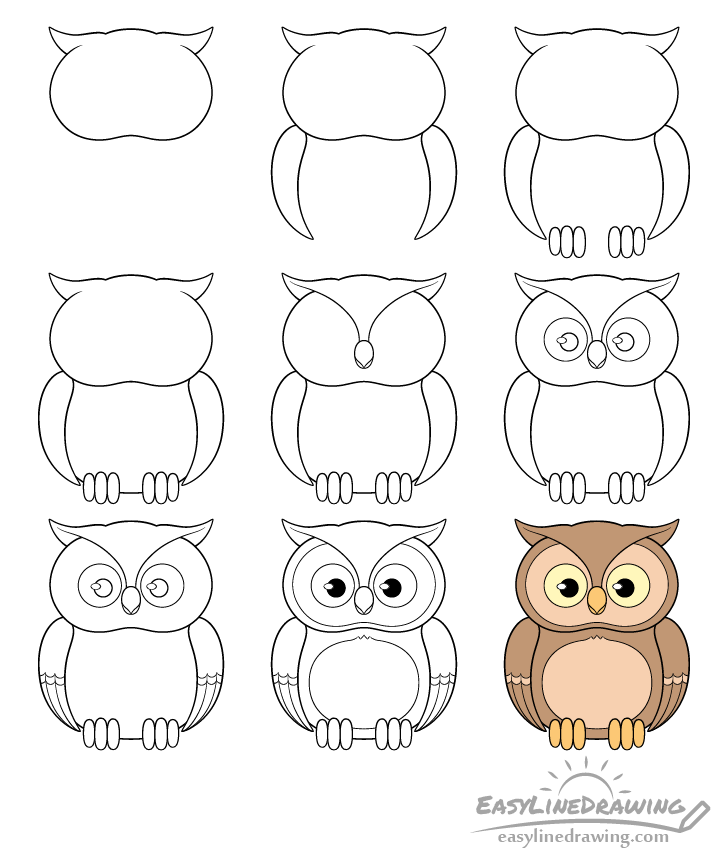
The owl in the example is a “horned drawn in a very simple style to make the tutorial beginner friendly. You can see a preview of it in the image above.
Start in pencil and make light lines that are easy to erase as you will need to do so in some of the steps. You can darken them before colring once you have all of the part of the owl in place.
Step 1 – Draw the Owl’s Head & Body
Begin with an outlined of the owl’s head followed by the body.
Add the body as one long curve that is very slightly flattened at the bottom.
Step 2 – Draw the Wings
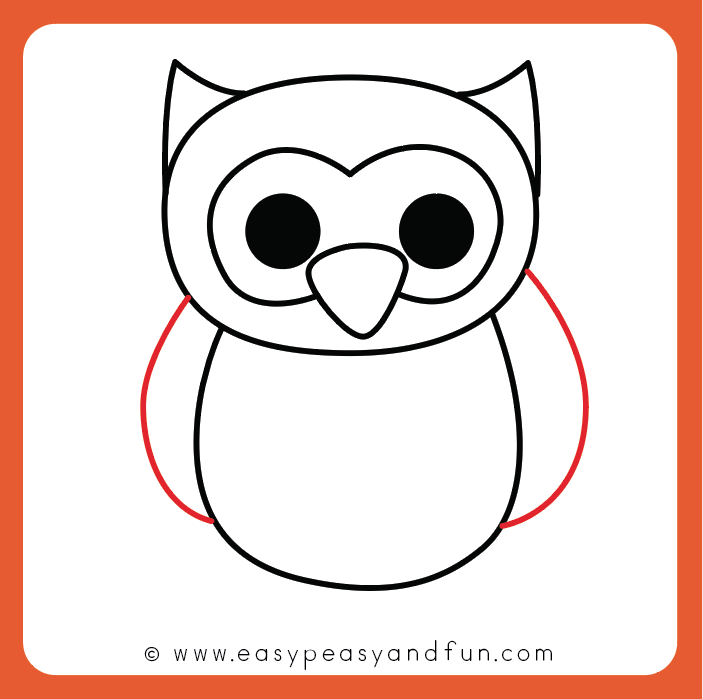
Going down from the bottom of the head and overlapping the sides of the body add the wings. Make these wider towards the top and narrower as they go down.
You can then erase the parts of the body that are covered by them (shown in red).
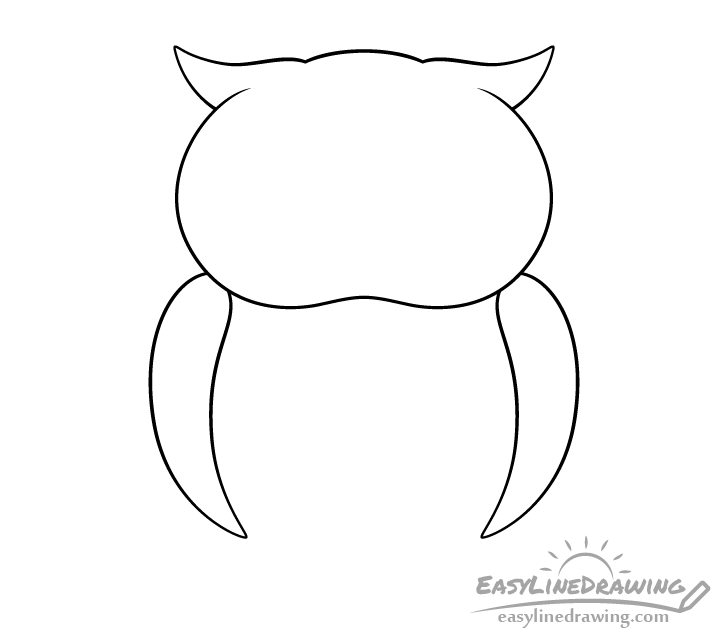
You should have a drawing similar to the one above after your done.
Step 3 – Draw the Feet
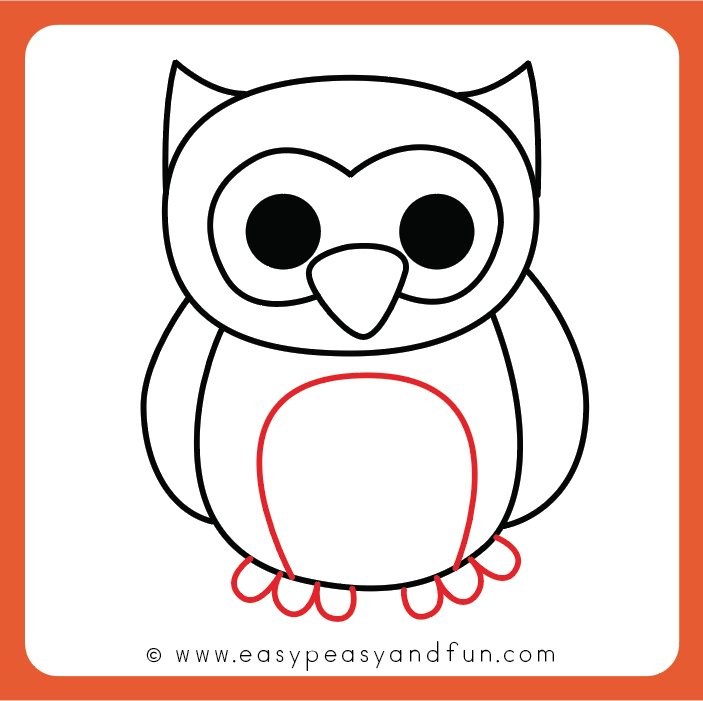
Add the feet as two sets of oval shapes with the middle toe being the largest and the ones on the sides being slightly smaller.
These will again go over top of the body so you can once again erase it’s outline where they overlap (shown in red).
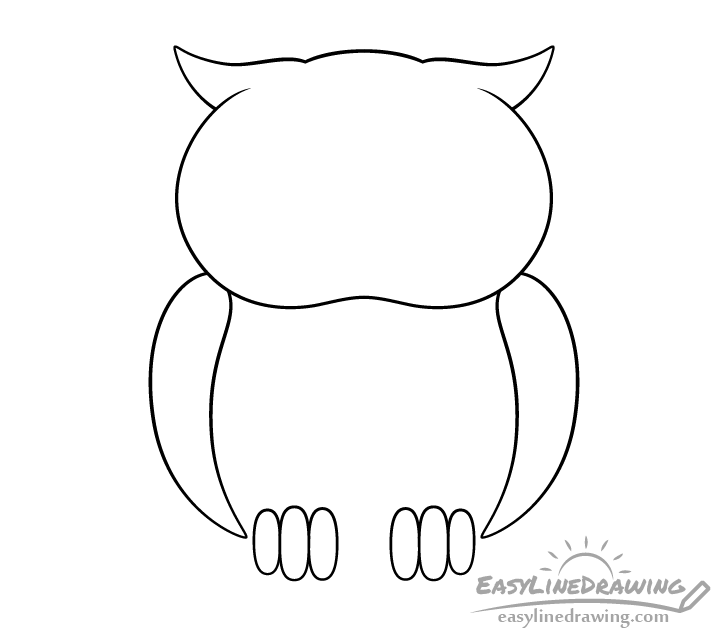
Once you are finished with this step your drawing should be similar to the above example.
Step 4 – Draw the “Horns”
As this is a horned owl add the “horn like” shapes on the top of it’s head (really these are just feathers) with a bump like curve between them.
Step 5 – Draw the Beak
In the middle of the head draw the beak. Owls generally have fairly small and narrow beak compared to the size of their head. First draw it’s outline and then add the split that goes down into a pointy tip.
Step 6 – Draw the Face Pattern
Draw a pair of curved lines going from the upper part of the beak towards the tip of each of the horns (but not touching them).
Afterwards erase the outline of the head (shown in red) between these two lines.
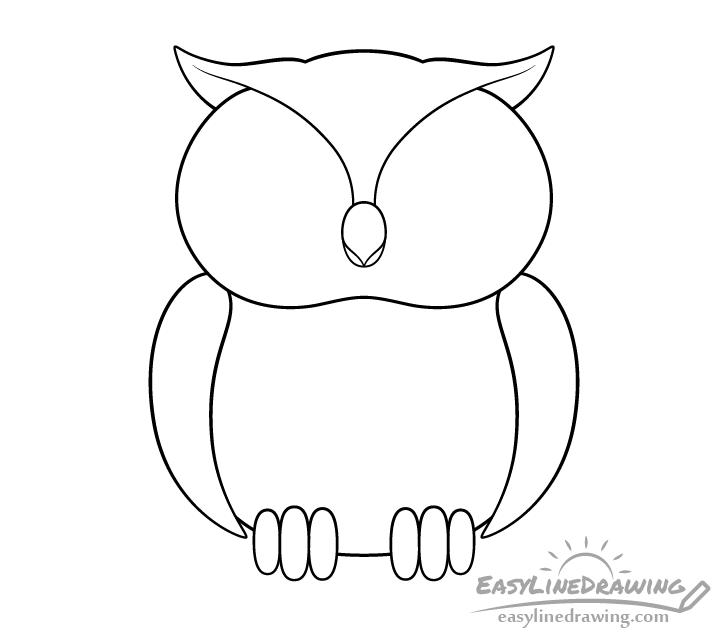
You should have a cleaned up drawing similar to the above once done.
Step 7 – Draw the Eyes
Draw a pair of large round eyes that are so characteristic of an owl. Inside each eye draw another small circle for the pupils. Instead of placing these directly in the middle draw them slightly closer to the beak. Also add a small oval shaped highlight overlapping each pupil. You can erase a little bit of their outlines before drawing these in.
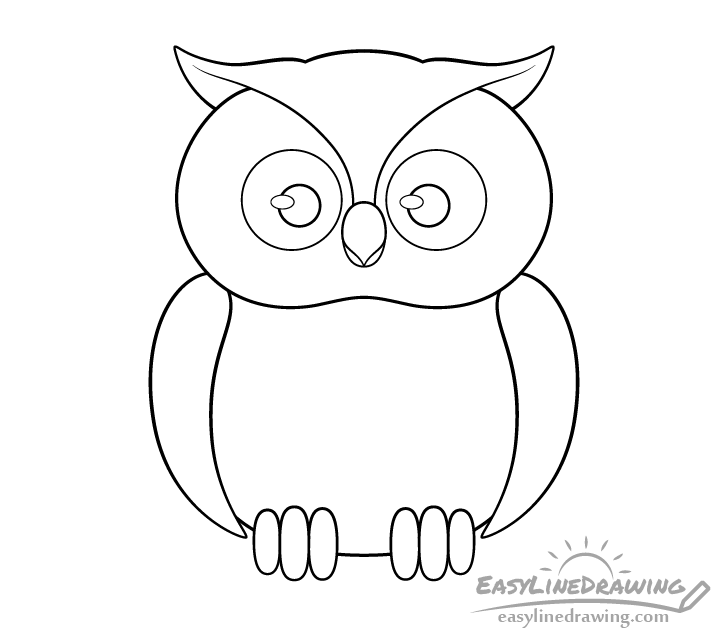
Once you finish drawing the eyes you should have an owl similar to the one above.
Step 8 – Finish the Line Drawing
Outline some areas along the owl’s head and body that will have feathers of a different color (used in the next step). On the head draw a smaller inner shape that somewhat follows it’s main outline. Next draw an oval like shape on it’s chest/stomach area.
With the above in place you should have all of the parts of the owl outlined. If everything looks good you can trace over your drawing with a black pen/marker or darken your lines with the pencil. You can also fill in the pupils of the eyes with black or dark pencil shading (leave the highlights white).
Step 9 – Color the Owl
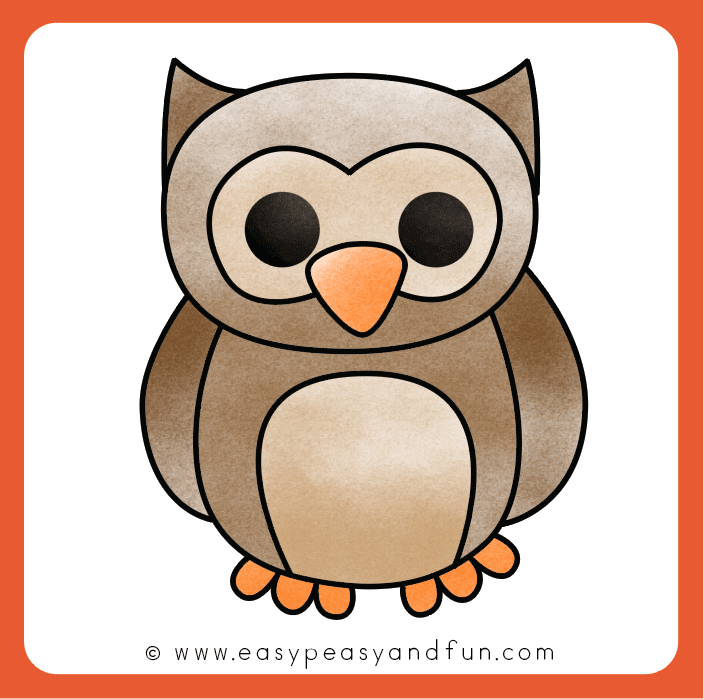
To color the owl you can use whatever you have available (paints, markers, colored pencils, etc…). Make the body brown with lighter brown areas on the parts outlined in the previous step. Color the beak and feet orange and the eyes yellow.
Alternatively you can also make the main body grey and the lighter areas a lighter grey.
When done coloring you should have a finished drawing of a horned owl.
Conclusion
Drawing a stylized cartoon owl like the one in this tutorial is fairly easy and can be great practice for beginners. As was shown in the step by step breakdown it’s generally good to first outline it’s larger shapes such as the head and body and then add the smaller parts followed by the little details.
Hopefully you’ve found this drawing guide helpful and easy to follow. For more similar tutorial also see:
Better world by better software
Gleb Bahmutov PhD
Our planet 🌏 is in danger
Act today: what you can do
How To Draw An Owl
Refactor code using functional approach (Maybe, immutable).
Intro
I like simple code. I consider functional code simpler than OO code. Yet, I am not an advanced practitioner of functional programming; and I easily get lost when people throw words like «comonads» around. After writing [a lot of blog posts][../tags/functional/] about functional way of writing JavaScript, I only scratch a surface of actually using the full power of FP in JS.
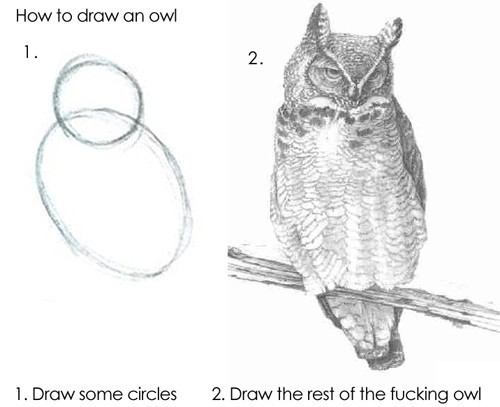
A lot of FP explanations seems to start with basics and then immediately switch to controlling side effects via Abstract Data Types (like Functor, Monad). Meanwhile I am sitting there reading about it and feeling like I am learning to draw an owl:
In this blog post I will try to refactor a piece of my code applying the following functional principles:
and I will also do it slowly, explaining each code transformation. Hopefully, I will better understand the FP myself, and fill in the details on how to draw an owl.
Initial code
Our Rocha wrapper looks at the previous run results, and if there is no previously saved failing test run order, shuffles the top level suite object.
The initial implementation of order.shuffle is in function shuffleDescribes that you can see here
Before we refactor, we must write unit tests. I quickly wrote a few sanity checks using snap-shot utility to add snapshot testing to Mocha framework. For sanity, I added returning the suite reference from shuffleDescribes
Note in the last test we are getting shuffled test, but because we are mutating the s.suites array directly, our initial object s does NOT hold the original list of items from 1 to 100.
Comment the code
Two quick notes on refactoring: we need to have unit tests, and we need to understand what is going on (to the best of our abilities) before changing any code. To better understand, I usually write a few comments to see if I understand the coded algorithm. Isn’t this what we do every day: read and understand what the code does (and then change it to really do what it claims to do?)
Note that we already found a problem. A suite can have just tests, and no nested suites; but our shuffleDescribes only calls shuffleTests(suite) if there are nested suites! This is a common occurrence; reading the code and trying to document each step finds flaws in the coded logic.
Refactoring the condition
The condition is just AND of several predicates. I have shown how to refactor this case in this blog post. We just need to clearly express each check and then use R.allPass to combine them.
step 1
step 2
The rest of the code stays unchanged. Function isValidSuite is waiting (patiently) for an object suite to inspect.
Refactoring imperative code
Now that we have a clean self-explaining and robust condition function, let us see how to write better code in its if/else branches. Our current code required comments in order to be clear (otherwise a logical error we just found would be tough to hide). One good way to avoid using comments, is to split the code in small functions. Each function should be so small that it should have a single purpose and good descriptive name. Then the code would not require a lot of comments, because function names would explain what is happening step by step.
We have 3 new candidate functions to write looking at the code. Just look at each line with a comment!
Functio shuffleTests already exists, so we only need new functions to log debug message, shuffle suites order and recursively shuffle each suite. Moving each line into its own function makes the code self-documenting
Use object lens to modified properties
Hmm, on of our unit tests fails!
Turns out Ramda lenses, clone the given object when setting the property. It plays right into our hands and gives us data immutability at this particular step.
We can update our tests and move on.
But there are other places were we can use lenses. For example shuffling each child suite. Our current code does this in «side-effecty» way using Array.forEach
We can first refactor this code to be pure and use Array.map
s.suites = s.suites.map(. ) looks almost like a property lens, yet instead of a transformation function the code calls a method on the array. Not going to work. Luckily, Ramda provides the map function we can use instead, passing the array.
Note: sometimes I use R. prefix in my code to make clear that lensProp is coming from Ramda library. Usually I prefer destructuring assignment to import only the desired properties from the library to make code more readable.
Beautiful, lenses can really focus on object’s properties. Sigh, it is a bad pun.
Maybe
Ramda itself does not implement this wrapper type, but a companion library ramda-fantasy does. In case we are going to use the Maybe type which represents a value that might or might not be there.
step 1
step 2
Is this really better than imperative code? I would argue yes.
And that is how you draw an owl.
More info
More writings on refactoring and writing code functional style
Follow Gleb Bahmutov @bahmutov, see his projects at glebbahmutov.com, watch his Cypress videos, browse his presentations
Want to know more about Cypress? Check out cypress.tips
Have a Cypress question? Want me to answer it? Consider supporting me via GitHub Sponsors or by purchasing my Cypress courses.


