How to draw monkey
How to draw monkey
Fly, My Pretty! How to Draw a Winged Monkey Step by Step
Sometimes it’s not zombies and vampires that scare us, but characters from childhood stories. Even though objectively they’re not that scary, there’s something in them that brings us chills even in our adult lives. The Winged Monkeys from «The Wizard of Oz» are certainly that type of character. Let’s learn how to draw one!
1. Prepare for Drawing
This is the most overlooked part of drawing projects. Beginners often «strongly wish» they could draw something, so they just try to do it. Professionals, on the other hand, practice before drawing something new. You can’t draw something well if you’ve never drawn it before!
Step 1
Find a lot of references of jumping monkeys and sketch them quickly. Try to capture the main rhythm of the movement, avoiding details. Use a small scale.

Step 2
Now switch to a variety of references of monkeys. Practice the details, but keep sketching quickly, without hesitation.

Step 3
Time for wings. Draw flying birds, paying special attention to the placement of feathers. Try to find a way to simplify it; understand how it works. If you need some help, try my complex tutorial about drawing wings.

Step 4
Finally, you can sketch a few poses of the flying monkey. Draw only the rhythm of the body, nothing else.

2. Plan the Skeleton
Step 1
Choose one pose from your practice sketches. Now:
Step 2
Build a simplified skeleton of the monkey out of sticks. It’s similar to a human skeleton, so you can learn a bit about it in my other tutorial—how to draw a human in a simple way.
Don’t forget about the wings!
Warning: you can draw freely and even sloppily until I tell you to stop. Don’t be afraid of mistakes, crooked lines, or a general mess—we’ll fix it later, I promise!

Step 3
Sketch the torso and the head.

Step 4
Use the trick described in my tutorial about drawing 3D forms to give depth to the chest and head.


Step 5
Draw the hands and feet. Even though monkeys have hand-like feet, they’re not 100% hands.

Step 6
Add the fingers and «toes».

3. Build the Body
Step 1
Have you ever seen a drawing dummy? Their «joints» are spherical, and they don’t only allow rotation—they also define the width of the part. We can use them here, too.
Hips are very complicated, so you can use two or even one sphere in their place.


Step 2
Draw the open jaw. It can be made of two halves of a sphere!

Step 3
Add some details on the face.


Step 4
Take a closer look at the hands and feet, and draw spherical joints for every finger.

Step 5
Once the whole shape is established, you can emphasize it with outlines:


4. Draw the Wings
Step 1
Start with the marginal coverts, or «wing arms», as I like to call them.

Step 2
Add another row of coverts.

Step 3

Step 4
Now draw a place for the main feathers: secondaries and primaries.

Step 5
Time to draw the actual feathers. Start with very simple, round, symbolic ones.

. then switch to more elongated feathers.


Step 6
Big birds often have slotted primaries. Here’s how to draw them:


5. Finish the Drawing
Step 1
If you’re a traditional artist, you probably have a mess of lines on your sheet right now. Don’t worry, that was the plan! To continue, take something making dark lines and emphasize the parts of the sketch that are important to you. Then place a new sheet of paper at the top. Can you see the lines below? If not, use thinner paper or make the lines even darker.
If you’re drawing digitally, simply merge all the previous layers and make that new layer almost transparent.

Step 2
Using the lines below as a base, draw all the details. Be careful and slow now—this is the final version.

Step 3
When you’re done, you can stress some of the more important lines to make the drawing more interesting.

Good Job!
That was a lot of work, wasn’t it? If you enjoyed it, try some more of my tutorials. And if you had problems at any point, you can solve them by going through my How to Learn to Draw series. See you next time!
How to draw monkey
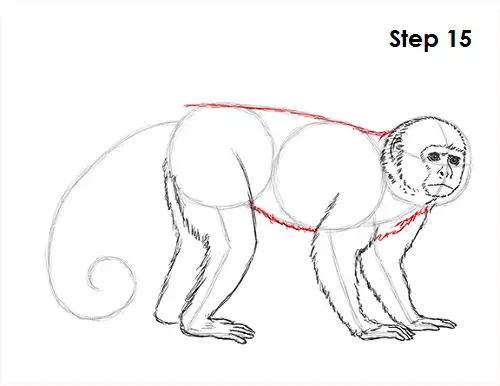
Step 15: Use the remaining lines as guides to draw the rest of the monkey’s body.
Step 16: Thicken up the initial spiral to create the monkey’s long tail. Simply go around the line, making it thicker, and darken it when you have the shape right.
Step 17 (optional): For a cleaner look, erase as much as you can of the initial guide lines. Don’t worry about erasing all of them. It’s okay to leave some behind. Also re-draw any final sketch lines that you may have accidentally erased.
Final Step (optional): Add some shading to your monkey drawing to give it more dimension and volume. Pick the direction of the light source when shading so that the shadows are consistent with it. Vary the pressure on your pencil to get different degrees of tonal value.
Add a cast shadow underneath. This helps ground the monkey so it doesn’t appear to be floating.
You can add more value throughout your monkey drawing for extra detail. It’s a good idea to use reference to be as accurate as possible. Remember to PAUSE the video any time you need help along the way.
Thanks for watching! Subscribe to the How2DrawAnimals YouTube Channel for a new tutorial every Tuesday.
How to draw guide – learn how to draw
Learn how to draw manga, how to draw cars and how to draw anime from our guides
How to draw a monkey
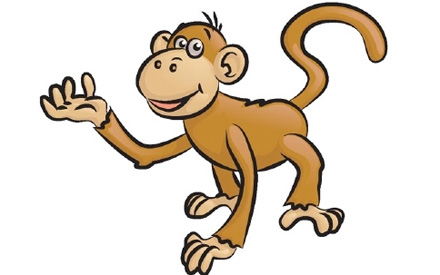
Today you are going to find out how to draw the monkey in the picture above. Let’s get starting.
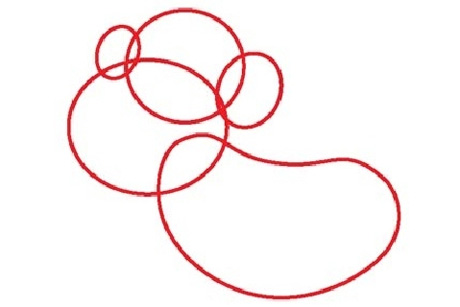
How to draw a monkey – Step 1: Draw a kidney-bean shape for the body. Now think where the face of the monkey should be placed and add an overlapping oval and circle for the face and the head. Draw two more ovals, one on either side of the head, for the ears of your monkey.
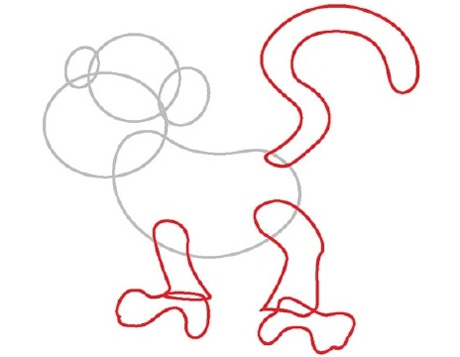
How to draw a monkey – Step 2: Now draw the tail of the monkey: a curved, snakelike shape. Add two shapes from the bottom of the body for the monkey’s back legs. Try some different models of feet, and choose the ones you end up liking the most. Just don’t forget that a monkeys’ feet look like hands.
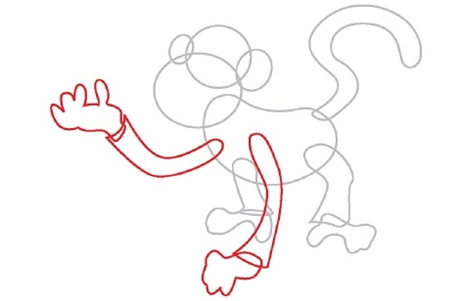
How to draw a monkey – Step 3: Add two more curved shapes for the arms from the upper part of the body and draw hands at their end. Again, take your time. Might not get what you want to from the first try.
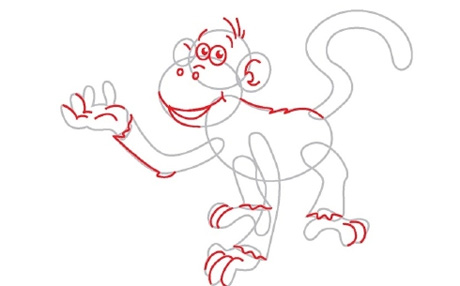
How to draw a monkey – Step 4: Now it’s time for the details. Draw eyes, pupils and nostrils. Add curved lines for the mouth and for the monkey’s eyebrows, nose and hair. Also work on all the other details, like drawing fingers on the monkey’s hands and feet, drawing the interior of the ear, etc.
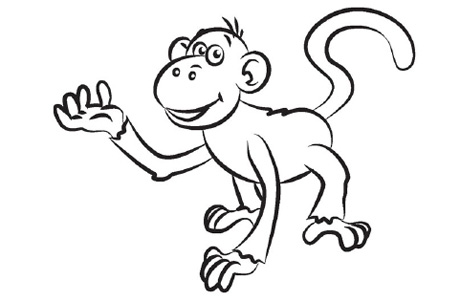
How to draw a monkey – Step 5: Your sketch is almost over. Just erase the extra lines and trace with a pen or a marker the lines you want to keep. Don’t forget about the details you drew on the previous step.
How to draw a monkey – Step 6: Now add some color and shades to your sketch and you’ll end up exactly with the first picture in this post.
Congratulations! You can always improve your drawing with lots of practice, but for now we can say you’ve learned how to draw a monkey in a couple of steps.
how to create a Monkey Drawings using a cute lesson
Monkey drawings are not always easy to create. This cute animal might be similar to man, but sometimes it can be tough to come up with the proper posture or facial expression. I know that it’s one of the animals that I find a little bit tougher to achieved.
For this tutorial, I decided to create a simple character with large eyes and a funny face. Of course, I added a banana to simplify the work on the posture. With something in one hand, it’s easier to come up with a relevant and believable posture.
Step 1
First, you must sketch the cartoon monkey using a simple pencil and a piece of paper. Nothing too complicated! If you are equipped with a tablet, you can render the drawing directly to your computer. Personally, I prefer to use a good old pencil even if I do have a tablet.
Step 2
Next, import your sketch on your computer either with a scanner or by taking a picture of it. Once this is done, open your vector software and import your digital file. Select your digital pencil and add a few dark lines on the character.
Step 3
Once the lines are completely covering the illustration, create a new layer and add plain shapes behind the lines to add color to the drawing.
Step 4
Plain colors are nice, but you can already add a simple effect by using the gradient tool. Simply select each shape individually and use the gradient tool to apply a simple shadow. Make sure that the bottom part of each shape is darker.
Step 5
To create more efficient shadows, your need to add more shapes on areas that are affected by light. These new shadows are nice, but right now everything is too dark to be effective.
Step 6
Select the transparency tool and partially hide the top part of each shape created in the previous step. Shadows are softer and the drawing is now easier to read.
Step 7
Shadows are great, but adding reflection can also add more depth to the illustration. Duplicate shapes already created to represent the monkey and scale the new shapes a little bit. Add a plain color (white) and select the transparency tool.
Step 8
Just like you did with the shadows previously, partially hide the bottom part of each shape so that the top is slightly white. This will give the illusion that light is bright and the character more visible.
Step 9
Finally, you can also change the color of the outlines using a tone similar to the shape near each line. Black outlines are nice, but not always pretty on cartoon characters like this one.
I hope you had fun creating this cartoon animal. Don’t hesitate to draw more monkey drawings. Practicing is the only tip I can give you to become even better at drawing. Enjoy!
How to draw monkey
Step 16: Now draw the brim of the hat as a long curved line. The line starts on the left side of Monkey D. Luffy’s head and moves to the left before curving up toward the top of the main circle. Then it curves back down to the right and in toward the head again. As you draw the line, give it a few extra smaller lines along the way to make it seem like an old, used straw hat.
Step 17: Now draw the top part of Monkey D. Luffy’s hat by draw a long, curved, dome-like line above the head. Draw a line on the left side between the brim and the top for the band around it. Draw a few more shorter lines throughout for the straw hat texture.
Step 18: That’s it! You now have a nice sketch of Monkey D. Luffy. You can stop at this quick drawing for a rough, sketchy look or go for a more finished look by continuing to the step below.
Step 19: For a more finished, inked look, carefully draw over the final sketch lines with a pen or marker. Wait for the ink to dry, and then get rid of every pencil mark with an eraser. You now have a finished inked drawing of Monkey D. Luffy! You can stop here or go to the final step to complete your Luffy drawing.
Step 20: For a completely finished Monkey D. Luffy drawing, you have to color it. You can use markers, color pencils or even crayons! Color his hat yellow and the hat’s band red. His hair should be black. The skin should be peach, but if you don’t have peach, improvise and use light brown or yellow-orange. The sides of his mouth should be brown and the tongue pink. That’s it! You now have a completed drawing of Monkey D. Luffy from the Manga and Anime One Piece.


