How to install cmake
How to install cmake
Установка CMake в Ubuntu
CMake — это набор инструментов, который позволяет создавать, тестировать и упаковывать программное обеспечение. Это семейство инструментов доступно сразу на нескольких платформах и распространяется под открытым исходным кодом. Чаще всего CMake применяют для упрощения процесса компиляции созданного ПО путём использования простых кроссплатформенных файлов конфигурации.Также с помощью CMake создаются специальные файлы makefile — наборы инструкций, которые позволяют использовать возможности компилятора в дальнейшем при автоматизации сборки.
Автором CMake является команда Kitware. Создание этого ПО было продиктовано необходимостью формирования мощной среды, которая могла бы работать сразу на нескольких платформах с проектами, где открыт исходный код (прежде всего — с Insight Segmentation and Registration Toolkit и Visualization Toolkit). В этом материале вы узнаете, как установить CMake Ubuntu, используя графический интерфейс либо командную строку. Если вы пытаетесь собрать программу и получаете ошибку cmake not found, то эта статья будет для вас очень полезной.
Установка CMake в Ubuntu
1. Менеджер приложений
На момент написания этой статьи использовалась самая последняя версия CMake (3.15.2). Она была доступна в рамках известного всем магазина Snap Store. Ниже вы узнаете, как установить CMake через штатный в Менеджер приложений в Ubuntu.
Если вы не хотите тратить много времени на взаимодействие с командной строкой, то работа с графическим интерфейсом должна вам понравиться из-за своей простоты. На панели инструментов, расположенной слева, щёлкните значок Менеджер приложений.
В верхней части открывшегося окна нажмите на значок поиска и в появившейся строке введите CMake. Результаты отобразятся следующим образом:
Первый пакет в результатах поиска — это и есть нужный нам файл, доступный в рамках магазина Snap Store. Щёлкните по этой записи и вы попадёте в раздел с подробной информацией о приложении, который будет выглядеть так:
Нажмите кнопку Установить, чтобы запустить процесс установки CMake. Возможно, вам придётся ввести свой пароль в окошке аутентификации, которе появится сразу после нажатия кнопки Установить. Это одна из форм защиты в Ubuntu — только авторизированный пользователь может устанавливать программное обеспечение в этой системе.
Введите свой пароль и нажмите кнопку Enter. После этого вы сможете наблюдать за статусом установки на отображающемся графическом индикаторе.
После успешной установки система выдаст вам следующее сообщение:
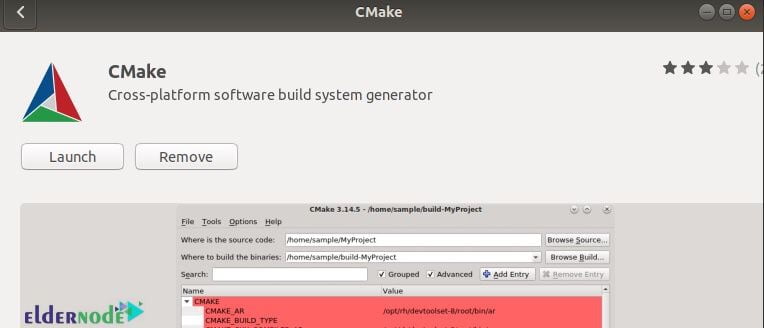
Из этого окна уже можно запустить CMake (или тут же, например, удалить).
2. Менеджер пакетов snap и apt
Такую же версию CMake можно установить через командную строку, если воспользоваться следующей командой:
sudo snap install cmake
Установка cmake ubuntu 18.04 из официальных репозиториев выполняется командой:
sudo apt install cmake
3. Сборка CMake из исходников
Если по каким-то причинам вы не хотите использовать графический интерфейс, или вы хотите самую свежую версию, можно прибегнуть к помощи командной строки. Нам надо будет скачать исходный код с официального сайта (https://cmake.org/download/), скомпилировать его, а потом установить.
Откройте командную строку — для этого либо найдите приложение «Терминал», либо нажмите сочетание клавиш Ctrl+Alt+T. Введите команду, которая начнёт загрузку исходного кода:
Когда tar.gz полностью скачается, его нужно распаковать. Воспользуемся следующей командой:
Перейдём с помощью терминала к папке с распакованными файлами:
Чтобы провести компиляцию скачанного кода, выполним ещё одну команду:
После правильного выполнения всех операций, командная строка выдаст следующий результат:
Теперь можно запустить процесс установки с помощью простой команды:
Затем выполните ещё одну команду:
sudo make install
Процесс установки завершён. Теперь можно проверить версию CMake, чтобы убедиться в правильности своих действий.
На момент написания этого материала CMake был доступен в версии 1.15.2, с которой мы и работали. Теперь вы можете использовать этот инструмент для выполнения своих рабочих задач.
Как удалить CMake?
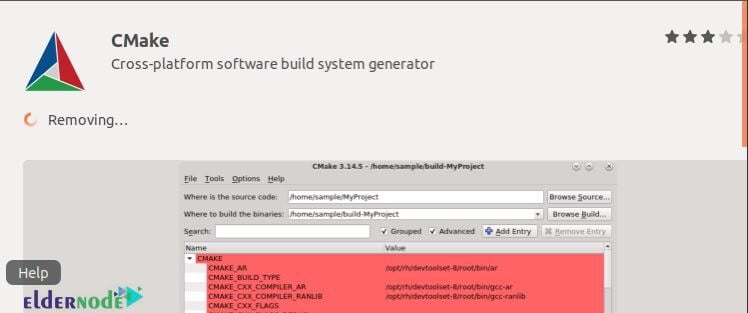
Если вы решили удалить CMake, который был установлен через Менеджер приложений, то этот процесс будет происходить следующим образом. Снова откройте Менеджер приложений, в открывшемся списке найдите пункт CMake (рядом с ним будет надпись Установлен). Нажмите на иконку приложения, перейдите к следующему экрану и найдите кнопку Удалить. Так будет запущен процесс деинсталляции.
После этого система вновь предложит ввести вам пароль — и сразу же после этого приложение будет удалено.
How To Install CMake On Ubuntu And Debian
Previously, CMake was introduced to you. To control the software compiler process, this open-sources software uses a simple platform and compiler-independent configuration files. In this way, native makefiles and workspaces would be produced to be used in a compiler environment of choice. Join us with this article to learn How To Install CMake On Ubuntu And Debian. Do not miss 2021 offers on Eldernode to purchase your own Linux VPS.
Table of Contents
Tutorial Install CMake On Ubuntu And Debian
Prepare the latest version of CMake which is available on cmake.org/download/ and Snap Store. Also, pre-compiled binaries are available for some UNIX platforms and you can alternatively download and build CMake from the source. In this article, we will explain how you can install it through the Ubuntu & Debian Software Manager.
To let this tutorial work better, please consider the below Prerequisites:
A non-root user with sudo privileges.
How to install CMake on Ubuntu
Here, we will describe how to install CMake to your Ubuntu both through the UI and the command line. If you prefer to not open the Command line very much, you can install software present in the Ubuntu repository through the UI.
How to install CMake through UI
First, click the Ubuntu Software icon on your Ubuntu desktop Activities toolbar.
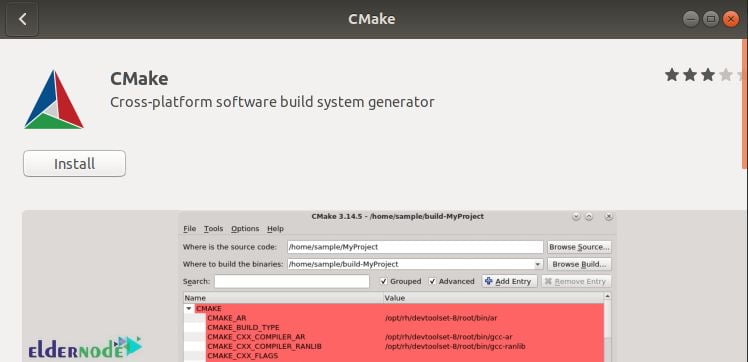
Then, if you search ”CMake” in the search bar, the first package listed is the one maintained by the Snap Store. Click on the CMake entry to open the page below:
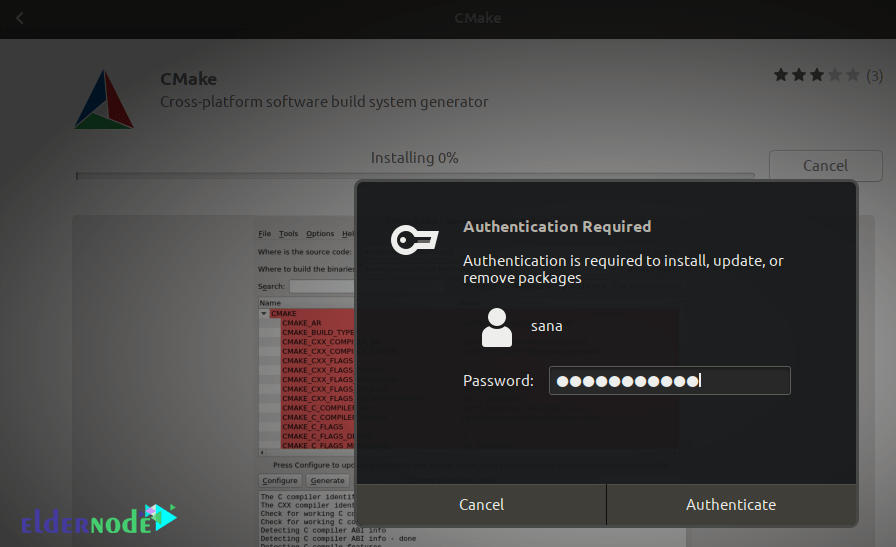
To start the process of the installation, click on the Install button. Since only one authorized user is able to install software on Ubuntu, the authentication details will be displayed. So, enter your password to let the installation process begin.
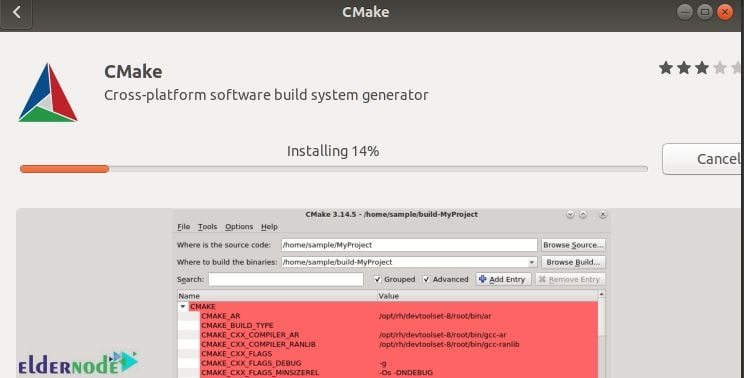
Tracking the installation is like the image below:
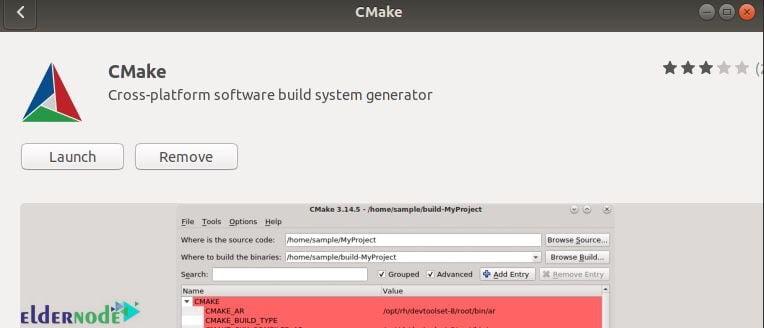
Once the CMake is installed, you will receive the following message. So, you can choose to directly launch CMake or maybe Remove it if you wish.
How to install CMake through the Ubuntu Command Line
As we mentioned, you can install CMake through the command line. Download the source code from the Official CMake website, compile it and then install CMake through it. The same version could be installed by running the command below:
To download the source code, type:
When the file is downloaded, use the following command to extract it:
To move to the extracted folder, run:
Next, use the following command to compile and install CMake.
Now, you can make it using the command below:
And to install it, type:
Once the installation is completed, you can verify its installation and check the correctness of the installed version. So, run:
When you checked for the latest version, you can use the CLI too to work with your software’s code.
Note: If you have already installed CMake using Ubuntu package manager, use the command below to remove it.
How To uninstall CMake Using The Ubuntu Software
When you decide to remove CMake from your system using the Graphical User Interface, it would not be so difficult. Let’s go through the steps of this part.
Search for ”CMake” on the search bar above. Then, click on the CMake application. The below windows should be displayed.
To uninstall CMake from your Ubuntu system, click on the ”Remove” button.
How to install CMake on Debian
The repository of Debian does not include any of the latest version of CMake. So, you need to download it firstly. Follow the below steps to learn CMake installation on Debian.
When you opened your terminal (Using Ctl+Alt+T) download CMake in your system. Run the command below and wait for the proceeding.
Then, you should extract the downloaded file. So, type:
Now, use the cd command after extracting the director.
At this point, you can run the following command since you have reached the CMake directory. Wait for a while to see CMake will be bootstrapped.
You will do this step when CMake is bootstrapped. So, run the make command in the terminal window. Processing of the make will take time, so do not exit the terminal window and let it reach 100% completion.
Finally, to install CMake, type:
If you wish, verify the process of installation of CMake using the command below:
Once you view the version, you can ensure that the installation is confirmed. Otherwise, check the steps again or send us the error you receive.
Enabled snaps on Debian and install CMake
Also on Debian, you can use snaps to install CMake. Snaps are applications packaged with all their dependencies. Snapes could be run on all Linux distributions from a single build. Snap Store is the best place you can install snaps.
To install snap directly from the command line, run:
Then, use the following commands to install CMake on your Debian Server:
Conclusion
In this article, you learned How To Install CMake On Ubuntu And Debian. Two methods of installing CMake was presented to you for both Ubuntu and Debian. In case you are interested in learning more, find the related article on How To Install CMake On Windows Server.
A Step-By-Step Guide to Install CMake on Linux
In this article, we’ll learn to install cmake on Linux. CMake is a cross-platform open-source meta-build system that can build, test, and package software. It can be used to support multiple native build environments including make in Linux/Unix, Apple’s Xcode, and Microsoft Visual Studio.
Table of Contents
How to Install CMake on Linux?
If you are to work with CMake in Linux, you’ll probably need a C/C++ compiler and the make build system since CMake generates ‘Makefiles’ on Linux. A Makefile contains the steps for compiling the program and generating an executable. The installation steps for these tools depend on the distribution.
We will be looking at two ways to install CMake.
1. Using Package Managers like apt/dnf
Note: Installing this way, the version of CMake installed will generally be an older one.
For Ubuntu/Debian (and their derivatives)
We can obtain information of a package and its dependencies using the apt command. Doing that for cmake :
Note that while installing these packages, the gcc package is also installed.
For Fedora/CentOS (RedHat based distros and their derivatives)
2. Using CMake’s Official Website
CMake’s official website has two options to install CMake on Linux as of now:
For RedHat Based distros, type:
Note: The link is for the latest version of CMake as of writing this article and may change in the future.
It is in general a good idea to inspect scripts before running them. To do that you can open it in the editor of your choice. Using the nano editor to open it:
40MB). The script acts like a ‘self extracting archive’. Now that we’ve inspected the script, we can run it from the current directory using:
Also, cmake will not be managed by the system package manager when installed this way. To update cmake you’ll need to repeat this process for any new versions.
A Sample CMake project
We’ll create a simple C++ Hello World program which uses CMake. Let’s start by creating a different directory for our project. Using the mkdir and cd commands:
Currently, the directory is empty. We’ll now create a C++ source file named hello_world.cpp which, as the name suggests, will print just Hello World!
You can use the editor of your choice. I’ll be using nano:
Now we’ll create a CMakeLists.txt file(with this exact capitalization) which is required by CMake:
The root directory of the project (
/projectzero in this case) must contain a CMakeLists.txt file. Each line in a CMakeLists.txt file has a command.
The CMakeLists.txt file for this project is quite trivial and will only contain these three lines:
It’s a good practice to have a separate build directory for executables. So, let’s do that:
The project structure looks like this now:
To run cmake we need to change into the build directory:
Now we can generate the executable simply by typing:
Run the executable by typing:
Congratulations on building your first CMake project. You can find more such beginner-friendly CMake projects on this GitHub profile.
Conclusion
In this article we learnt how to install CMake on Linux and created a simple Hello World program using CMake. CMake is a very useful tool for C/C++ development. You can find more information about CMake in its documentation.
Installing CMake
There are several ways to install CMake, depending on your platform.
Windows
There are pre-compiled binaries available on the Download page for Windows as MSI packages and ZIP files. The Windows installer has an option to modify the system PATH environment variable. If that is not selected during installation, one may manually add the install directory (e.g. C:\Program Files\CMake\bin) to the PATH in a command prompt.
One may alternatively download and build CMake from source. The Download page also provides source releases. In order to build CMake from a source tree on Windows, you must first install the latest binary version of CMake because it is used for building the source tree. Once the binary is installed, run it on CMake as you would any other project. Typically this means selecting CMake as the Source directory and then selecting a binary directory for the resulting executables.
macOS
There are pre-compiled binaries available on the Download page for macOS as disk images and tarballs. After copying CMake.app into /Applications (or a custom location), run it and follow the “How to Install For Command Line Use” menu item for instructions to make the command-line tools (e.g. cmake) available in the PATH. Or, one may manually add the install directory (e.g. /Applications/CMake.app/Contents/bin) to the PATH.
One may alternatively download and build CMake from source as in the following section.
Linux, UNIX
There are pre-compiled binaries available on the Download page for some UNIX platforms. One may alternatively download and build CMake from source. The Download page provides source releases. There are two possible approaches for building CMake from a source tree. If there is no existing CMake installation, a bootstrap script is provided:
(Note: the make install step is optional, cmake will run from the build directory.)
Or, an existing CMake installation can be used to build a new version:
(Note: the make install step is optional, cmake will run from the build directory.) If you are not using the GNU C++ compiler, you need to tell the bootstrap script (or cmake) which compiler you want to use. This is done by setting the environment variables CC and CXX before running it. For example:
Download Verification
Each release on the Download page comes with a file named cmake-$version-SHA-256.txt, where $version is the release version number.
One may use this file to verify other downloads, such as the source tarball. For example:
The SHA-256 file itself can be verified by GPG signature:
The GPG key C6C265324BBEBDC350B513D02D2CEF1034921684 is a signing subkey whose expiry is updated yearly.
Installing Files
Each call to the install command defines some installation rules. Within one CMakeLists file (source directory), these rules will be evaluated in the order that the corresponding commands are invoked. The order across multiple directories changed in CMake 3.14.
install(TARGETS …)
Installs the binary files corresponding to targets built inside the project.
install(FILES …)
General-purpose file installation, which is typically used for header files, documentation, and data files required by your software.
install(PROGRAMS …)
Installs executable files not built by the project, such as shell scripts. This argument is identical to install(FILES) except that the default permissions of the installed file include the executable bit.`
install(DIRECTORY …)
This argument installs an entire directory tree. It may be used for installing directories with resources, such as icons and images.
install(SCRIPT …)
Specifies a user-provided CMake script file to be executed during installation. This is typically used to define pre-install or post-install actions for other rules.
install(CODE …)
Specifies user-provided CMake code to be executed during the installation. This is similar to install (SCRIPT) but the code is provided inline in the call as a string.
install(EXPORT …)
Generates and installs a CMake file containing code to import targets from the installation tree into another project.
DESTINATION
” on Windows, where SystemDrive is along the lines of C: and ProjectName is the name given to the top-most project command.
PERMISSIONS
CONFIGURATIONS
This argument specifies a list of build configurations for which an installation rule applies (Debug, Release, etc.). For Makefile generators, the build configuration is specified by the CMAKE_BUILD_TYPE cache variable. For Visual Studio and Xcode generators, the configuration is selected when the install target is built. An installation rule will be evaluated only if the current install configuration matches an entry in the list provided to this argument. Configuration name comparison is case-insensitive.
COMPONENT
This argument specifies the installation component for which the installation rule applies. Some projects divide their installations into multiple components for separate packaging. For example, a project may define a Runtime component that contains the files needed to run a tool; a Development component containing the files needed to build extensions to the tool; and a Documentation component containing the manual pages and other help files. The project may then package each component separately for distribution by installing only one component at a time. By default, all components are installed. Component-specific installation is an advanced feature intended for use by package maintainers. It requires manual invocation of the installation scripts with an argument defining the COMPONENT variable to name the desired component. Note that component names are not defined by CMake. Each project may define its own set of components.
OPTIONAL
This argument specifies that it is not an error if the input file to be installed does not exist. If the input file exists, it will be installed as requested. If it does not exist, it will be silently not installed.
Installing Targets
Projects typically install some of the library and executable files created during their build process. The install command provides the TARGETS signature for this purpose.
Created by add_executable (.exe on Windows, no extension on UNIX)
Created by add_library with the SHARED option on Windows platforms (.dll)
If the above sample project is to be packaged into separate run time and development components, we must assign the appropriate component to each target file installed. The executable, shared library, and plugin are required in order to run the application, so they belong in a Runtime component. Meanwhile, the import library (corresponding to the shared library on Windows) and the static library are only required to develop extensions to the application, and therefore belong in a Development component.
Component assignments may be specified by adding the COMPONENT argument to each of the commands above. You may also combine all of the installation rules into a single command invocation, which is equivalent to all of the above commands with components added. The files generated by each target are installed using the rule for their category.
Either NAMELINK_ONLY or NAMELINK_SKIP may be specified as a LIBRARY option. On some platforms, a versioned shared library has a symbolic link such as
Installing Files
The FILES keyword is immediately followed by a list of files to be installed. Relative paths are evaluated with respect to the current source directory. Files will be installed to the given DESTINATION directory. For example, the command
The RENAME argument specifies a name for an installed file that may be different from the original file. Renaming is allowed only when a single file is installed by the command. For example, the command
will install the file version.h from the source directory to include/my-version.h under the installation prefix.
Installing Programs
Projects may also install helper programs, such as shell scripts or Python scripts that are not actually compiled as targets. These may be installed with the FILES signature using the PERMISSIONS option to add execute permission. However, this case is common enough to justify a simpler interface. CMake provides the PROGRAMS signature for this purpose.
which installs my-util.py to the bin directory under the installation prefix and gives it owner, group, world read and execute permissions, plus owner write.
Installing Directories
Projects may also provide an entire directory full of resource files, such as icons or html documentation. An entire directory may be installed using the DIRECTORY signature.
The DIRECTORY keyword is immediately followed by a list of directories to be installed. Relative paths are evaluated with respect to the current source directory. Each named directory is installed to the destination directory. The last component of each input directory name is appended to the destination directory as that directory is copied. For example, the command
will install the data/icons directory from the source tree into share/myproject/icons under the installation prefix. A trailing slash will leave the last component empty and install the contents of the input directory to the destination. The command
installs the contents of doc/html from the source directory into doc/myproject under the installation prefix. If no input directory names are given, as in
the destination directory will be created but nothing will be installed into it.
Files installed by the DIRECTORY signature are given the same default permissions as the FILES signature. Directories installed by the DIRECTORY signature are given the same default permissions as the PROGRAMS signature. The FILE_PERMISSIONS and DIRECTORY_PERMISSIONS options may be used to override these defaults. Consider a case in which a directory full of example shell scripts is to be installed into a directory that is both owner and group writable. We may use the command
which installs the directory data/scripts into share/myproject/scripts and sets the desired permissions. In some cases, a fully-prepared input directory created by the project may have the desired permissions already set. The USE_SOURCE_PERMISSIONS option tells CMake to use the file and directory permissions from the input directory during installation. If in the previous example the input directory were to have already been prepared with correct permissions, the following command may have been used instead:
Returning to the above example of installing an icons directory, consider the case in which the input directory is managed by git and also contains some extra text files that we do not want to install. The command
which uses вЂ/’ and вЂ$’ to constrain the match in the same way as the patterns. Consider a similar case in which the input directory contains shell scripts and text files that we wish to install with different permissions than the other files. The command
Installing Scripts
Project installations may need to perform tasks other than just placing files in the installation tree. Third-party packages may provide their own mechanisms for registering new plugins that must be invoked during project installation. The SCRIPT signature is provided for this purpose.
The SCRIPT keyword is immediately followed by the name of a CMake script. CMake will execute the script during installation. If the file name given is a relative path, it will be evaluated with respect to the current source directory. A simple use case is printing a message during installation. We first write a message.cmake file containing the code
and then reference this script using the command:
Installing Code
Custom installation scripts, as simple as the message above, are more easily created with the script code placed inline in the call to the install command. The CODE signature is provided for this purpose.
The CODE keyword is immediately followed by a string containing the code to place in the installation script. An install-time message may be created using the command
which has the same effect as the message.cmake script but contains the code inline.
Installing Prerequisite Shared Libraries
Executables are frequently built using shared libraries as building blocks. When you install such an executable, you must also install its prerequisite shared libraries, called “prerequisites” because the executable requires their presence in order to load and run properly. The three main sources of shared libraries are the operating system itself, the build products of your own project, and third party libraries belonging to an external project. The ones from the operating system may be relied upon to be present without installing anything: they are on the base platform where your executable runs. The build products in your own project presumably have add_library build rules in the CMakeLists files, and so it should be straightforward to create CMake install rules for them. It is the third party libraries that frequently become a high maintenance item when there are more than a handful of them, or when the set of them fluctuates from version-to-version of the third party project. Libraries may be added, code may be reorganized, and the third party shared libraries themselves may actually have additional prerequisites that are not obvious at first glance.
CMake provides a module, BundleUtilities to make it easier to deal with required shared libraries. This module provides the fixup_bundle function to copy and fix prerequisite shared libraries using well-defined locations relative to the executable. For Mac bundle applications, it embeds the libraries inside the bundle, fixing them with install_name_tool to make a self-contained unit. On Windows, it copies the libraries into the same directory with the executable since executables will search in their own directories for their required DLLs.
The fixup_bundle function helps you create relocatable install trees. Mac users appreciate self-contained bundle applications: you can drag them anywhere, double click them, and they still work. They do not rely on anything being installed in a certain location other than the operating system itself. Similarly, Windows users without administrative privileges appreciate a relocatable install tree where an executable and all required DLLs are installed in the same directory, so that it works no matter where you install it. You can even move things around after installing them and it will still work.


