How to make ribbon flower
How to make ribbon flower
10 easy ways to make beautiful Ribbon flowers : DIY tutorials
I could easily have titled this post “100 ways to make ribbon flowers” – there are that many and more ways. I already have a crazily boggled mind, so I decided to stop at ten and showcase just the best and, of course, the easiest ways to make beautiful ribbon flowers.
Ribbon flowers make great embellishments on anything you sew – so long as you do not wash it; I mean, you cannot not put the ribbon flower embellished thing, whatever your project is, into the washing machine and forget it. Y ou will need to hand wash it.
Besides this disadvantage, ribbon flowers are great on bags, gifts/ packages, wedding decorations, jewelry, accessories especially hair accessories. Ribbon flowers look beautiful as a one-off flower but when made in more than one piece you have a garden already, wherever you want it.
How to make Ribbon flowers – 10 easy tutorials
1. Easy Gathered ribbon flower
This is the easiest ribbon flower you can hope to make.
Just take 1/2 inch wide ribbon in the color of your choice and cut into a 12 inches long piece. Fold it 3 inches from one end (short edge – this ensures that the cut edge is folded to the inside). Take a sewing needle and thread and make running/gathering stitches along the long edge.

Gather the ribbon into your flower by puling at the gathering stitches.

When the flower is arranged to your liking and you have stitched the loose ends at the back together, attach a pearl/bead etc in the middle.

You can add two different color ribbons and make flowers this way for a multi color flower.
2. Pleated ribbon flower
To make this flower, take a 1 inch wide ribbon.
You will be making pleats on this ribbon – you can pleat as you sew it on the sewing machine. The portion which comes to the center should be pleated more closely than the outer edge

Start to stitch the pleated ribbon on to a circular felt base with a hand sewing needle and thread. Start from the outer edge.


3. Pleated ribbon flower (2)
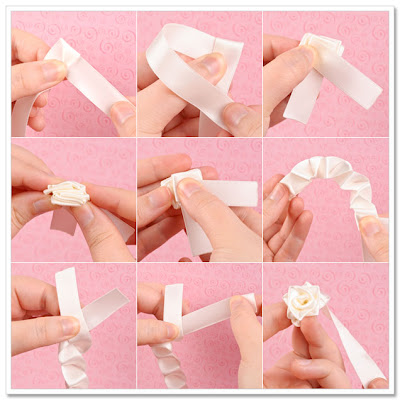
A beautiful ribbon carnation-rose flower can be made by pleating ribbon.
This flower is made with a ribbon which is 1/2 inch wide and 20 inch long.

Cut the ribbon and pleat it into small even inverted pleats.

After you pleat it will now be a 10 inch long ribbon

After making the pleats, just roll it into a flower.
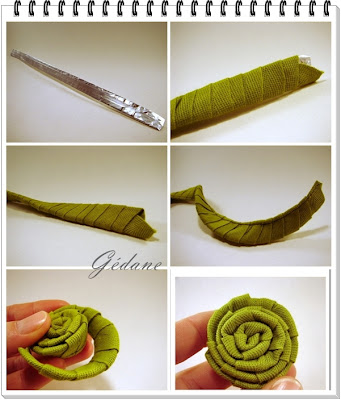
It resembles a pretty carnation rose this way. You can also have a look at the different ribbon roses you can make here.

4. Knotty ribbon flower
This flower is very pretty but very very easy to make. Cut out many ribbon pieces in different lengths – I took 3 inch long ribbons for the outer petals and 2 inch long ribbon for inner petals.

Knot all the ribbon pieces and keep aside. Fold the ribbon pieces with the knot in the middle. Using needle and thread, attach the knotted pieces on to a base/fabric. The cut edges should be together.

Layer all the ribbon pieces in a flower shape


For the inner petals take smaller ribbon, 2 inches long. Assemble and attach.

Add a bead or more to hide the petal raw edges, joints and stitching
5. Medallion flower
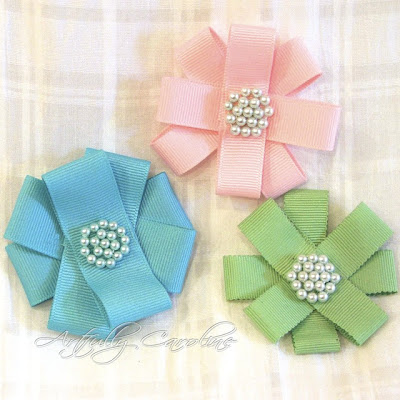
This ribbon flower is made by making loops like the ones below. Just layer these ribbon pieces one on top of the other and attach, buttons, beads or another flower in the middle.


6. Ruched ribbon flower
Mark the ribbon evenly on both sides.

Take small stitches on alternative points as in the picture below.

Gather the stitches and arrange the ruched ribbon into a circle. Stitch the raw edges together with a matching thread

7. Loopy ribbon flower
This flower is made with ribbon loops. Cut out 1/8 inch wide ribbon into small pieces of about 3 inches. I wound the ribbon on three of my fingers many many times and then gave a single cut to get these ribbon pieces.
You can measure each and every ribbon painstakingly and cut it out individually. Good for mental peace.

I stitched it into a loop by just inserting needle and thread through one end of batches of the ribbon from one side and then from the other end. Once the loop is made, cut through the middle

Add more loops around this bunch in a different colour ribbon. Stitch in place. You can make the loops and add another flower in between for a variation
8. Simple Ribbon flower
Cut out several ribbon pieces of length 5 inches. I used 1 inch ribbon. Less wide ones would look as good. Fold the ribbon as shown in the picture below.

Turn this to the other side.
Now turn the sides to the back to resemble a petal. It is when you gather the lower edge and tie with a thread that this will look really like a petal

Layer all of these petals over a fabric/felt piece or simply one on top of the other. Stitch each petal in place as you layer.

If you are adding pips you will want to add them before they are gathered. Add beads for prettying it up as well as hide the stitching.
9. Ribbon embroidery flowers
Ribbon embroidery uses ribbons to embroider pretty flowers and other floral designs on fabric. Some of the flowers you can make using this technique can be seen in this post – 10 ribbon embroidery flowers.
10. Multilayered ribbon flower
This flower is made by folding the ribbon pieces in a particular way. Nothing complicated. Cut ribbon into 3-inch pieces (for the outer layer) and 2-inch pieces (for the inner pieces – in a different colour). Cut out a piece of felt as the base.
Fold these ribbons in the way shown below.

Gather the lower edge and tie with a sewing needle and thread. Prepare all the petals this way and keep aside.

Layer and stitch on a felt base as done with previous flowers.

When life gives me ribbons I make flowers. What about you? What do you make with ribbons?
How to make ribbon flower
I thought with pretty good certainty that the last corsage I would ever pin on was at Senior Prom in High School.
But I was wrong. A few weeks ago I visited the Quilting Cottage in American Fork, Utah. I love the Quilting Cottage, which is not only a quaint little store, but they have a wonderful selection of fabrics. While there, I spoke with Wendy, one of the women who works there…
She was making ribbon flower pins for an upcoming wedding. The fabric flowers look a lot like the ones they sell at Anthropologie, but hers are a fraction of the cost. They were so darling I would happily wear one.
Wendy was kind enough to teach me how to make these fabulous fabric flower pins. Here’s what you need:
1. Pull on the wire of one side of the ribbon to ruffle. Ruffle the entire length of your piece of ribbon. Not all wire ribbon is the same. Some are more fragile, so pull gently. Leave a few inches wire hanging out from the ends, but clip away the rest to get it out of your way.
2. To start, fold your ribbon back on forth a few times (on the side of ribbon which you’ve just pulled the wire). Using quilting thread run a stitch through the ribbon several times to secure.
3. Start wrapping the ribbon around. Secure each wrap by stitching all the way through the layers in a star pattern.
4. Once it is large enough to be difficult to stitch through all the layers, secure by stitching to the previous layer.
5. When you come to the end of the ribbon, fold the the corner of ribbon back inside to hide the raw edge. Stitch into place. Cut off any excess wire hanging out of the ends.
6. Cut a circle out of felt to cover the back of the flower. I cut a second layer of felt in a wide strip and secured it with a zigzag on each side. That way I could easily slip in onto a hair clip or a pin.
7. Stitch the felt into place on the back of the flower using a blind stitch.
I love how this flower pin turned out. I used 4 yards of fabric for this flower, and made it fairly dense. It looks just like the peonies blooming in my garden right now. And it was fast and easy… my kind of one evening project. I’m off to make several more as gifts right now…
Check out my Felt Poinsettia Flower Pin tutorial as well.
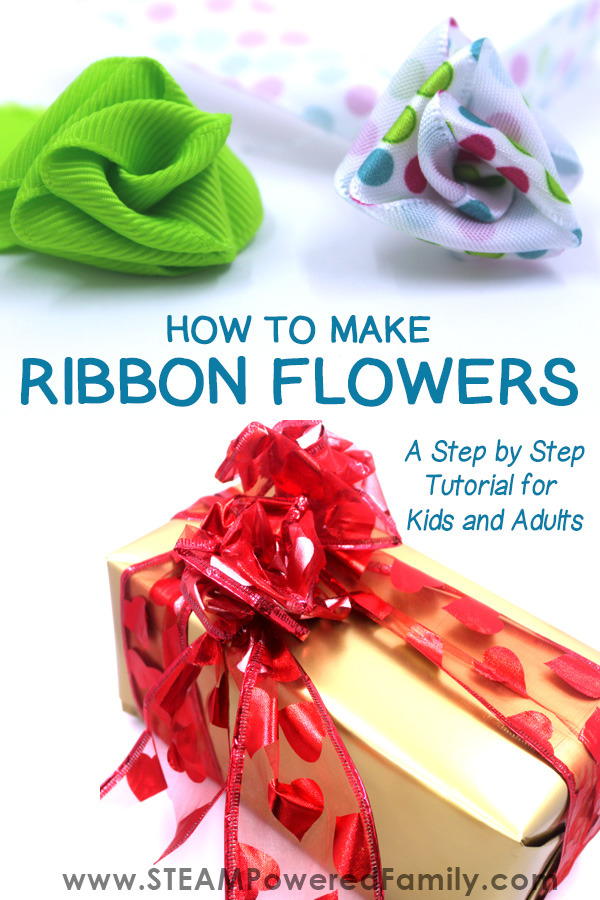
How To Make Ribbon Flowers – A Step By Step Tutorial for Kids and Adults
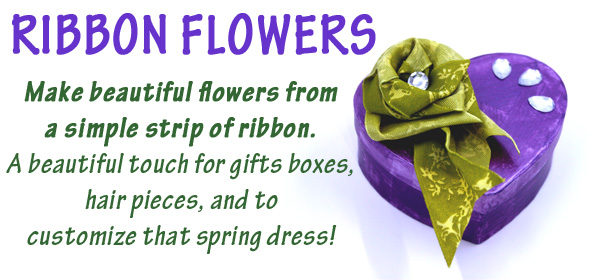
Ribbon flowers are a simple but stunning craft that can be used to add a beautiful touch to gifts, clothing, decor items and more. Simple enough for even young children to create, this is a fantastic activity with results that have the WOW factor! Here I’ve provided a full tutorial of how to make ribbon flowers with step by step instructions. Happy creating!
Ribbon Flowers
Disclaimer: This article may contain commission or affiliate links. As an Amazon Associate I earn from qualifying purchases.
Not seeing our videos? Turn off any adblockers to ensure our video feed can be seen. Or visit our YouTube channel to see if the video has been uploaded there. We are slowly uploading our archives. Thanks!
My mom is amazing. She literally was a crafting expert who worked for years at the hospital teaching crafts and activities to patients who were bedridden. Growing up she was always teaching us new crafts and getting us creating. One of the things she taught all of us how to make flowers out of ribbon.
Originally she taught us how to make ribbon flowers so we could decorate gift boxes but soon we were creating custom flowers for our dresses, hair clips, and even to put on our pony’s bridles when we rode in parades.
One of the coolest uses for these flowers is to customize dresses for a wedding. Simply find a ribbon that matches the wedding colours and you can customize both flower girl and bridesmaid dresses (and even hair pieces) for a beautiful, unique and cohesive wedding party.
OK, so lots of amazing ideas, but I know you are asking… Is it easy to make a ribbon flower? YES, especially with our easy ribbon flower tutorial!
So are you ready? Let’s make ribbon flowers and ribbon roses!
Check Out This Video Of Me Making A Ribbon Flower
If you can’t see the video, please turn off your adblockers as they also block our video feed. Thanks!
How To Make Ribbon Flowers Step by Step
Step 1
First you need a piece of ribbon. To start with cut it with scissors to approximately 12 inches in length.
Pro Tip! Pretty much any length or width or ribbon will work and once you master the technique. When you are first learning or working with children chose a silkier ribbon as it helps with the pulling step at the end. Once you get good at this easy technique, you can use other textures.
Step 2
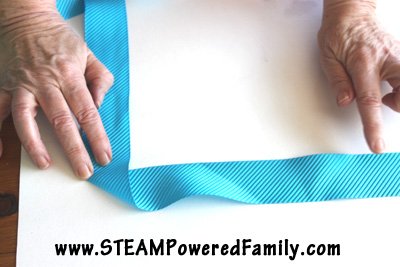
Create an L shape with your ribbon like this:
Step 3
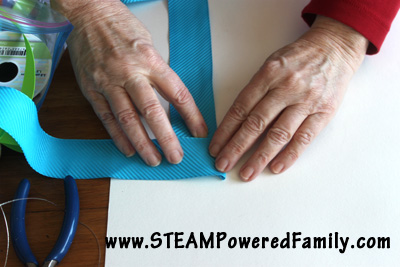
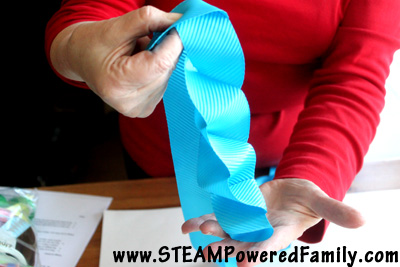
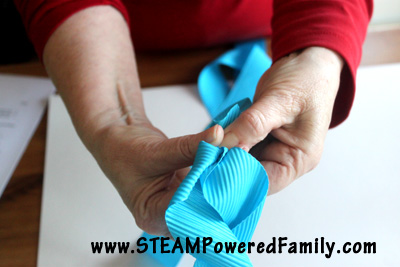
Now start folding one side, then the other. Fold back and forth until you have just a couple of inches left on each end.
Step 4
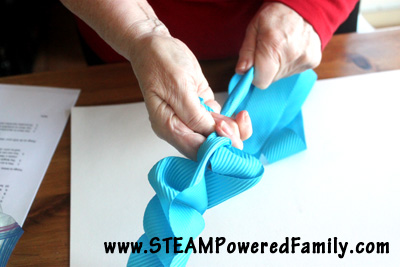
Grasp the ends and twist together. You will create a beautiful helix shape.
Step 5
Now this next step requires a bit of feel. Twist until the ends are snug but not too tight.
Step 6
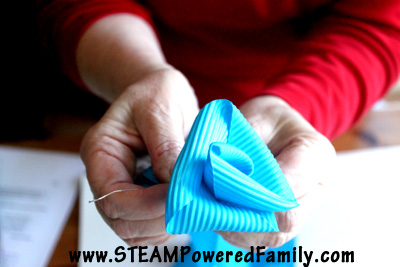
Now grab one end and pull, if it doesn’t seem to pull through, twist again until it slides nicely. Pull until your flower is created.
Step 7
You can secure your flower with a little bit of wire, tape, glue or even a few stitches. Add a simple stem with a hot glue gun and some pipe cleaners or sticks.
VOILA! One beautiful ribbon flower or ribbon rose!
Feel free to add embellishments like a dusting of glitter on the petals, use a needle or bit of glue to add a bead to the center of your flower, or any other special touches that make your fabric flowers special.
Making Ribbon Flowers for Fine Motor Development
Ribbon flowers are a great activity for helping to develop fine motor skills including fine motor strengthening and coordination. Starting at a very young age, kids can make these flowers, but even adults enjoy making them.
Where Can I Use Ribbon Flowers?
The great thing about ribbon flowers is that you can use them for so many things!
Get your whole class making them and use them for gorgeous spring or Christmas decorations in the classroom. For wall decorations, use bigger wide ribbon for a bolder and larger flower.
Add handmade flowers to your craft projects, like our DIY Jewelry Box.
Customize clothing, backpacks, and lunch bags. One reader shared that she made hundreds of these to attach to her wedding dress. These would be a gorgeous way of customizing a flower girl dress too!
Make your hair accessories or hair clip match your outfit perfectly by adding these flowers.
Combine a ribbon flower with a custom stamped tag for a special gift or to really make your backpack or purse unique.
Make a bunch of ribbon flowers to create a bouquet that can be gifted or even used as a wedding bouquet.
Make a special Lei inspired necklace with ribbon flowers.
Decorate gift boxes during the holidays. If you want your box under the tree or at that birthday party to really standout, make a ribbon flower to decorate your box and make it extra special.
Why not put something extra special in that gift box and make some delicious candy treats with these Candy Science lessons?
What other ideas do you have for using ribbon flowers?
Ribbon Flowers Tutorial (Make flowers)
Ribbon Flowers
Ribbon Flower Rose:
Make ribbon flowers
Burlap and Fabric Flowers
Yarn Rosettes
25+ Handmade Flower Tutorials
Looking for more Handmade Flowers?
Welcome to craftionary
Hi, I’m Hani
I’m a mom of 2 decorating and soulfully designing our home. I love to share crafts and simple ideas for home and garden.
Follow us
Good Reads
120 Best Front yard and Backyard Landscaping Ideas
How to Make Bas-Relief Sculpture Dried Flowers Casting Art
DIY indoor planter box idea with IKEA plant stand flower box
200 DIY Dollar Store Organization and Storage Ideas
36 Stunning epoxy resin projects diy that look expensive
30 ways to make Abstract Art projects
40 Impressive DIY Mosaic Projects to love
25 New things made with DIY cardboard box anyone can make
ORGANIZE
Related Posts
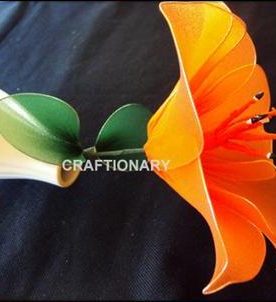
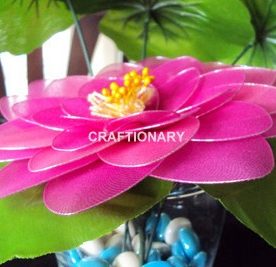
How to make nylon flower lily with stocking net
Sewing organization (Embroidery hoop)
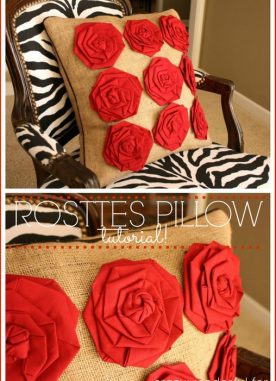
Rosette pillow (Make rosettes throw pillow)
How to make nylon flower lotus tutorial
I learned how to make these roses before several months watching one video tutorial.I was happy like a child! Your flowers are perfect.Thanks for your version how to make such a lovely flowers:)
Love the basket and flowers for your wedding. Thanks for sharing that. Great inspiration for wedding season.
Lovely flowers! Thanks for the tutorial.
I had never seen the method used by borrowed and blue before! I am going to have to give it a try!
Thanks for the tip!
Wow, that’s really beautiful! Thanks for sharing! Liz
These are gorgeous and very elegant!
Thank you for the tutorial – appreciate it a lot 🙂
I love your roses.
Stopping by from Nifty Thrifty! Your roses are so pretty and elegant looking. Thanks also so your tutorial! My fingers are crossed you’ll share your creative inspiration tonight with Sunday’s Best – sharing is a good thing! PS – I’ve pinned this!
Really beautiful roses! Thank you for sharing so many ways to make them 🙂
Ok if I say the roses made perfect decoration for your basket? Beautiful work all around.
Janet
I love the dress! You did a fabulous job on it. I’d love for you to link it up to our What I Wore Sunday link party:
http://crafting-cousins.blogspot.com/2012/09/what-i-wore-sunday-week-31.html
Oh goodness. I meant flowers. I was talking about a dress…while I was typing…so sorry! 🙂
<<
perfect flowers!
I would like to let you know about a new Craft Party,
I would love to see your creations linked up with Crafty Tuesday
Every week I will choose few tutorials and they will be featured on my blog and my facebook, twitter and pinterest page
I hope to see you link up
LOVE the flowers. I want to make some too!
Thanks so much for sharing this at The DIY Dreamer.. From Dream To Reality!
Such pretty ribbon flowers! Was tickled you shared your creative inspiration with Sunday’s Best – you helped make the party a success!
Thanks for posting this. I’ve seen a lot of fabric flowers, but your’s are especially pretty! Maybe I’ll give them another go, my last ones turned out a bit wonky 🙁
Love all the flowers. I am making some right now out of fabric. Time consuming, but so nice. Thanks for sharing. Loved seeing all the different ones.
I love ribbon flowers. so very pretty!
So charming! Thanks for sharing.
Beautiful!! Thank you for sharing at Sharing Saturday!!
Those flowers are gorgeous!
Wow!! So beautiful! Lots of ways ou could use them too.
Thanks so much for linking up at I Gotta Create! karen says:
Greetings and Regards
Excuse me, my name is Amina from Iran, I am a beginner and would like you to learn how to make these beautiful flowers
So I ask, if possible, video clips of how to make some of these flowers please send me an email.
I do appreciate it, thanks.
Good luck
You can find tons of video tutorials on youtube to make various forms of ribbon flowers.
How to Make Colorful Flowers With Curling Ribbons
Introduction: How to Make Colorful Flowers With Curling Ribbons
Are you looking for a fun craft project? Making these colorful flowers using curling ribbons may be the perfect one.
I had many ribbons of different colors I no longer needed. Instead of throwing them out, I thought of making something useful and beautiful out of them. I just wasn’t sure what. Then, I saw a cluster of daisies for sale in the craft store, and I immediately knew my curling ribbons could be turned into colorful flowers. Excited, I went to work. And the result is this amazing bouquet.
Step 1: Materials and Tools Needed
Here is what you need:
1. An assortment of different colored curling ribbons, approximately 10 meters long in each color (10 meters is enough to make two flowers). I have three different width ribbons: 0.75″, 0.5″ and 0.2″. The wider ribbons can be used to make the larger sized flowers.
2. 16 gauge by 18″ long pieces of floral wire. If you don’t have this size, you could use 18 gauge. I need 20 wires for my bouquet of 20 flowers.
4. Medium size vase. Mine is 8″ high, clear glass with ruffles.
5. A roll of floral tape (optional).
8. A cluster of daisies (optional).
9. Small size clothes pins. You can find these in the scrapbooking section at your craft store.
10. Iron (not in the picture).
Step 2: Preparing the Ribbon Before Cutting
I prefer 0.2″ wide curling ribbon because I want the size of the flowers to complement the daisies. So, when I need different colors I have to cut the widest ribbons into 0.2″ wide strips.
Okay, so I unpacked and turned the ribbons lose. Unfortunately, they are all tangled and curled like the green ribbon shown in the picture. I’m glad the cat wasn’t nearby.
So, the solution is to iron all strips before cutting them.
Set the iron temperature on low to medium heat. In order to avoid mistakes, cut a sample test strip. Put the strip under a piece of fabric and press, and at the same time pull the strip away slowly. Only when you adjust the iron to the right temperature to successfully flatten and straightening the ribbon should you iron all of the strips.
After ironing, the ribbon becomes manageable.
Step 3: Making the Flower: Cutting Petals
Now, you’re ready to begin making a flower. Each flower is made by assembling eight main petals. Each of these assemblies is made from four strips of ribbon. Here are the steps to make the main petal:
a. Choose any color to start. I selected the red color. For the first flower, cut 32 strips all 6″ long. Put them aside.
b. Cut 32 strips 5″ long for the second flower. Put them aside.
c. Repeat process for all colors.
You have two sizes of flowers. You can always make a different size. For instance, 8″ long strips will make a larger size flower. Now, let’s move to next step.
Step 4: Assembling the Petals
a. Take four 6″ long strips. Fold each of them into two with one side 0.4″ shorter than the other. This is to make sure when you fold the longer strip it will be equal in length. I’ll use four different colored strips to make the instructions easy to follow as each petal is easily identifiable. I use the small clothes pins to hold them in place and to arrange them with the short strip underneath the long one.
b. Now, connect the first two strips—the red and the navy blue ribbon—by inserting the folded red ribbon into the loop of navy blue ribbon as shown on the second picture.
c. Next, take the folded yellow ribbon and insert it into the red ribbon loop as shown on the third image.
d. Finally, loop the folded green around the navy blue folded ribbon before slipping them into yellow ribbon loop.
e. Then, tighten them by pulling each folded strip away from the center. This will temporarily connect them together. You will still need the clothes pins to hold each folded strip in place.
Step 5: Locking the Petal Assembly Together
In this step, lock all folded ribbon strips together. In order to do this, you need to:
a. First, take the long green strip and fold it over the yellow and navy blue strips.
b. Then, fold the long navy blue strip over the green and the navy blue itself as shown on the second image. (I put the clothes pin on top of the strips to hold them in place).
c. Next, fold the red ribbon strip over the navy blue and the red. You can press along the folded area to create a line to help the strips stay in place. But, still you need something to hold them in place.
d. Finally fold the yellow strip over the red and insert the end into green loop. Usually, it’s hard for the yellow strip to go through the tight loop. With the scissors, trim the yellow strip end into 45 degree angle and insert it through. Then pull the yellow strip all the way through to complete the petal formation.
Now, all strips are locked together. It should look like the fifth picture.
I’ve made eight main red petals as shown in the last image. After you have your first batch of petals made, I will guide you to the next step.
Step 6: Trimming the Petal Tips
Right now, the petal tips don’t look attractive. To make them look realistic, you need to trim each by cutting a 45 degree angle on both sides.
The picture shows how they look after trimming.
Step 7: Shaping the Petals
Since I ironed the ribbon into flat strips, the petals need to curve upwards to make a floral shape. Using the blade side of the scissors (or pliers), I place it on top of the beginning of the first two petals. With my thumb on the blade and a forefinger underneath both ribbons for pressure, I drag the blade. If I want the petals to curl tightly, before I reach the tip of the strips, I turn the side of the blade up and drag it. The ribbon will curl up as shown. Repeat this procedure to curl the other three sides of the petal assembly.
Repeat for each of the seven sets of petal assemblies for a complete flower.
Step 8: Putting It Together
Take a floral wire, and insert the end through the center of the flower petals. It should look as shown in the picture.
Repeat for the other seven flower petals. When you’re done, you now have a red flower!
But, wait! One more step. You’re almost there.
Step 9: Securing the Petals to the Wire Stem
Using pliers, bend the tip of the wire into a hook. This will prevent the flower from being accidentally pulled off the stem. Next, push the flowers all the way up to the bend. The bend will act as a stopper.
Note: If the connection is not tight between all eight petals assemblies, they may slide down. You could add a leaf or leaves and wrap the floral tape around the wire. This will thicken the wire and secure the flowers and the leaf or leaves into place. The leaves in the picture belong to the daisies. I decided that the flowers I made resemble chrysanthemums and they share very similar looking leaves with the daisies. You can also make your own leaves using my previous Instructable.
Through all the steps, you’ve successfully created your first flower! However, you need to make more flowers to fill in your vase.
Repeat steps 4 to 9.
Step 10: Arranging the Flowers
Arrange all flowers in a vase. Since my floral wires are longer than the vase, I need to trim the lengths accordingly to create the preferred height. Be careful when you cut the wire with the pliers. Cover the excess wire with a towel prior to cutting, so when you cut, it won’t fly off and hit your face. Finally, I added daisies to the arrangement as fillers.
After all the hard work, you’ll be rewarded with beautiful and colorful flowers for the summer.
There are so many places in your house for this bouquet. For instance, you can put them on your desk, in the living room or on the dressing table.
I hope this project will inspire you to begin making your own bouquet. Other than ribbons, you could also use different materials, such as drinking straws. Enjoy!


