How to shade hair
How to shade hair
How To Cel Shade Hair – Step-By-Step Guide
Table of Contents
I get commissions for purchases made through links in this post. As an Amazon Associate, I earn from qualifying purchases. Read the disclosure.
This is a step-by-step guide to cel shade anime hair. Shading hair is so much fun that I always look forward to doing it. Yes, sometimes it’s not so much fun, but usually, it is. This particular piece was done in Adobe Photoshop.
So, where to begin?
Picking light source for the hair
It would be best if you started with the light source. Is the light coming from above, below, from the side or possibly from the back (which is always cool)?
I’ve chosen the light source being above (easiest). We more than often see the light coming from above us (sun), so it’s the easiest to go with that. You kind of know how the shadows work, when it’s coming above. You’ve seen it so many times.
Select base color before starting to shade the hair
When you’ve drawn the line art, move on to selecting a base color for the hair. If you are not sure what to select. You can select quite a light color to make the shading nicely visible.
Get the shading going on the anime style
The next step is to lay down the first shadow color, I more than often use slightly cold shadow color. Pick something like #aea4b3, for example. Shading hair is slightly different from shading other elements. Hair has lots of strands. So the goal is to illustrate those strands and volume.
As we are shading the hair, we do not draw individual strands, but focus on volume and main shapes.
Building the volume for the hair
Focus on the volume first. Shading or drawing the volume first gives the hair its shape and personality. Don’t be afraid to make the shading fill the hair. The goal is to make the hair look lively.
Shading individual hair strands
When you have the volume in place, you can move on to the hair strands.
The easiest way is to use the lasso tool. Pick the lasso tool and create a long spike going from the “root” towards the end of the hair. This illustrates the strands. Do take into account the flow of the hair. Which way is the hair moving? Make the spike flow according to the hair’s movement.
If you have lots of volume in the hair. Make the spikes thicker rather than thin.
Fill the hair with these spikes while keeping the light source in mind. Now you should have the first shadow/shading in place. However, the image might look a bit empty still. This is where you start to create the next shade to the hair.
Adding the next shade for the hair
This process is very similar to the one you already did. One thing to keep in mind is that the shadows should be smaller and more defined. By this, I mean that, think through at what areas you would like to emphasize.
Not every area should be emphasized or highlighted. Only the ones which get affected by the light source the lightest (pun intended). Darker shadows mean that light doesn’t get there so easily. Logical, Right? You can use the same shading color you used previously.
Finalizing the hair shading
Check that the volume of the hair and strands are going in the right direction. Light source works, and the hair looks good even if the canvas is flipped. (You can do this by selecting Image – Image Rotation – Flip Canvas Horizontally / Adobe Photoshop CC). If everything is looking good, share your work and be proud of what you have accomplished.
I hope this step-by-step post was educating or at least gave you some new perspective on shading hair.
Sorry for the video not showing the actual shading process, but I still wanted to show the drawing process to you.
Available resources for this artwork
Find this and more from the Anime Artist’s Art Bundles
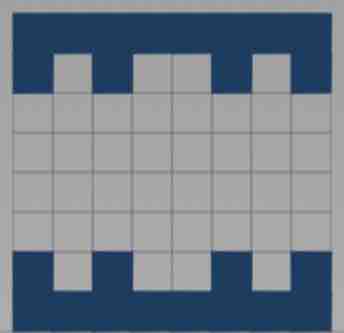
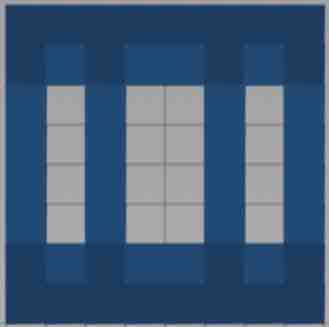
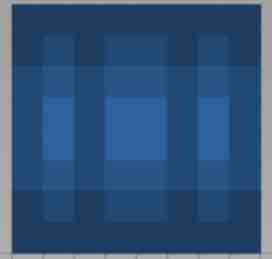
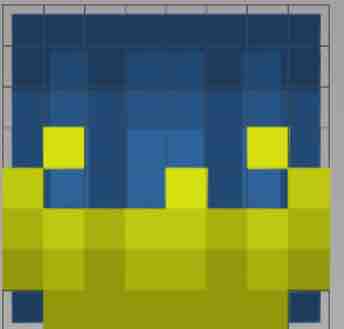
Generally, each side of the head is made up of 3 different components, so I’ll be showing you each three components and what they look like combined.

The back of the head is shaded like this. To understand why I put the shading and highlights where I did, think of the actual shape of the skull. It’s not strictly round—instead it bulges out in the back slightly above center. That’s why the highlight is higher than center.

The shading on the side of the head is pretty similar. Keep in mind that the ‘front’ of the head is where the arrow is pointing. I put the highlight slightly towards the front of the head. Also keep in mind that, like I said in the picture, the front first column of pixels is generally covered up by 3D hair put in the hat layer. When I put hair in the hat layer I like to have it wrap around the sides slightly—I feel this looks more natural than putting it only on the front.

The top of the head is probably the most complex part of the head to shade. The reason of this is because this is where the strands of hair from the sides meet, and this is where the part is. For skins with long hair, you should always include a part at the top of the head for realism. To get an idea why I shade my parts with one dark line and one light line, take a look at this lovely lady. Look at how the light creates a highlight on one side of her part while it leaves the other side in shadow. That’s basically what I’m trying to replicate.
If this example seem too complex for you, try simplifying the colors a bit. Try only using one shade of highlighting as opposed to two, so the highlights are less complex to draw.
Before I finish this blog, I’d like to address some of the common problems I see when people shade hair:
-Many people shade hair vary lightly. While light shading might make sense for clothing (since clothing isn’t shiny or reflective), hair looks better when it’s shiny. Don’t be afraid to make some bright highlights on your hair.
-Sometimes people will shade hair by only drawing stripes (or ‘strands’) and leave out any other shading. Remember, the head is rounded, so your shading should indicate that.
-Finally, most people don’t hue shift their colors. I can’t overstate how important hue shifting is! Out of everything, it’s probably the simplest way to make your skins look eye-catching and professional. As an example, think of shiny dark brown hair. When the light hits it, it doesn’t just look light taupey-brown, it shines a bright golden shade. Similarly, red hair will shine a coppery-orange shade and not just a pale red pink shade. For more information about hue shifting, check out my blog on the subject.
I hope this blog is helpful and informative. If you like it, please leave a diamond or comment! Thanks.
How To Shade Hair
This is how I shade my skins. Note: I don’t know how to have pics of the shading so I am just going to try to explain this is a less complicated way. I hope this helps.
Step 1.) Go on your skinning website such as minershoes, skincraft, exc.
Step 2.) What you want to do is color the head left, head right, head front, head back, head top and finally head bottom a TOTALLY different color then what you want the actual hair color to look like.
Step 3.) When you complete that step, you want to create a pallete. If you don’t know what a pallete is, this is what it is: A pallete is a row of pixels in order from darkest to lightest. I usually do 8 or 7 pixels for my pallete.
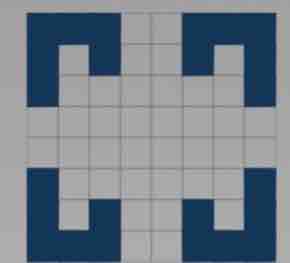
Step 4.) Now what you want to do is start shading. So, get your darkest pixel and place it in the left top corner on either the head left, head right, exc. AND still with your darkest pixel, place another one after 3 pixels.
Step 5.) Okay, so now get your second darkest pixel and place it on the bottom of the one in the top left corner and still with your second darkest pixel, place it in the middle. You should be placing that pixel in the spot in the middle of the 3 pixels. (Sorry, I stink at explaining!)
Step 6.) Now keep placing pixels on the bottom of the one on the left side, and on the top, bottom, top, bottom keep covering until you are done.
Oooh, sorry I am so bad at explaining things. It probably didn’t help much people but atleast I tried. I HOPE it helped. 🙂 Please subscribe if you like my submissions and if you would like more of them. Thankyou Dec 15th, 2013
How to Dye Your Hair the Perfect Shade of Blonde
This article was co-authored by Karen Leight. Karen Leight is a Professional Hair Stylist and the Owner of Karen Renee Hair, a private salon suite inside the Salon Republic Hollywood in Los Angeles, California. With over 12 years of experience, Karen is a licensed cosmetologist specializing in hair color, balayage technique, and women’s and men’s precision haircuts.
There are 15 references cited in this article, which can be found at the bottom of the page.
This article has been viewed 1,011,374 times.
We’ve all been there. You want to dye your hair and you’re set on blonde, but you have no idea what shade to choose. Here are some secrets on finding the perfect shade the first time and with minimal damage to your hair.
\u00a9 2022 wikiHow, Inc. All rights reserved. wikiHow, Inc. is the copyright holder of this image under U.S. and international copyright laws. This image is not licensed under the Creative Commons license applied to text content and some other images posted to the wikiHow website. This image may not be used by other entities without the express written consent of wikiHow, Inc.
\n
Karen Leight
Professional Hair Stylist Expert Interview. 13 November 2020. For a bold blonde that goes beyond 2-3 shades lighter than your natural hair color, seek the help of a professional hair stylist. Extreme blonde shades or highlights require multiple bleachings, and most of the time, multiple visits to the salon. If you try to bleach your hair at home, you could end up with banana or canary yellow hair or brassy, golden orange. [14] X Expert Source
Ways to shade hair!
I decided to do a tutorial on some ways to shade hair because I see most people find it difficult. For this tutorial I’ll be using Skindex although I usually use GIMP (I’m making this on my IPad and you can’t get GIMP on IPads). If the pictures don’t show up, try downloading Gyazo?
1.
Do this pattern first with your darkest colour:
Then, make the colour lighter and surround that pattern with it:
Continue doing that until you get something like this:
You can change the two lightest colours that are in the middle a bit to make it look more realistic (make it uneven, etc.)
On the sides of the head, you can add a bit of overlay. I can’t really explain why, but it makes it look better xD I added the overlay in yellow so you can see it:
2.
Do this pattern first with your darkest colour:
Then, lighten your colour a bit and put it on the tips of that pattern you just did (sorry I can’t explain things well). Also put it on those middle areas on the sides, top and bottom:
Make your colour lighter again and fill in the rest with it (I don’t think I need to show you a picture for that).
Remember, you can always add a few more lines or highlights, whatever you want to make your own, beaUTIFUL shading!
Here’s an idea I literally just thought of now for the top of the head. It won’t really work if you do this EXACTLY because the colours wont «carry over» (scroll down to the tips to see what I mean).
(A line going through the middle like a parting and then lines sticking out like strands of hair).
4.
Here is a shading style I just made up now. I can’t explain it so I’ll just put a picture.
Some tips:
Always «carry over» the colour. So, let’s say you’re doing the corner or the edge of a side. If you do the corner or edge of the side next to that with a different colour/shade, it will look horrible. Always make edges and corners the same colour/shade to make it neat.
When you’re shading, try not to lighten or darken the colours too much. So, when you’re making it a bit lighter for the next pattern, if you make it too light it will look a bit odd. Try to make the shades of the colour you’re using similar.
Think of where the light source is. If it’s coming from the right side of the body, make the right side lighter by adding highlights and add lots of shadows/darker tones on the left side. I usually just think of the light as being right in front/at the back of my skins so the light is kind of in the middle.
Your underarms, neck, etc. should be darker. Always use darker shades of your colour in those areas to make it look realistic (because they’re kind of hidden areas so the light is blocked which makes shadows).
I’m sorry that I’m not very good at explaining things, I tried my best xD
If you have any ideas that you would like me to add, please comment below 🙂
If this helped you in ANY way (even if it was only a bit), please leave a diamond.
If this saved your life, please leave a favourite!
If you have some other reason, also leave something xD


