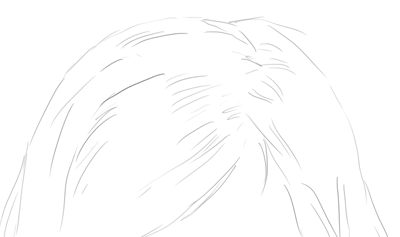
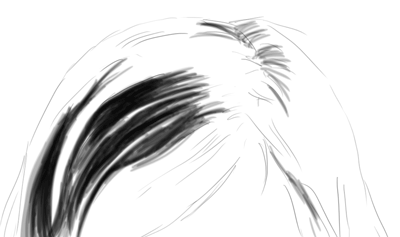
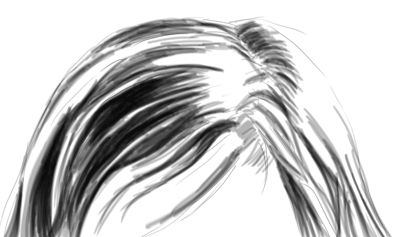
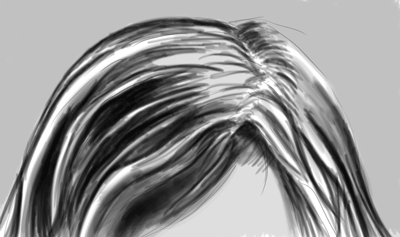
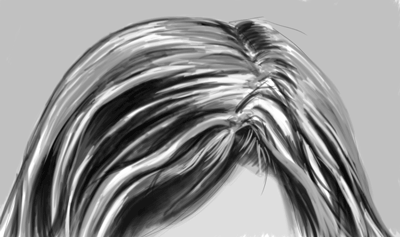
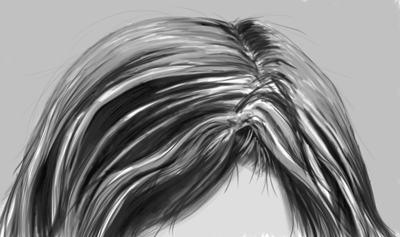
How to draw long hair
How to draw long hair
How to Draw a Long-Haired Character Portrait With Color Pencils

In this tutorial, I would like to show you how to draw and color long hair using a mechanical pencil and color pencils. Grab you tools now, it’s time to draw!
Tools
1. Draw the Hair
Step 1
I have already drawn the face and the head as this tutorial is focusing on creating the hair. So it’s assumed you know how to create this element. What we are starting with is a female base, with a bald head to work from.
Step 2
I’m going to start with two freely drawn lines extending from the head. This is going to be from where and the direction we’re heading for drawing the hair.
Step 3
Further lines are added over the forehead and underneath the hair. These will be shorter lines. Remember to use soft lines as these are much easier to erase should the need arise.
Step 4
Let’s give the hair some more volume by adding lines to the other side of the head.
Step 5
Add more lines from the head down to shoulder.
Step 6
Let’s create more volume by adding more hair flowing upwards.
Step 7
Add more lines for around her forehead and we will use this point for the hair whirl later.
Step 8
Add more lines for the side of her forehead, where you decide the hair will flow from.
Step 9
More lines are added on top of her head, to create further volume.
Step 10
Erase part of the basic head’s line. Add more lines for the hair, from head down to shoulder.
Step 11
More lines start from the whirl which we planned before. Use bold lines this time to create contrast.
Step 12
More lines start from the whirl down to shoulder. Again using bold lines.
Step 13
More lines start from the whirl down to the shoulder, bold but lighter than the bold lines on previous step.
Step 14
Add flowing lines for other side of the head.
Step 15
Erase the rest of the basic head’s line. Add more lines on top of the head.
Step 16
Add bold lines next to her ear and make them look like flowing.
Step 17
Add lines from the hair whirl.
Step 18
I decide to play with her hair so I will draw the hair as if she has a headband made from hair. That’s why I add lines that follow the head basics line.
Step 19
Add a few bold lines at the areas which don’t have as much detailing.
Step 20
Add a few curly lines on her head. Play around with them if you want, so she has a different hair style.
Step 21
Add more flowing lines to the longer lines.
Step 22
Build up the lines by adding more bolder strokes.
Step 23
Extra bold lines are added on the hair on top of her head.
Step 24
Draw out the curl on top on her head to give it more depth.
Step 25
Continue adding depth to the strands of hair on top of the head, which are flowing away.
Step 26
Add extra bold lines in middle of her hair.
Step 27
Extra more bold and light lines throughout. I’m building up the depth carefully to make sure it’s not over done.
Step 28
Where the hair meets in the parting, near the front left of the portrait, I’ve added bolder lines to add further contrast.
Step 29
I then add more lines to the lower curl in the bottom right.
Step 30
As your hair line begins at the middle to the top of your neck, I’ve added a curved section of hair here, so the hair looks more full.
Step 31
Further lines are added towards the ends of the flowing sections of hair.
Step 32
I’ve added a loop in the hair. This is to add some interest to the composition.
Step 33
I then begin structuring a slither of hair to the left side of the composition. Hair is a great way of directing the viewers eyes. The theory is to guide them to the face and then to follow the path of the hair from the lower left to the top right of the design.
Step 34
Then repeating the processes we’ve already went through, I’ve added volume and contrast to this slither of hair. In addition, I’ve added soft curls of hair throughout the design to create a soft, feminine look.
2. Bring the Design to Life With Color Pencils
Step 1
Color No: 309 – Royal Yellow
I start to add the base color for the hair. Cover the majority of the hair with this, leaving small areas.
Apply the color lightly on the hair. If you’re wanting to create a bolder color, then layer the softer strokes over each other. Pressing your pencil harder in an area may alter the texture of the paper, which will create inconsistency in the design.
Step 2
Color No: 314 – Orange
Add this color to the hair of her right side.
Step 3
Color No: 314 – Orange
Continue to use the orange to add to the top curl in the hair and in the hair parting on the forehead.
Step 4
Color No: 314 – Orange
Keep using this color and blend more from her hair outwards.
Remember to leave a few parts uncolored as this will help create contrast.
Step 5
Color No: 388 – Brown, 392 – Fire Brick
We use 388 (brown), to apply a light layer on the hair around her head and forehead.
After that, use 392 (fire brick) to create contrast on the edges of the hair.
Step 6
Color No: 314 – Orange
Build up the color on the hair with orange, to help blend the brown and fire brick.
Step 7
Color No: 318 – Red
We will use this color to touch up a few part of her hair, including the loop.
Step 8
Color No: 318 – Red
Keep applying this color to further areas of the hair. You can now see the headband more clearly.
Step 9
Color No: 321 – Scarlet
Using this darker shade of red, add contrast to the hair.
Step 10
Color No: 314 – Orange
Add more orange to her hair. This time I’m starting to add the color beyond the initial sketch. This is most apparently on the left of the portrait.
Step 11
Color No: 321 – Scarlet
Use the scarlet pencil again to add more contrast. Going backwards and forwards with color helps you balance out the tones and contrast in the hair.
Step 12
Color No: 318 – Red
Red is more the mid tone in this design, so I’m using it to blend the colors together.
Step 13
Color No: 309 – Royal Yellow
To create a more fantasy style, add the royal yellow beyond the sketch lines, fading into the background.
Awesome Work, You’re Now Done
I finish the design by adding further areas of orange. This helps blend the tones together. You’re now done creating your fantasy long hair design. Until next time, happy drawing!
How to Draw Different Kinds of Hair: Short, Long, Straight, Wavy, and Curly
Photo: photostockman/DepositPhotos This post may contain affiliate links. If you make a purchase, My Modern Met may earn an affiliate commission. Please read our disclosure for more info.
People are some of the most fascinating and difficult subjects to draw. From rendering the complexity of eyes to the shapes of lips, there are many different nuances involved. And, while facial features capture the likeness of a person, hair can say a lot about their personality and style.
Here we will learn how to draw five different kinds of hair: short, long, straight, wavy, and curly. All you’ll need to get started is a pencil, an eraser, a pen, and some paper. Ready to give it a shot? Then let’s get started!
Learn how to draw different kinds of hair in this step-by-step tutorial.
How to Draw Short Hair
Step One: Sketch the hairline
Photo & Art: Margherita Cole | My Modern Met
Begin by creating the hair part. This can be anywhere (left, right, center), but it may help to look at a couple of photo references first.
Step Two: Create the shape of the hair
Photo & Art: Margherita Cole | My Modern Met
Next, draw the basic shapes of the hair. Since this is a short hairstyle, keep them closer to the shape of the head, adding just slightly more volume to the outline of the skull.
Step Three: Add texture to the hair
Photo & Art: Margherita Cole | My Modern Met
Now, fill in the hair with texture. To do this, move your pencil to the hair part and draw several lines in the direction of where the hair grows. These lines can vary in length, from long to short, just so long as they follow the hairstyle.
Step Four: Continue adding lines to the hair
Photo & Art: Margherita Cole | My Modern Met
Continue to fill in the hair with texture, adding more lines to the hairstyle to indicate volume.
Step Five: Go over the drawing in ink
Photo & Art: Margherita Cole | My Modern Met
Finally, when you’ve fleshed out your sketch enough, it is time to go over it in ink. So, using your pen of choice (we recommend a technical pen, like Sakura Pigma Microns), slowly go over the lines. If you want to add some variation to the hair texture, then try mixing up your pens with broader and finer types. All that’s left is to erase the pencil marks.
Congrats! You’ve finished drawing short hair.
How to Draw Long Hair (With Bangs)
Step One: Part the hair
Photo & Art: Margherita Cole | My Modern Met
Begin by adding the part to the hairline. In this case, we will be starting at the center.
Step Two: Sketch the bangs
Photo & Art: Margherita Cole | My Modern Met
Starting a little above the hairline (or forehead), draw large petal-like shapes to create the bangs.
Step Three: Draw long locks of hair
Photo & Art: Margherita Cole | My Modern Met
Next, construct the rest of the hairstyle by sketching long thick locks of hair, starting from the top of the head and going down past the shoulders (or as long as you want). It’s important to keep in mind that the longer the hair is, the closer it tends to sit on the head.
Step Four: Add texture to the hair
Photo & Art: Margherita Cole | My Modern Met
Now, fill in the locks of hair with more lines. The more you add, the denser the hairstyle will look.
Step Five: Go over the drawing in ink
Photo & Art: Margherita Cole | My Modern Met
At last, it is time to go over the illustration in ink. Pick out a fine-tipped pen and trace all of the graphite lines. Once you’re sure the ink has dried, erase any visible pencil marks.
And voilà! You’ve now drawn long hair.
How to Draw Straight Hair
Step One: Part the hair
Photo & Art: Margherita Cole | My Modern Met
Starting at the hairline, add a part in the center or to the side.
Step Two: Sketch locks of hair
Photo & Art: Margherita Cole | My Modern Met
Next, sketch several thick, long locks of hair extending from the top of the head to the shoulders (or wherever you prefer).
Step Three: Add texture to the hair
Photo & Art: Margherita Cole | My Modern Met
Afterward, it is time to fill in the hair with more texture, so add long and short lines throughout the hairstyle.
Step Four: Fill in the hair with texture
Photo & Art: Margherita Cole | My Modern Met
Continue adding more lines to the drawing so that it looks more realistic.
Step Five: Go over the drawing in ink
Photo & Art: Margherita Cole | My Modern Met
Finally, using your favorite pen, go over the illustration in ink. Take your time tracing over the graphite lines, and consider mixing up your pens to create more line variation in the drawing. (If you need recommendations, then check out our guide to the best drawing pens.)
Give yourself a pat on the back! You’ve learned how to draw straight hair.
How to Draw Wavy Hair
Step One: Part the hair
Photo & Art: Margherita Cole | My Modern Met
Starting at the hairline, sketch a line to indicate the parting of the hair (whether it is in the center or to the side).
Step Two: Frame the face
Photo & Art: Margherita Cole | My Modern Met
Next, add two thick locks of hair to frame the face. Start these voluptuous shapes at the hair part and move downwards in undulating, ribbon-like shapes.
Step Three: Draw locks of hair
Photo & Art: Margherita Cole | My Modern Met
Using the same rolling shapes as before, fill out the rest of the hair until you reach the back of the head.
Step Four: Add texture to the hair
Photo & Art: Margherita Cole | My Modern Met
Afterward, fill in the shapes of the hair with varying lines to give it texture, volume, and depth.
Step Five: Go over the drawing in ink
Photo & Art: Margherita Cole | My Modern Met
Finally, you can go over the drawing in ink. So, choose a pen (or a couple of different ones) and trace over the graphite sketch. Once, the ink is dry, erase the pencil marks.
Good job! You’ve learned how to draw wavy hair.
How to Draw Curly Hair
Step One: Part the hair
Photo & Art: Margherita Cole | My Modern Met
Draw a line from the hairline to the back of the head to create the hair part (this can be center or to the side somewhere).
Step Two: Sketch the hairstyle
Photo & Art: Margherita Cole | My Modern Met
Next, make a rough sketch of the curly hair. Move your pencil to the hair part and sketch bouncy, cloud-like patterns until you are just above the shoulders (or wherever you prefer).
Step Three: Draw locks of hair
Photo & Art: Margherita Cole | My Modern Met
Divide this hairstyle into several curly locks of hair by drawing the same bouncy line as before as many times as needed.
Step Four: Add texture to the hair
Photo & Art: Margherita Cole | My Modern Met
Afterward, add depth to the hair by adding numerous lines to each lock of hair.
Step Five: Go over the drawing in ink
Photo & Art: Margherita Cole | My Modern Met
Lastly, it is time to go over your drawing with ink. So, using the pen of your choice, trace over the graphite marks. If you want line variation then use a couple of technical pens with different-sized nibs or a brush pen.
Congratulations! You’ve learned how to draw curly hair.
How to Draw Hair
JOIN THE VIRTUAL INSTRUCTOR
Get ALL of our courses, ebooks, live lessons, critiques, lesson plans and more today.
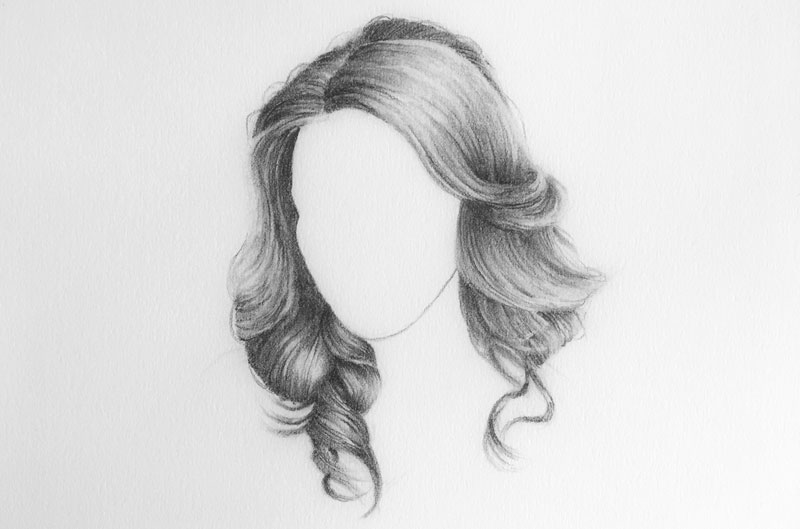
In this lesson, we’ll take a look at how to draw hair and I’ll share with you a simple step by step approach of observation and application of media that can be applied to any type of hair.
We’ll first look at an easy to follow method that is broken down into 4 distinct processes.
I may be defining this process as a four-step approach, however it’s more like a three-step approach. The third and fourth steps are combined and are executed at the same time. Before we begin the process of drawing the hair, we need to be sure that the structure of the head is drawn in place. The structure of the head dictates the shape and flow of the hair and should be defined before we begin drawing the hair.
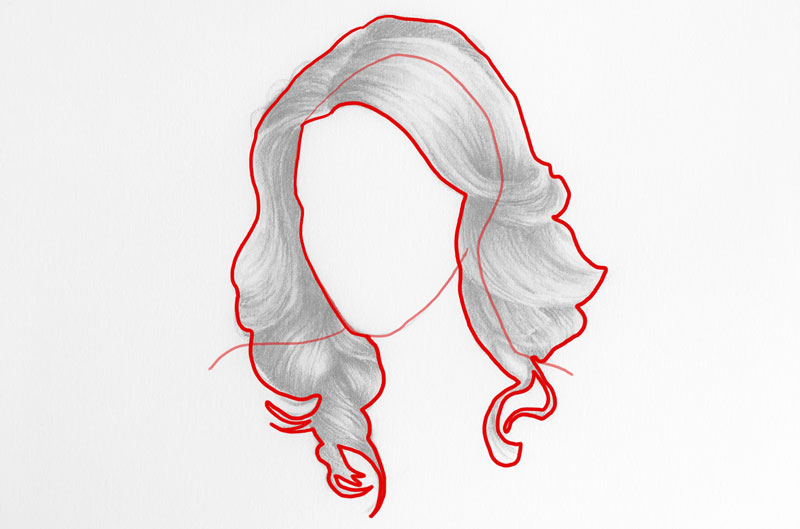
Assuming that the structure of the head is in place, the first step is to define the outer contour or outline of the hair. This includes the lines that are formed as the hair overlaps the forehead, portions of the face, and the shoulders. In many cases, the hair lifts off of the cranium and may overlap much of the face. Of course, every head of hair is different and the contours that are drawn at this stage will be different for every subject.
Tip: The medium that you use will influence how you approach drawing the hair. In this lesson, graphite pencils are used. For example, if you are drawing hair with pastels, you may choose to fill in the shape of the hair with solid color and skip drawing the contours.
We’ll draw the contour lines lightly and loosely with a harder and lighter, 2H pencil. We’re careful not to place too much pressure on this harder pencil as this can lead to indenting in the surface of the paper.
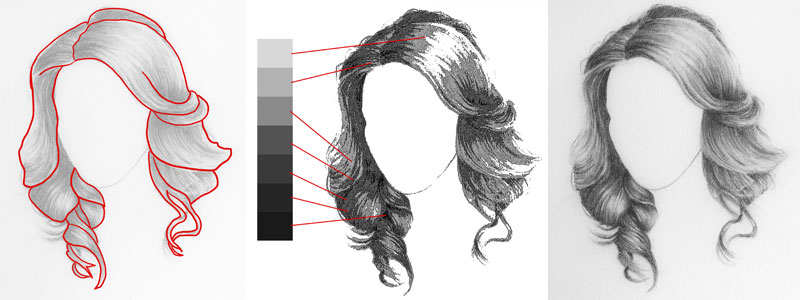
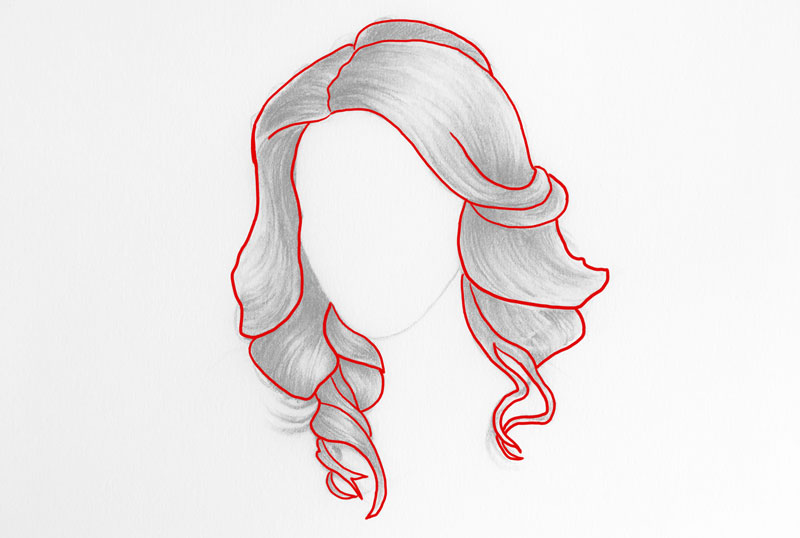
As we draw the contour lines, defining the overall shape of the hair, we’ll also draw smaller shapes for clumps of hair. Hair strands naturally collect and create a form (which is what I am referring to as a «clump»).
It clearly doesn’t make sense to draw every strand of hair. Not only would this take an incredible amount of time to accomplish, but it also would lead to very unnatural looking hair. Instead, we need to consider the hair as a form. We’ll define the volume of these forms in the next step, but for now we’ll concentrate on defining the shapes.
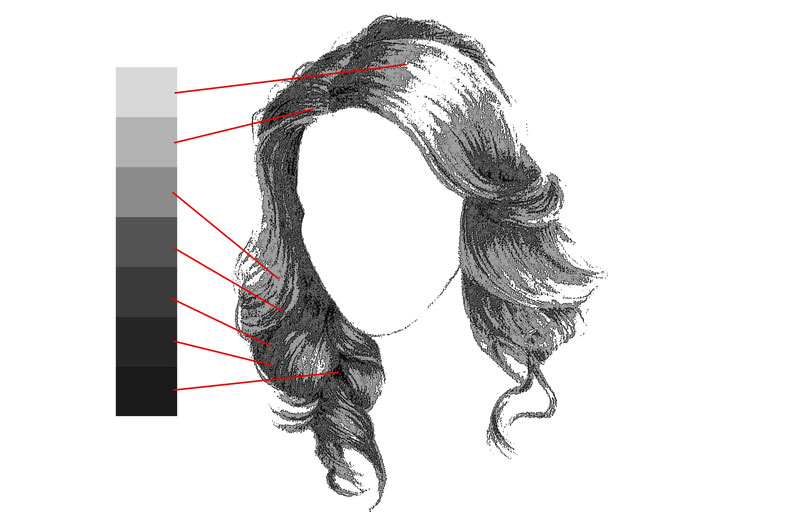
We understand forms because of the manner in which light interacts and behaves on them. We understand light through the use of value. Therefore, we understand forms in a drawing through the use of value. Value is the darkness or lightness of a color. The placement of dark and light values on a subject inform us of the intensity of light and the nature of the form.
We must consider the values and tones that are observed within the hair and include them in our drawing in order to communicate the volume of the hair. In most cases, a full range of value is present. This means that we’re likely to find the darkest darks, the lightest lights, and the middle values all within a head of hair.
We know that locations within the hair that are closer to the light source or extend out from the head are likely to «catch» more light. Naturally, this results in an area of lighter value.
We also know that areas that recede or are blocked from receiving light should be darker in value.
All hair colors will feature a full range of value. Blonds have locations of darker tone in their hair, and people that have black hair have areas that are almost white (highlights).
If we keep these things in mind, then we can assume that (in most cases) the parts of the hair and the areas around the face will be darker in value since these areas recede. We also know that highlights are most likely to be found on the top of the head, closest to a light source above.
To control the value fully, we’ll start with a harder 2H pencil and develop the locations of darkest value, the mid tones, and the locations of light value. We’ll do our best to preserve the areas of strongest highlight, allowing the white of the paper to do the work for us.
Portrait Drawing The Smart Way
«Portrait Drawing The Smart Way» is a complete video course on drawing portraits designed for beginner and intermediate artists.
(The texture of the hair is actually defined as the value is developed. So, the third and fourth steps of this process are addressed concurrently.)
Texture, like form, is also defined largely through the use of value. Light values and dark values work together to inform us of the texture of the subject. High contrast between values with little transition or gradation often leads to the illusion of coarse texture.
Smooth transitions between values with even gradations often leads to the illusion of a smoother surface texture.
But there is more to texture than the relationships of tone and value. The surface of the paper, the medium used, and the manner in which it is applied are all contributing factors as to how the texture of the subject may be perceived by the viewer.
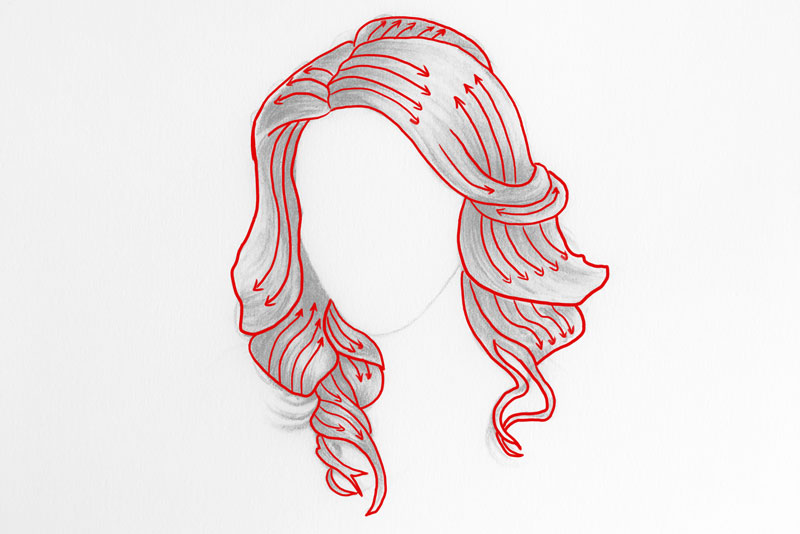
Hair is soft, but there should be some indication of linear texture. To create the impression of linear texture, we’ll apply the medium using directional strokes that flow over the form of each «clump» of hair. These lines are sometimes referred to as cross contour lines.
For each layer of graphite that we apply, we’ll use a blending stump to work the medium into the tooth or texture of the paper. This will help to create the impression of softness and smooth any inconsistencies produced by the softer graphite applications.
Any locations within the hair that need to be lighter can be rendered using an eraser. An eraser pencil or eraser pen works best at lifting the graphite in these areas. Strands of lighter hair can be developed using the eraser as well.
To finish up, we’ll add a few stray hairs that extend from the body of the hair. These stray hairs can be made with quick deliberate marks with a sharpened HB pencil.
Hair is complex and is therefore complex to draw. But by breaking down the steps, we can simplify the process a bit. If you know how to see hair in terms of shapes, lines, and values then it becomes just like drawing anything else.
Drawing a Strand of Hair
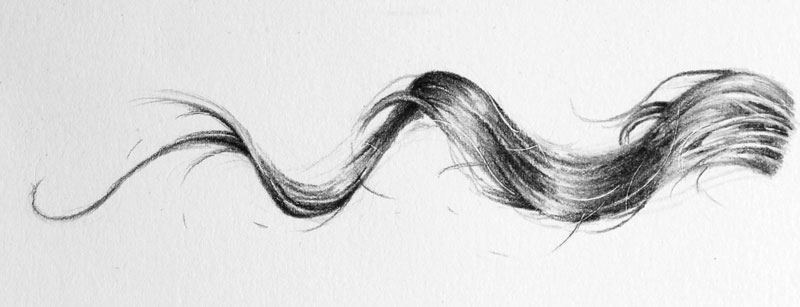
As is the case with any subject that you draw, practice is important. The more that we practice with a particular subject, the better we understand it. Drawing a whole head of hair will give you lots of practice. However for some, the thought of doing this may be intimidating. Instead, it may be better to tackle a portion of the hair first. In this case, a single strand of hair will do.
The four step approach that we explored above can also be used for a single lock of hair.
Drawing Straight Hair
In both of our first two examples, we saw how to draw hair that is wavy. But not everyone has wavy hair. So how is this process different if the hair is straight?
Well, it’s not that different. In fact, we’ll use the same approach to draw hair of any style. The only exception with straight hair is that we’re likely to see less dramatic changes in value. We’ll still see contrast between darks and lights, but this will happen from layering instead of within each «clump» of hair.
So again, we’ll first define the outer contour of the shape of the hair. And again, we can simplify this further into smaller shapes that describe the clumps.
From here, we can look for the relationships of values. It may help to squint at your subject. Doing this may make the shapes of lighter and darker value stand out a bit more.
Then we’ll use directional stroking to develop the texture and the range of value.
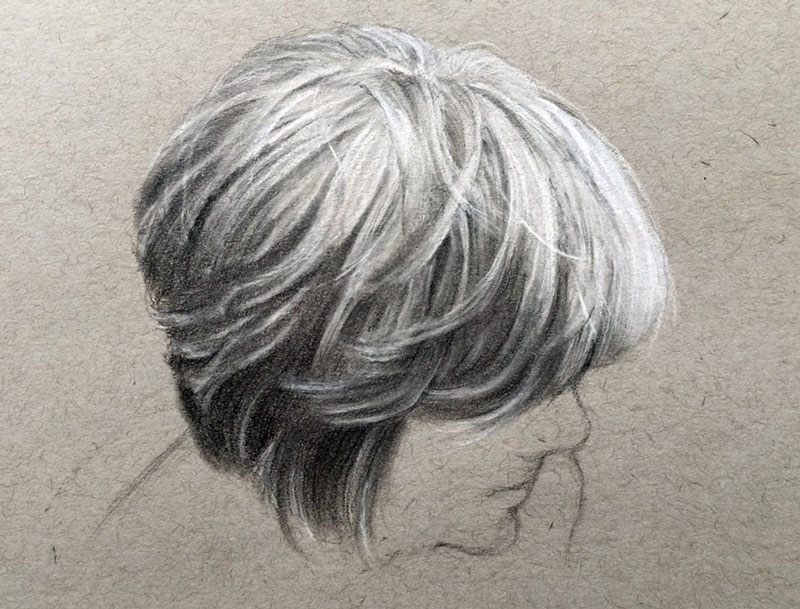
In the example below, a combination of graphite and white charcoal is used to develop the drawing. The drawing is completed on toned paper which makes the white charcoal applications stand out. The image below is from Portrait Drawing The Smart Way.
How to Draw Curly Hair
But what about curly hair? Shouldn’t this type of hair be different?
Well, the results may be different, but the thought process is the same. We’ll still need to start with the overall shape of the hair. Curly hair tends to have more stray hairs that find their way outside the confines of the general shape. For this reason, we’ll concentrate on drawing the shape without all of the stray hairs. These stray hairs can be added after the general shape has been drawn, but more on this in a moment.
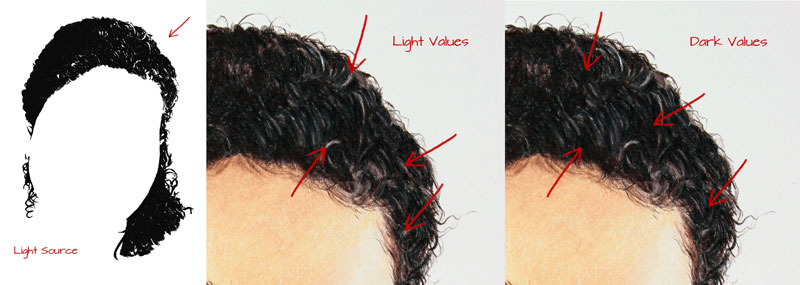
After the general shape has been defined, we’ll consider the light source. In this case, the light source originates from the upper right corner. This produces highlights on the upper right portion of the head. Even though we have light areas here, we’ll still see some dark values as well. This is true even if the hair is light in color.
Once we have a good understanding of the light, we can begin developing the texture and value of the hair. The directional strokes that are used should flow along the form of each collection of hairs. With curly hair, the collections are smaller and more compact. Since the hair is curly, the directional strokes that we make for each «clump» should also curve just as the hair does.
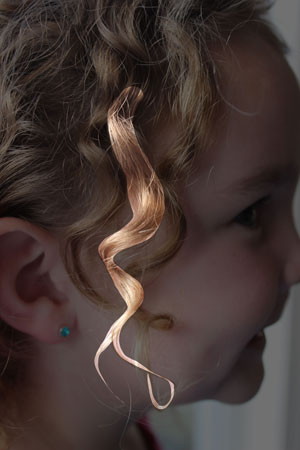
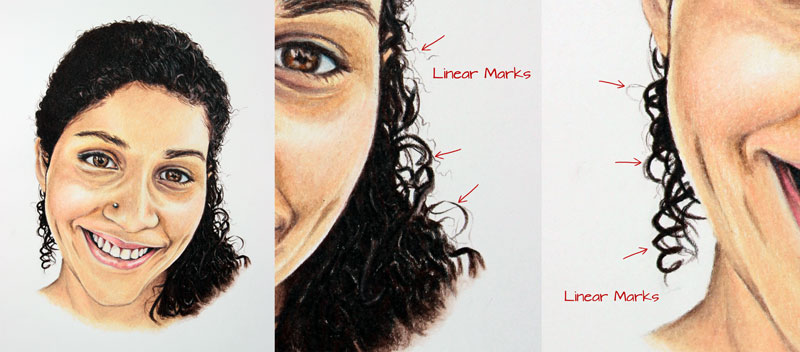
Once we have the main body of the hair developed, we can go back and add those stray hairs. Doing this adds to the realism. Deliberate and confident marks work best for stray hairs. It doesn’t have to be an exact copy of the subject, so don’t put too much pressure on yourself to make it perfect.
Below you’ll see the finished portrait drawing from The Colored Pencil Course along with close ups of the marks used for stray hairs.
Different Approaches
There is no true formula for drawing hair. Every head of hair is unique and like many aspects of figure drawing, changes in viewpoint can dramatically affect the approach that you take. Light reflects off of hair differently and textures are diverse.
Observation is always paramount to your success no matter what approach you take or method you choose to use. There are always multiple «rights» and different ways of seeing.
Begin by drawing the outline of the outside of the hair. Notice the dark areas and the light areas in the hair. Try to map out these areas as shapes. Don’t try to draw every strand of hair. Instead, concentrate only on shapes and the value within them.
Continue darkening up the shapes and lines that you see. When you add directional lines in the hair, make sure that they flow in the direction that the hair grows.
Contrast is important. Be sure to have a background value in mind. This will make your hair stand out.
Don’t be afraid to work the values to increase the contrast. Adjust darker tones by adding additional applications of graphite and make areas lighter with your eraser.
Be patient and understand that drawing hair is slow process. Take your time and allow the drawing to develop gradually.
How to draw short hair (very detailed)

It’s an expanded version of the mini tutorial from my first hair article. So if you’ve seen the thumbnail for this article before, I’m not feeding you old content. What you’re getting in this tutorial is new content with more images, more steps, more explanations and over 2000 words of valuable content! Let’s get into it!
Tools:
I hope I don’t lose you during any step in the application part of this tutorial, so here are a few things I want to cover with you before we start. Let’s talk about:
Grouping Hair
Grouping is a great way to approach drawing a an entire head of hair, especially if the sheer amount intimidates you. This method can help you draw hair faster because you’re simplifying something that looks complex.

When you’re in the grouping phase, you’ll want to draw using very light outlines. These groups will eventually be broken down into smaller, more detailed sections of hair.
In the grouping phase, all you need to think about is the length, overall design and flow of hair.
If you’re drawing from a reference image, you can identify groups of hair by zooming out of the image or standing back to find patterns in the hair. Group hairs that are flowing in the same direction and/or close together.
Layering Hair
This part is self explanatory, but I decided to include it just in case. If you get the idea, move on to the next point.
The order in which you draw each group of hair is important. If you’re drawing a hairstyle where the hair is prominently parted at the side of the head, you’ll want to start your first layer there and work your way out.
The image below is an example of drawing from the part and working your way down the side of the head.
If all the hair is brushed from the back of the head towards the front, start your first layer of hair from the back of the head where the swirl or whorl is located.
If the hair is brushed from front to back, you’ll draw starting from front to back.
Hair Flow and Direction

Avoid drawing hairs that follow the exact direction your arrows are pointing. You can make your drawing look a lot more interesting by pointing the hair in several different directions, while still appearing to point in the same general direction.
Dark Spaces
Drawing hair isn’t about creating as many lines as possible. Between some hairs, there should be dark space. These dark spaces are important and can make a head of hair look more interesting to the eye and give the hair more volume or depth.

Detailing Short Hair
If you’re drawing from a picture and you’ve lost track of which hair you just drew and you don’t know which patch of hair to draw next… there’s really no need to copy the exact picture hair by hair.
If you end up reading through this entire tutorial, you will be more comfortable playing it by ear instead of pouring over the tiny details from your reference image.
Below are just a few ways you can detail hair. You can incorporate a few or all of them in your drawing wherever you see fit. Come up with your own formulas. It’s a lot of fun!
Lighting and Consistency
Overall Lighting:

Lighting Across Particular Sections:
Once you start drawing the individual hairs, it’s easy to lose track and end up with inconsistent lighting across small groups of hair. Here’s an example:

How to Draw a Small Section of Hair – Mini Tutorial
Step 1: Light Planning

Step 2: Add Individual Hairs
You can start drawing the individual hairs now. If you’re not comfortable with that just yet, see the mini tutorial from the original hair article. You can do this step with many pencils or you can use one. I usually draw one group of hair at a time. But in order to make this mini tutorial short, I’m working on all 3 groups at the same time.

Using a 4B mechanical pencil, I created strokes that were bold to begin with, but ended lightly as I approached the areas I wanted to highlight. Then I used a sharp HB pencil to fill in some spaces. I applied a variety of pressures to get a mix of different values and line thicknesses.
Some lines are shorter or longer than others. This is great, but make sure the area that you want to highlight has not been shifted.
Step 3: Directional Strokes
Now, you’ll want to draw from the end of the hair towards the highlight. If you draw the hair ends as dark as the root, the hair will have more of a curve to it.

The thing you need to keep in mind here is that the stroke needs to appear as though both ends are faded out or thinned out. The way to do this is to draw each hair using 2 strokes going in opposite directions. You only need to do this if your hair ends are noticeably blunt, making them appear unnatural.
Step 4: Touchups
If you haven’t been mindful of the prearranged lighting and your highlights appear to be off, use your kneaded eraser to redefine them. If you want the highlights to pop more, increase the level of overall darkness and/or use an eraser to brighten up individual strands of hair.
If you’re still reading, you’re one heck of a patient person. I think you’re ready for the full tutorial now!
How to Draw Short Hair From the Side
Step 1: Head Outline

Step 2: Hair Length

Make sure the distance between the hair and head is consistent.
Step 3: Separating Top From Side Hair

Step 4: Overall Lighting

Step 5: Grouping, Layering, Flow and Shading

You can cover the entire side of the head or work section by section. I stopped as soon as I got close to the area I wanted most of the light to fall on.

After you’ve defined the major shadows, start drawing individual strands of hair. Naturally, you’ll start breaking large groups into smaller groups and you’ll find ways to incorporate overlapping hairs and other unique and interesting patterns.
For the individual hairs, I used a 0.5mm 4B mechanical pencil.
Step 6: Repeat

Step 7: Grouping, Layering, Flow and Shading


Step 8: Fixing/Adding Highlights

The image on the left is before erasing and the one on the right is after.
Step 9: Grouping and Layering

Step 10: Adding Dark Space and Individual Hairs

After you’ve drawn the shadows, use your mechanical pencil to break groups of hair down into smaller groups until they start looking like individual strands of hair. While you’re drawing the strands, improvise and find unique ways to incorporate unruly, overlapping, loose hair, etc.

In the meantime, here are other tutorials you can check out:
Darlene created RFA In 2013 with the goal of sharing simple yet detailed drawing tutorials with other artists on the world wide web. She is a self taught pencil portrait artist and Youtuber.
HAIR: 9 уроков рисования по ВОЛОСАМ
HAIR: 9 уроков рисования по ВОЛОСАМ. Как нарисовать легко, быстро, поэтапно волосы и различные прически? Уроки рисования предназначены для начинающих художников и здесь вы найдете 9 причесок, как мужских, так и женских.
Перед началом нужно хорошенько подготовиться, а именно найдем немного свободного времени, очистим голову от посторонних мыслей, создать мирную атмосферу вокруг и положим на рабочий стол вот эти инструменты для рисования:
Рисуем волосы «Сзади»
1. Хоть лица и не будет видно, но нужно добавить вспомогательный овал, не сильно давя на простой карандаш во время рисования.
2. Отойдем в правую и левую сторону овального лица, чтобы нарисовать уши по бокам.
3. Опускаемся ниже вспомогательного элемента и дорисуем тоненькую шею, ведь на них ложатся волосы.
4. Чуть выше ушей нарисуем макушку, смотря на картинку под текстом.
5. Рисуем не спеша бантик, состоящий из локонов волос.
6. Рисуем локоны, которые закрывают уши. Смотрите на картинку под текстом и делайте как я, дорогие художники и художницы.
7. Плавным движением простого карандаша в руке прорисуем прерывистые пряди.
8. Закрывает волосы, которые мы добавили ранее. Будьте предельно внимательными и сконцентрированными, а также не забывайте точить кончик простого карандаша, чтобы на бумаге не появились ненужные штрихи и помарки.
Раскрашиваем
9. Настал час пройти поэтапные уроки раскрашивания, поэтому кладем рядом с собой пачку цветных карандашей. Темно-фиолетовым карандашом нанесем тени возле бантика.
10. На макушке добавим блики светло-фиолетового оттенка.
11. Раскрашиваем пряди волос на макушке фиолетовым карандашиком.
12. Возьмем в руку бирюзовый цвет и нанесем его в качестве теней на бантик.
13. Закрашиваем бантик голубым цветом.
14. Берем в руку зеленый карандаш и раскрасим им локоны волос, что распущены позади шеи.
15. Раскрашиваем все то, что ранее мы оставили без должного внимания.
 |  |  |
 |  |  |
 |  |  |
 |  |  |
 |  |  |
Рисуем «Два Хвостика»
1. Так-так, кладем на рабочий стол белый альбомный лист и чуть выше середины добавим вспомогательный овал, не сильно давя на простой карандаш во время рисования.
2. Опускаемся ниже головы и нарисуем не спеша шею.
3. Плавным движением простого карандаша в руке нарисуем несколько локонов в качестве челки, смотря на картинку под текстом.
4. Дорисовываем кончики челки.
5. Рисуем волосы вокруг предыдущих элементов.
6. С правой стороны головы добавим резинку. Смотрите на картинку под текстом и делайте как я, дорогие художники и художницы.
7. Отойдем в правую и левую сторону альбомного листа, чтобы нарисовать красивые хвостики по бокам.
8. Прорисовываем макушку.
9. Рисуем не спеша и поэтапно дополнительные волнистые локоны на хвостиках.
10. Закрываем хвостики по бокам. Будьте предельно внимательными и сконцентрированными, а также не забывайте точить кончик простого карандаша, чтобы на бумаге не появились ненужные штрихи и помарки.
Раскрашиваем
11. Настал час пройти поэтапные уроки раскрашивания, поэтому кладем рядом с собой пачку цветных карандашей и первым делом раскрасим кончики черным цветом.
12. Раскрашиваем все то, что ранее мы оставили без должного внимания.
 |  |  |
 |  |  |
 |  |  |
 |  |  |
Рисуем мужскую «Короткую» стрижку
1. Итак, кладем перед собой чистый альбомный лист и посередине добавим вспомогательный овал, не сильно давя на простой карандаш во время рисования.
2. Поднимемся чуть выше середины вспомогательного овала, чтобы добавить три линии челки.
3. Закрываем предыдущие элементы, смотря на картинку под текстом.
4. Отойдем в левую сторону от челки, так как нужно нарисовать еще три дополнительных отрезка.
5. Закрываем челку. Смотрите на картинку под текстом и делайте как я, дорогие художники и художницы.
6. Прорисовываем волосы по бокам.
7. Дорисовываем края прядей.
8. Отправимся в левую сторону и плавным движением простого карандаша в руке нарисуем макушку.
9. Добавим теперь кончики. Будьте предельно внимательными и сконцентрированными, а также не забывайте точить кончик простого карандаша, чтобы на бумаге не появились ненужные штрихи и помарки.
10. Раскрашиваем волосы черным карандашом, а края можно сделать серого цвета.
 |  |  |
 |  |  |
 |  |  |
 |
Рисуем женскую «Молодежную» стрижку
1. Ну что же, кладем на рабочий стол белый альбомный лист и чуть выше середины добавим вспомогательный овал, не сильно давя на простой карандаш.
2. Отойдем в правую сторону лица, чтобы нарисовать одно ухо.
3. Опускаемся ниже головы и нарисуем поэтапно тоненькую шею, смотря на картинку под текстом.
4. Плавным движением простого карандаша в руке нарисуем три локона ближе к уху.
5. Потихоньку отправляемся влево и добавим еще три линии. Смотрите на картинку под текстом и делайте как я, дорогие художники и художницы.
6. Закрываем предыдущие локоны.
7. Осталось только дорисовать две пряди волос с левой стороны овального лица. Будьте предельно внимательными и сконцентрированными, а также не забывайте точить кончик простого карандаша, чтобы на бумаге не появились ненужные штрихи и помарки.
8. Настал час пройти поэтапные уроки раскрашивания, поэтому кладем рядом с собой пачку цветных карандашей и начинаем раскрашивать. Темно-красным карандашом раскрасим края локонов.
9. Раскрашиваем оставшиеся места на прическе розовым цветом.
 |  |  |
 |  |  |
 |  |  |
Рисуем «Лесенку»
1. Так-так, кладем перед собой чистый альбомный лист и ближе к верхнему правому углу добавим вспомогательный овал, не сильно давя на простой карандаш во время рисования.
2. Опускаемся немного ниже головы и нарисуем линию в виде одной линии.
3. Плавным движением простого карандаша в руке нарисуем по бокам длинные пряди волос. Смотрите на картинку под текстом и делайте как я, дорогие художники и художницы.
4. Добавим дополнительную прядь волос, что свисает на лоб.
5. Дорисовываем волосы в виде лесенки слева, смотря на картинку под текстом.
6. Рисуем волосы в виде лесенки на втором плане альбомного листа. Будьте предельно внимательными и сконцентрированными, а также не забывайте точить кончик простого карандаша, чтобы на бумаге не появились ненужные штрихи и помарки.
7. Настал час пройти поэтапные уроки раскрашивания и первым делом раскрасим несколько прядей на макушке да по бокам черным цветом.
8. Раскрашиваем все то, что ранее мы оставили без должного внимания.
 |  |  |
 |  |  |
 |  |
Рисуем «Короткую» мужскую стрижку
1. Так-так, кладем перед собой чистый альбомный лист и посередине добавим вспомогательный овал, не сильно давя на простой карандаш во время рисования.
2. Отойдем в левую сторону овального лица, чтобы добавить одно ухо.
3. Рисуем шею, смотря на картинку под текстом.
4. Плавным движением простого карандаша в руке прорисуем семь прядей челки в виде вертикальных отрезков. Смотрите на картинку под текстом и делайте как я, дорогие художники и художницы.
5. Закрываем пряди челки. Будьте предельно внимательными и сконцентрированными, а также не забывайте точить кончик простого карандаша в руке, чтобы на бумаге не появились ненужные штрихи и помарки.
6. Поднимаемся выше овального лица и прорисуем волосы на голове.
7. Добавим дополнительные пряди в виде небольших линий.
8. Настал час пройти поэтапные уроки раскрашивания и положим рядом с собой пачку цветных карандашей. Зальем все пряди волос коричневым цветом.
 |


Рисуем «Растрепанные» мужские волосы
1. Итак, кладем на рабочий стол белый альбомный лист и первым делом добавим вспомогательный овал, не сильно давя на простой карандаш во время рисования.
2. Отойдем в правую сторону овального лица, чтобы нарисовать одно ухо.
3. Рисуем шею, смотря на картинку под текстом.
4. Плавным движением простого карандаша в руке прорисуем четыре прядей волос в виде небольших линий. Смотрите на картинку под текстом и делайте как я, дорогие художники и художницы.
5. Закрываем линии волос, которые мы нарисовали на предыдущем шаге поэтапного урока рисования.
6. Отойдем в разные стороны альбомного листа, чтобы добавить пряди волос, которые помогут определить направление и пышность прически.
7. Добавим дополнительные волосы, закрыв предыдущие локоны.
8. Дорисуем волосы на макушке. Будьте предельно внимательными и сконцентрированными, а также не забывайте точить кончик простого карандаша, чтобы на бумаге не появились ненужные штрихи и помарки.
9. Настал час пройти поэтапные урок раскрашивания. Закрасим всю прическу темно-коричневым цветным карандашиком.
 |


Рисуем «Низкий» хвостик
1. Итак, кладем перед собой чистый альбомный лист и нарисуем вспомогательный овал, не сильно давя на простой карандаш во время рисования.
2. Опускаемся ниже головы и нарисуем шею, смотря на картинку под текстом.
3. Плавным движением простого карандаша в руке нарисуем пряди челки.
4. Рисуем волосы на макушке. Смотрите на картинку под текстом и делайте как я, дорогие художники и художницы.
5. Закрываем пряди челки. Будьте предельно внимательными и сконцентрированными, а также не забывайте точить кончик простого карандаша в руке, чтобы на бумаге не было лишних помарок и штрихов.
6. Спускаемся вниз и нарисуем с левой стороны альбомного листа хвостик, определив ширину и длину волос.
7. Дорисовываем низкий хвостик.
8. Настал час пройти поэтапные уроки раскрашивания, поэтому кладем рядом с собой пачку цветных карандашей и начинаем раскрашивать нашу работу. Коричневым карандашом раскрасим кончики прядей волос.
9. Берем в руку желтый цветной карандаш и раскрасим всю прическу на голове.
 |


Рисуем хвостик «Сбоку»
1. Ну что же, кладем на рабочий стол белый альбомный лист и посередине добавим вспомогательный круг, не сильно давя на простой карандаш во время рисования.
2. Ориентируясь на вспомогательный круг, рисуем лицо с шеей, смотря на картинку под текстом.
3. Ближе к вспомогательному кругу и лицу добавим ухо в виде небольшой палочки.
4. Плавным движением простого карандаша в руке нарисуем пряди волос на голове.
5. Закрываем волосы на голове. Будьте предельно внимательными и сконцентрированными, а также не забывайте точить кончик простого карандаша, чтобы на бумаге не появились ненужные штрихи и помарки.
6. Рисуем на макушке поэтапно резинку, что собираем пряди волос.
7. Нарисуем две линии волос, чтобы определить длинную и ширину пряди.
8. Дорисовываем хвостик сбоку. Смотрите на картинку под текстом и делайте как я, дорогие художники и художницы.
Раскрашиваем
9. Настал час пройти поэтапные уроки раскрашивания, поэтому кладем рядом с собой пачку цветных карандашей и начинаем раскрашивать. Коричневым карандашом раскрасим кончики прядей волос.
10. Закрываем оставшиеся волосы на голове и резинку на макушке красным цветным карандашом.
 |


Здесь мы прошли 9 поэтапных уроков рисования по волосам с различными женскими да мужскими волосами. Также научились красиво, легко и быстро раскрашивать.


