How to draw torso
How to draw torso
How to draw female torso
Drawing a proportional, well-shaped body may look challenging to you. In this tutorial, you will discover the steps needed to make it look right quickly and easily with no effort. Learn how to draw the torso and chest in fashion design sketches and have fun!
Time, Tools and Difficulty:
Time to complete the tutorial: 6 min
Tools you’ll need: drawing paper, a pencil, and an eraser
Difficulty level: 4/10
How to draw a female torso in 11 steps:
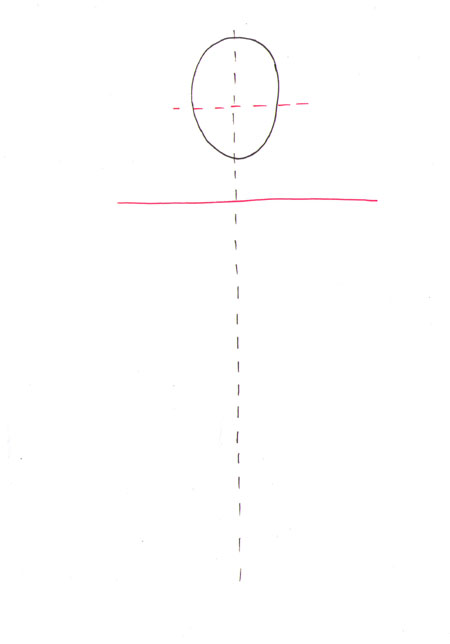
Step 1: Draw the head
Draw an egg-shaped ellipse that will be the head of your model. Leave enough space for the body. Once you have it, pull down a vertical Centerline for the torso.
Step 2: Shoulder line
Draw a horizontal line half-head below the chin. This is the shoulder line and also marks the length of the neck.
One of the reasons fashion illustrations look that graceful is the long necks of the models. Don’t be afraid to draw a neck longer than half the head size, but avoid making them shorter. A shorter neck will give your model a masculine look.
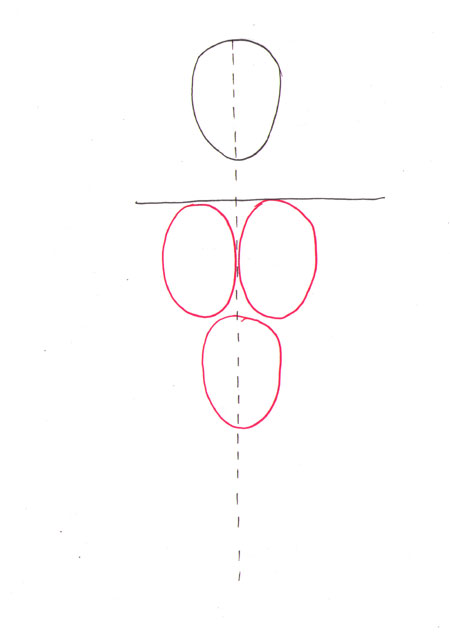
Step 3: Torso guidelines
First, make two ellipses one next to another right under the shoulder line. They should be the same size as the head and touch the Centerline. Make them one from each side.
Then, draw a third “head” between and under the latter two. The torso Centerline should separate it in the middle. It is essential that you draw all the ellipses the same size in order that your model does not result in an unproportionate figure.
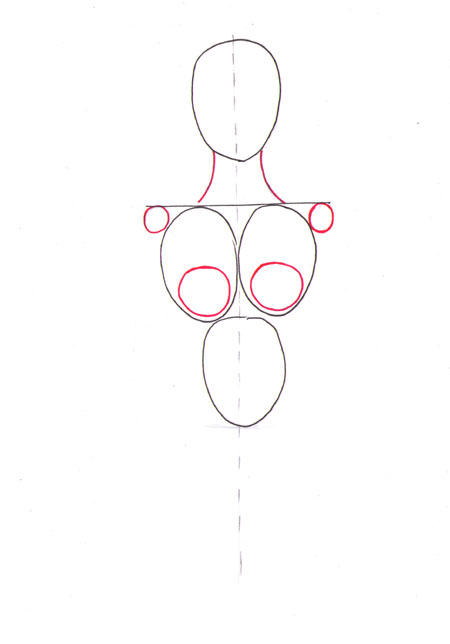
Step 4: Draw chests guidelines
Begin by drawing a feminine neck that is slightly curved towards the Centerline in the middle.
Then, touching the upper two ellipses draw two smaller circles. The size of those is about ¼ of the head. Make one from the left side and one for the right.
The circles in the lower half of the upper two ellipses mark the breasts of the model.
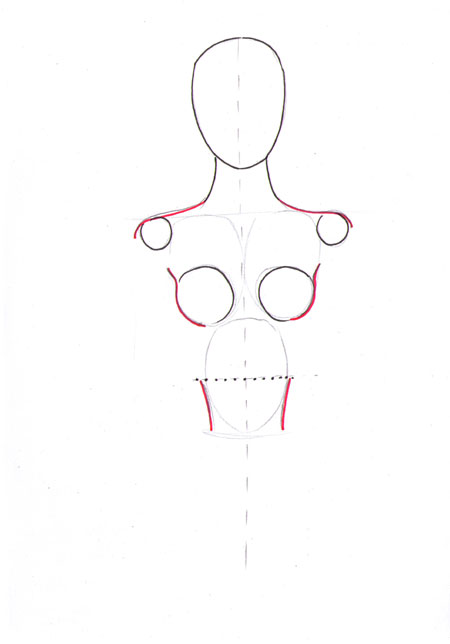
Step 5: Nice curves
Shape the shoulders. Try to make them slightly narrowed and follow the outline of the small circles in the end.
Next, shape the breasts as shown in the picture. Make sure to leave enough space between the shoulder line and the chest.
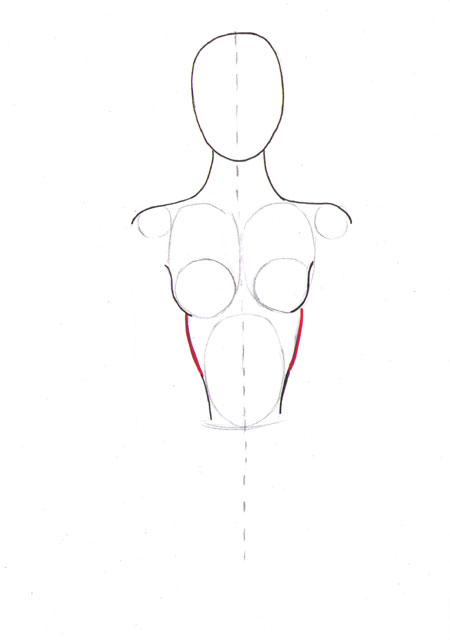
To draw the waist find the middle of the head frame and make two narrow lines. Follow the guidelines of the ellipse.
Step 6: Rib cage
Connect the waist and the breast by curved lines. These are for the rib cage.
Step 7: The details make it work
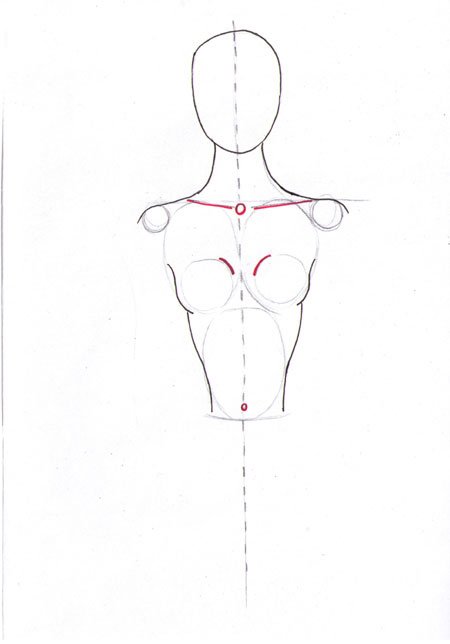
Follow the circle guideline of the breast and add short lines from the opposite side of the outline you already have.
Mark the belly-button close to the bottom of the last head frame.
For the breastbone draw a small circle where the shoulder line and the torso Centerline cross. Connect it with the shoulders by narrowed (up) lines.
Step 8: Pelvis guidelines
Soften the line of the collarbone.
Draw two circles from both sides of the Centerline again. These are the frame for the pelvis.
Mark the crotch.
Step 9: Bones
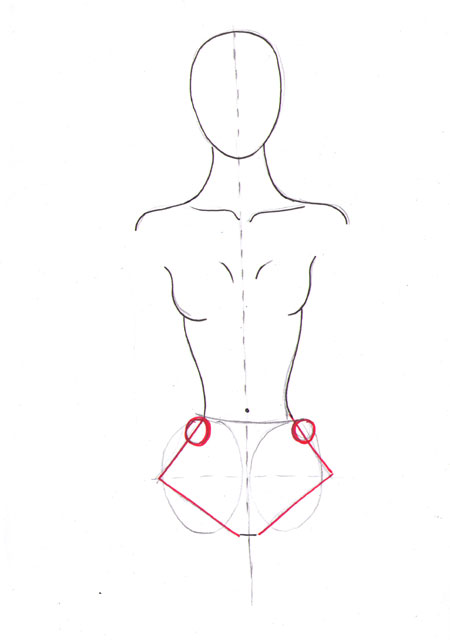
Find the middle of the last ellipses and connect the waist and the crotch forming a diamond-like shape.
Just below the waistline draw two circles with the same size as those used for the shoulders.
Step 10: Cure the pelvis
Outline the pelvis with soft curves. Don’t forget the small circles.
Step 11: Add the legs
Erase all the guidelines you don’t need and draw the legs and arms that you’d like. It’s up to you!
Learning how to draw a fashion figure with the right proportions is an essential skill for every fashion illustrator. If you want to learn how to draw beautiful fashion figures check out my online course ‘Fashion Figures 101‘!
It doesn’t look right! Common mistakes:
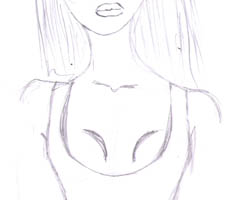 | 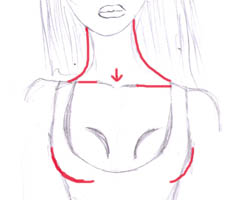 |
Mistake 1: The neck and the collarbone are among the most beautiful things about models. Have your time to draw thew properly. The breasts shouldn’t be too pushed up.
 | 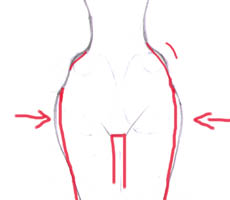 |
Mistake 2: Follow the guidelines you have drawn for the hips or you risk to make your model too curvy.
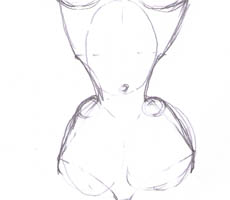 |  |
Mistake 3: The waist is too thin. Watch out for this common mistake!
CC-BY-NC 4.0. Share and re-use for non-commercial purposes only.
Always give attribution and a link to I Draw Fashion.
Your Custom Text Here
How to Draw the Torso
Welcome to this drawing tutorial! Make sure to grab the free worksheets below and take time to practice. Drawing is a skill that requires hands-on practice so make sure you spend more time making art than consuming tutorials.
Simple Forms
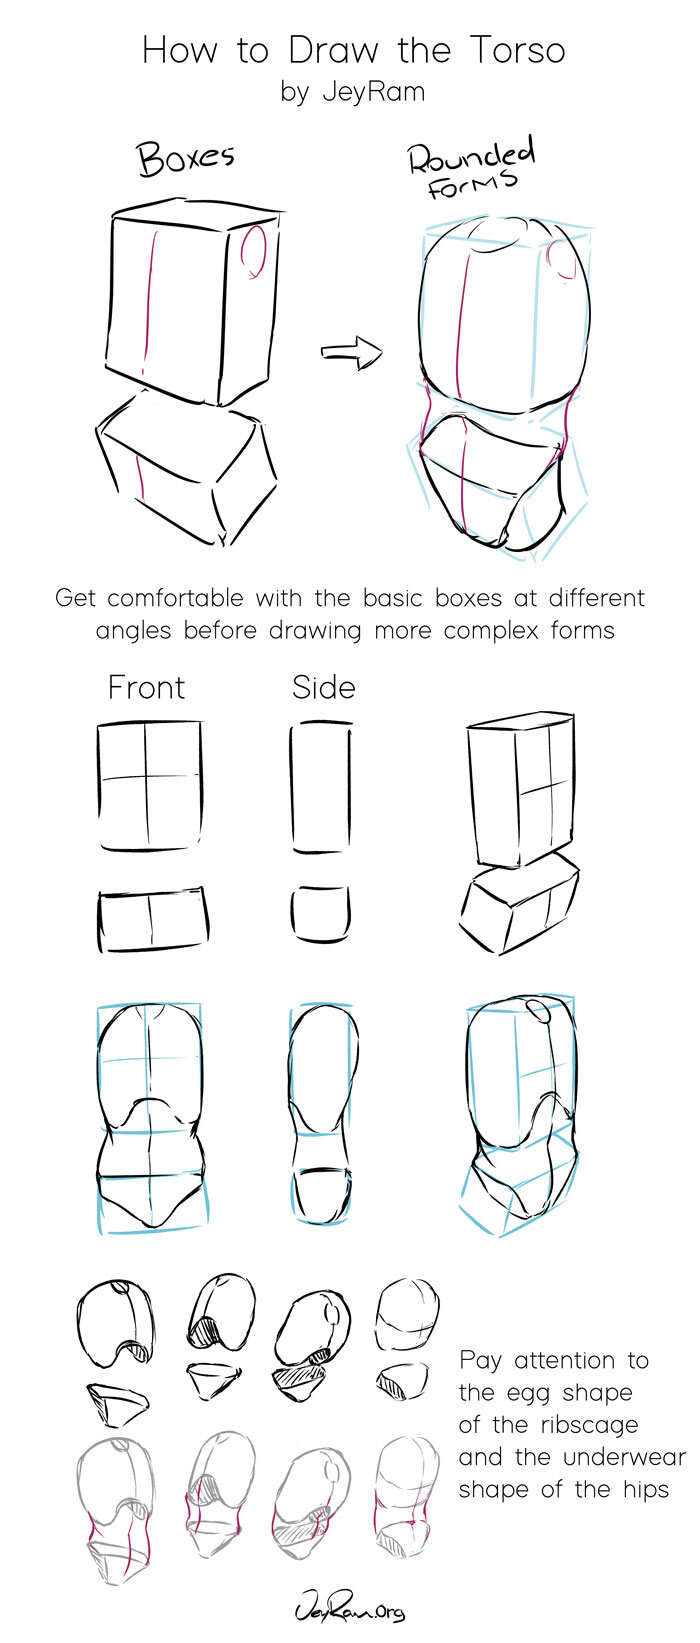
There are two major steps to understanding the torso. The first step is made up of two boxes for the ribcage and hips. At this stage, we leave the stomach area empty because the stomach doesn’t have a solid structure.
When practicing this stage I recommend that you pay attention to the tilts of the ribcage and hips and try to capture the natural flow of most poses. Use lots of references and try to simplify down two of these major forms.
Notice that the box at the top is much taller while the bottom one is short. You can play around with these proportions to get a large variety of character designs but ribcage is almost always drawn taller than the hips.
Practice the box stage until you are fully comfortable with it before moving forward, getting the simplified forms down will make the entire process much easier
If you want help with drawing boxes that have dimension, you can check out my Basic Forms tutorial here (Opens in a new tab)
Complex Forms
In the second step, we draw an egg shape that has a rounded space toward the bottom which makes up the ribcage. For the hips, we draw a form that is reminiscent of a pair of underwear, drawing in the hips this way makes it much easier to draw in the legs once we get to draw the full figure.
Take note of how the ribcage has a curve (towards the center bottom) on the front side that does not exist on the back. Putting this curve helps us describe the perspective of the ribcage and also gives definition to where the stomach begins. In the last few examples, you can see how I have darkened the inside region of this form to give it more dimension.
Draw a few ribcages and hips without the stomach to begin with until you are comfortable with these complex forms. Once you have got a hang of it, draw in the stomach.
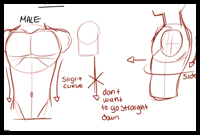
For the stomach, we extend the center line and curve it slightly to give it an organic feel. This will feel natural once we draw in the ribcage and hips first. Use references to study and then try to draw the same poses from imagination, this will help you reinforce what you have learned.
I hope this was useful to you! If you want more hands-on practice you can check out the worksheets I have below and also check out the rest of the tutorials available on the site! Thank you for letting me be part of your creative journey ^.^
How to Draw the Human Torso. Learn the Anatomy and Forms.
This article contains affiliate links.
In this guide, I will show you the anatomy of the human torso and I will teach you how to draw the torso in every angle. I will also show you some tips and tricks, that will help you with drawing the torso correctly in perspective! So let’s get started!
The Muscles of the Torso
So we are going to start with the muscles of the human torso.
I will quickly go over them and then I will show you some tips and tricks, that will help you memorize some of the muscles and the forms of the muscles.
Important, you don´t have to know the names of the individual muscles! I have only displayed them here so that you have an easier time knowing what muscle I am talking about.
You only have to know where the muscles are, how they attach to each other and what forms they have. Nothing more!
Muscles of the front side of the Torso.
We are going to start with the front side of the torso.
The ribcage and hip can later be simplified with just two boxes but for the sake of learning anatomy, I am showing you the ribcage and hip bones like they accuratly are.
The rectus abdominis is the muscle you usually train to get a six-pack. The muscle has, however, actually eight segments, that can in some rare cases be seen through the skin.
So theoretically it is actually possible to get an eight pack.
Directly next to the rectus abdominis are the external obliques. These muscles are wrapping around the side of the skeleton and attach to the rectus abdominis.
The pectoralis major is slightly covering the rectus abdominis on the very top part of it. The pectoralis major has a few individual “strings” of muscles, that are layered over each other on one side and attach to different parts of the skeleton on the other side.
One side of the pectoralis major attaches to the upper arm of the skeleton and the other side attaches to the color bone, the middle of the ribcage and the fourth and fifth rip from the top.
And finally the deltoid! The deltoid consists of three muscles, that attach to the collarbone on one side and on the upper arm on the other side. The deltoid slightly covers the pectoralis major.
And that’s really it for the front side of the torso! There are obviously a lot more muscles, that are present in the torso but these muscles, that I just went over, are really the most important ones for drawing the torso. At least for the beginning.
The Muscles of the Back
You will quickly realize, that we already know some of these muscles from the previous part. That is because some of the muscles of the torso are wrapping around the body. so don´t be confused!
First of all, let’s have another look at the deltoid but this time from behind. Here you can see, that the deltoid is also attached to the shoulder blade.
Or to be more specific, the deltoid is attached to the part of the shoulder blade, that is going up over the ribcage and that part will attach to the collarbone in the front.
Next up the latissimus dorsi. This muscle is one of the largest in the human body but it is also the thinnest. it is so thin, that you can see some of the muscles, that are underneath it, though. It attaches to the spine and goes all the way around the skeleton and attaches under the armpit.
You can see a little bit of the external oblique in the back. This muscle also wraps around the skeleton.
The most important muscle of the back is the trapezius muscle. This muscle attaches along the spine all the way up to the skull. It also attaches to the top part of the shoulder blade and to the collarbone.
The trapezius muscle dictates the complete neck form of the back and the shoulder form.
Simplifying the Form of the Torso
It is obviously easier to simplify the whole drawing process and not always draw the skeleton first and then attach all the different muscles to it.
The ribcage can be simplified by drawing a simple elongated cube. A proximity 2/3 the way down will be the solar plexus.
The spine, that connects the ribcage and the hip can just be drawn as a simple cylinder.
The pelvice can also be simplified by drawing a cube.
It is a good exercise to just draw a lot of these simplified versions of the torso to get a feeling for the dimensions.
You can also take a look at different pictures of people running, jumping or people that just strike interesting poses and try to use these images as reference for drawing some of these simplified torsos.
The forms of the Muscles
Every single muscle in the human body has volume. Don´t forget that and always keep that in mind when you draw a figure.
As you can see above, the muscles are following the movement of the torso and wrap around the form of the torso. The muscles are casting shadows!
But even though the muscles are twisting and stretching they still have volume! Don´t forget that! It seems like a little detail but it is very important to give your drawings that little final bit of believability!
As you can see above, I did not add any shadow and the figure still looks three dimensional and believable. That is because the forms of the muscles are defined by the lines in the drawing.
Tips and Tricks
Don´t be to hard to yourself!
This may be the most important tip here. Don´t be to hart to yourself. You should be looking at your drawings and ask yourself, what you could be doing better but you should not beat yourself up over it.
Don´t demotivate yourself! and don´t give up!
Try to draw Forms and not Lines.
This may sound a little bit weird to you but let me explain.
What I mean by that is you should keep in mind, that in the real world no actual lines exist. Think of every drawing you do as if it consists of forms and shapes. This will actually help you to understand objects and people in a three-dimensional space way better.
As I said, it sounds weird but this actually helps. Just try to see the shadow planes and light shapes in every drawing, you do and draw these shapes and not the lines, that separate them. You will see the difference!
Use Reference!
Dont shy away from reference. Seriously it is not cheating and it will help you to draw better and it will also help you to exercise drawing way better!
Final words
This guide is not meant as an in-depth complete guide to help you learn anatomy in all its integrity. There is a lot more to drawing and understanding anatomy!
This guide is only meant to help newcomers to learn the first few very basics to get you started with anatomy.
But there are a lot of little things, that you still have to understand and learn in order to get really good at drawing human anatomy. Things like how muscles change their forms, when they are flexed or stretched and what muscle moves which part of the body and so on.
But don´t get intimidated and just keep on learning! You can do it!
Hi, I am a passionate maker and professional prop maker for the entertainment industry. I use my woodworking, programming, electronics, and illustration know-how to create interactive props and puzzles for Escape Games and marketing agencies. And I share my knowledge and my experience on this blog with you so that you can become a maker yourself.
How to Draw the Female Torso, an in-Depth Guide
Drawing the female torso is an elusively difficult task. It is hard enough to keep all the muscles together, you also have to account for proportions and shape, and on top of it all, you have to get perspective just right, or the entire drawing falls apart.
Yet there is hope in a careful, focused approach to drawing, backed by knowledge of the skeletal structure. In this tutorial on drawing the female torso, we will start with a simplified underdrawing that helps us get perspective right. You will see that as long as you get perspective right in your drawing, all other elements will follow.
For those of you looking for a simple answer on how to draw the female torso, here it is:
Start with drawing two boxes to represent the ribcage and the pelvis, on top of this framework, begin to develop the torso drawing by paying special attention to the landmarks and proportions that are descriptive of the female form.
Let’s go over my top three tips for drawing the female torso, and then we will get into everything you will need to begin drawing on your own.
Gvaat’s top three tips for drawing the female torso:
The Method for Drawing the Female Torso
When drawing the human body, you must account for proportions, perspective, and angles or the drawing won’t look right. For me, drawing the female torso is all about getting the angles right from the first marks on paper.
I gauge proportions as I draw since they will change depending on the reference anyways. We can play with proportions to achieve different results. You can’t really play with perspective and angles.
The body twists a certain way and it doesn’t twist in other ways. You must place in front of the viewer something that looks realistic and is grounded in how the body behaves, or else your drawing of the female torso will just not look right.
The system I developed to draw the female torso is an adaptation of the popular box method. I shave off the edges from the boxes in my drawings so that the cuboid forms look a bit more organic. In the end, the structure quickly helps me understand the position of the pelvis and the rib cage.
Worry Less About Proportions and More About Perspective
I’m not too worried about the proportions of the boxy shapes that I’m drawing. Instead, I’m very focused on the angles and perspective.
(However, there’s a rule of thumb for proportions when using the box method for constructing the torso. The rule goes like this: stack two perfect cubes on top of each other, slice the bottom one across at halfway point. and the last bit on the bottom is the pelvis, while the box at the top is the rib cage.)
I don’t worry about creating this perfect situation of proportion, because for me I always had issues with placing the torso in proper perspective. So when I draw the boxes or the cube-like shapes to establish a torso, I do so only to establish the perspective and the angle. Once I have those identified and solidified on paper, it is so much easier to draw on top of it starting with really any major landmark of the torso.

To me, it’s much easier for a student to see that one leg is bigger than it should be, then to really understand that half of the torso that they’ve just drawn is just not placed in the correct perspective. My view is that you should focus on the perspective and the proportion issue will solve itself over time.
Consider that I never counted 8 heads to draw a human figure. Focus on perspective first and as you hone your artist eye the proportion issue will get easier over time.
Drawing the Female Torso, Major Landmarks
On the image above, note the sequence of landmarks appearing from 1 to 4. At 1, you see the ridge of the lower ribs (the end of the rib cage anteriorly). At 2, is the area where the torso folds on itself during a bending or twisting movement – this point is below the ribcage, and above the navel. At 3, the navel (belly button) is positioned above 4, the iliac crest of the pelvis.
Drawing the Female Torso, Skeletal Structure:
In this section let’s go over the ribcage, the pelvis, and other bones that make up the torso. Knowledge of the bones is absolutely critical to drawing the torso correctly. Don’t skip!
I wrote a detailed tutorial on how to draw the torso in general. In it, I went over all the bones and all the muscles that you need to know. I also went over the origin and insertion points of each muscle group you need to know. You can view the tutorial free by following this link.
Today, I still want to review the major landmarks and skeletal structure with you. Just because these landmarks are incredibly important in conveying proper information to the viewer.
Let’s first take a very general view of the torso and the landmarks we need to learn. Below you will see an illustration where I take the cuboid/boxy shapes and turn them into the general mass of the pelvic bones and the general mass of the ribcage.
Then at the top of the rib cage I add the clavicles and the scapulas. (We will cover each one below).
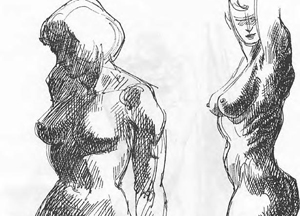
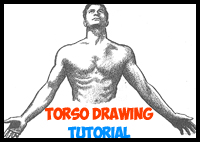
FIGURE DRAWING : HOW TO DRAW HUMAN BODY, TORSO WITH LESSONS
How to draw human body / torso with figure drawing lessons and step by step drawing pictorial tutorials for drawing People’s Bodies, Figures, and Torsoes to create great cartoons, illustrations, and comics.
How to draw human chest and torso with male and female body and figure drawing lessons and step by step drawing pictorial tutorials to create great cartoons, illustrations, and comics.
Learn how to draw a person’s chest and torso with the following drawing lesson. This tutorial will guide you through the process that artists use to draw the male and female torso.
Here is a picture detailing how to draw the chests on both women and men
Here is a picture detailing the way to draw chest and torso
Drawing and rendering male body, man torso or upper body, chest, abs, ribcage and shoulder: front view character design, comics, manga, anime and video game concept art
Complex shapes are much easier to draw if they are first simplified. With the torso for example, I would think a shape that corresponds the general feel of the torso. By knowing what directions the planes ought to face, it’s easier to analyse what’s wrong with the drawing.
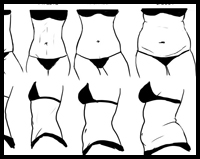
Learn how to draw the torso and chest of different body types. fat, thin, normal, etc
Helpful Instructional Demonstration Images for drawing the chest. great for referencing when drawing chests / torsoes.
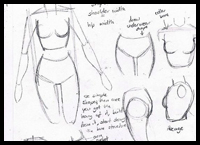
Here is a drawing tutorial for learning how to draw the feminine waist and torso
Here is an illustrated tutorial for drawing the comic-style male torso and chest
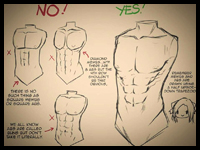
Reference illustration for drawing abs and the no-nos.
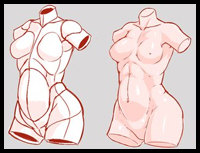
An illustrated drawing lesson on drawing the female torso and chest
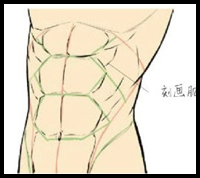
Here is a reference image showing you how to draw the male chest and abs.
Create a beautiful male chest that is ripped
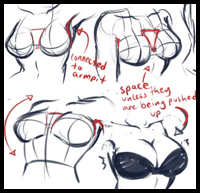
Here is a guide to drawing cartoon, manga boobs.

