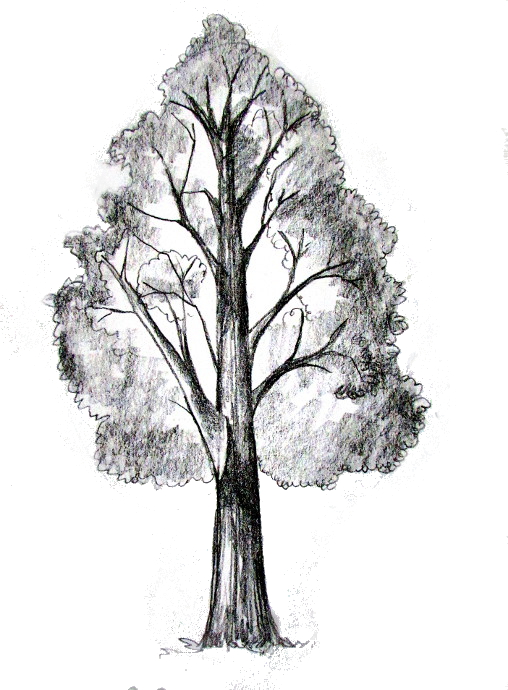
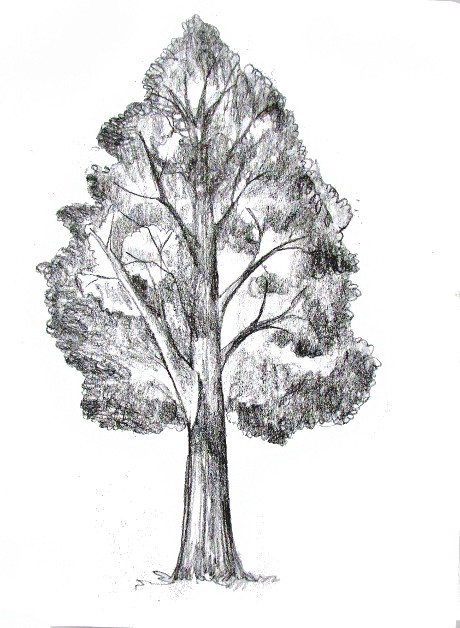
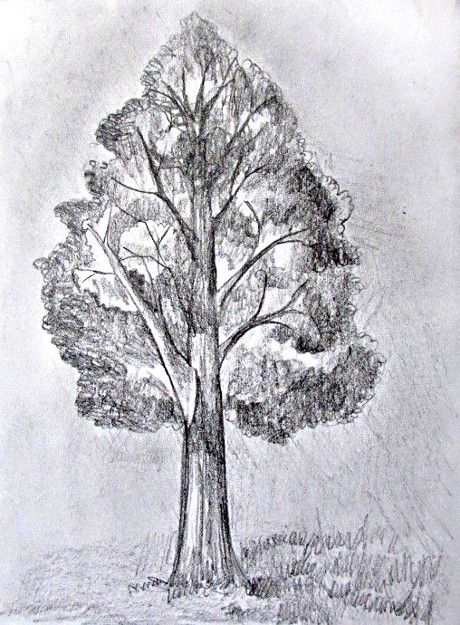
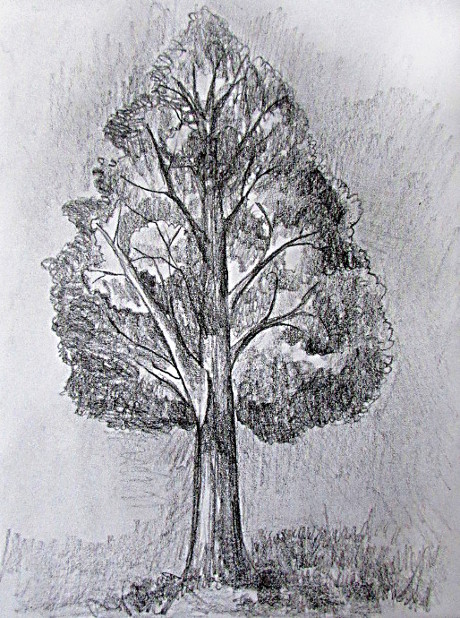
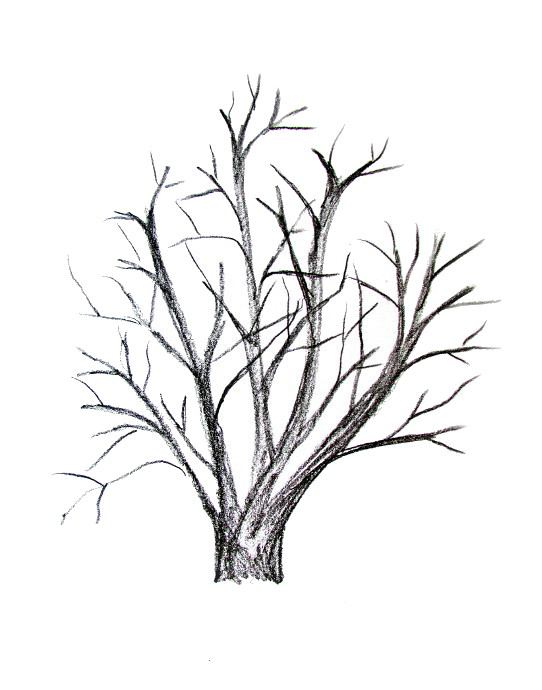
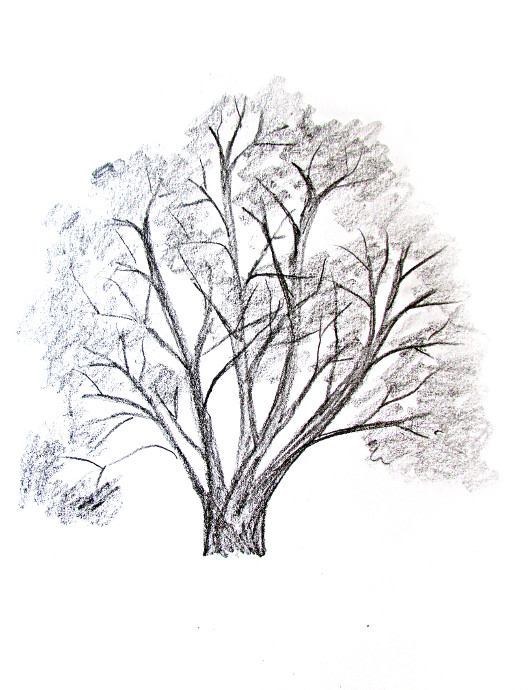
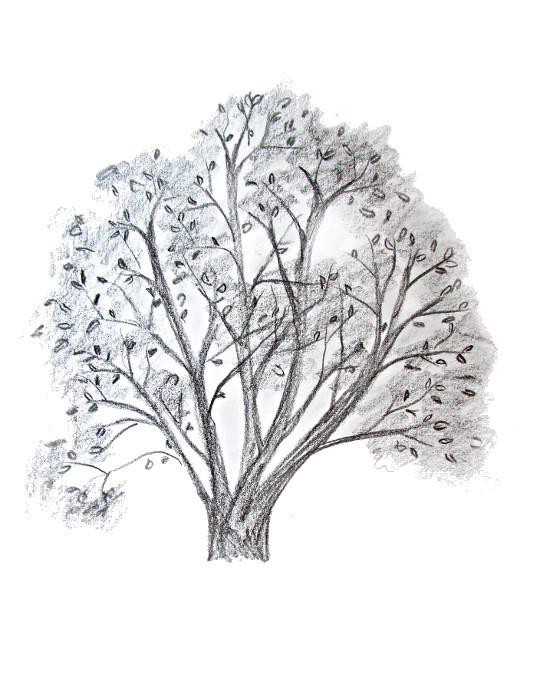
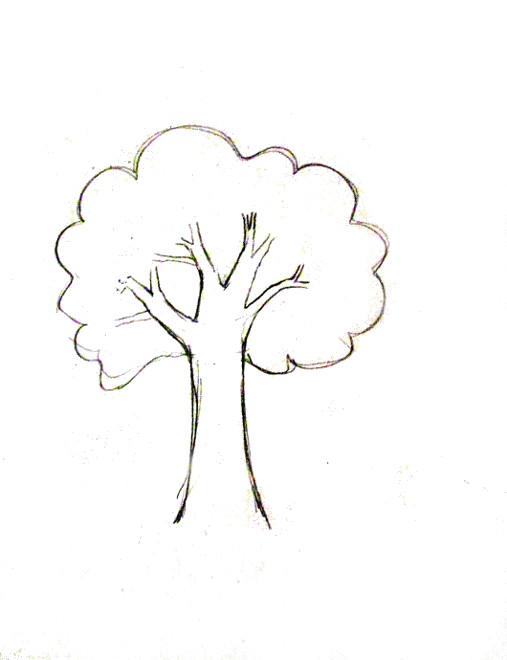
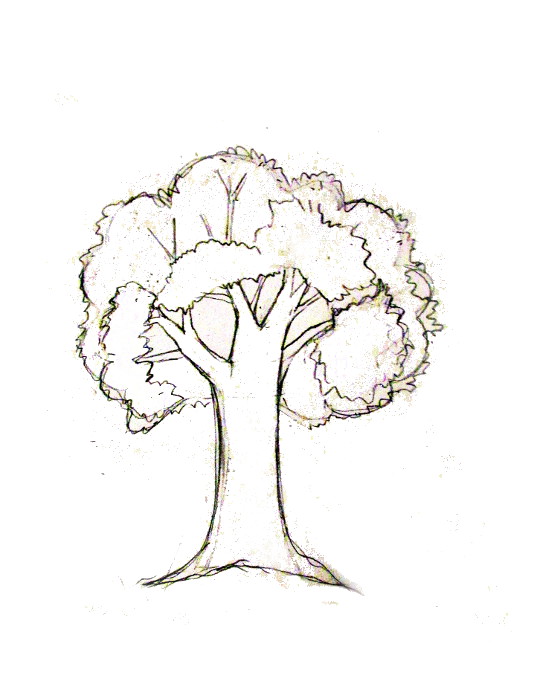
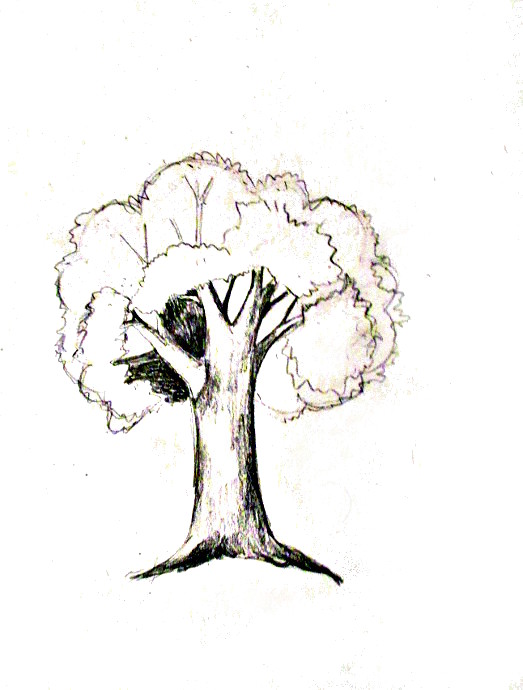
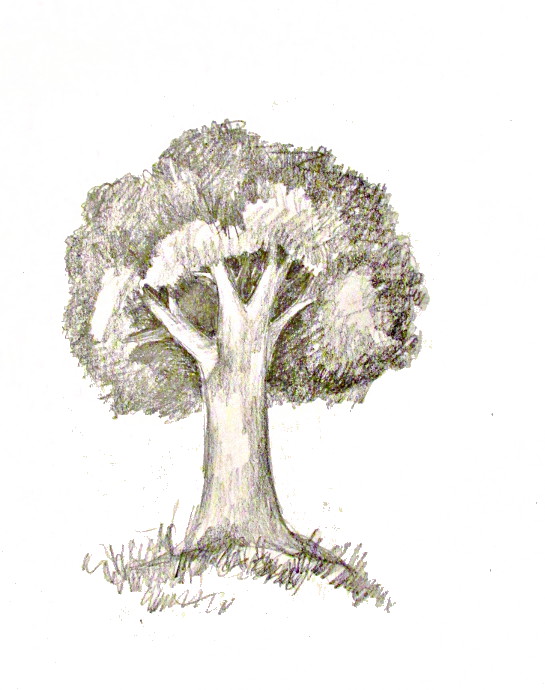
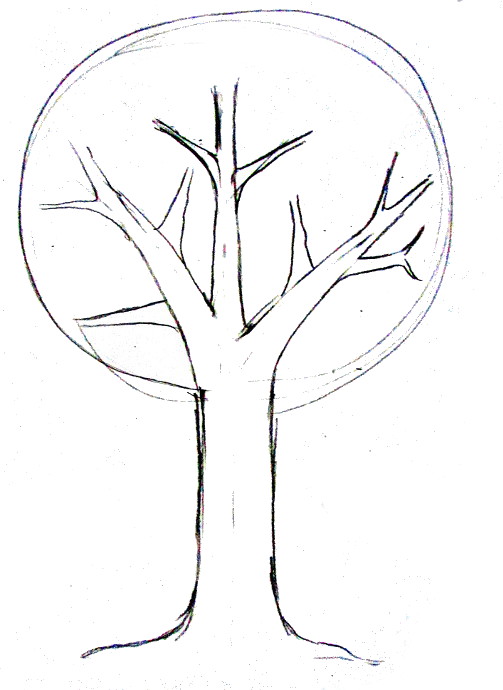
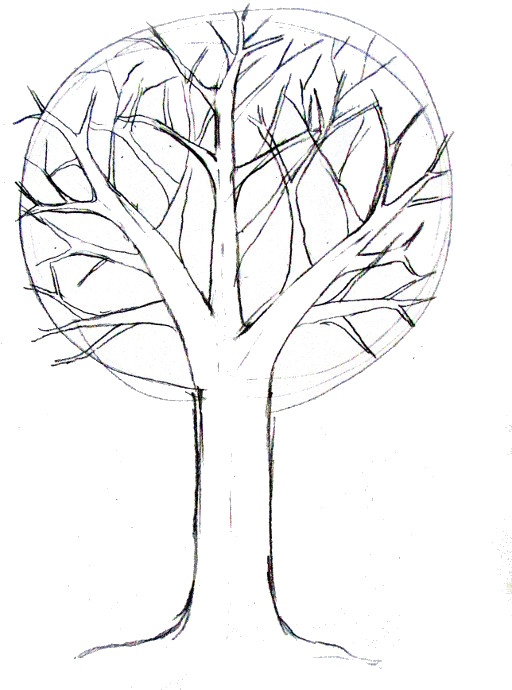
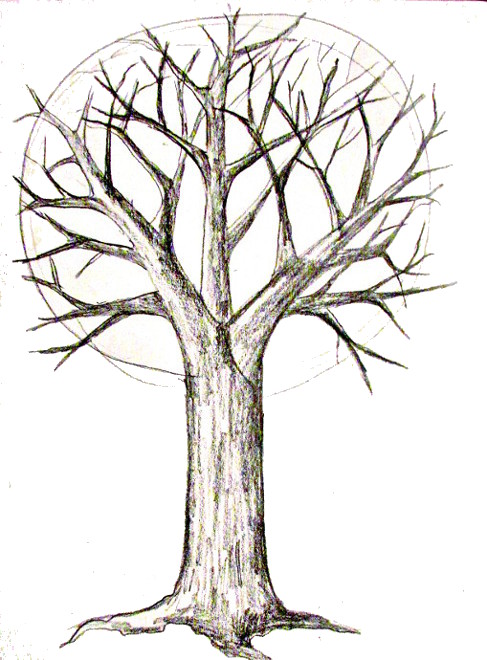
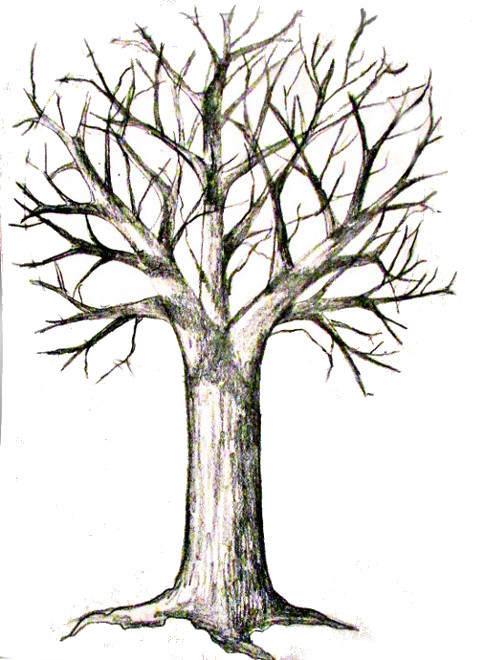
How to draw trees
How to draw trees
How to Draw Trees
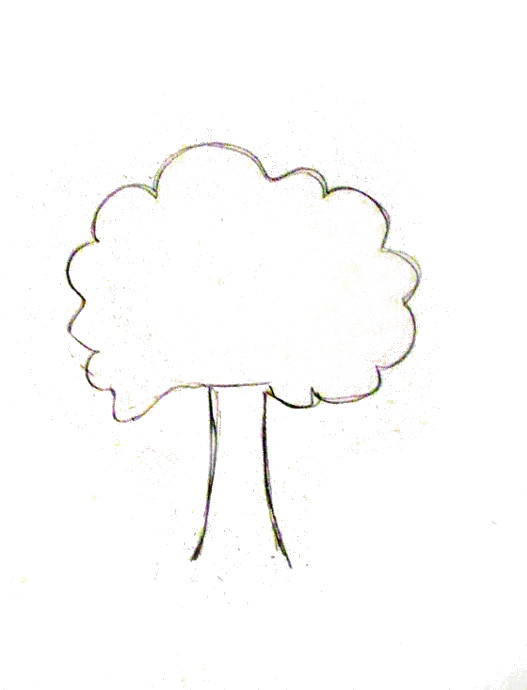
Trees seem like one of the few things that are easy to draw. However, if you know nothing about drawing, you may either go too simple.


Neither of these is what a real tree looks like. The first is a symbol of a tree, and the other represents a definition of a tree. Your job, as an artist, is to draw what we see, not what we know. Drawing trees may be a great exercise in developing this skill!
In this tutorial, I’ll show you how you can draw an oak tree, a pine tree, and a weeping willow in a realistic, yet simple manner.
What You Will Need
A common no 2 pencil, also known as HB, is very universal, but it’s not perfect for every task. We need softer pencils to achieve darker shades. These aren’t some special, expensive tools—I bought mine in a dollar store and they work just fine. Even if you’re not sure if drawing is for you, a set of graded pencils is not a huge investment, and they certainly make learning more convenient!
You’ll also need a pencil sharpener. A blunt tip creates slightly lighter strokes and disturbs the overall texture. Keep your pencils sharp during this tutorial, and remember that soft pencils blunt faster!
As for the paper, it can be any kind. Cheap printer paper will do great for these exercises. However, don’t make your drawings as big as the whole sheet—the smaller the drawing, the less detail it will need. My examples are about 9 cm high.


1. How to Draw an Oak Tree (Aka Generic Tree)
Step 1
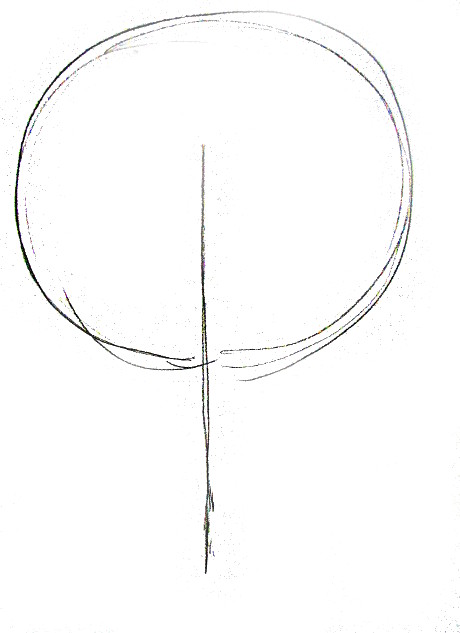
The mind works in a special way: first it notices a general picture, and then it focuses on the details. That’s why you shouldn’t start your drawing with details—you need a general base first.
Draw a very general form of the final image with a few subtle lines and dots. Use the HB pencil for this, and don’t press too hard. This way, its strokes won’t be a part of the final oak tree drawing—they won’t be registered by your camera or scanner (I had to use some heavy Photoshop magic to make these strokes visible for you!).


Step 2
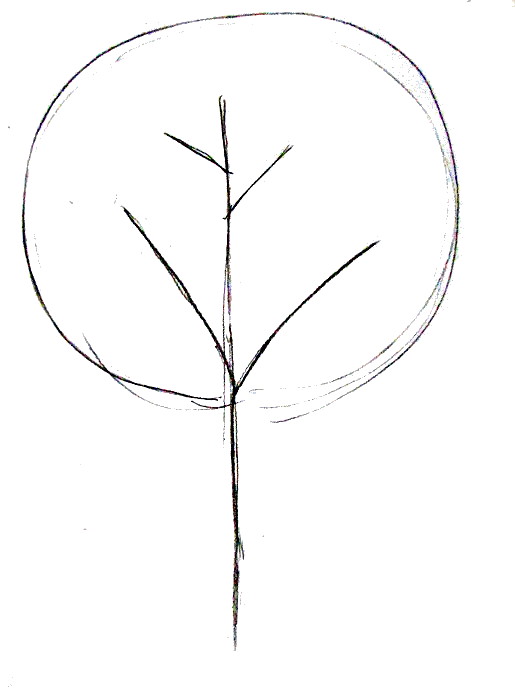
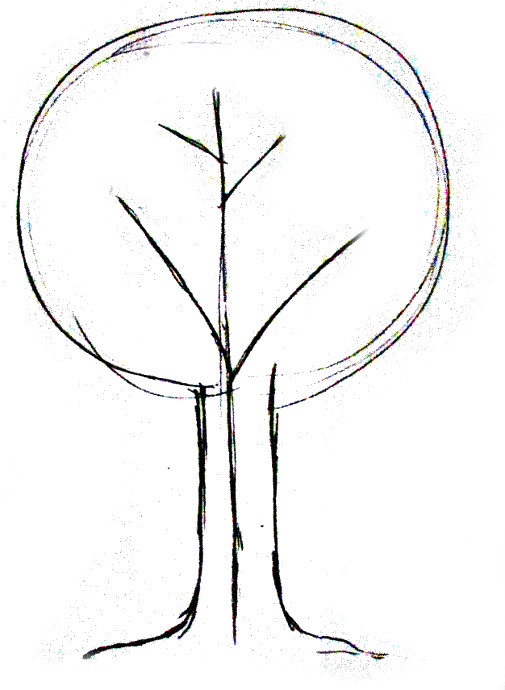
Time for the oak tree trunk drawing. Remember to make the lower part wider. The bigger the tree, the shorter and thicker the trunk.

Step 3
Draw a branching on top of the trunk.

Continue drawing the oak tree branches, going lower the longer they get.


Step 4
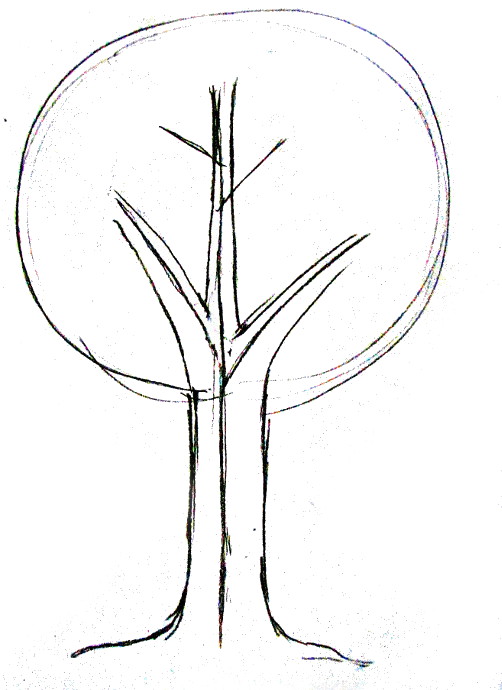
Add more branches to every branch, using the same method to make them look natural. Keep the strokes subtle! It will keep them from affecting your final realistic oak tree drawing.

Step 5
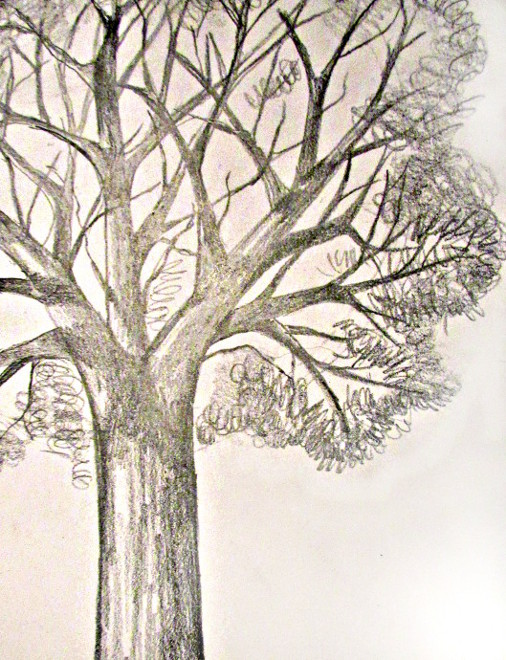
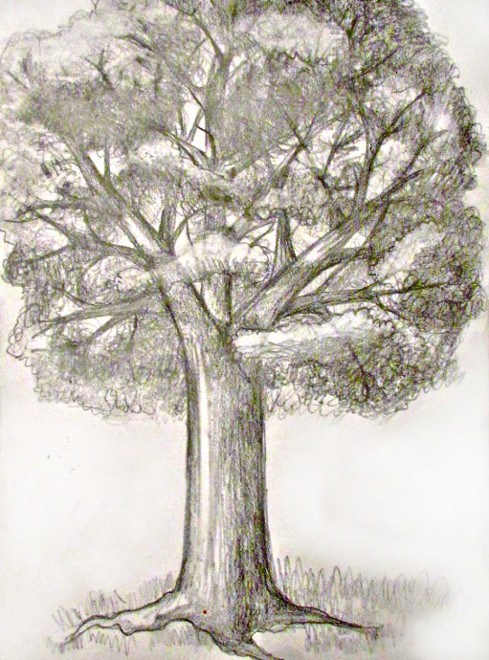
Use quick, jerking motions of your hand to draw the overall shape of the crown. Keep it uneven and ragged.

Step 6
Use the same method to draw smaller «clouds» of leaves within the crown. Leave a few areas empty to reveal the branches beneath, just where they make the most interesting structures.

Step 7
Add some thickness to the oak tree branches that are not concealed by the leaves.

Step 8
Before you start shading, decide which part should be bright and where the shadow is. You can define it with a subtle cross-hatching.

Step 9
Take the 2B pencil and make sure it’s sharp. Use it to draw the texture of the trunk. Keep in mind that white areas are a crucial element of the texture!

Step 10
Use both 2B and 5B (or softer) pencils to shade the trunk according to your planned lighting. Feel free to press hard with the softest pencil to get the darkest shade when it’s necessary, but don’t overuse this effect! The fewer black parts in the picture, the more impressive they are. This will all come together when your simple tree drawing is finished.

Step 11
Take your HB pencil once again to sketch the leaves in your tree drawing. Draw them as loose curls, quickly, using a jerking motion.

Step 12
Each branch has its own mini-crown, too (the small «clouds» you drew earlier). You need to shade them as if they were all separate trees.
First, use the 2B pencil to draw darker curls on the shadowed side. Press lightly on your tree illustration at first to see if you’re doing it the right way.

When you’re sure you’ve found the correct shadowed sides, make them darker and denser, and create a medium-dark border between the light and shadow.

Step 13
Use the 2B pencil to add a few loose leaves here and there around the crown and small «crowns». This will simulate the thin, barely visible branches.

Step 14
Use the softest pencil to add a few dark accents in the deepest shadow. This will improve the contrast of the crown in your realistic oak tree drawing. Also, make sure that all the «clouds» seem slightly darker than the «sky»—leaves are not transparent! You can achieve this effect by adding more leaves with the HB pencil in the lighter areas of your realistic tree drawing.

2. How to Draw a Pine Tree
Step 1
Again, we need to start with a very general outline of the pine tree drawing. Use the HB pencil and draw the strokes lightly.

Step 2
Draw the branches in your tree illustration. There’s no need to be precise; just sketch their shape.

Step 3
Just like with the oak, draw the «clouds» on the pine tree branches drawing. This time, they should be narrower and even more ragged. Keep a lot of empty areas between them.

Step 4
Draw the outline of the trunk; make it long and narrow.

Step 5
Use the 2B pencil to shade the pine tree trunk drawing.

. and then use the softer pencil to add the darkest shadow for this step of your pine tree drawing.

Step 6
This time, don’t fill the «clouds» of your pine tree drawing with curls. Make the strokes sharp and chaotic instead.

Step 7
Use the 2B pencil to draw needles all around the outlines of the «clouds». Make them thin and sharp.

Step 8
Draw the branches, and make them dark using both soft pencils.

Step 9
Draw more needles within the «clouds» with the 2B pencil.

Step 10
Use the softest pencil to shade the «clouds» in this tree drawing. If you want, you can simply make all the «clouds» dark—evergreen trees are usually quite dark.

Step 11
Finally, you can use the softest pencil to draw a few dark (fully shadowed) «clouds» between the branches of your simple and realistic tree drawing.

3. How to Draw a Weeping Willow
Step 1
We’re going to start this tree illustration the same way. First, draw the general shape of the weeping willow tree—something like a fountain.

Step 2
Make the outline of the willow tree trunk drawing.

Step 3
In your tree illustration, draw the branches sticking out of the trunk.

. and then pull them down.

Step 4
Draw the outlines of the «clouds» in your simple tree drawing. This time, they’re shaped more like curtains.

Step 5
Fill the willow tree trunk and branches drawings with a darker shade using the 2B pencil.

Step 6
Shade the trunk and branches with the softest pencil for this step of the tree drawing.

Step 7
Take the 2B pencil and draw braid-like strokes along the curtains. They should curve a little on top of the curtains in your tree illustration.

Step 8
Shade the curtains by drawing darker, thicker braids in between.

Step 9
Use the softest pencil to draw dark curtains from the other side of the tree. You can also add leaves to the braid-lines to make them more detailed.

Your Tree Drawings Are Done!
As you can see, trees are pretty easy, as long as you draw their look, not their definition. But this was just the beginning. Do you want to become a real master of tree illustrations? Take a sketchbook and go for a walk around trees. Observe the ones you pass and try to make tree sketches of them quickly. This way it will become intuitive for you.
If you prefer to stay at home, you can use photo references, like these photos of trees on Envato Elements. You’ll be able to elevate your simple tree drawings without braving the elements.
If you want to upload your drawings to the Internet, make sure they’re properly digitized. These tutorials will help you with this:


And if you want to learn more about drawing, check out my How to Draw article to find other tutorials you may find useful. Here are some guides to get you started:
How To Draw A Tree
‘How to draw a tree?’ is a question that I get asked often, online an offline, so I decided to make this tutorial here. I made 7 drawings of various trees with step by step instructions. I hope you all find it helpful!
***This post contains affiliate links.***
For me drawing trees is all about branches and the crown, and fining a balance that you are happy with. There are many amazing artists, books and tutorials out there all about drawing trees. For example, THIS BOOK is very good, and my kids and I enjoyed it in the past.
This tutorial is my take on drawing trees. For these drawings I used a regular sketching pencil, though the same principal applies to other mediums as well. I also adjusted all the sketches in Gimp 2 so that they are more visible, so there will be a slight variation between the photos.
Alright, here is tree number one. I call this one “Tree # 1”. 🙂
How To Draw A Tree: Tree # 1
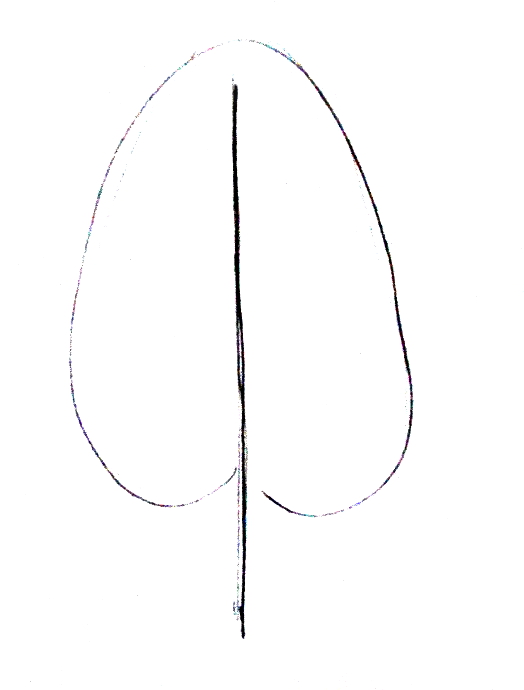
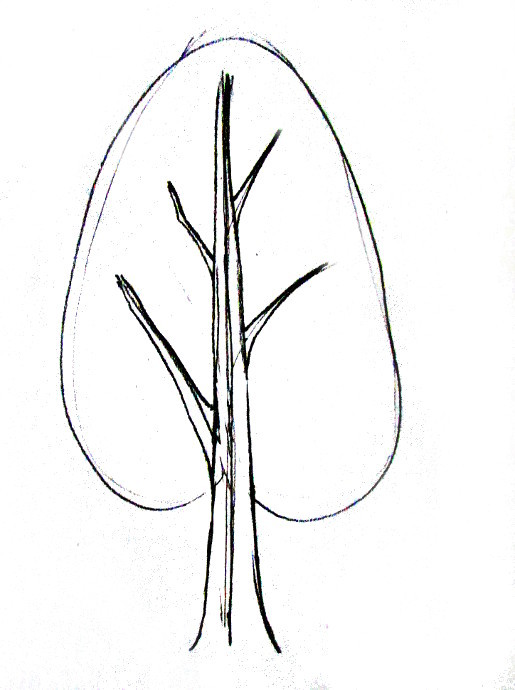
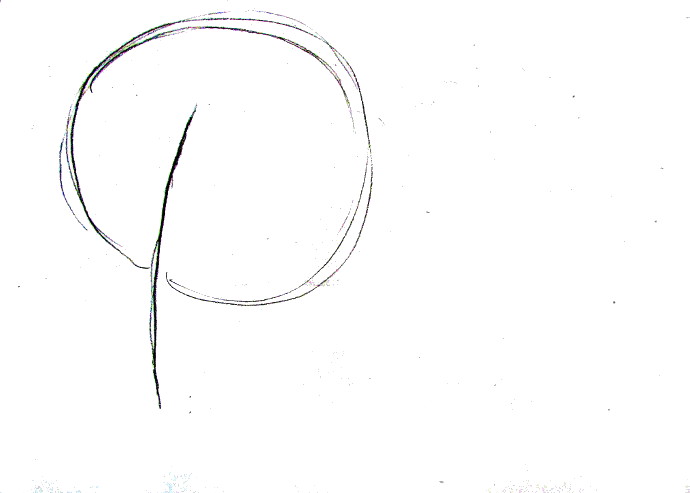
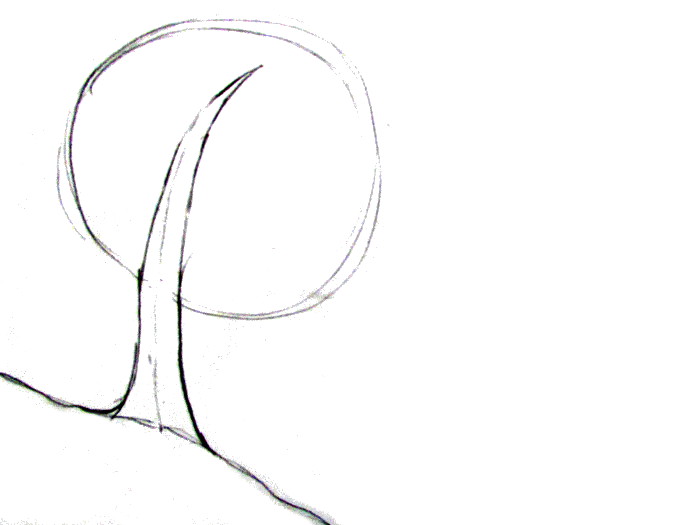
I start with a line and the general shape that I would like the crown to be.
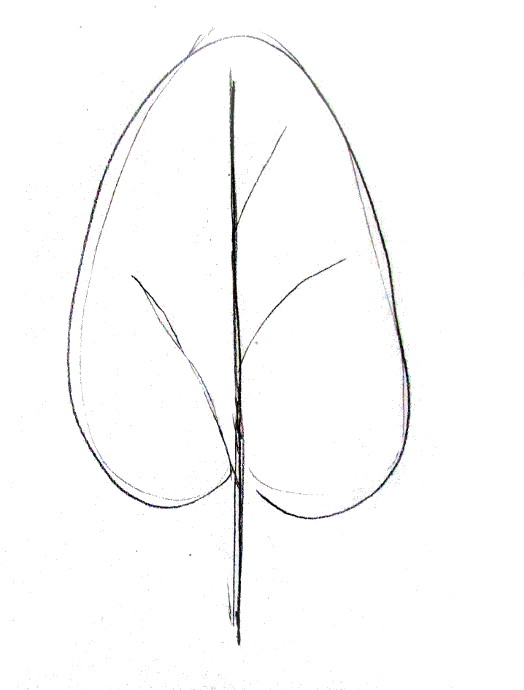
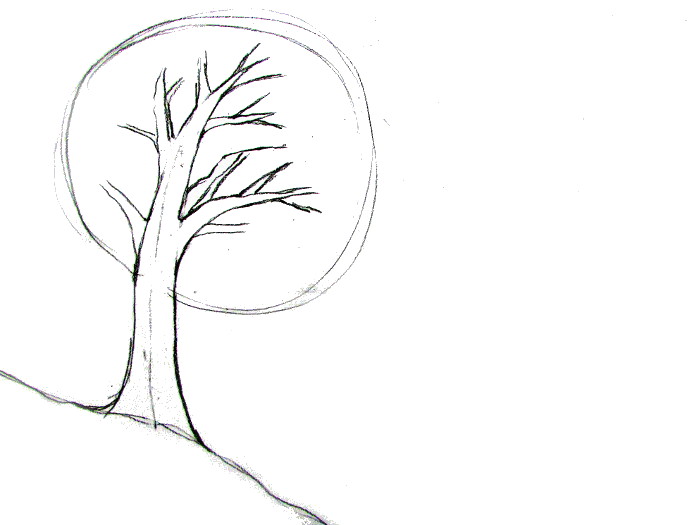
Then I add a few lines to indicate the main branches.
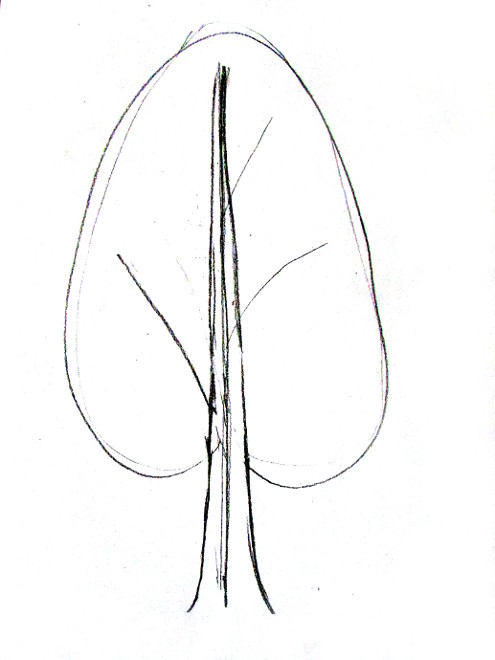
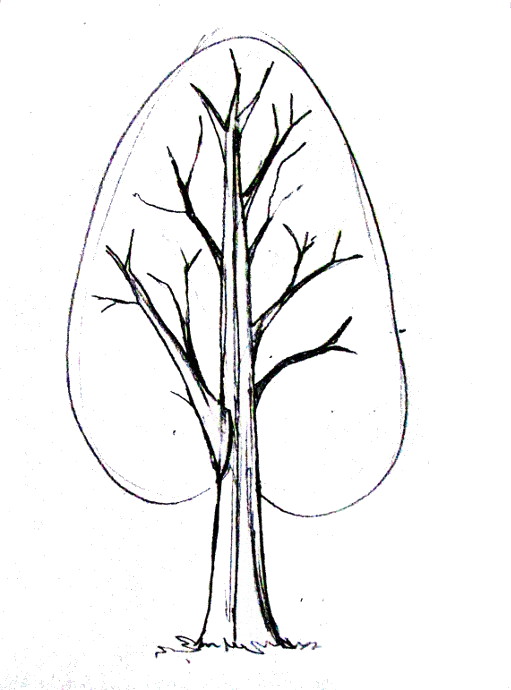
Make the trunk thicker. It is thick towards the bottom and the roots, and narrows closer to a point toward the top.
The same thing with the branches. They are thicker toward the base and narrower towards the tip. Easy-peasy.
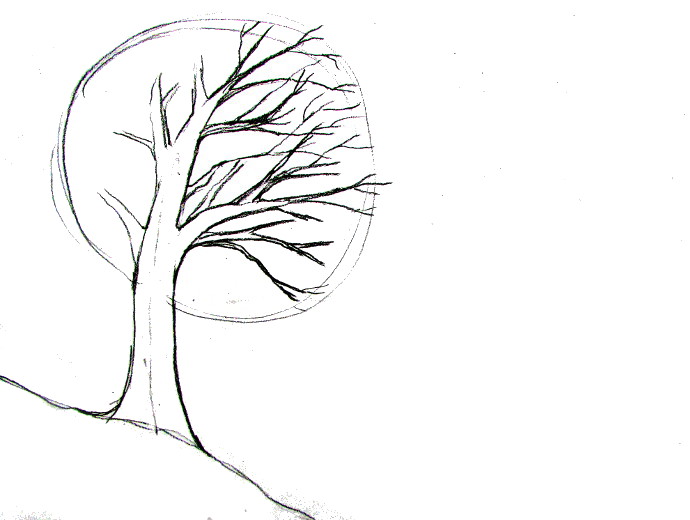
Now each one of the main branches gets a few branches of their own, but smaller and added a squiggle on the bottom to indicate a bit of grass.
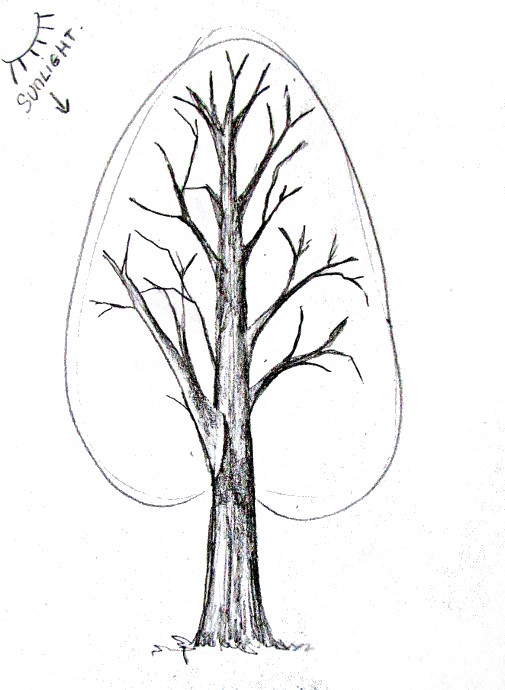
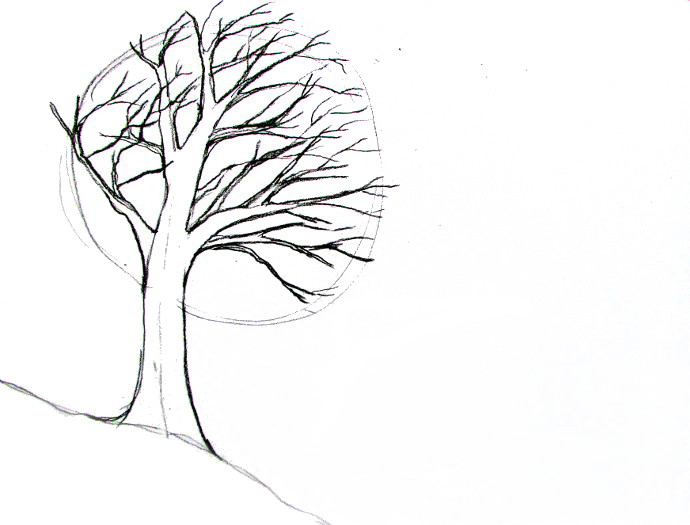
Even more smaller branches splitting off from the bigger ones. I also pick an spot where the sunshine is coming from. I also shade the trunk a bit, using long straight lines.
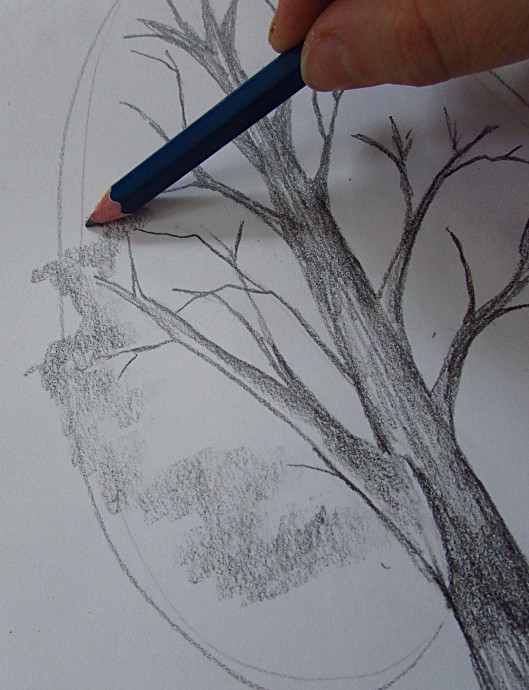
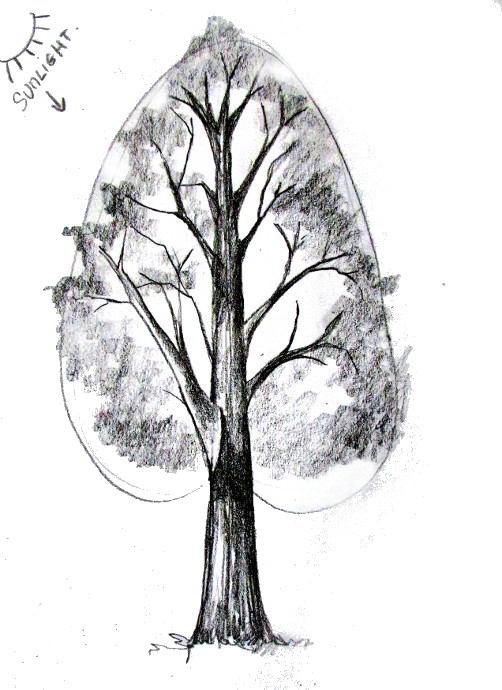
Putting my pencil sideways, I shade in the area in the crown where the leaves are. I am going in a sort of irregular pattern of peaks and troughs.
I finish shading the crown area.
I keep working on the crown, now by adding some layers, and outlines. I also erased the line that was giving me the initial crown shape idea. When shading, keep in mind where the sun is coming from: areas facing the sun should be lighter then the areas facing away from it.
And keep working on the crown. Just doodling away until you feel your tree crown is complete.
I decided that the tree shouldn’t just hang in the air, so I gave it more grass, and shaded in the background.
Even more shadows in and around the tree.
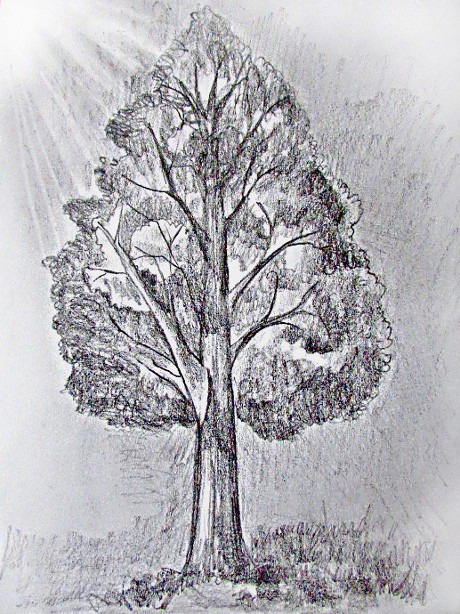
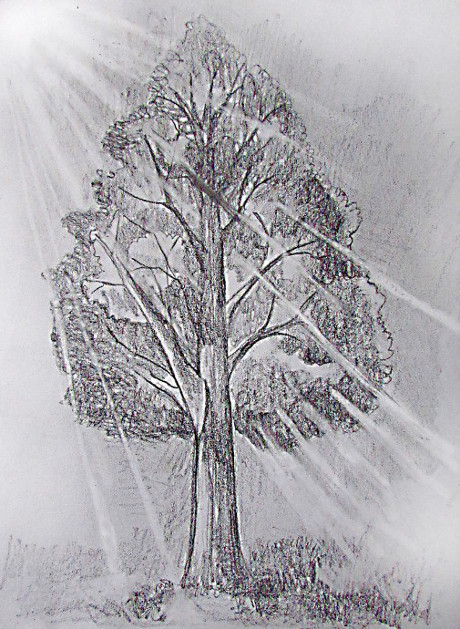
Then I went all out and decided I am going to use my eraser and add some sun rays coming out of the corner.
Even further, I got eraser happy and made more rays coming out through the tree and on the ground below it. Tree # 1 is all done.
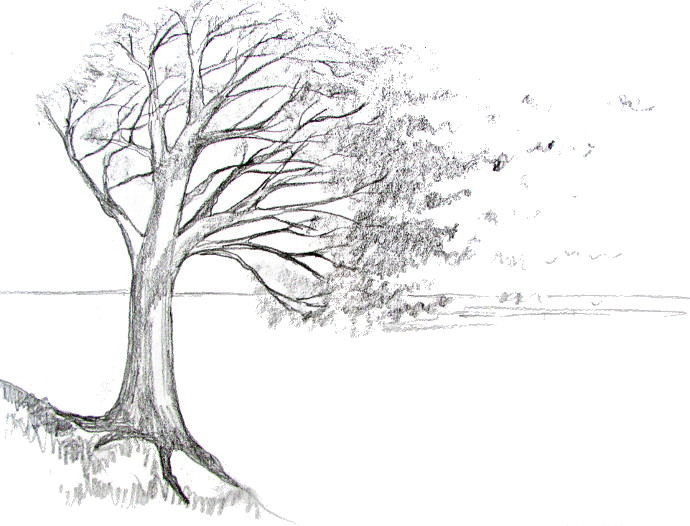
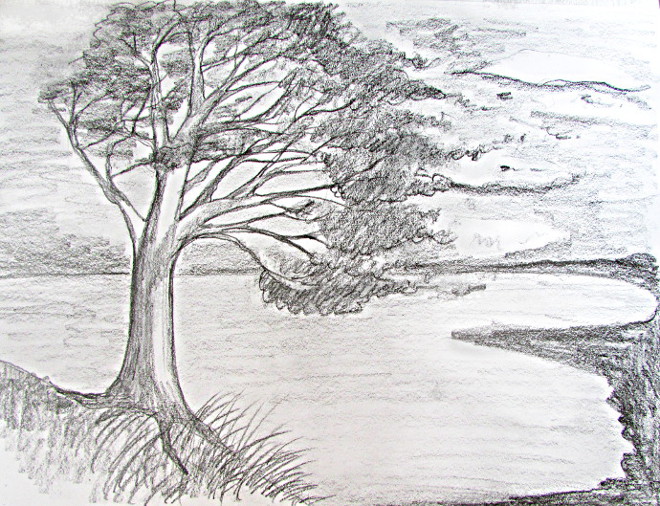
Tree # 2: The Seascape Tree.
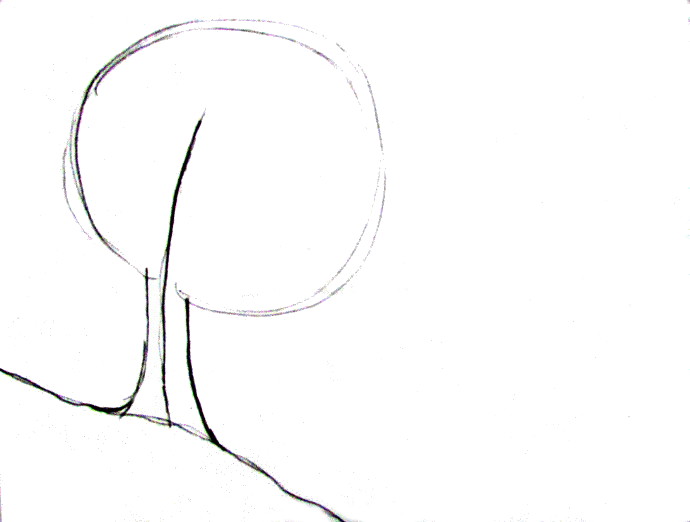
As before, I drew the line and the crown, but this tree is being bent by the wind, so the tree will be bending down a bit.
I add the hill, and make the trunk thicker.
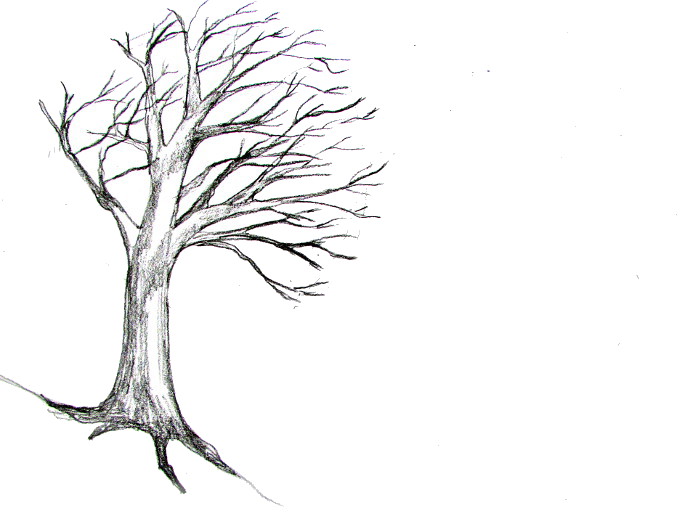
I extend the trunk shape up. As before, it’s thicker towards the bottom, and comes to a point on top.
Add some main branches. Because the wind is blowing, many of the branches are leaning to the right.
Keep adding branches, so far all leaning to the right.
Here is more branches. Here is the thing about the branches. The thick, main branches are stronger, so they will not be as affected by the wind, but the smaller branches will all point in the direction of the wind.
I shade the trunk a bit and added some roots to the hill.
Alright, now leaves are squiggly lines drawn with the side of my pencil. Some of them are flying off, so more small squiggles. I also add a horizon line: where the water meets the sky and some grass on the hill.
I added some clouds, shaded the water, drew a sand line, and some tall grass on the hill. The tall grass is also leaning in the winds direction. I also darkened some of the leaves a bit.
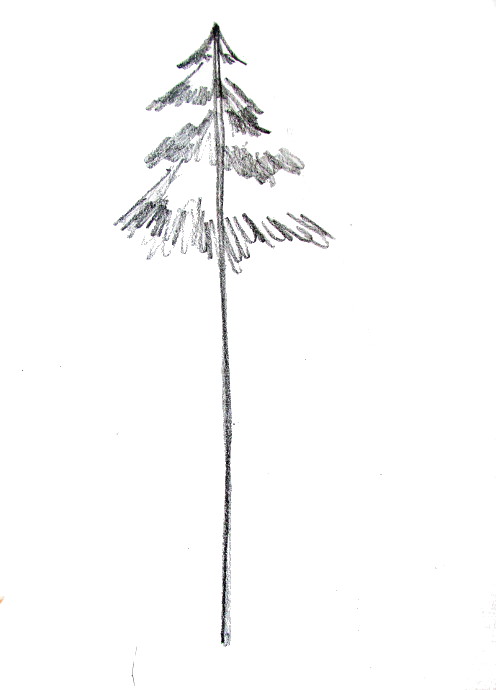
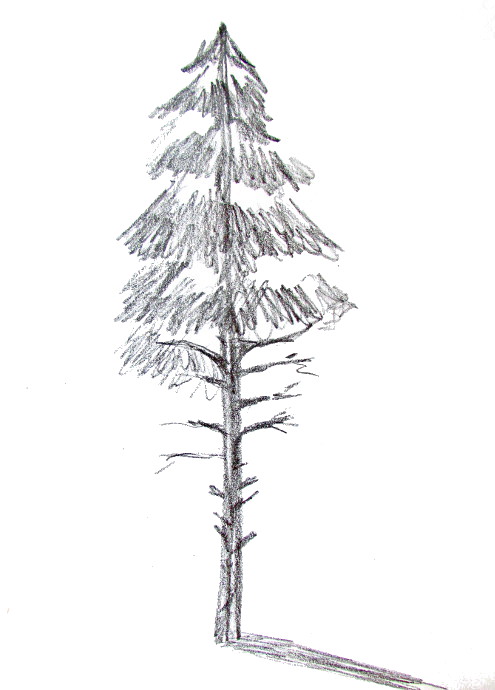
Tree # 3: Pine Tree:
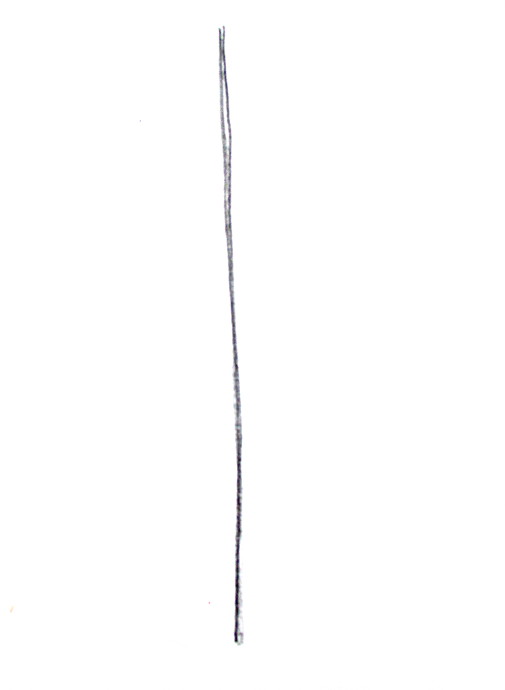
As before, I start with a trunk.
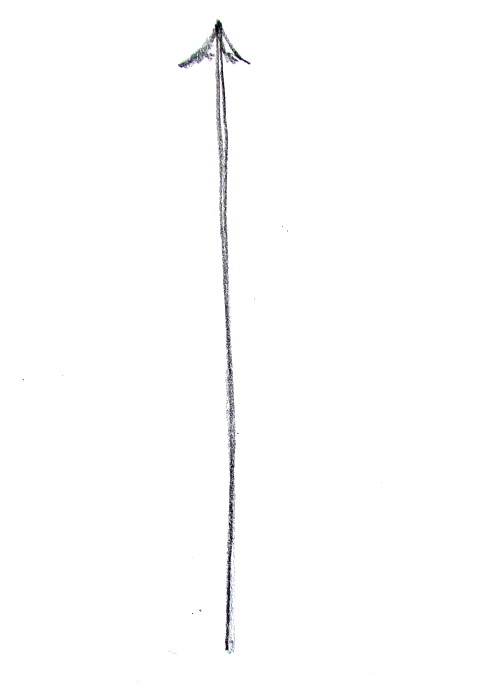
I add a small triangular shape on top with straight lines all moving to the top.
Add more triangular lines on top of one another.
Keep adding the branches with needles to about half way, and then sketch a few empty branches. Thicken the trunk. Add a shadow to the tree.
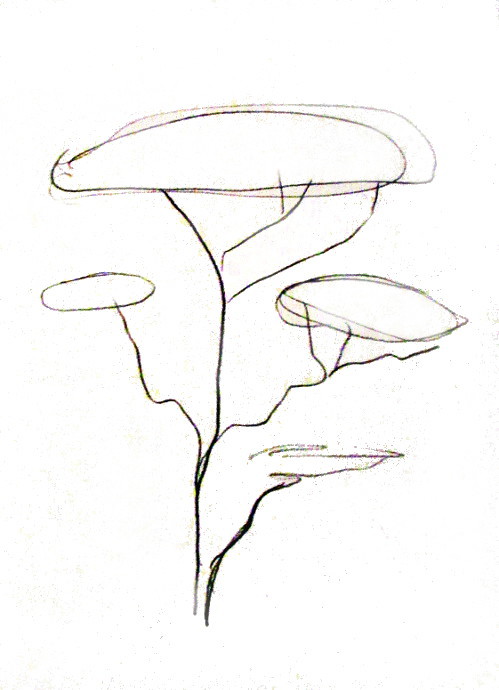
Tree # 4: Umbrella Tree
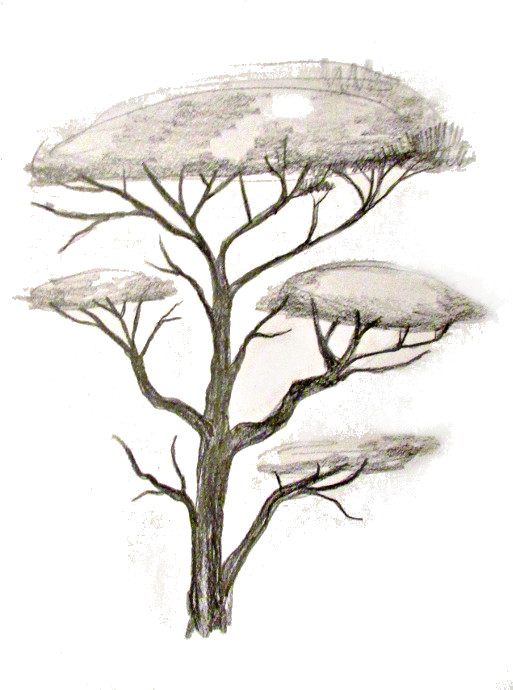
This tree was especially fun to draw. I started to draw it by drawing the ovals for the leaf parts. I decided on four, but if you want more, that would be quite awesome too! Then I added some squiggly lines coming down to the same area for the tree trunk.
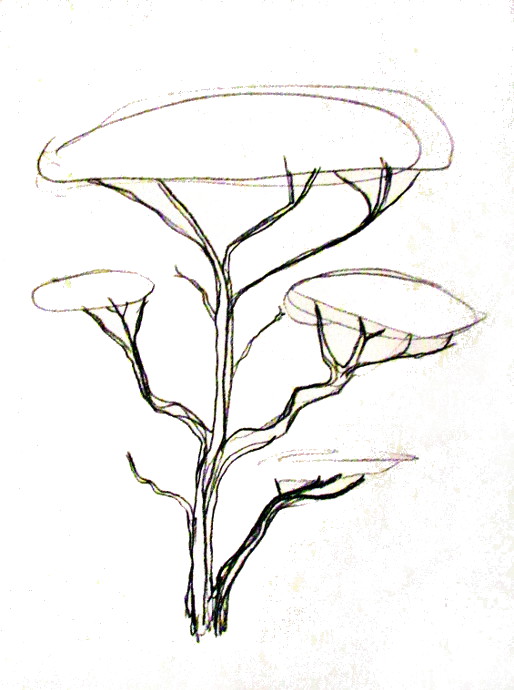
I added more lines to create thicker trunk branches, added more branches going out to the ‘umbrellas’ and added a few empty branches as well.
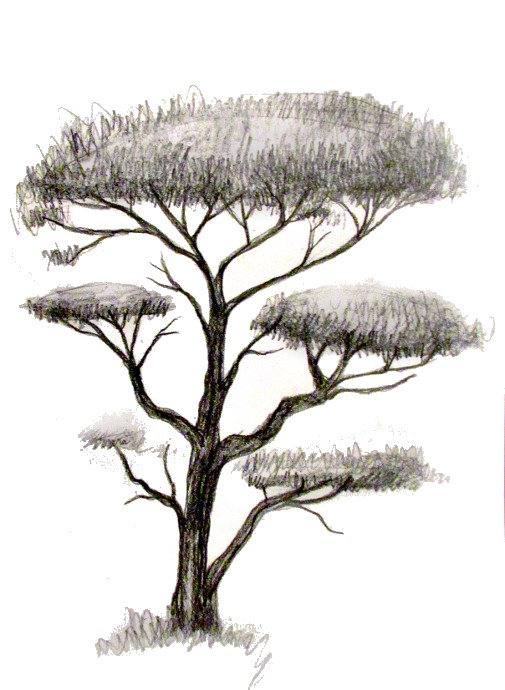
I added more details to the trunk, made more squiggly branches, and added some shading to the ‘umbrella’ portions.
A bit of grass, and some textures on the ‘umbrellas’, also make the ‘umbrella’ textures thicker on the bottom and thinner on top.
Tree # 5: The Bushy Tree:
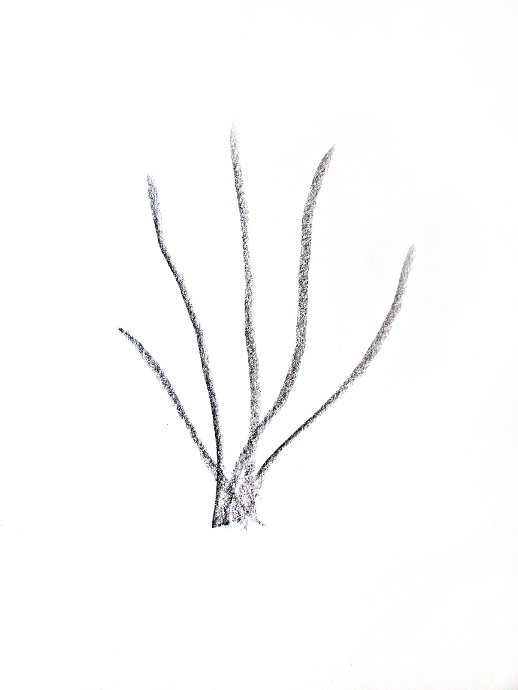
This tree is more of a bush. All the branches are coming out from the bottom, and growing to about the same size. I start with five main branches.
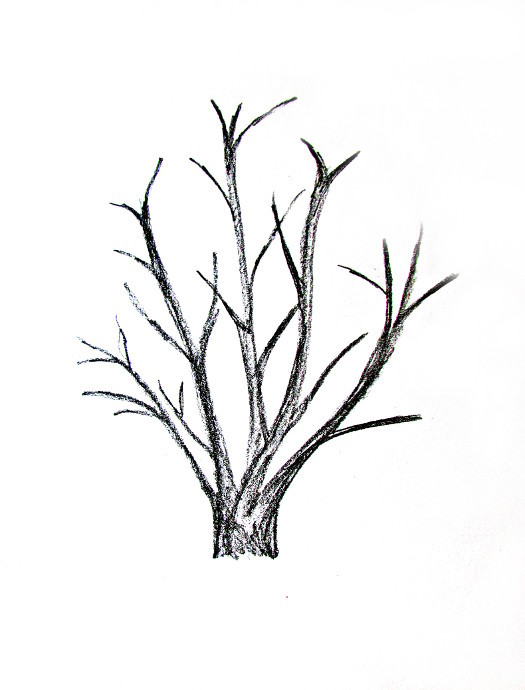
Make the branches thicker, and add some more small branches.
Even more small branches, making the bush thicker and thicker.
With the side of my pencil I added some shadow to where the leaves are going to be.
I added some more detailed leaves, but they could also be berries, or flowers, or what ever else you would like.
Here is the Tree # 6, Or The Little Tree:
Too often kids (and adults) draw trees which ends in a stump, and has a semi round crown on top of it. Here I start by doing that, and then work on it some more.
I erased the stump line and gave the tree a few branches, but instead of doing the way I did the above trees, I ended them half way and will cover them up with leaves.
Define the leaf areas in the foreground, and add some branches coming up behind them, also a few roots.
Shade the trunk a bit, and then start shading the leaves that are towards the back.
Do a bit more shading, and add some grass.
Tree # 7: The First Tree.
This was the first tree I actually drew, and I wasn’t too thrilled about it, but here it is anyway. I start as before, a line for the trunk, and a circular shape for the crown.
Lines for the few main branches.
Make the trunk thicker, and give it some roots.
Make the main branches thicker as well.
Split off some branches from the main branches.
Add even more branches.
Shade the trunk with straight lines. Decide on where the sun will be and add shadows to the areas facing away from the sun.
If you’re feeling adventurous, you could even add shadows that the branches are casting on the rest of the tree. Actually, at this point, I really liked what this tree was coming out like, and maybe I should have kept it as a winter tree…
…but no, I had to go and add squiggly lines to indicate leaves.
I kept working on the leaves, occasionally using my eraser to add highlights, until I was somewhat happy with it.
One more little thing I noticed is that I needed to give myself extra space. I would usually run out of space for the tree much quicker then I thought I would.
There you go! My trees are all done. Now go and practice some trees of your own! Play around, and draw some amazing trees!
Learn How to Draw Three Types of Trees: Oak, Pine, and Palm
Photo: Stock Photos from Allen Paul Photography/Shutterstock
For many artists, the outdoors is an unending source of inspiration. While some prefer to fill their canvases with colorful bouquets of flowers, others may prefer the majestic beauty of a tall tree. For those that are just beginning their creative journey, however, learning how to draw a tree can appear to be a daunting task. No need to worry. Like any new subject, the key is to take it one step at a time.
With so many beautiful varieties of trees, it can be hard to choose a good starting off point. Here, we will learn how to draw three basic types of trees: an oak tree, pine tree, and palm tree. Ready to grow your art skills? Then grab your drawing supplies and some paper—it’s time to draw some trees!
Learn How to Draw Trees Step by Step
Art: Margherita Cole | My Modern Met
How to Draw an Oak Tree
Art: Margherita Cole | My Modern Met
Oak trees are often considered the “standard tree” in illustration for their classic shape.
How to Draw a Pine Tree
Art: Margherita Cole | My Modern Met
No sketch of the mountains is complete without at least one pine tree.
How to Draw a Palm Tree
Art: Margherita Cole | My Modern Met
Just as pine trees are synonymous with wintertime and mountains, palm trees bring to mind warm climates and relaxing vacations.
How to Draw Trees
Updated: 11 Jun 2022
In this guide, I will demonstrate how I simplify the drawing process, and I hope that by the end of it you will be able to draw your favorite tree.
In order to draw realistic trees with pen and ink, it is important to pay attention to accuracy of the form (structure), and to learn how to create the illusion of brightness values and transitions with pens.
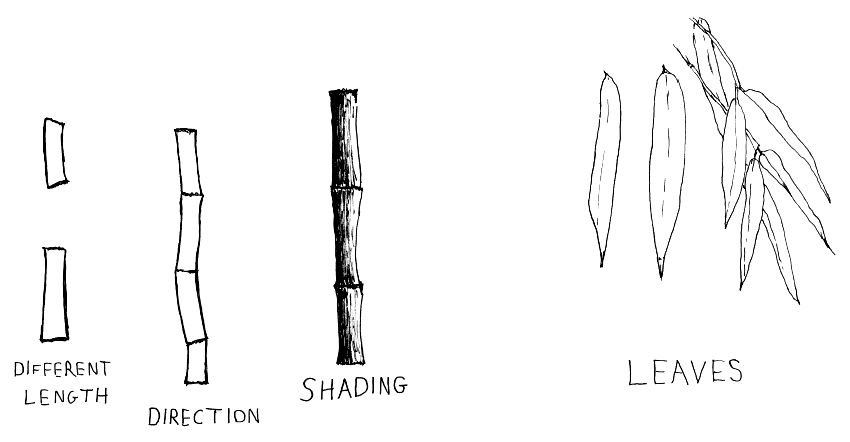
Bamboo
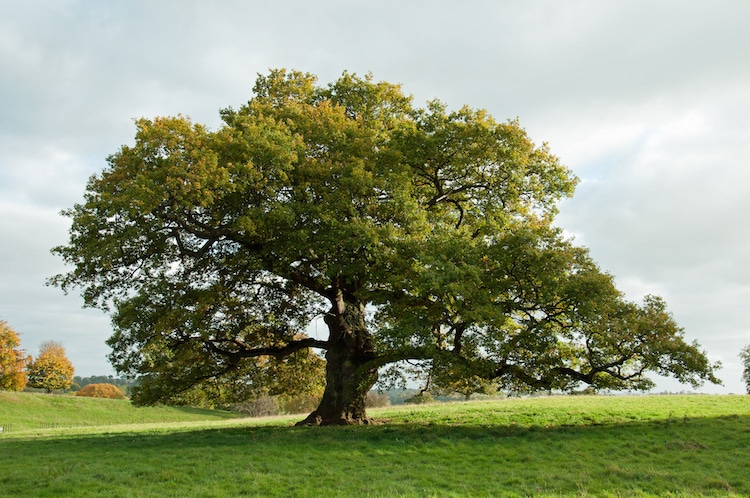
When looking at ANY tree, examine its basic shapes.
It is a good practice to draw its simple shapes first:
Once you understand these simple shapes, you can use your artistic license and your knowledge to recreate it.
There is no point drawing every single leaf as you see it (when using a reference image as a guide).
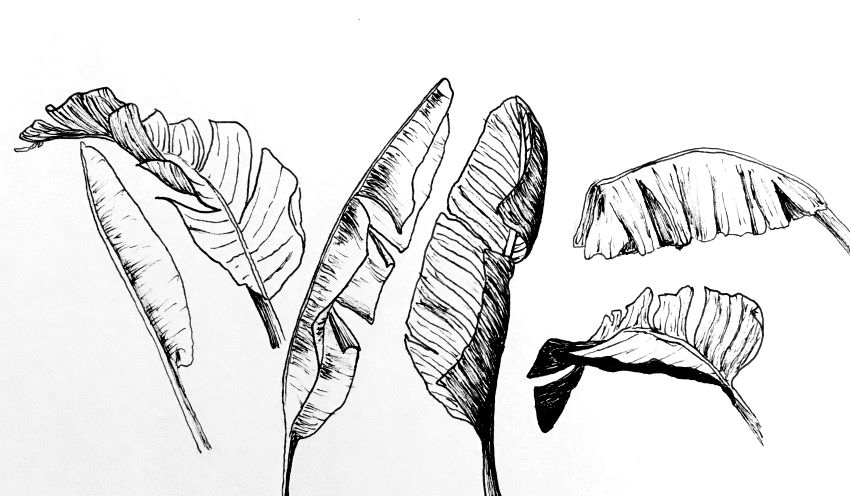
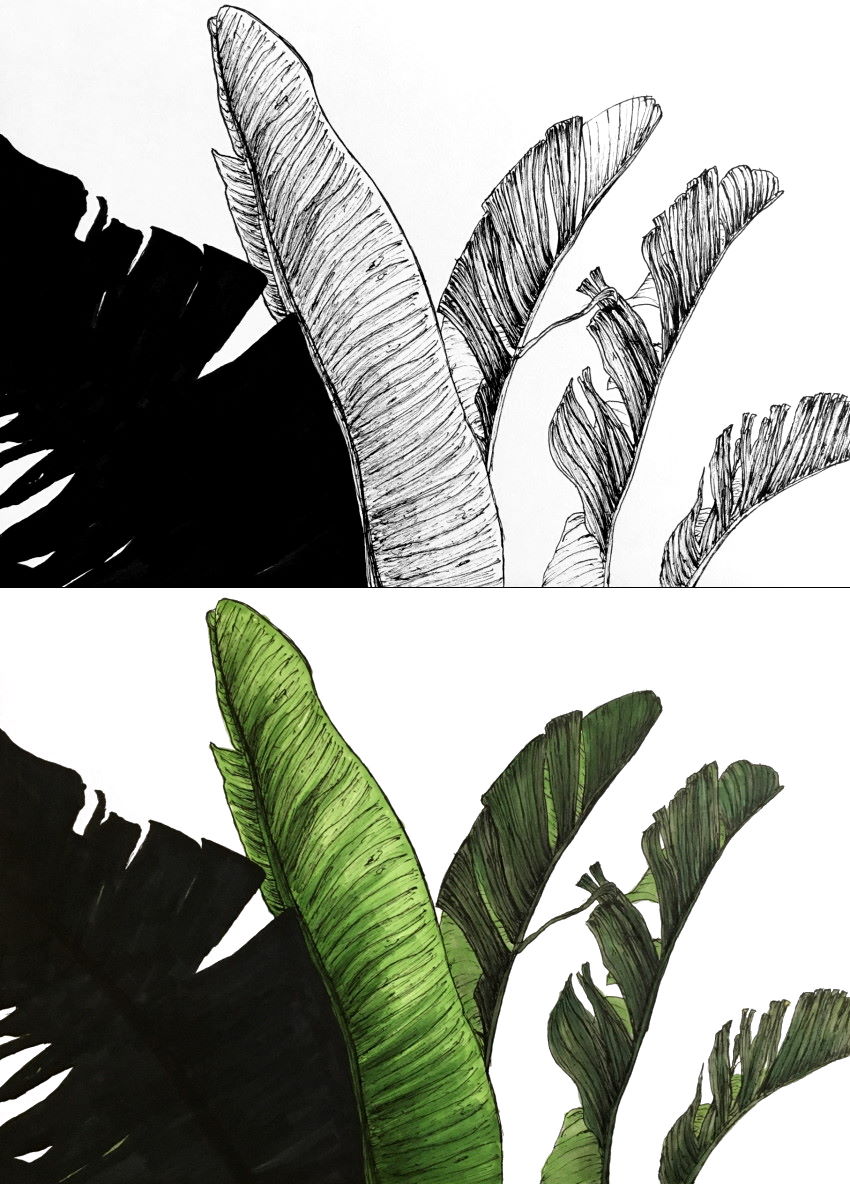
Banana Tree
For trees with big leaves, like a banana tree, first draw a study of the leaves from different angles.
For a realistic result, make sure there is no symmetry, and that each leaf is unique.
You can use markers; they work well with pens.
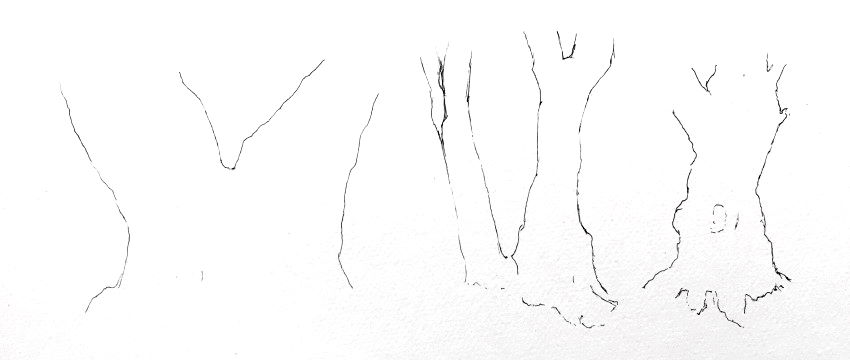
Olive Tree Trunk
Look at some reference images, or actual trees, before drawing the tree trunk.
First, draw outlines to create the form (structure).
Draw thin and gentle outlines, so they are not bold.
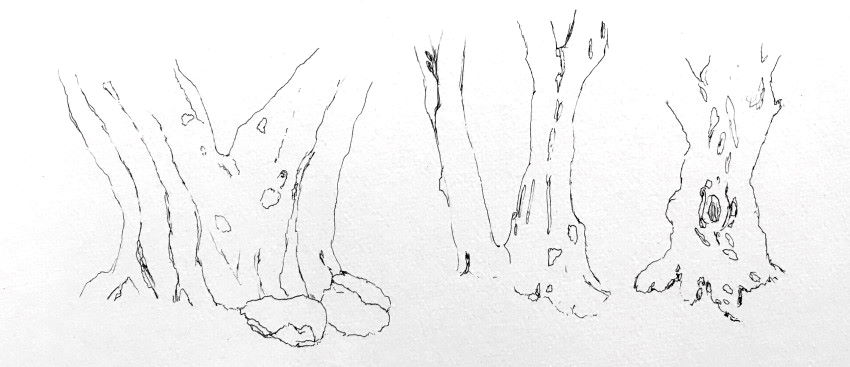
Next, add some guidelines and basic details.
Last step is texture drawing.
Each olive tree trunk has its own «personality», but all olive trees share common basic shapes.
How to Draw Leaves
Drawing leaves can be challenging. Understanding their structure, and breaking the drawing process into steps, will produce a satisfying and realistic result.
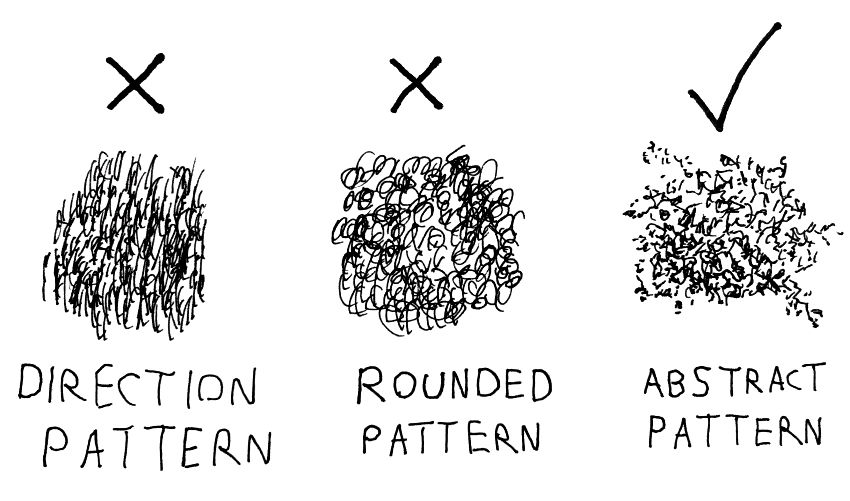
Simply put, the form and texture of leaves is abstract and messy.
To draw that, you need to be sketchy and loose with your marks, and to avoid any pattern!
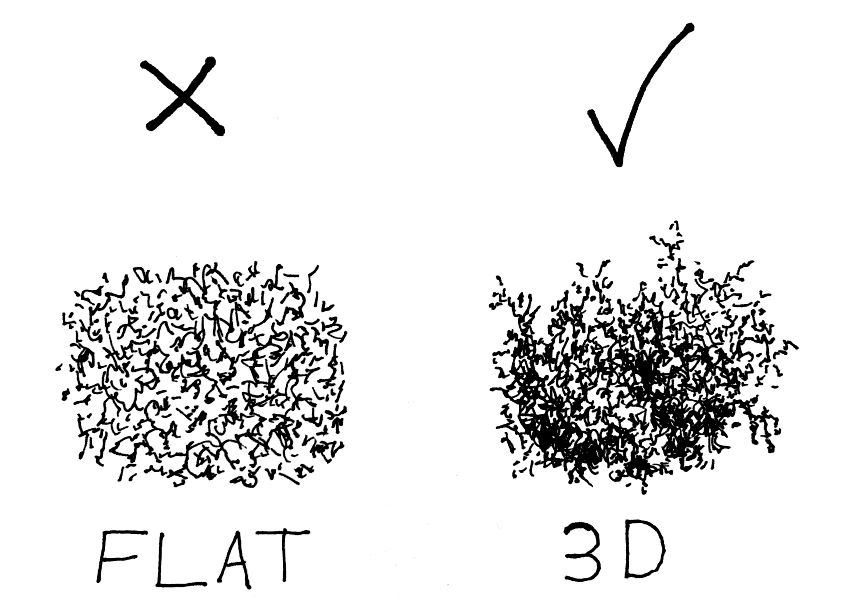
Next step is to pay attention to brightness values. That is how you create the illusion of volume. Meaning, three-dimensional and not flat.
To create that illusion, scribble more lines for darker values, and fewer lines for brighter values :
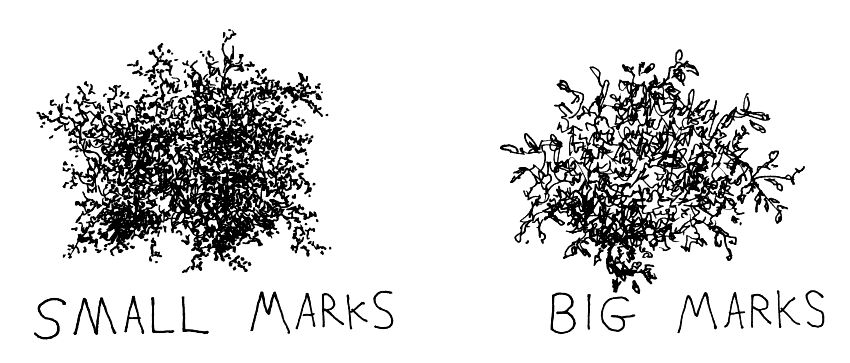
In addition, pay attention to leaves size, depending on the tree type, and how distant it is from the observer.
For big leaves, sketch big marks, and vice versa:
While the treetop is messy, at its edges you can add some indication of leaves type and size.
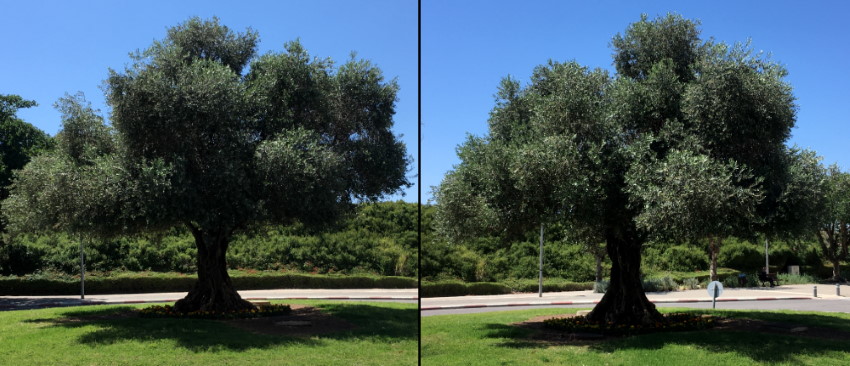
After understanding the characteristics of a specific tree (olive tree in this case), it is quite easy to draw it from imagination.
If some terms like foreshortening and overlapping are new to you, read my guide on how to draw with a sense of depth. It covers 15 methods to add depth to your drawing or painting.
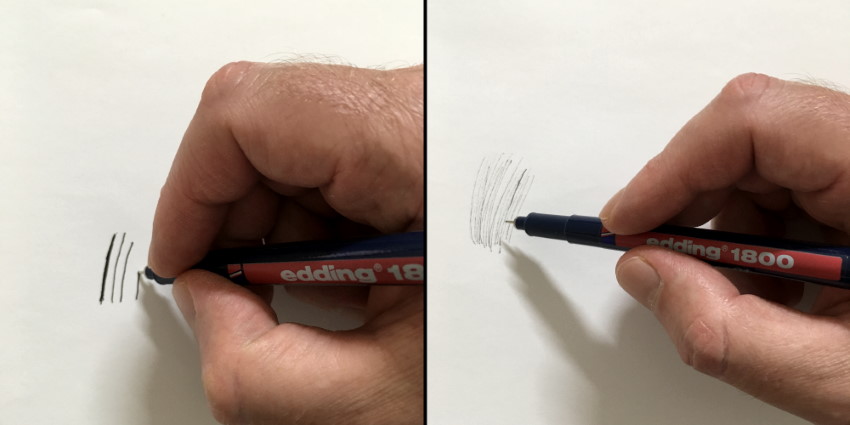
Mostly, I use a pen with nib size 0.1. It is small enough to create fine details.
Photos & Contrast
When I am taking photos of a tree, I do it from several angles.
If possible, I circle the tree to get a photo from every angle.
I select a photo that has high contrast as my reference image.
Contrast between highlights and shadows is crucial for a drawing to stand out, and to have presence.
Not enough contrast leads to a flat drawing with no depth. Too much contrast looks cartoonish.
Pine Trees
Before diving into complex texturing and rendering, if you are a beginner, you might want to practice the next step.
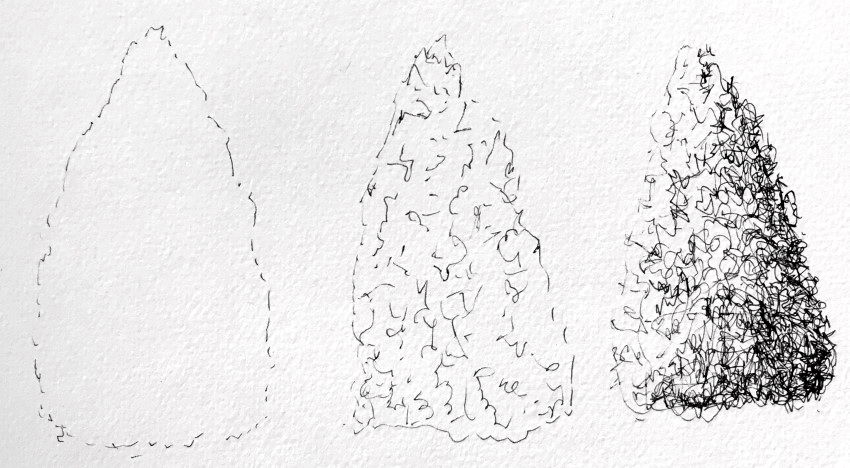
Draw any random tree shape, sketch some random marks to fill it up, and then draw more sketchy marks in one side and at the bottom of the tree (to create a darker value for the shadow area).
This should not take more than 5 minutes! The advanced texture you will see after this example is just a matter of many hours of practice to refine the texture marks.
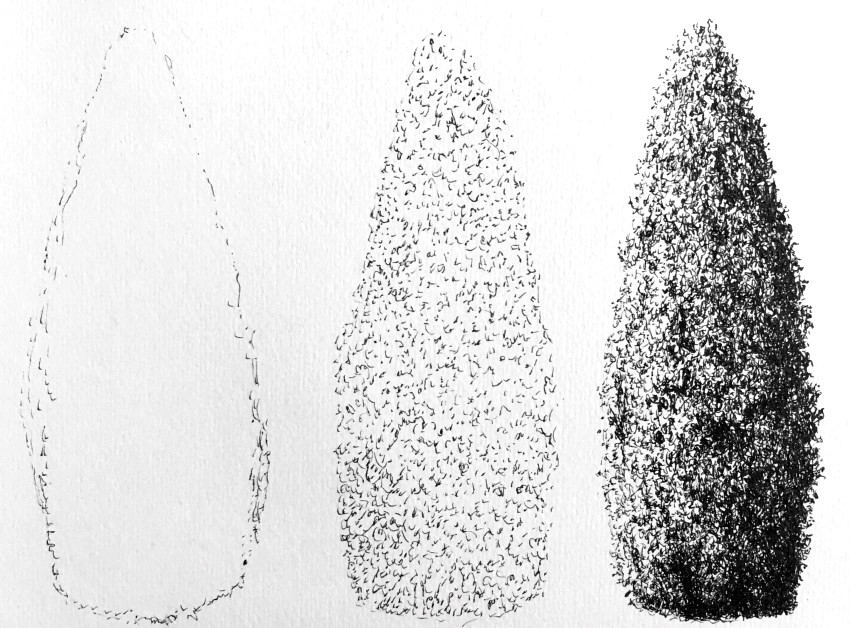
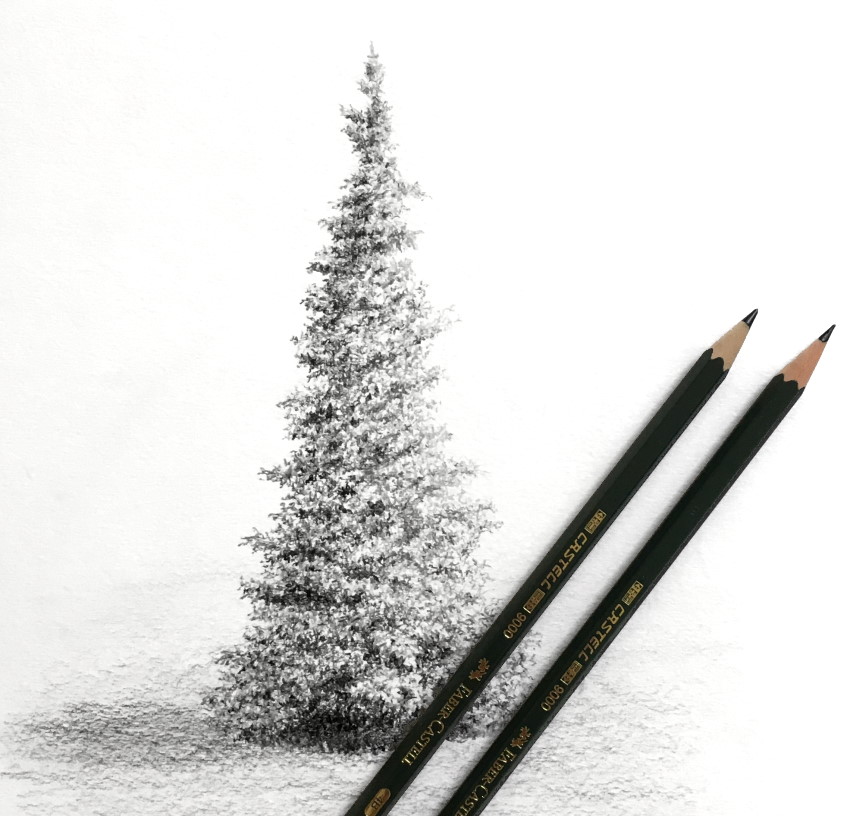
Pine trees are relatively easy to draw from imagination.
They have very small, needle-like leaves.
Last step is to draw more marks for darker areas, depending on the direction of light you choose.
Pine trees come in many types and shapes.
Looking at a reference image can help at the beginning, just as a guide to draw the form, and to pay attention to dark and light areas.
Other than that, try to be loose and sketchy with your marks.
When drawing a close-up view, you can indicate the needle-like leaves at the edges of the tree.
Snowy Pine Tree
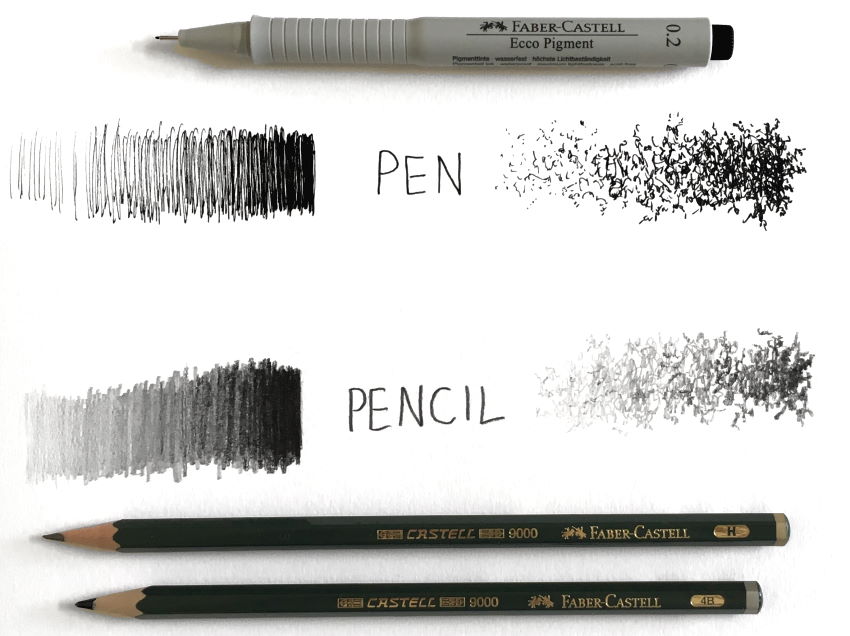
A pen has only one brightness value. Therefore, you have to use different techniques to create the illusion of transitions in brightness values.
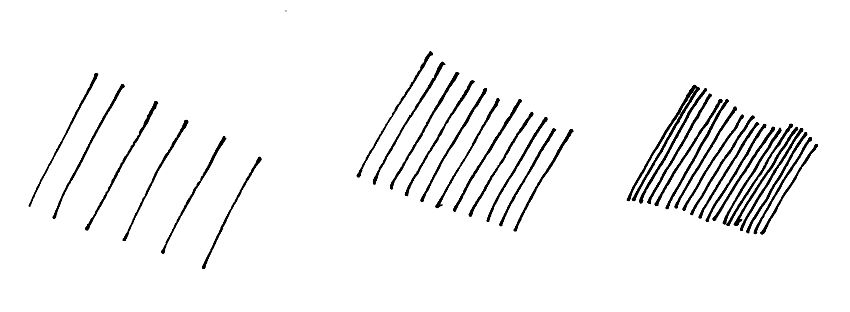
By drawing lines with different degree of spacing between them (or with different line width), you can create an illusion of different brightness values.
Cross-hatching means drawing sets of parallel lines in different direction. By adding more sets of cross-hatching, you can create the illusion of darker values.
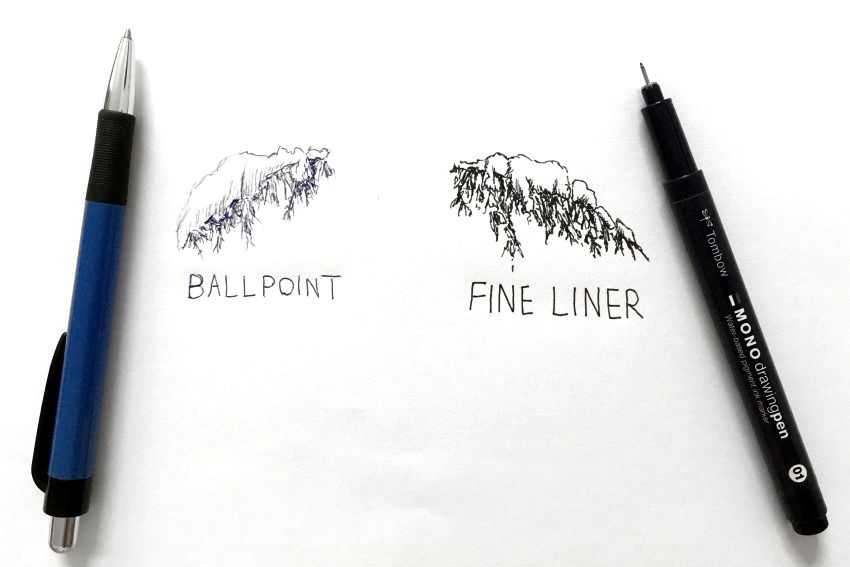
You can use ANY pen for drawing. I prefer artist-grade technical pens (also fineliners). They create lines with fixed width, and their ink is made of pigments, which is very durable and lightfast.
For the snow part, you can leave it empty («white»), or you can use hatching in some areas.
In this example, I used some hatching, and some marks with very light gray marker.
If you want to know more about markers, visit my markers review for artists.
Christmas Tree
A Christmas tree is just another pine tree, but with decorations.
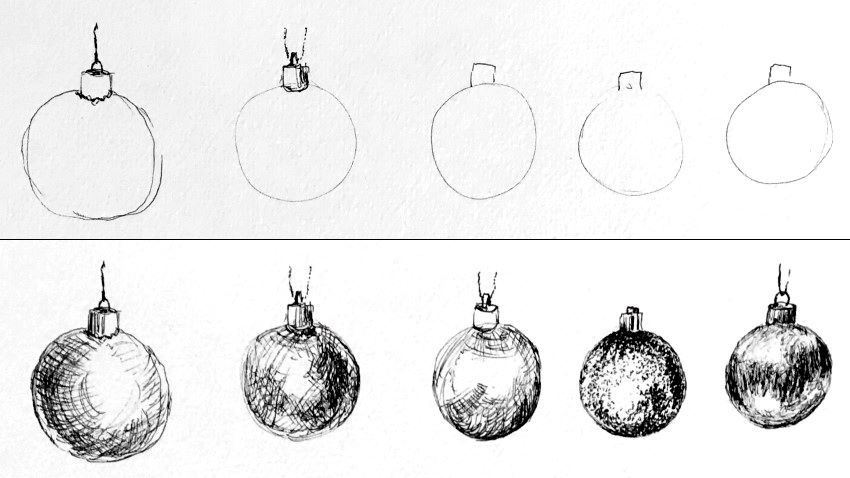
To add some baubles, first draw their shape, and then try different types of hatching, cross-hatching, and stippling.
Stippling is a drawing technique that uses dots. The more dots you add in one area, the darker it looks.
You can add other decorations to your Christmas tree.
It is best to first sketch some test drawings on a different paper, to see what works, before adding them to your drawing.
If you find it hard to draw a tree with a pen, you can always start with a pencil.
When you reach a satisfying result, you can go over it with a pen, and gently erase the pencil marks.
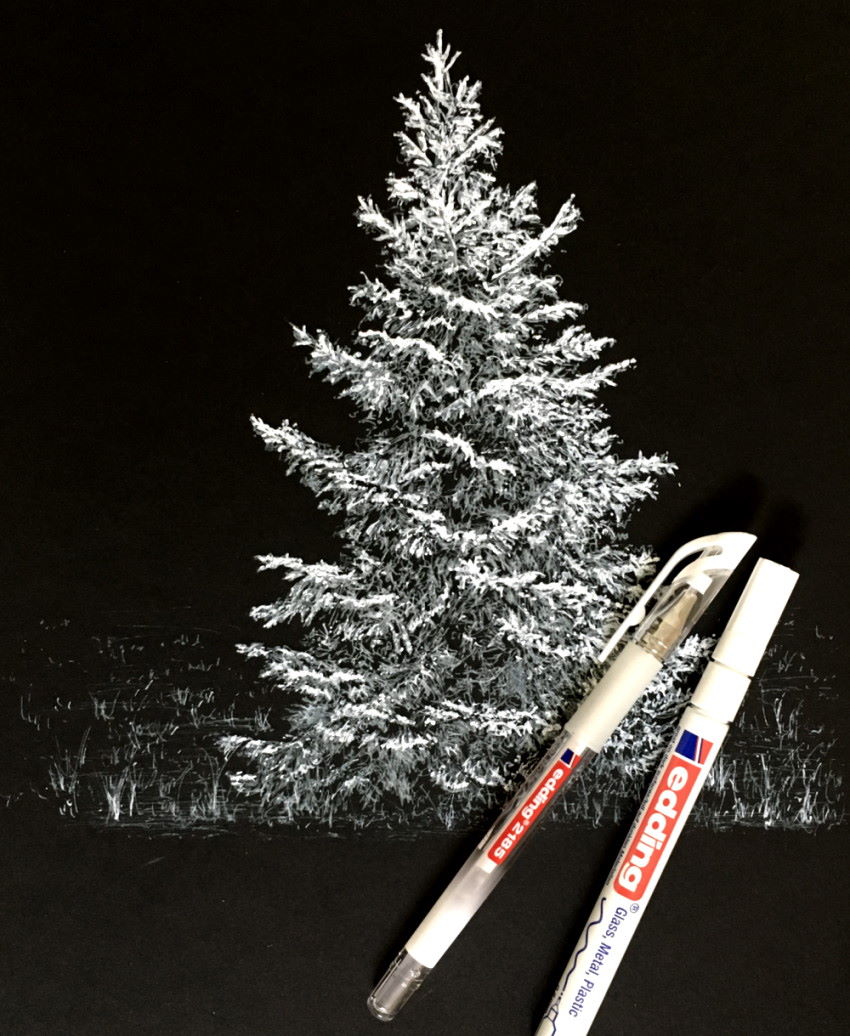
Drawing with White Pens
When drawing with white pens, pay attention to the same drawing fundamentals.
While with black pens you draw more lines for darker areas, with white pens you should draw more lines for light/bright areas.
These pens are most effective on black (or dark) paper, and for highlights.
White pens are designed for covering.
Drawing with a black pen (which has ink) over white areas (made by a white pen), may ruin the pen’s nib, because it will be covered with the white substance (therefore its ink will not flow smoothly).
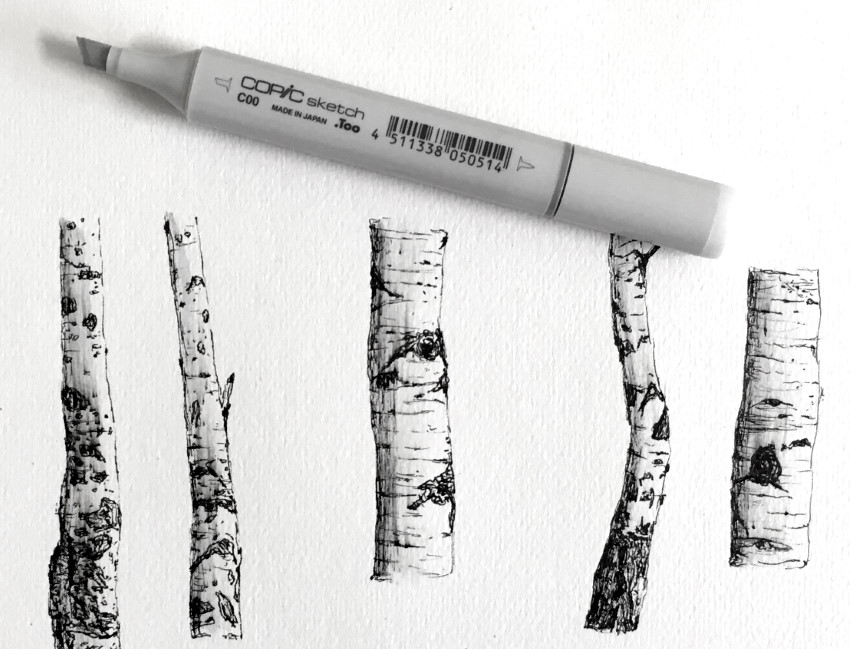
Aspen & Birch Trees
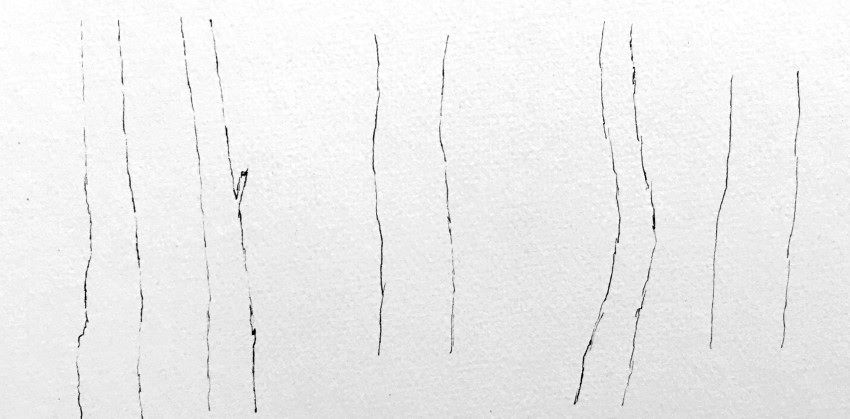
Aspen & birch tree trunks are easy to draw when doing it in steps.
Draw the form first:
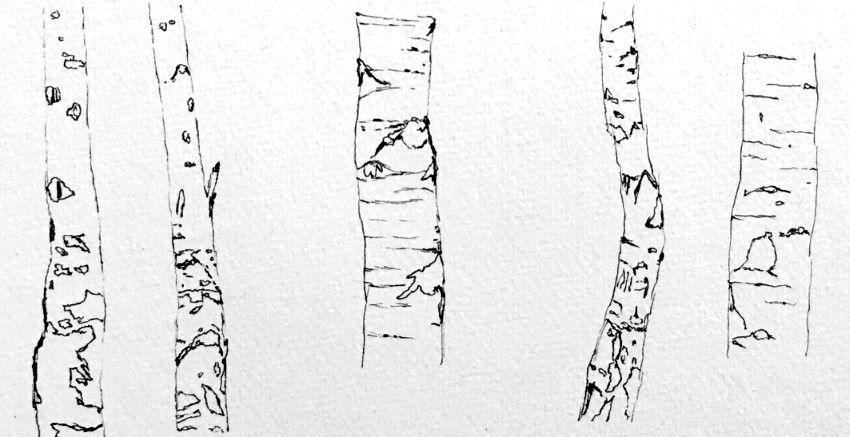
Then, add some basic details:
Finally, draw some brightness values, and texture:
You can use (light) gray markers for coloring:
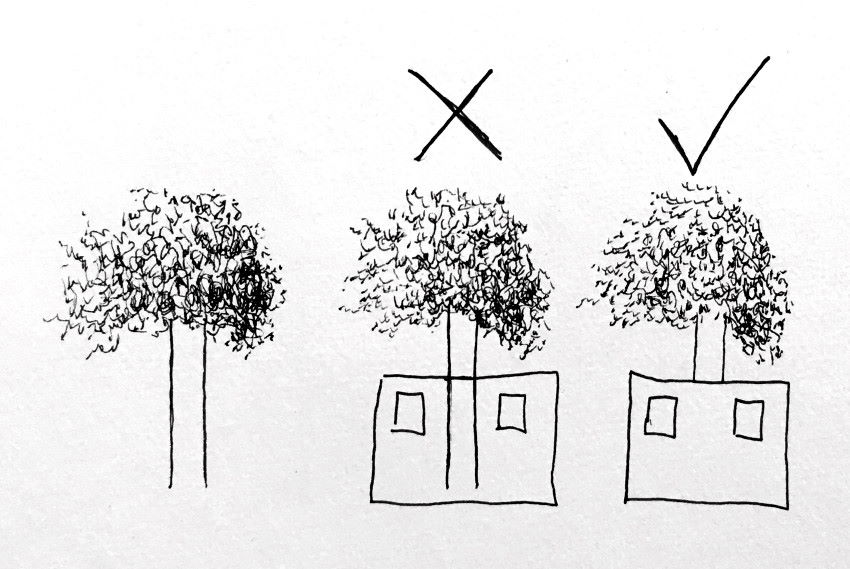
Overlapping
Overlapping means an object that partially covers another object.
When you see an object that overlaps another object, you assume that this object is in front of the object it covers.
Overlapping is one of the most powerful ways to create the illusion of depth on a flat paper.
Because you cannot erase pen marks, it is best to draw foreground objects first!
If you want to draw a house in front of a tree, draw the house first:
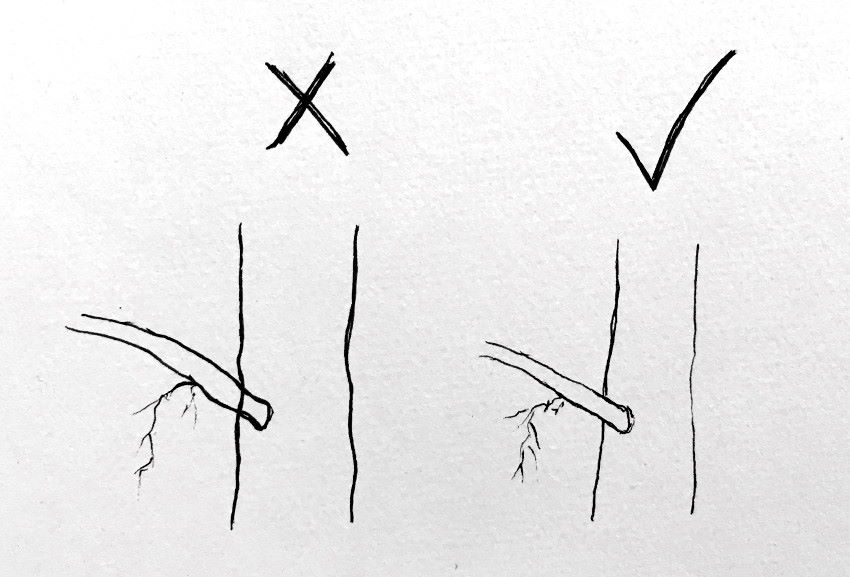
Do the same for tree branches.
First, draw the branch that overlaps a tree, then the tree trunk.
For trees that have a complex structure, with many branches, you can use a pencil to draw the basic shapes.
When you are happy with the result, you can draw over it with a pen, and gently erase the pencil marks.
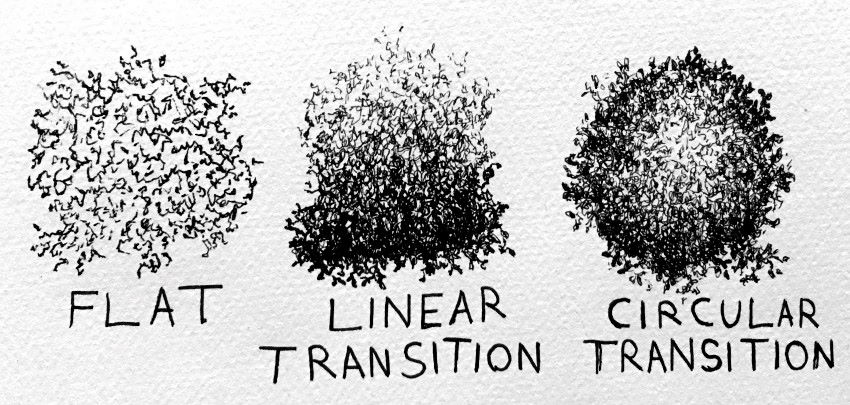
Transitions
Transitions are part of drawing (and painting) fundamentals. They exist everywhere!
For example, different areas of a flat plane have different relationships with any light source, reflections, and shadows.
Therefore, always look for transitions (in brightness values) for your drawing to look realistic and natural.
First, look for light and dark areas.
Then, look for transitions within each area. Transitions from dark to light, from light to lighter, and from dark to darker.
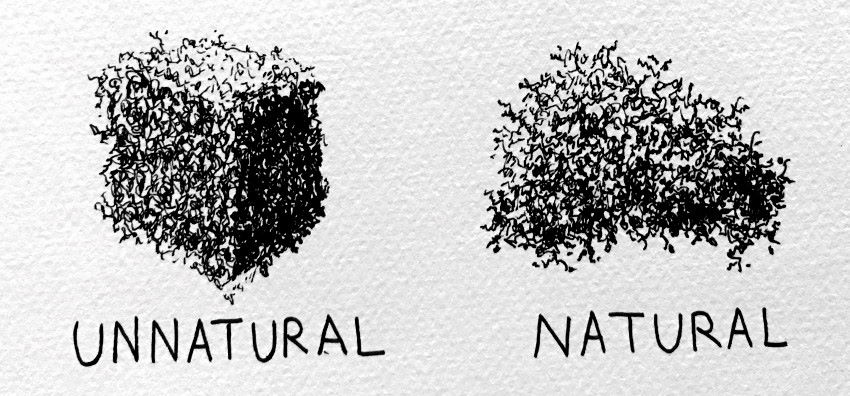
By drawing with NO transitions (and using hard edges), you can create something that looks unnatural, as opposed to something realistic with transitions.
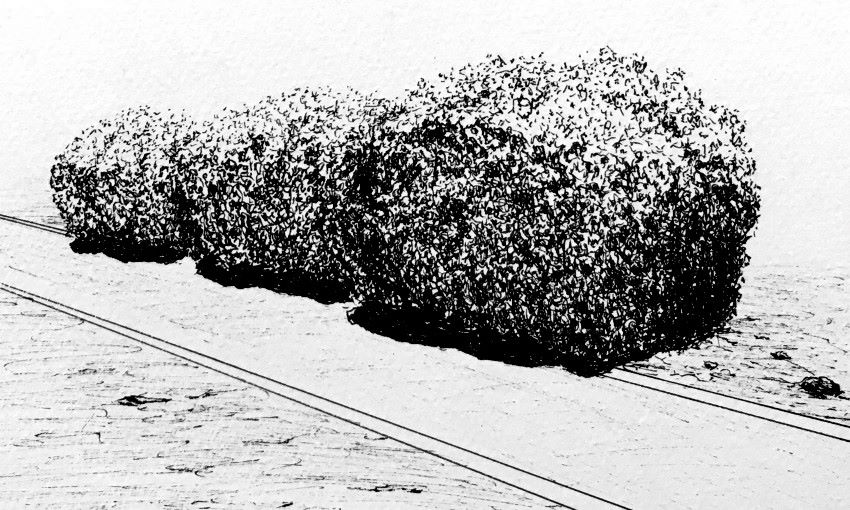
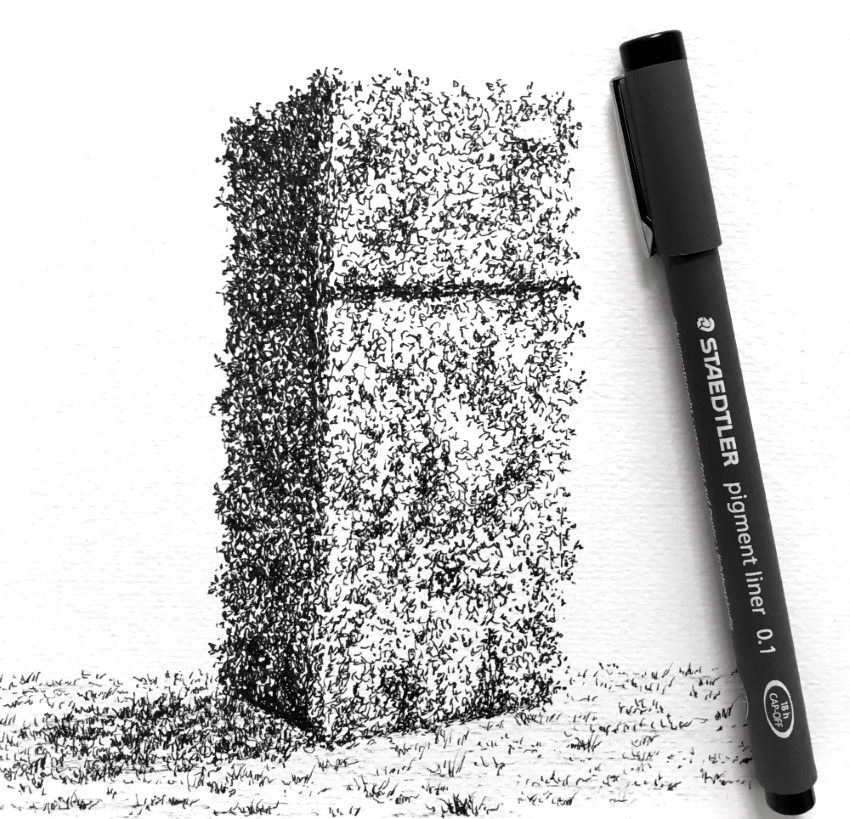
The same way a gardener trims bushes and trees, you can use your artistic license to create something that looks artificial or man-made:
Artistic license means to use your knowledge and experience.
Once you understand how to draw leaves, you can draw anything with leaves texture. Objects, figures, vehicles, or even a refrigerator:
Transitions are not limited to brightness values. Transitions exist in colors, texture, edges, and temperature (transition from warm colors to cool colors).
If you are struggling with realistic drawing, you might want to read my realistic pencil-drawing guide. It covers the 4 important fundamentals (accuracy of the form, brightness values, edges, and transitions).
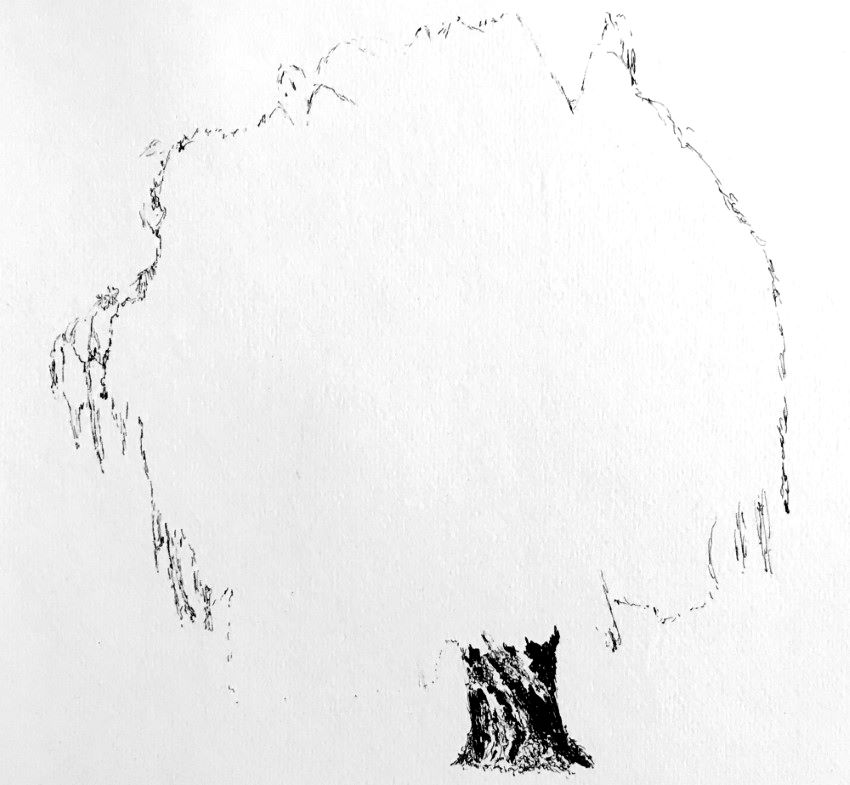
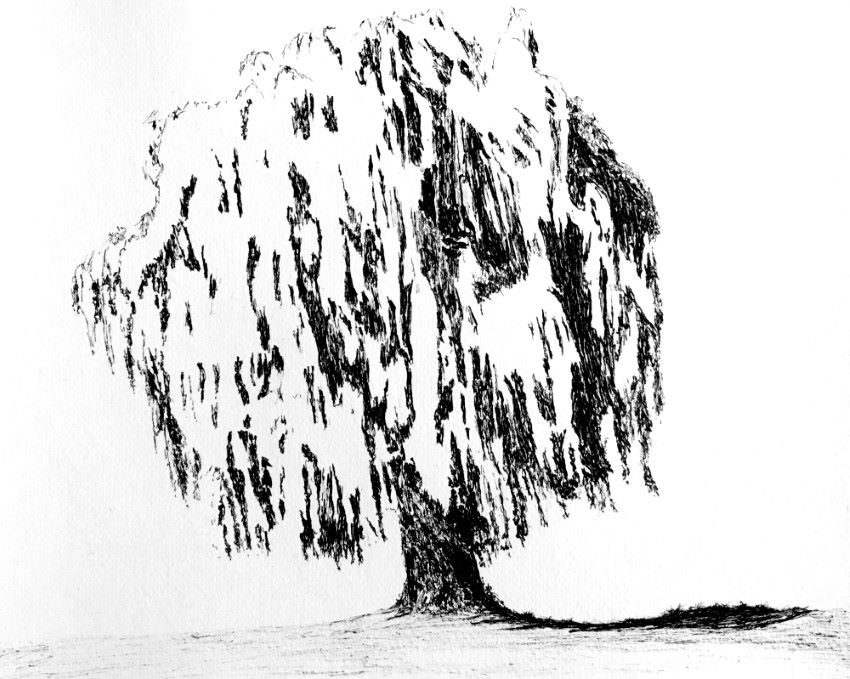
Weeping Willow
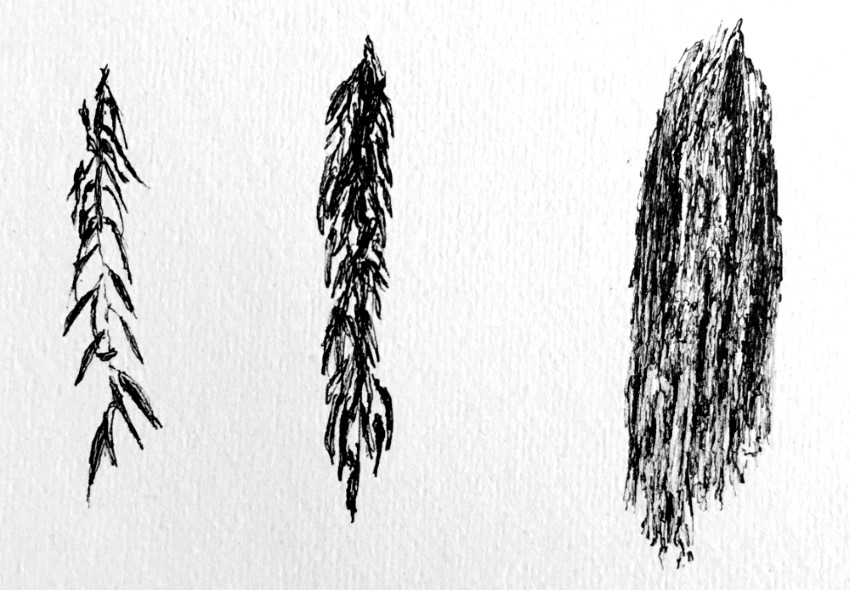
A weeping willow tree is a bit tricky to draw.
Its leaves are easy to draw at an up-close look. As you get farther away, you can see long clusters of leaves with no single leaf shape.
You can start by drawing an outline for the tree structure. Do it gently.
Then, one way is to draw the treetop (crown), section by section.
Alternatively, like in this example, you can draw the dark values first.
Something to consider:
As mentioned above, a pen has one brightness value (usually black, though other colors exist, more on that later).
The last step is to add the light values.
Pay attention to brightness values, transitions, and texture. Be abstract with your marks, yet with a sense of direction.
How to Draw Huge Trees
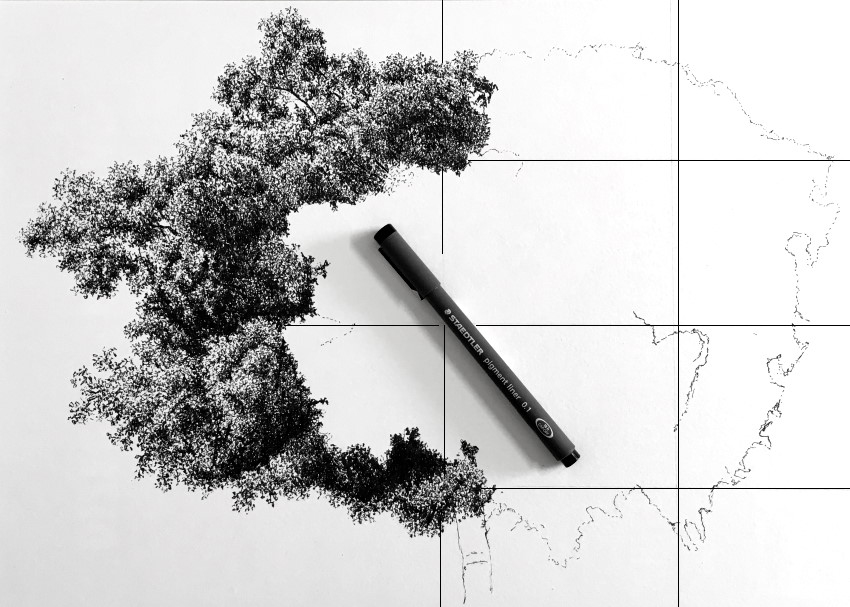
For some large trees, like Ficus, I like to use a large paper sheet (A3 in this case).
If the tree is too complex to draw, you can draw a grid (softly with a pencil), to divide the paper into smaller sections (and use the same grid for your reference image).
Drawing on a large paper with a pen (or a pencil) is time-consuming. For a tree like this, it can easily take more than 20 hours to complete.
Sometimes, huge drawings may not look so big on a small screen.
You can give it context by adding background trees (from imagination in this case).
Something to consider:
You should use the rules of atmospheric perspective when drawing backgrounds (landscape).
When objects are far away, there are more atmosphere particles (that scatter light) between them and the observer.
For far away objects, use less contrast and fewer details. In addition, background layers become lighter, and have soft edges.
Adding Background
Trees are beautiful on their own. Sometimes though, you may want to add a background.
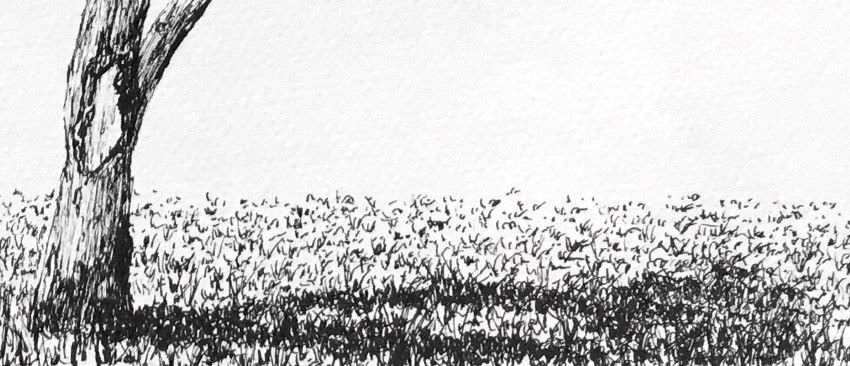
Drawing grass is a simple and easy solution for background.
Add more lines; some can be longer (mostly in the foreground).
Avoid any pattern, and try to be abstract with your marks.
By drawing cast shadow by the tree, you can add a sense of space to your drawing.
To draw cast shadow, add more marks (lines) for that area, to create the illusion of dark value.
Adding Plants
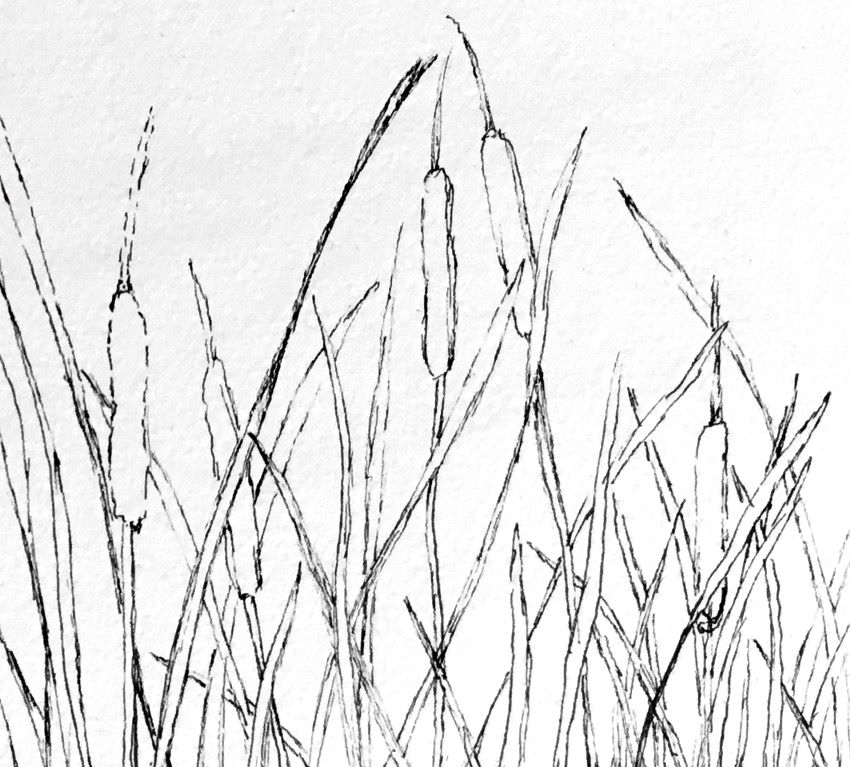
Another option is to add some plants. For example, cattail plant (Typha).
Natural plants and trees have an abstract shape. Make sure you do not draw them too round and uniform.
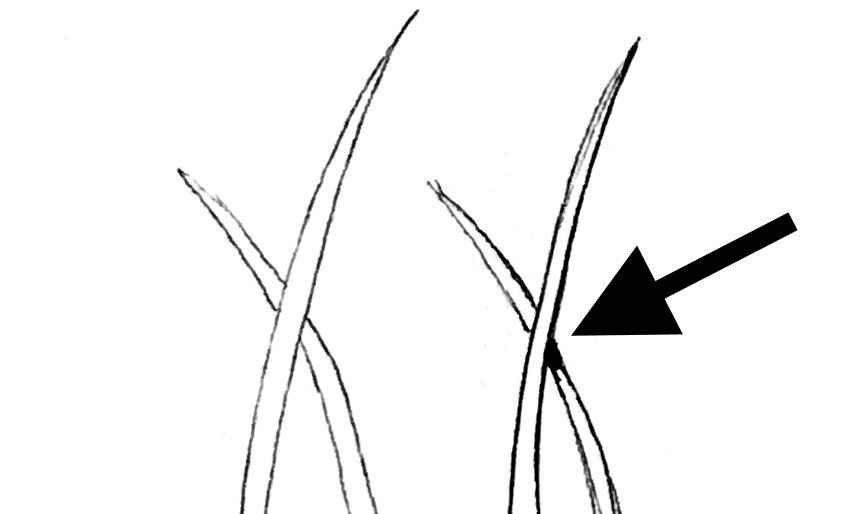
When drawing long leaves, pay attention to cast shadows :
After test-drawing the plant’s parts, draw some loose outlines.
For realistic results, draw each flower or leaf with different size, shape, and direction (but, keep in mind the tree or plant characteristics).
Additionally, pay attention to overlapping.
Then, add some brightness values and cast shadows.
Now you can combine grass and plants to draw a landscape.
And, paint it with markers.
Size & Context
The way to define the size of objects is by placing them near other familiar objects.
Although a worm is usually quite small, by drawing it big compared to known objects like trees, it is possible to create a giant monstrous worm.
On the other hand, you might want to draw a small tree, like a bonsai tree.
Drawing a tree in a plant pot can help, but sometimes even large trees are sold inside pots.
Drawing familiar surroundings, like a room, can help a lot in defining the bonsai’s size.
Colored Pens
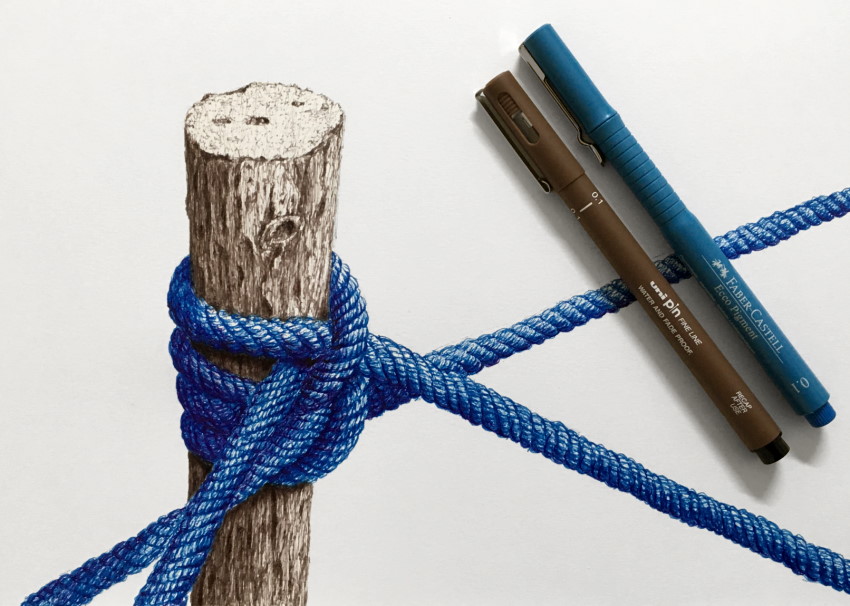
While the main color for technical pens is black, many brands offer other color options.
I prefer black ink, but occasionally I like to mix it up with colors.
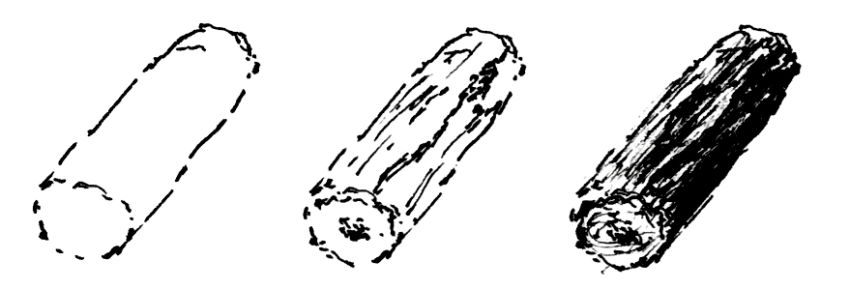
To draw logs, timber, or tree trunks, start by drawing the outlines gently.
Pay attention to foreshortening, and add some basic details.
Lastly, decide where to place the light source, and draw a gradual transition in brightness values with sketchy marks.
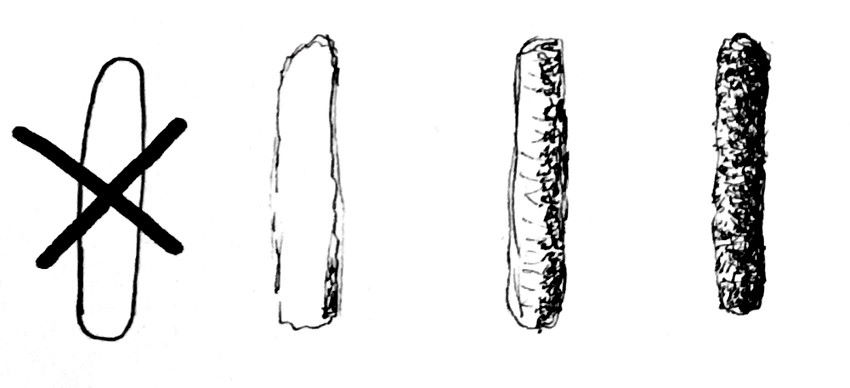
A cylindrical object has a transition in brightness values, from dark to light.
When using a black pen, draw more lines for darker areas.
Another option is to draw less defined lines (swiftly at an angle), and add more lines for darker values.
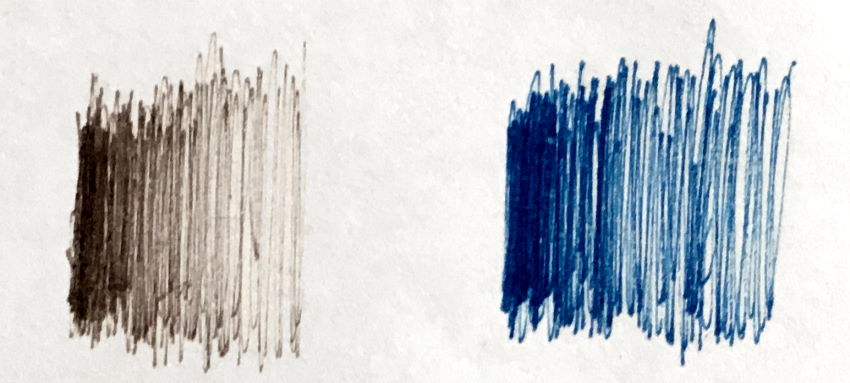
Unlike black pens, colored pens come in different levels of opacity.
When drawing more in the same area, the pen creates a darkness value. Sometimes you can let the pen ink dry, and then draw over it again.
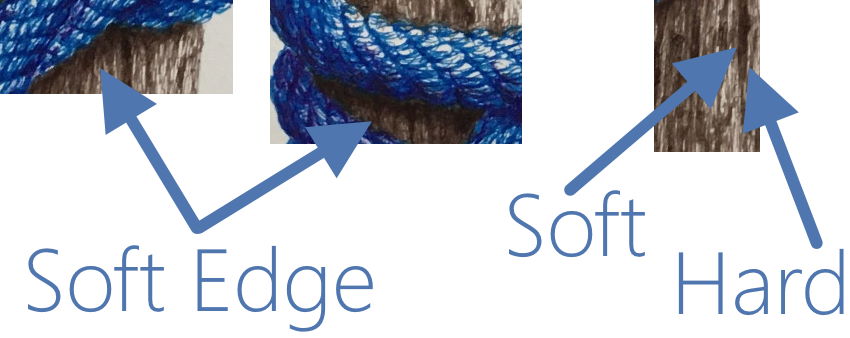
Cast shadows usually have soft edges (see below how the cast shadow from the rope has a soft edge).
When you scribble the wood texture, you want to have some dents and holes in some areas.
Draw these dents with a hard edge on their darker part, and a soft edge when the transition ends (the light side of the dent, or hole).
For a more realistic rendering, with more details, draw big.
How to Draw Trees with Pencils
When drawing with pens, you create the illusion of different brightness values by drawing different amounts of lines.
With pencils, you can actually draw different brightness values.
While with pens you draw lines, with pencils draw stains or smudge the surface, as if you are drawing with a brush.
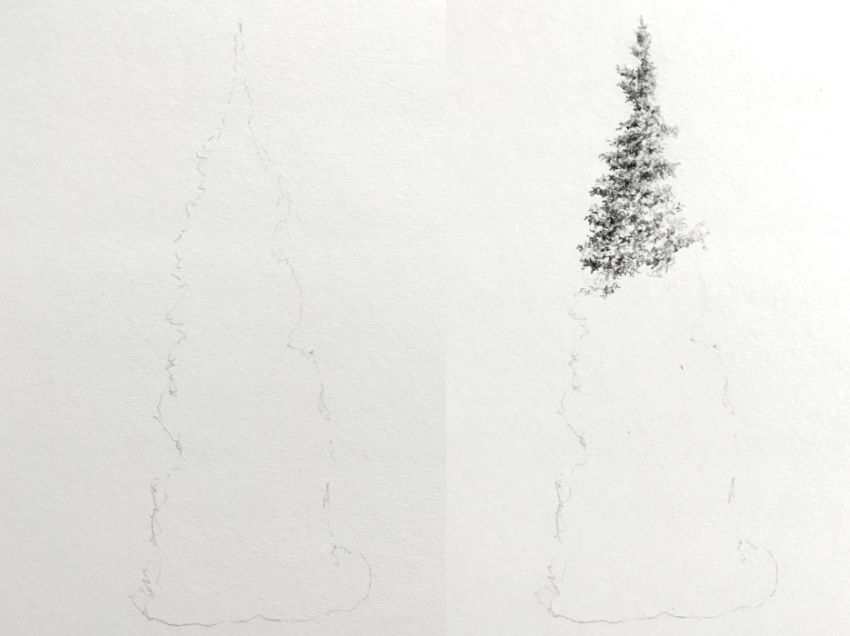
I usually draw the structure first.
For a tall tree, I draw from top to bottom, so not to smudge the graphite particles.
If the tree is wide, I draw from left to right (because I am right-handed).
Make sure there is enough contrast between dark and light areas, and that you are abstract with your marks.
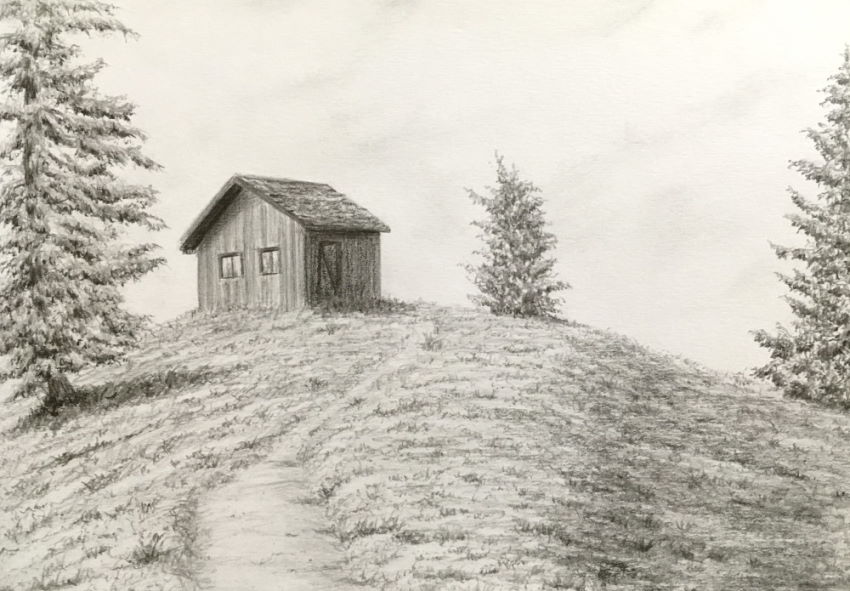
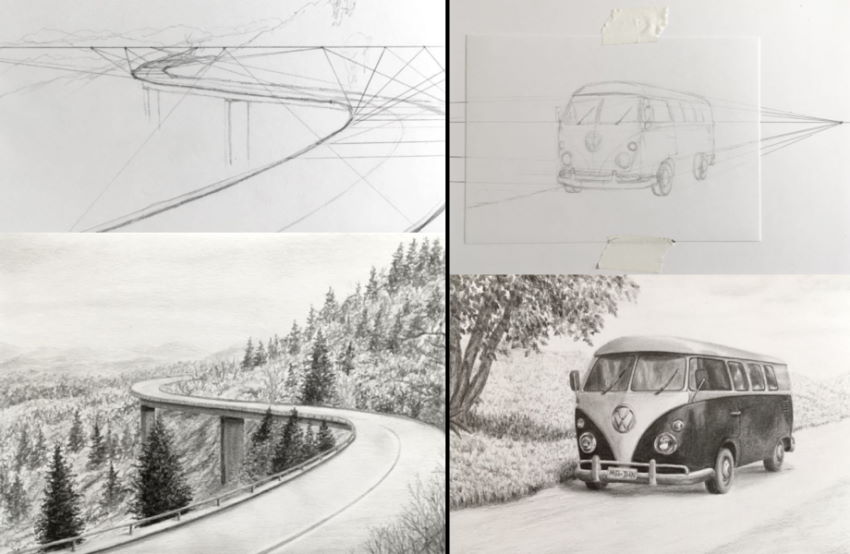
When drawing landscapes, especially with roads, use linear perspective to draw it accurately.
Mixed Media
The same way you can use a pen with markers, you can use other mediums.
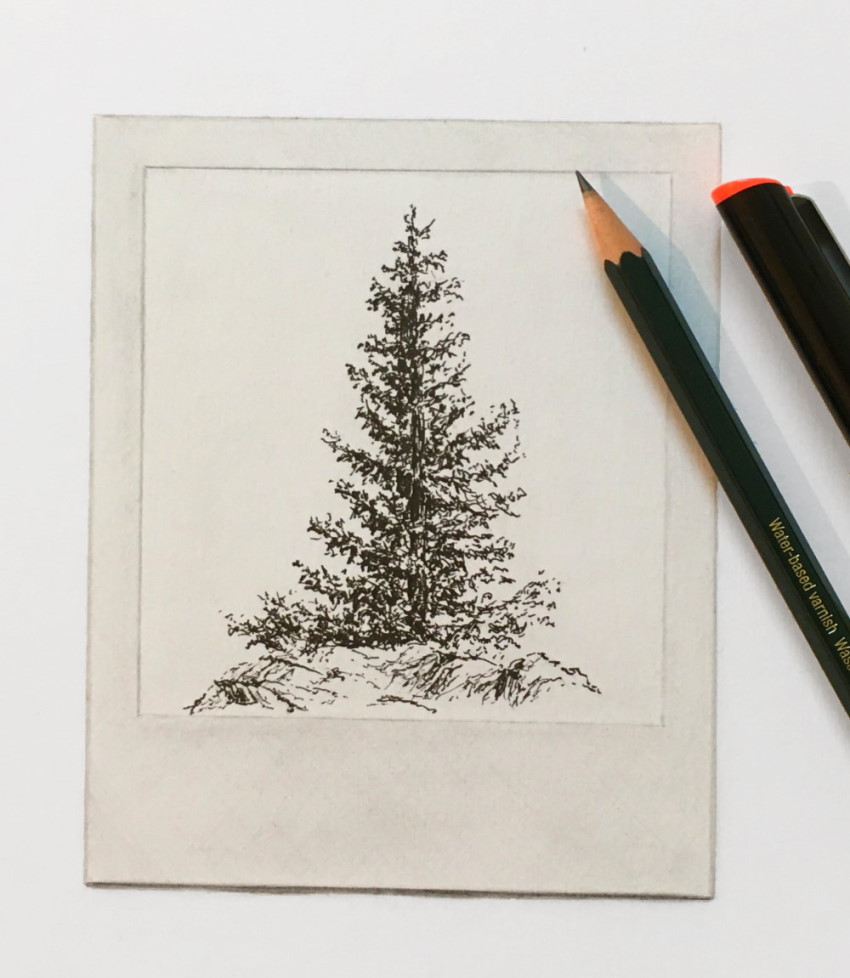
In the next example, I used a pen for drawing a tree, and pencils for drawing the Polaroid photo.
Colored Pencils
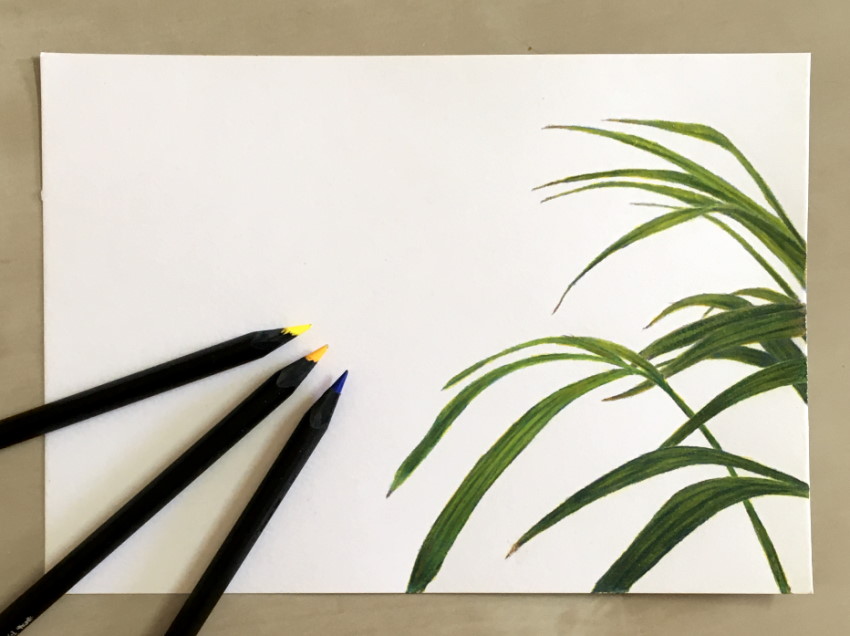
To draw with colored pencils, you should have a basic understanding on how to mix colors for painting.
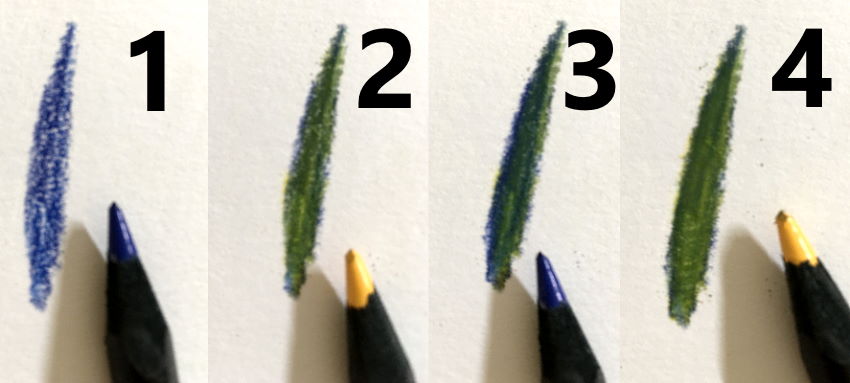
For this example, I mixed blue and yellow (to create green).
The key for mixing colors with colored pencils, is to work with many layers (blue, then yellow, then blue, then yellow, and so on).
The more layers you add, the more pigments are on the drawing surface, and it is easier for them to mix.
Do not to press too hard when adding layers.
Summary
While there are no lines in nature, pens can only create lines!
Drawing is creating an illusion. The world is three-dimensional, but your paper-sheet is two-dimensional.
To create this illusion, pay attention to brightness values, edges, and transitions (among other things).
Make sure you have enough contrast between highlights and shadows, for the drawing to be noticeable.
After you master drawing the form and brightness values, details (texture) make all the difference.
If you liked this article, you might like my flower pen-drawing guide too.
For my recommended pens that I used in this guide, visit my review for fineliners and technical pens for drawing.
How to Draw a Tree
Trees are beautiful embodiments of nature’s abundance and variety. They can live for many years; the oldest tree ever discovered is approximately 5,000 years old. No wonder that artists of all skill levels are attracted to trees, trying to convey their charm and diversity.
In this tutorial, I’ll show you how to draw a typical tree, using graphite pencils. But first, we need to observe some basic things, like constructing a branch with twigs, creating an illusion of foliage, and drawing the bark.
Let’s dive into the world of nature and have fun!
You may also be interested in these tutorials on drawing trees and leaves:


What You Will Need
You will need the following supplies to create this project:
1. How to Draw Bark
Step 1
What is commonly called bark includes a number of different tissues that overlay the wood and serve as a protective barrier. For example, cork is an external tissue that is impermeable to water and gases.
Why do we start with this part of the tree? Bark is a concluding element that covers the shape of the trunk and branches. Knowing how to draw bark will speed up our process later on, when we gain an understanding of designing a tree from scratch.
Let’s draw just a sample of the tree bark in close-up; we’ll focus on its pattern and details. With an HB pencil, I draw a small rectangle and fill it with lines that imitate the bark’s pattern.
Don’t overthink this pattern in the early stages; just draw something resembling irregular rhombs.

Step 2
I add more details to the drawing, using the HB pencil. The groups of parallel hatches help to create the illusion of a three-dimensional surface.

Step 3
With the 3B pencil, I darken the borders between the sections of bark. You can also use dots to make the texture more interesting.

Step 4
With the 3B pencil, I decrease the contrast, covering the sample with a layer of soft, smooth hatching. Then I accentuate the shadows once again. This sample is complete!

Step 5
Let’s create another sample of the bark texture; this time I draw larger shapes, using the HB pencil. I also add areas of moss and cover them with a layer of hatching.
Step 6
With the HB pencil, I add some shadows to the moss and the bark.

Step 7
With the 3B pencil, I increase the contrast in the drawing, accentuating the borders between the sections and under the moss.

Step 8
I add more details with dots and short hatches, using the 3B pencil. I also darken the perimeter of the sample to create an illusion of depth.

2. How to Draw a Branch
Step 1
A branch is a woody element that is connected to the central trunk of a tree. Large branches are known as boughs, and small branches are known as twigs or sprigs.
Branches and twigs may be found in many different shapes and sizes; while branches can be nearly horizontal, vertical, or diagonal, the majority of trees have upwardly diagonal branches.
Let’s draw a standard branch; I mark its core line with the HB pencil. It’s also useful to mark the place where the branch connects to the trunk.

Step 2
I draw the form of the branch. Remember that it is a three-dimensional shape with a round foundation.

Step 3
I erase the subsidiary lines and refine the contour of the branch.

Step 4
I add the smaller branches. Feel free to add as many of them as you wish, and make them diverse.

Step 5
I add tiny twigs.

Step 6
I draw the leaves; they capture light energy and convert it into sugars by photosynthesis, providing the food for the tree’s growth and development.
Make sure that the leaves in your drawing have different sizes and directions. Usually, we don’t see each leaf as an individual element, but for the sake of our study let’s allow a hint of stylization.

Step 7
I add the long lines and the groups of hatching, imitating the bark texture. It’s so great that we already know how to draw bark, isn’t it?

Step 8
With the 3B pencil, I darken the sides of the branch to make it three-dimensional. I also fill the space around the leaves with groups of hatches to create an illusion of depth.

3. How to Draw a Tree
Step 1
Now we are ready to draw the whole tree. I mark the foundation of the tree and add the core line.

Step 2
A tree usually has a wide foundation and a thin top. I construct the shape of the tree, creating the segments of the shape and joining them together with a pencil contour.

Step 3
I add the shapes of the branches; they differ in size and direction.

Step 4
I erase the subsidiary lines and refine the contour. When it comes to the natural objects, small imperfections are charming!

Step 5
I add the smaller branches and twigs, based on the principles that we observed in the previous part of the tutorial.

Step 6
Since we are drawing a whole tree, there is no point in representing every single leaf. I add rough shapes of the leaves just to the lower branches and the bounds of the crown.
It’s important to keep the shapes sketchy; too many details will make your drawing look weird and unnatural.

Step 7
Let’s create an illusion of foliage. An easy way to draw masses of leaves is to fill the crown with scribble lines. You can find an example of this technique in the lower corner of the illustration below.
With the HB pencil, I cover the area of the crown with scribble-like lines, leaving some areas lighter and darkening the underside of the crown.

Step 8
It’s time to work on the trunk; it usually is darker than the foliage, so having the right contrast is vital.
With the HB pencil, I draw the rough pattern of the bark and mark the core shadows. Please note that we see this pattern from a distance, so having much detail here won’t be a help.
I also decided to bring in a cute addition: a hollow with an owl that is looking out.

Step 9
With the 3B pencil, I increase the contrast in the drawing. Feel free to make the sides of the tree and the visible parts of the branches really dark.

Step 10
With the 3B pencil, I darken the foliage, accentuating the lower part of the crown. The goal here is to achieve a contrasting yet harmonious look.
I complete the drawing by adding some grass near the base of the trunk.

4. How to Draw a Tree Stump
Step 1
With the HB pencil, I draw the core line and the foundation of the stump.

Step 2
I add the top section of the stump. The core line may be a useful reference tool, but you don’t have to make this shape perfectly even.

Step 3
I mark the texture of the bark, using the HB pencil.

Step 4
A transverse section through a tree trunk may show concentric circles of lighter and darker wood—the tree rings (also known as the annual growth rings). These circles usually have a regular shape, but sometimes, due to abnormal growth conditions, they turn into wavy joint lines.
I mark the center of the inner part of the trunk, and then draw circular shapes going from the section’s center to the periphery. I also add small cracks to make the drawing more credible.

Step 5
With the HB pencil, I create the texture of the bark. I also add horizontal hatches to the top section of the stump to accentuate its flat plane.

Step 6
I darken the sides of the stump, using the 3B pencil. It’s time to add details to the bark, like small islets of moss, and to vary the pattern of the growth rings.
The top plane of the stump may demonstrate interesting transitions from a darker core to a lighter periphery (which proceeds to a slightly darker area near the bark).

Step 7
The drawing of the stump itself is complete, but it doesn’t look believable. I add some grass and fern leaves to create a nice natural environment.

Your Drawings Are Complete
Congratulations—we’ve created four beautiful graphite pencil sketches! I hope you were inspired by the trees and enjoyed the process of drawing.
Let your creative journey be fruitful and full of joy!


