How to learn how to swim
How to learn how to swim
The Must-Read Guide to Swimming for Beginners
Let’s say you decide to take a swim. In the early morning light, armed with fresh new goggles, you hit the pool. Images of Michael Phelps and Katie Ledecky run through your head. But before you finish the first lap, you can hardly breathe.
Video of the Day
Don’t sweat it: It’s an all-too-common scenario for beginners. «Swimming takes longer to adapt to than any other sport,» says Gerry Rodrigues, a Los Angeles-based swim instructor who’s been coaching for more than 30 years. «We’re used to moving our bodies on land. But we have very little practice moving in the water.»
Even if you’re a marathon runner or have logged endless hours in the weight room, learning how to swim takes time. You have to acclimate to a new breathing pattern, feeling of weightlessness and way of moving your body. But this guide will help you get there.
3 Form Tips to Help You Get Started
Eager to learn how to start swimming for exercise?
First things first: Adult swimming lessons are essential for beginners who are just learning how to swim. Even if your stroke just feels rusty or it’s been a while since you swam laps, work with an instructor. Your local pool will likely offer adult group or private options.
You can also find a program near you through U.S. Masters Swimming, a national group that provides organized workouts and clinics for anyone who is 18 or older.
But if you decide to go solo, first check up on these tips for swimming laps for beginners:
1. Stay ‘Athletically Relaxed’
Unnecessary tension can zap your energy, but you also don’t want to be too relaxed and just float in the water. Instead, Rodrigues says to think of having some tautness to your body to keep it aligned.
Think about gently engaging your core muscles rather than actively squeezing them.
2. Go Long
An elongated posture will help you move faster and easier in the water. So think about stretching out in the direction you’re headed.
When your hand and arm enter and move through the water, they should not cross the midline of your body. Even elite-level swimmers work on technique frequently, so give it time.
3. Stick With Small, Steady Kicks
The biggest mistake beginners make is kicking too much, according to Rodrigues. Kicking provides little propulsion but sucks up huge amounts of energy and sends your heart rate skyrocketing because you’re moving big muscle groups like the quads. You want to kick just enough to keep the legs ups. A light, gentle tapping should do the trick.
3 Beginner Swimming Strokes to Try
Sure, you could just jump in the pool and doggy paddle. (And if that feels like the best place for you to start, go for it!) But good swimming form can make a world of difference.
To help you get started swimming for exercise, here’s a quick breakdown of some of the most popular swimming strokes for beginners.
1. Freestyle
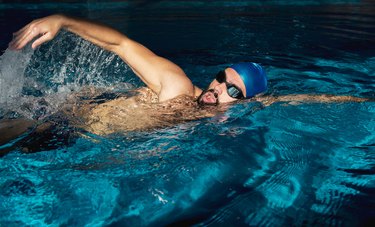
This is the fastest swimming stroke you can do when swimming laps. And fortunately it’s not incredibly complicated.
To do the freestyle stroke, you want your head, hips and feet to form one long line. If your middle sags or your feet ride low, you increase drag, slowing you down and wasting energy.
If your midsection tends to sink, try doing some core exercises when back on dry land. If your feet flirt with the pool floor, try pushing your head down a bit farther into the water. Your upper body will act as a counterbalance to help your lower body float.
2. Backstroke
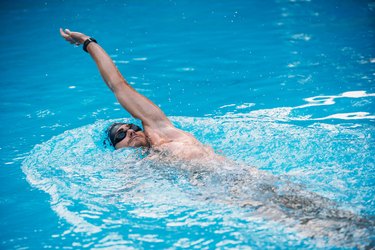
If you’re swimming laps in the pool, adding the backstroke into your routine can help work your arms and shoulders in a different way from all of the forward-facing strokes. Bonus: Because it has you lie face-up, you don’t have to worry about turning your head to the side to breathe.
The key to doing the backstroke is to think of reaching your arms forward instead of back. Stick with strong, powerful flutter kicks.
3. Breaststroke
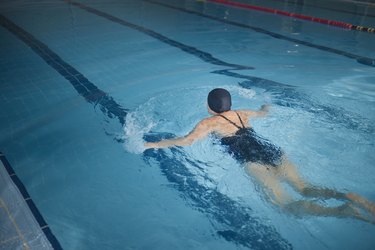
The breaststroke is a great way to work your lower body more than you do with other strokes.
Begin with your palms together in front of you and your legs behind you. Extend your arms forward, then turn your palms out as you sweep your arms back in a semi-circle. Return your arms to the front and repeat.
At the same time, bend your knees and bring your feet toward your hips. Then kick your legs out and back forcefully like you’re a frog.
As you get a hang for the coordination, you can play with dipping into the water and coming back up with each stroke.
What Beginners Should Know About Lap Pools
Most lap pools are usually 25 or 50 meters long. One «lap» is out and back; a «length» is one direction. So, a 50-meter swim in a workout would mean you swim one lap in a 25-meter pool or one length in a 50-meter pool.
Try This Beginner Swim Workout
Consistency is key to learning anything, so start with regular sessions of steady swimming.
1. Pool-Walk Warm-Up
The natural resistance of the water is a great way to warm up before any swimming exercises, similar to the idea behind water aerobics. With the water at chest-height, walk across the pool for 100 meters to warm up. With each step, pump your arms.
2. 50-Meter Swim Intervals
Choose one of the beginner swim strokes listed above, and try swimming 50 meters. At the end of the distance, take a rest and check in with yourself and how you feel. Try to stay at a rate of perceived exertion (RPE) of 6 to 7 (on a scale from 1 to 10). At this intensity, you should feel like you’re working but not feel out of breath.
Once you feel ready, repeat. Continue this pattern for at least 15 minutes. Work up to 30 minutes as you grow more comfortable swimming.
Everyone is different, Rodrigues says, so don’t get discouraged if the person in the next lane over is cranking out laps two at a time, and you’re winded after 30 seconds. Swim, rest, repeat. Stamina will come.
Once steady-state swims feel easy, Rodrigues recommends progressing to this beginner-intermediate swimming workout. Its short-distance intervals improve power, and the long-distance intervals increase endurance.
​1. Warm-Up:​ Swim one or two lengths at an easy pace, rest for 10 to 15 seconds, then repeat for 10 minutes.
​2. Short-Distance Intervals:​ Swim 100 meters at a speed that feels hard but manageable (an RPE of 8 out of 10). Rest for 20 seconds. Repeat 15 times.
​3. ​​Long-Distance Intervals:​ Swim 300 meters, 200 meters and then 100 meters, resting 20 seconds in between each set. If you’re not comfortable with these distances, try swimming 100 meters, then 75 and 50, again resting for 20 seconds in between each set.
If you’re looking for a way to balance your swimming workouts on land, consider using the elliptical. Ellipticals usually have moveable arms so that you work your upper body and lower body, which is a great opportunity to hone your arm and leg coordination skills for the water. You can alter the intensity of your workout by adjusting the resistance, pace or incline.
4 Benefits of Swimming for Beginners
Swimming statistics show that picking up the sport is worth the effort — with big benefits for your overall health and fitness levels.
«Commit to doing a block of 10 swims over the course of three weeks and you’ll be amazed at the body’s uncanny ability to adapt,» Rodrigues says.
Keep these great health benefits in mind when you’re doing the hard work of learning how to swim laps.
1. Improved Cardio Health
Swimming is a full-body workout that focuses on your heart and lung health, according to Harvard Health Publishing.
2. Stronger Muscles
Swimming also builds muscle from head to toe. The lats and back muscles in swimmers tend to be among the most developed. That bodes well for your posture.
3. No Joint Impact
Low-impact cardio workouts support your health without stressing sensitive joints and bones. But swimming isn’t just low in impact, it involves zero impact.
4. Big Calorie Burns
A 185-pound person swimming laps in a pool at a vigorous clip can burn around 420 calories in 30 minutes, per Harvard Health Publishing. Swimming at a more leisurely pace can still burn up to 252 calories in 30 minutes.
Keep in mind that swimming is just part of the equation. In order to lose weight with swimming, you also need to maintain a calorie deficit (aka burn more calories than you take in).
4 Pieces of Essential Swimming Gear
After you’ve found the best swimsuit for you, it’s worth stocking up on a few other swimming tools.
1. Goggles
Swimmers’ most prized possession is their goggles. You’ll want a set of clear lenses for indoor swimming and tinted ones for outdoors.
Goggles We Love
2. Nosepiece
There’s nothing quite like sucking water up your nose. So buy yourself an adjustable nosepiece for the best fit possible.
Nosepieces We Love
3. Cap
If you need a swimming cap to keep your hair under control, go with a silicon version. It’ll last much longer than latex will.
4. Pool Floats
Kickboards let your upper body rest while you work your legs. Meanwhile, pull buoys (figure-8 shaped foam devices that you place between your legs above your knees) support your lower body so you can concentrate on your stroke.
How to Learn to Swim for Beginners
Swimming provides a combination of an aerobic workout with strength building in your arms, core and legs. Since you’re in water, you are buoyant, which is easy on your joints, according to Harvard Health Publishing.
Video of the Day
When you start a swimming program, you may find that it is difficult to complete a lap and you’re quite breathless, even if you are already fit. This is because swimming requires controlled breathing when your face is in the water, which takes time to learn.
To progress as a swimmer, it’s helpful to take lessons. Swimming statistics show 43 percent of women and 34 percent of men have taken swimming lessons from a certified instructor, according to the American Red Cross. But you can start learning to swim by trying a number of things on your own.
Warning
Find a pool with a lifeguard. You need another person with you to keep an eye on you when you’re in the water. If your pool doesn’t have lifeguards, bring a friend. Never swim alone.
1. Get Comfortable in the Water
Get in the water and walk around the shallow end. Use this time to get used to the feel of the water and how buoyant you are. Progress to deeper water, getting wet up to your armpits or shoulders. Many beginners have a natural fear of water. Don’t worry if this takes a few visits until you’re comfortable going this far into the pool.
2. Get Your Face Wet
Get in the shallow end. Hold onto the side of the pool. Put your face in the water and blow bubbles, advises Swimming.org. Stand back up and breathe normally. Practice until you feel comfortable with your face in the water. Move to deeper water and, without holding onto the side, put your face in the water and blow bubbles. Stand back up and breathe normally. Practice until you feel comfortable.
3. Learn to Float
Learn to float. Hold the side of the pool. Take a deep breath and lift your feet up while leaning backward. Try to float. This can take a few tries. Practice until you can float for 15 to 30 seconds. Practice without holding onto the side.
Hold onto the side. Take a deep breath and put your face in the water while kicking your feet out behind you. Try to float. Practice until you can float for 10 to 15 seconds. Practice without holding onto the side.
4. Practice With a Flotation Device
Grab a flotation device and try one lap of swimming. A kickboard or styrofoam noodle is ideal. Don’t use arm supports or anything around your waist as these types of flotation devices interfere rather than help.
Hold the kickboard in front you with straight arms. Push off from the wall and scissor kick with your legs straight behind you, rotating your head to the side to breathe. Complete one lap, resting along the way as necessary.
5. Do It Again
Try another lap, including your arms. Hold the flotation device in front of you with straight arms. Push off from the wall and scissor kick with straight legs. Lift one arm off the kickboard, pulling down through the water and lifting, returning your arm to its starting position. Switch arms and repeat. Rotate your head to breathe from the side as necessary. Rest and repeat as you feel comfortable.
6. Swim Without the Device
Try a lap without the flotation device. Push the kickboard out in front of you and begin your freestyle stroke or front crawl as it is otherwise known, scissor kicking, straight arms in front and side breathing. When you reach the kickboard, either use it as support to rest or push it out again and continue for another few strokes. Rest and repeat as you feel comfortable.
Purchase the Right Equipment
Make your debut in the pool more productive and enjoyable by buying a few pieces of basic swimming equipment:
To learn proper technique and additional strokes, enroll in an adult swim clinic.
Learn How To Swim: A Beginners Guide
Swimming is an amazing workout. The water soothes your body and takes the strain off your joints, making it a great remedy for muscle soreness and joint pains. Studies show that spending 30 to 40 minutes in a pool at least four days a week can help you shed some weight and tone ‘em muscles. It is also the best way to unwind after a long day at work.
Learning how to swim can save your life too. A good number of us live within a driving distance of a body of water and many are the times we may feel the urge to spend time in the waters. We want to kayak, surf, paddleboard, and do everything else that gets us enjoying the marine world but unfortunately, all these activities can put our lives in danger.
If you flip your kayak or fall off your board and don’t know how to get back up, then the only self-rescue option you got is to swim. Imagine how ugly things would be if you don’t know how to beat that water! That’s why taking swimming lessons is important. It is a basic survival skill that everyone should know and practice.
Getting Started With Swimming
Swimming can only make our lives better. Yet, there are so many of us who cannot do it. Good news? Mastering the basics of swimming is easy and achievable for anyone. With a little time and practice, you will be gliding in that water like nothing!
So here is a beginner’s guide on how to swim that will give you a firm grip of the workout and get you reaping all the amazing health benefits of swimming. Now, grab your swim bag, throw in your swimsuit and a life jacket, and let’s go hit the water!
Getting Ready
The best time to go swimming would be when the waters are warm and the weather calm. Visit a local swimming pool or find a shallow, calm water body near you.
Take your bathing suit, swimming goggles, nose clips, a good pair of swimming earplugs, and anything else you may need to stay safe in the water. Some people bring swimming gloves too just to make their first time more comfortable.
Swimming snorkels could also be a great add-on. Don’t forget your life jacket or PFD and most importantly, let someone go with you.
Acquainting Yourself With The Water
The first thing you need to do is to get familiar with the water. Find a spot with calm, shallow water that is almost up to your neck. Take the time to just get in the water and enjoy how it feels around you.
Next, practice having your head underwater. Start by wearing goggles, and placing your face under the water. Breathing while swimming can be difficult, so make sure you don’t get water into your nose in the process.
Have a look around and practice blowing air out through your nose to get water out. Come back to the surface and enjoy how that felt. Repeat this a few times to get more confidence in having your face under the water.
Now, try putting your whole head under the water. Being a first-timer, you may feel a little discomfort when water enters your ears. But it is still good to try submerging your head without the earplugs so your ears can get familiar with the surrounding. If your ears are a bit sensitive or prone to infection, however, then there would be no harm donning the plugs.
Let your headrest for a while under water and then come back to the surface. Tilt it to each side to release the water from your ears. You may need to shake it a little to get the water out.
Practice immersing your head until you feel completely confident having it underwater.
You are doing great, let’s move on!
Treading Water
Treading water is simply “standing” in the water. It is a basic survival swimming skill that keeps you floating in an upright position. You gently use your arms and legs to keep your head above the water.
For a person who is learning how to swim, this is a good skill to have, just in case you panic and are not sure what to do next. You can get your head above water to take a deep breath and calm yourself before moving on.
To practice treading water, move into an area of your pool or any water body of your choice, and extend your arms out to each side. You are going to alternate between flapping your arms and kicking your legs.
Firstly, have your palms facing down and your fingers together. Push your arms down until they are by your side. Lift your legs off the bottom of the pool and as you start to feel the water pushing you upward, bend your knees and lift your legs toward your body.
As your arms reach your body, kick your legs out and downward, like a frog. Move your arms up to your body and then back out to the extended position. Make sure to avoid hitting the bottom of the pool as much as you can when you kick your feet down.
Being a first-timer, you may find that you kick and flap irregularly or quicker than you should. But the more you practice, the smoother your motions will get, and the slower the rhythm you will need to keep your head above water.
Once you can do this for at least 30 seconds, move out to a deeper part of the pool, by holding onto the wall or having a friend come with you. Practice making the same motion in a part of the pool where your feet do not touch the water. Keep kicking and flapping until you can go at least 60 seconds straight.
You are amazing! Keep going.
Floating
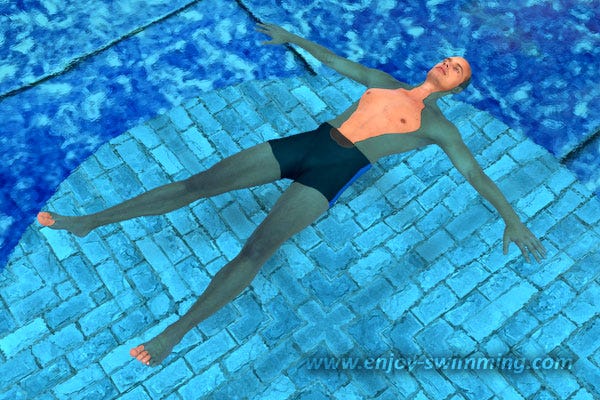
Now, that you can tread water, let’s get you floating on your back. Everyone has natural buoyancy, and if you spread out your arms and legs, you will find a calming experience floating on your back.
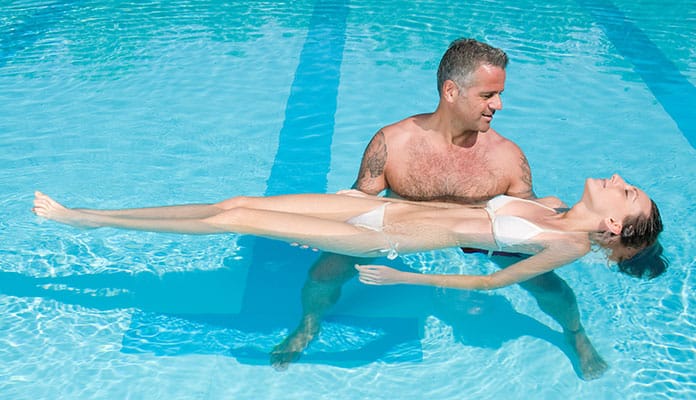
To get started, move to a shallow part of the pool, where you can place your feet down on the bottom if needed. Place one hand on the wall or have a friend hold you under your back. You want to slowly lift your legs and open them while spreading your arms so that your body is in the star-position. Once you feel yourself floating, let go of the wall or have your friend let go of you.
Enjoy the calm feeling as you stare up at the amazing pool roof (or wonderful blue sky) if you are outside. There is not much to practice with this skill. Just know that you can do it, should you find yourself in a situation that compels you to float on your back.
Awesome work! Shall we start swimming?
Kicking
Mastering kicks is easier than learning arm motions, so we are going to start with the lower body.
Find a place in the pool where the water is moderately shallow. Your feet should be able to touch the bottom. Place your hands on the wall and extend your arms, such that you are standing back from the wall. Lift your body in the water, so that your hands are holding the wall, and your body is parallel to the wall. Your feet should be parallel behind you.
Let’s begin with the flutter kicks. With a flutter strike, you alternate between kicking with your left leg and your right. These strokes are controlled by your hips, knees, and ankles. When you kick, your leg goes down, but your foot pushes the water backward.
You can start with your dominant leg or any leg you feel more comfortable starting with. Point your toes and kick the leg down. Your knee will help with the sharp kick. Remember, you are not kicking your leg all the way down, just enough to propel yourself forward. Keep your toes pointed so that your foot is angled to push the water back.
As you bring this leg back up, repeat the motion with the other leg. One should always be kicking down, and the other should always be returning up. Avoid breaking the water with your feet. Both of your feet should remain below the surface and not splash the water.
Practice with your feet at different angles, different rhythms, bends, etc. Find the motion that gives the most push forward. You may be using muscles that you have not used before, so if you feel like your body needs some rest, make sure to give it some before proceeding.
The more you practice kicking, the more you will build up your muscles. Once you feel confident with your kick, find a kickboard to hold onto and practice a couple of kickboard swimming techniques. For instance, move from one side of the pool to the next while kicking your legs. Put your face underwater and practice breathing as you move. The kickboard will make your move easier and keep your upper body afloat.
You are going great!
More Kicking
With the flutter strikeout of the way, let’s now get down to a whip kick. This is actually similar to the frog-like kick you did while treading water. It helps you perform a variety of strokes in the water when it comes to actual swimming.
Start in the same position as you did with the flutter kick, with your hands on the wall and your body horizontal in the water. Bend your knees and move them out from the sides of your body, while keeping your legs parallel to your body. Thrust both legs back at the same time until they are back in their original position (legs together and horizontal in the water). You should feel yourself being pushed forward.
Keep practicing until you are confident that the kick can push you through the water, and then use a kickboard to try it. Switch between flutter and whip kicks as you move from one side of the pool to the other.
Amazing! Way to go!
Adding Arms
Swimming is a combination of arm and leg movements. There are many different swim strokes you can learn to make the activity more enjoyable. If you want to become an expert swimmer, then you may consider signing up for swim lessons so you can get the benefit of a coach.
In the remainder of this article, we are going to discuss the two most popular arm strokes i.e. freestyle and breaststroke. So grab your swim paddles and let’s get this show on the road. Shall we?
Freestyle
The freestyle stroke is also known as front crawl, and that is technically what you will be doing. It is the most common movement and will propel you through the water the quickest. If you are surfing and your surfboard gets swept by the water currents, for instance, this is the stroke that will help you get out to the waves.
You will be using your arms to drag yourself through the water. The very first motion in freestyle is to throw your arm forward, then down into the water in front of you. Your hand should be cupped as if you are trying to hold water, but with your palm facing down as it enters the water. Your arm should enter the water when it is fully extended and must not be angled, to the side or at the shoulder. The side of your body, all the way up to your hand, should form a straight line.
Picture a line under the water, just below your hand, and running to just below your shoulder. Keeping your hand cupped, you should draw your hand back along that line. This motion will draw you forward through the water.
Once your arm is fully extended backward, pull your forearm forward by bending your elbow and then lift your arm out of the water to begin the stroke again. As you are pulling your arm back through the water to propel yourself, the opposite arm should be thrusting forward to create an alternating stroke.
Freestyle stroke should be combined with the flutter kick. You can practice just the arm movements for a while, but adding the kicks will help to push you through the water and keep your head above the surface.
When it comes to breathing in freestyle swimming, your face should be in the water. The key is to turn your head to the side when you are pulling through the water. You should take a quick breath in and then breathe out when your face is back in the water. You may want to take a quick breath after every stroke or a couple of strokes.
On your first day freestyling, you may experience swimming shoulder injuries due to the rigorous moves your arms have to make. But you need to stay active and eat right to recover from swimming quickly.
Breaststroke
Breaststroke, on the other hand, is a slower stroke. It is great for times when you need a relaxing exercise. It is also the best stroke for scuba divers and other underwater enthusiasts. We all know how crucial it is for divers to save air when underwater and minimizing movement is one of the best ways to do this. A breaststroke, being a slow move, will get a scuba diver using less energy hence lowering the risk of depleting their scuba tank.
The breaststroke is a calm and perhaps easier stroke than freestyle. Here, you will be moving both arms simultaneously and maybe add a few whip kicks to make the stroke more fun.
To do a breaststroke, start with your palms together, and your fingers pointed. Thrust both of your hands forward until they are fully extended.
Turn your hands such that they face away from each other and cup them slightly. Now push the hands away from each other and continue to move them in that direction so that they draw a circular path in opposite directions from the front to the side of you. You can bend your elbows as you do this.
Once you have your arms behind you, draw them in and underneath your body, and then back into the starting position. Repeat the motion as you kick. Alternate between your arms and legs. While your arms are getting back into position, your leg motion should be propelling you through the water, and vice-versa.
To breathe in this stroke, start by moving slow and keeping your head above the water. As you speed up, keep your face in the water, and come up to breathe as you pull your arms back through the water.
How To Improve Your Swimming
Swimming is good cardio, so the more you swim, the fitter you get and the easier it gets for you to hit those strokes. There are several things you can do to improve your swimming once you have mastered the basics. Let’s look at a few:
1. Tone Your Muscles
Swimming utilizes la lot of muscles, especially your core. Try to find other workouts that focus on your core, to give you better strength when you are swimming. Jogging and biking will also help in firming up your leg and arm muscles.
With time, you will even find adding equipment such as a swim parachute to your training an effective way to improve your muscle endurance. A swim cord will also go a long way in making the activity more versatile.
2. Control Your Breathing
If you run out of breath, then you will have to stop swimming. And if you do not take in enough oxygen, then you will not have enough energy in your body to complete your strokes. Find a good balance between your head being in the water, and it being out to take a breath. If you can keep the same breathing rhythm, your swimming will improve.
3. Take Small Steps
Swimming in a pool is a lot different from swimming in an ocean or lake. Make sure to perfect your strokes in a pool before you graduate to swimming in a natural water body. Start in the shallows and hone your skills there before you move on to deeper (and probably colder) water.
If you just finished your swim lessons, always take a friend (who can swim) with you when heading outdoors at least for the first few days. The combination of the cold, unknown, weedy, or different waters can cause anyone to lose focus. Trust us, losing concentration is the last thing you want to do when you are in the middle of the ocean.
Globo Surf Overview
As you can see, learning how to swim isn’t difficult at all. If you just follow our instructions and try hard while you do, you can learn a basic swim stroke in under an hour. All you got to do after that is practice.
Taking a splash in a pool will take your workout to an entirely new level. From exercising in a pool to diving down deep under the water, you will start seeing the fitness world in a whole new light. It is great for your body and gets you reaping tons of health benefits.
Swimming can be an amazing survival skill too especially if you live near a water body. If you or someone else were to fall in, it could give you the ability to save your own life or that of the other person.
It is also a peaceful and relaxing activity. There is nothing more soothing than taking a swim in a mountain lake as you enjoy the beauty of nature or diving in the ocean on a hot summer’s day.
So, take some time and learn how to swim. Practice as often as you possibly can. Once you have gotten a hang of the strokes, everything else will be a breeze.
How to learn how to swim
Swim Underwater Without Holding Your Nose
How to Keep Your Hair Dry and Damage-Free While Swimming (and the Best Swim Caps for Dry Hair)
Hold Your Breath Underwater
Open Your Eyes Underwater Without Goggles on and Not Hurt
Stay Underwater in a Swimming Pool
Tuck for Swimming
Teach Your Child to Swim
Learn to Swim As an Adult
Swim in the Ocean
Exercise to Become a Better Swimmer
How to Cover Your Ears While Swimming (and Get Water Out)
Hold Your Breath While Swimming
Go Swimming in Public As a Transgender Guy
Stay Underwater Longer
Swim Underwater Without Goggles
Get Skinny Thighs from Swimming
Do an Open Turn in Swimming
Do the Dolphin Stroke Underwater
Use a Pull Buoy
Do a Forward Flip in the Water
Prepare for the Swimming Unit in Gym Class
Introduce a Baby to a Pool
Build Your Stamina for Swimming
Prepare for Your First Adult Swim Lessons
Drop 50 Freestyle Time
Be a Good Swimmer
How to Prepare for a Swim Meet
Do a Cannon Ball Into the Water
Protect Your Skin While Swimming
Do a Handstand in the Pool
Convince People to Go Skinny Dipping
Swim to Stay Fit
Be Hygienic Using Public Swimming Pools
Start Synchronized Swimming
Swim Long Distance
Perform a Flip Turn While Swimming
Not Get Disqualified when Swimming Freestyle
How I learnt how to swim and understood my fear in less than 1 month
#2 — Second month of my challenge: 12 topics to learn in 12 months
Just after finishing my first learning challenge I took 1 week of vacations in the island of Dominican Republic 🇩🇴. In order to take fully advantage of this trip I decided that swimming would be my next learning challenge.
Yes, you read it well I cannot swim 🙁! Actually I can swim more or less and quite slowly but only in shallow waters. When I go on deep water I start panicking and I sink.
So my level before starting was the following:
The reasons why I want to learn how to swim are quite obvious, every time I go to the sea I cannot go as far as the others go. I have to stay close to the beach and this is very frustrating.
Preparation
Learning the tricks
While reading these articles I took a few notes. The main advice to conquer your fear is to relax, always relax, no matter what 😀. It’s actually very hard to relax, easier said than done. You need to come to terms with the thoughts and feelings you are experiencing, because there is always this small bit of anxiety and panic, and purely focus in your body. The second advice that I read everywhere is that most of the body floats naturally, especially when your lungs are filled with air. This is just physics!
Then I also read about a few exercises that you can do to get used to the water, to float, and to breathe. Here I list the ones that have helped me the most:
All these exercise has to be done in shallow water.
While reading all these articles I still had a question, which is for me vital, how to float vertically without swimming, because this is how I usually sink and the reason why I am not confident in deep water.
So after googling a bit I found out that there are two solutions: either you keep on swimming, or you do these little moves from the video below to make you float. People usually do it naturally but I don’t, so I have to practice it as well.
Sorry, it’s in French but visual enough to understand!
Practicing
After all this reading you can imagine how eager I was to start really trying all the exercises and tips. As soon as we reached the first beach in Dominican Republic I started to put into practice all the lessons.
First trial in the sea
(1) Going little by little into the water is something I always do naturally because the water temperature is always colder than air. Moreover, I usually do the starfish float facing the sky in the back to relax a bit before trying anything.
(2) The breathing exercise was really interesting. It was the first time I successfully breathe out under the water and the sensation is a bit weird: you make bubbles and you have to force it against the water pressure to make it happen. This exercise is mandatory to understand that the water cannot go inside you except if you open the mouth or breathe in while inside. Thus, you should never breathe in or open the mouth inside the water. Sometime I accidentally do it, for example when a big wave come to me. Now, I have to consciously force it to be sure.
(3) I didn’t directly pick an object inside the water but I was trying to reach my legs inside the water and to hold my breathe. It helps being more confident inside the water.
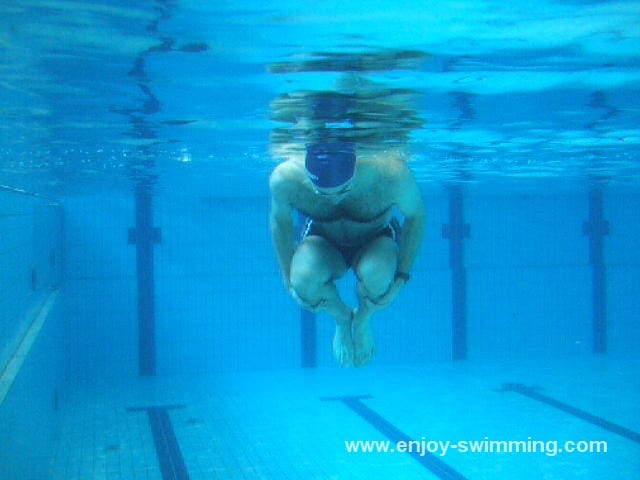
(4) The mushroom float brought a good feeling and it also helps to feel confident, knowing that even inside the water we can float!
(5) Floating horizontally with the back facing the sky was a bit hard for me, I preferred just to practice the breast stroke every time.
Second trial in the sea
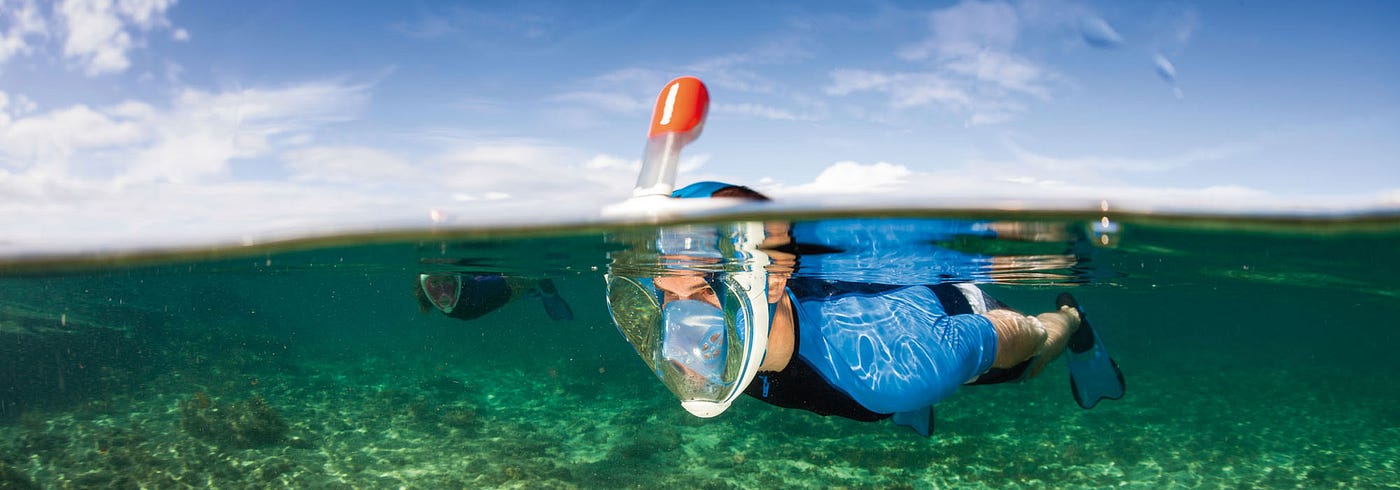
I repeated these exercises also in the second beach we went to (Playa Rincon), one of the most beautiful beaches of the Caribbean, with white sand, turquoise water, and most important for me: warm water 😉. Here I tried also something new, I used the “Easybreathe” snorkeling mask from Decathlon.
This snorkeling mask allows people to breathe naturally (with the nose or the mouth) under the water, the breathing tube with its valve should stay outside of the water if you want to breathe of course like a normal snorkel.
The reason I bought it is simple: I tried once to snorkel with a life jacket to float and a normal mask and tube. As soon as I tried to breathe, I drunk water, and of course, I started to panic. I stayed the rest of the snorkeling trip inside the boat looking how the rest of the people kept enjoying…
What happened when I swam with this mask is that I could put my head easily inside the water and I could easily float without moving. I was relax and I could swim very slowly. The possible reasons I believe this was possible are:
After this first attempt I tried to go a bit further into deep water with my mentor Patricia. When I realized that I was actually in deep water and that I couldn’t touch the floor with my feet I started to feel a bit anxious. I was very conscious of my body and I tried to continue being relax. When I started to feel a bit tired I decided to go slowly back and trying to keep relax. So even with the mask I felt this fear of not being able to touch the floor. I am convinced that it’s something that will disappear with repetition.
Trial in the swimming pool
I tried a few time in the swimming pool where the salt is not here to help you float. I did again the previous exercises.
I tried there different ways of swimming: breathe stroke and butterfly stroke that came a bit naturally.
I used again a bit the mask to swim and to be able to feel consciously how to relax and swim at the same time.
Moreover I took advantage of the swimming pool to practice vertical floating like in the video.
More trial in the sea
I tried to swim again in another beach in Dominican Republic and to repeat the exercises but I couldn’t do much because of the waves. Once I came back to France I tried to practice again in a very calm water of Mediterranean sea. I could even swim in some part of deep water with a calm way of swimming. I can easily distinguish the relaxed swimming since I am not tense after a few strokes.
What I realized there is that even though I am not fully confident with the vertical floating that I need to practice more and more, I am confident with going around if I keep on swimming. Indeed I have to practice my endurance to be able to do it longer, in a relaxed way ☺️.
My swimming tips
As promised, here are my swimming tips for the people who have the fear of swimming out of shallow water.
