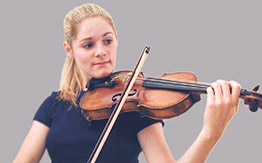
How to play violin
How to play violin
Learn the Violin By Yourself: The Ultimate Guide
Whenever anyone says, “Wow! You play so many instruments! How did you learn?,” I often say: “mostly, I taught myself!”
Sure, I had many inspiring musicians around me to talk with and to learn from – but except for the violin, I have never taken any consistent formal lessons on any of the instruments I play. Essentially, I learned to play most instruments on my own. Over the years I have taught myself the piano, the guitar, and many other instruments to be able to play with them in bands & music groups.
Combined with the fact that I am a violin teacher and violinist for 16+ years, I feel I have valuable information to share on how you can go about learning the violin on your own.
So, what were my tricks? How did I learn so many instruments on my own? And how can you go about learning the violin by yourself? There’s no getting away from the fact that it takes a long time and a lot of personal dedication. Anyone who says you can learn the violin in just a few months is lying. You might be able to play a simple tune after a quick crash course with a violin teacher, but it won’t be enough to join a jam session, play in an orchestra or even play along with a recording without scratching and squeaking. (If you’d like to see what you could realistically learn as an adult beginner in 1-5 years of playing the violin with video examples, you might like to read my article “How Long Does it Actually Take to Learn the Violin?”).
The key to learning to play any instrument well, including the violin, is to throw yourself into the deep end. During the time I made the most progress, I practiced every day, almost all my friends were musicians and basically, music was the center of my whole life for a while. As a young girl, I created lists in my diary of how much I had practiced which instrument to discipline myself to practice more. It was difficult sometimes, to practice new instruments and compare myself with all the awesome musicians I had around me. But I also believe it was vital to my success because it was a constant reminder that I needed to practice.
One thing that was extremely helpful in learning new instruments, is that I slowly developed ways to practice that worked for me and helped me to learn a new instrument more quickly. So, this is my personal advice to learn the violin by yourself, which includes all the strategies I used and proved to be very helpful to me.
How to Learn the Violin by Yourself in 6 (Not-so) Simple Steps
1. Spend at least 30 minutes a day practicing scales & basic violin exercises
Wait! Don’t leave the article just yet. I know you probably don’t like practicing scales. Most of my violin students don’t like scales when they first start playing. After all, we started playing the violin to play our favorite songs. Not to practice boring scales, right?
Funnily enough, after a while most of my violin students LOVE to practice their scales. The thing is, if you want to learn the violin effectively (and not take 20+ years to play a tune beautifully) practicing scales is THE way to go. You could see practicing scales as a highway to better intonation.
Of course, you will also learn intonation when practicing songs. But when you practice your scales and arpeggios, you will learn it 3 times faster. Scales are the best way to focus on all the basics aspects of your playing: intonation, violin hold, bow hold, tone production… And if you notice how fast you start improving at violin playing, you don’t want to go back.
If you practice scales and exercises, make sure that you choose ones that will progressively get more difficult. In that way you will get to learn new techniques with every scale and exercise that you practice. So start practicing scales right from the start, to make sure you will learn as effectively as possible.
2. Practice pieces, take the hardest parts out and practice only those
If there would be ONE secret to learning to play the violin beautifully by yourself, it would be: LISTEN TO YOURSELF!
If you don’t have a teacher, this skill is especially important. If you practice for hours a day, but don’t listen well to yourself and analyze your playing for mistakes, you might make no progress at all.
If you practice your pieces, make sure to listen very well to yourself. Do you like the way it sounds? Is it in tune? Do you use the correct bowing technique to make it sound pretty? And if not, how could you improve it? Then, only focus on those areas of your playing that you wish to improve.
Sometimes it is very difficult to listen to yourself while you are playing at the same time. Especially when you are just starting out with learning the violin, there are so many things you already have to look for: correct bow hold, violin position, if your fingers are in the right place. It gets even harder if you also have to analyze yourself at the same time.
So how do you go about it? The simple answer is: your phone! Video tape yourself while you are practicing and look back it afterwards to analyze your playing.
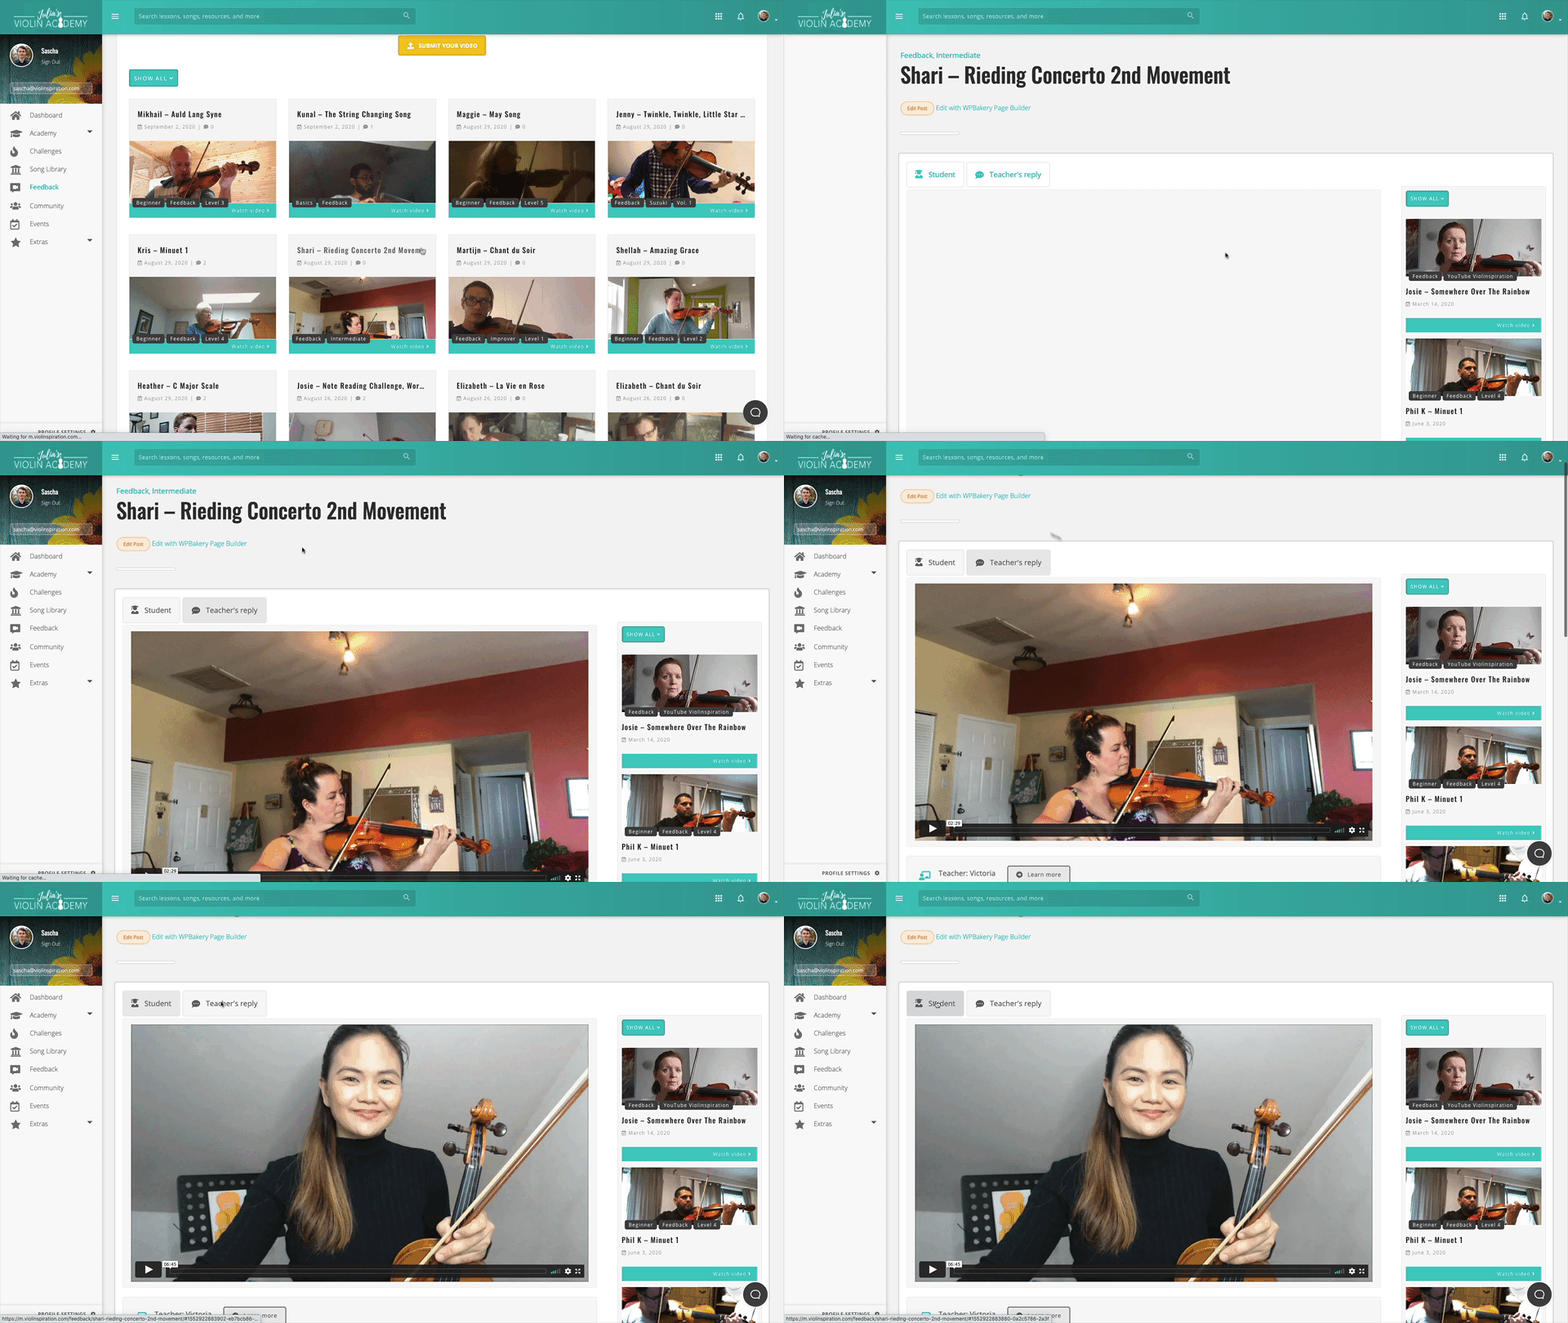
In my online violin academy for adults, Julia’s Violin Academy, my students can submit their personal videos for feedback to Victoria. Victoria is our 2nd violin teacher at Julia’s Violin Academy. As an assistant concertmaster of the Manila Philharmonic Orchestra and solo violinist in many musicals and film productions, we are proud to call her a teacher at our Academy! And I have noticed something fun!
Often my students have already learned so much from recording the video, even BEFORE they sent the video in! Just by watching themselves play, they became aware of mistakes they made that they didn’t realize before.
3. Listen to violin music as much as possible
One of the things that is so difficult about violin playing, is that you need to have a very good ear in order to have proper intonation. One of the best ways to develop your ear is: LISTENING to music! Especially violin music.
When I first started playing violin I listened to violin music every day, almost without a break. I listened to all the famous violin concertos, Bach, orchestral pieces and even listened to the CDs of my Suzuki Violin Method book on repeat…
If you want to optimally use your time, make sure to listen to violin music as much as possible, so you will develop your ear and get a better feeling for musicality, rhythm, and intonation.
4. Watch other, more experienced violinists play
And don’t only watch them, but try to analyze them at the same time. What kind of bowing techniques are they using? At which part of the string are they playing to get their tone as a result?
When you watch other violinists play, you will learn a lot, even when not being consciously aware of it. If you have a chance, go to local concerts. If you live in a city, there are often many opportunities to go to smaller violin concerts for a low price. Many music schools will even offer you to watch the concerts of their students for free, so they will have an audience to practice performing with. Immerse yourself in an environment where you constantly see other violinists play.
5. Make friends with other violin players
Did you ever hear the saying “You are the average of the 5 people closest to you?” Well, it’s true! It is much easier to learn to play the violin in a supportive environment with friends that understand your passion for music and why you are practicing for hours a day to learn an instrument.
Learning the violin is very difficult. If you are going to do it well, you need supportive people around you to help you with it.
Your violin friends will understand your struggles and motivate you to keep pushing forward. They will remind you that it is normal that you are sounding like a crying cat for at least a few months and that it is part of the process. They will really be understanding the difficulty of the pieces you play and how much you have practiced to get there. Your violinists friends will give you the strength to keep practicing.
I feel like one of the biggest contributors to my ability to play many instruments, is having a friend group and family that was very supportive of me taking time to practice and that motivated me to keep pushing through.
6. Find a bigger purpose to your practice mission
Ask yourself why do you want to learn the violin….. Do you want to connect more with other people in your life? Would you like to have a creative outlet? Do you want to join the jam session or orchestra in your town? Do you want to learn something amazing to remind yourself of what you are capable? Do you want to be a part of long lasting family traditions of playing an instrument? Is it a long childhood dream that you want to fulfill?
If you have cleared for yourself WHY you want to learn the violin, you will find the motivation to keep practicing, even in times that it is very difficult and seems impossible to learn the violin.
So there you have it, 6 steps to learning the violin on your own. Follow these steps along or a similar path, and there will come a day when someone compliments your violin playing and inquires how you learned to play the violin so well. And then, you can proudly respond, “I taught myself!”
If you want to become a violinist, make sure to check out my post “How to Play the Violin: The Complete Step-by-Step Guide” with more technical instructions from buying an instrument to playing in a band or orchestra. Enjoy!
How to Play the Violin: The Complete Step-by-Step Guide
Do you want to learn how to play the violin? Perhaps you’ve dreamed about becoming a great violinist. Are you curious about what you need to know or do to achieve this goal? If so, you’ve come to the right place. I’m happy to share a list of 35 steps you can take to play the violin and fulfill your dream of progressing from a novice student, to an intermediate player, and finally, a seasoned violinist.
The Right Equipment
If you want to start off your journey on the right foot when learning how to play the violin, begin with the right equipment.
1. Find a Proper Beginner Violin
This is much easier said than done. Given the variety of options out there, selecting the right violin for you can feel overwhelming. Be sure to take your time, as this is an important decision.
The first few years spent learning how to play the violin can be difficult. Thankfully, a high-quality violin will produce a wonderful sound and be easier to play when you embark on this journey—encouraging you and helping with your progress. On the flip side, a violin of lesser quality with a poor sound that is difficult to play can discourage students, who may not even want to play at all because of this!
Know Your Options: Buy or Rent
First, decide if you are going to buy or rent a violin.
Renting a violin is a good idea when:
Buying is a good idea because:
What to look for when buying a violin:
Listen to how the violin sounds when someone more experienced plays it. Do you LOVE it?
TIP: If you are left-handed, you can buy either a left-handed violin or the same instrument as a right-handed player. To find more information about this topic, check out my article “Left-Handed Violin Playing: This Is Why You Might Like to Try It.”
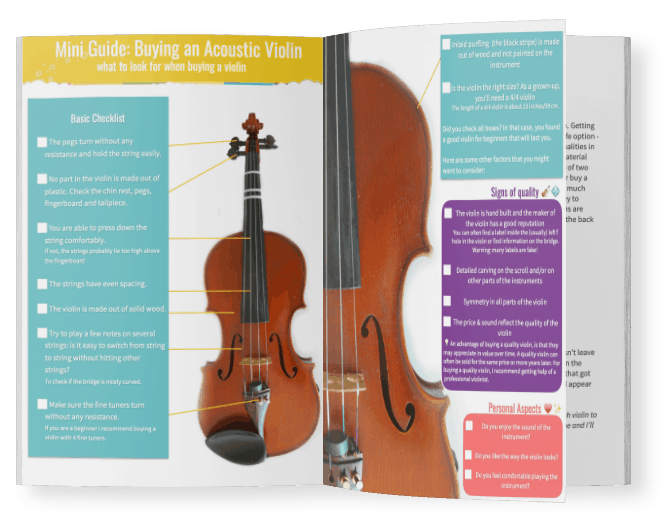
Before buying a violin, also be sure to check out my mini guide:
Violin Mini Guide [PDF]
Remember that your first violin doesn’t have to be expensive. You can always start with a more affordable alternative and employ strategies to make it sound better.
2. Buy Extra Equipment
To successfully play the violin, you need the following accessories:
Additional accessory options include:
Beginner violins usually come with a kit that includes a violin with a chinrest mounted on it, a case and bow, and perhaps also rosin and a shoulder rest. When buying from a violin maker, the bow and case are typically separate.
Prepare the Violin for Playing
3. Tune Your Violin
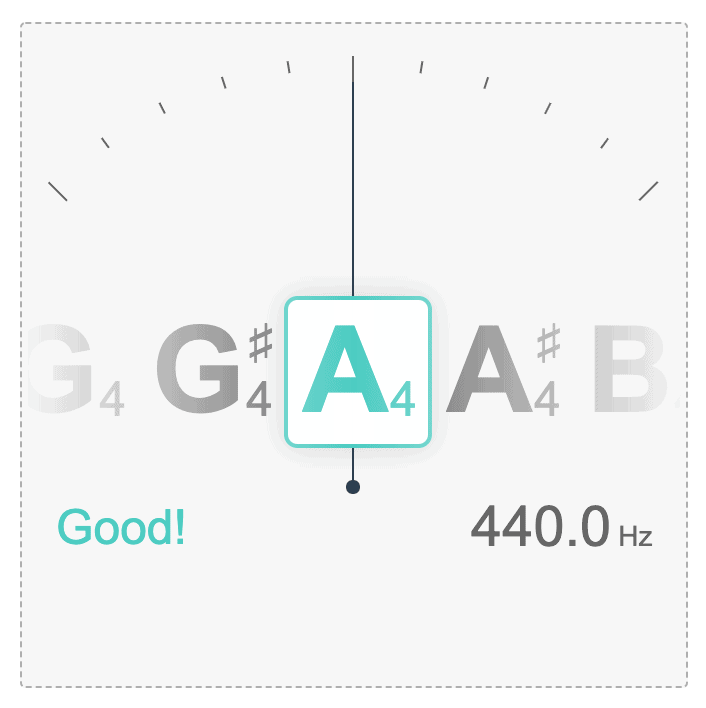
Tune your violin strings to the correct pitch using one of three possible methods:
Check out the following posts to learn how to properly tune a violin:
4. Prepare Your Bow
TIP: You can confirm that you have the correct amount of space by placing a pencil between the hair and the stick. The pencil should fit, grazing them both when moved back and forth.
Remember: Loosen the bow hair by turning the screw to the left after playing.
Learn How to Hold the Violin and the Bow
5. Learn to Hold the Violin Bow
TIP: Wash your hands before playing your instrument and never touch the bow hair with your fingers to prevent oil transfer from your skin, which attracts dirt and leaves residue behind. If this happens, you will need to get your bow re-haired!
The simplest way to learn how to hold the violin bow is the bunny technique. You can do so in six easy steps! Thereafter, you should work on relaxing your bow hand.
I want to emphasize how a relaxed and correct bow hold is the key to producing a beautiful-sounding tone when you are learning to play the violin: after which you are primed to learn advanced bowing techniques in the future.
6. Perfect Your Violin Hold
Your violin hold should reflect what feels most comfortable for you. This is in relation to the parts of your body needed to execute the violin playing technique—your arm, hand, and fingers—and how you would judge correctness. If you are not comfortable, you can develop pain.
How are you supposed to hold the violin?
You can always practice in front of a mirror and compare your hold with these pictures. This video about elbow and left-hand position is also helpful.
Learn Your First Song on Open Strings
7. Learn to Play on Open Strings
In this way, you will get a feel for bowing without the added difficulty of using your left hand. After all, it’s better to learn one thing at a time until you feel comfortable, and trying to grasp too many things at once will split your focus. Focus on one thing and make it great!
TIP: Learn the signs used in sheet music to know in which direction you should bow.
Best Ways To Learn How To Play Violin as an Adult
If you want to find out about the best ways to learn how to play the violin as an adult beginner – this post is for you! Here are the steps to take to start learning the violin as quickly as possible.
1. Find a Suitable Instrument: Buying a Violin for Beginners
You want to start a learning the violin, but wait – do you even own a violin? You can only learn the violin if you have a suitable instrument! The kind of violin you choose matters. Here are some key factors to consider when buying a violin as a beginning violin player:
Many beginner violinists decide to go for a new, affordable instrument, such as a Stentor II. These instruments are affordable for it’s quality.
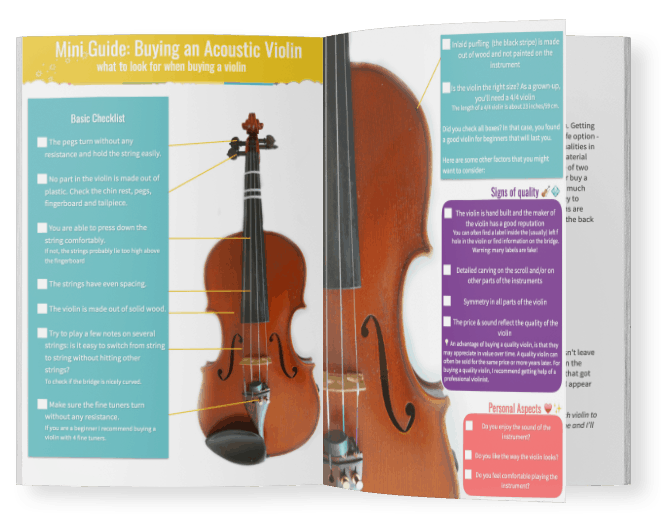
Get Your Free
Violin Buying Checklist [PDF]
I’ve also created a separate blog post about this topic. Make sure to look here if you’d like to buy your first violin.
2. Create a Violin Practice Routine
Once you have completed a level, you can go to the next level. Here you will find more difficult exercises. This is a great structure because it allows you to practice every area of violin playing and make steady progress. Also, by gradually raising the difficulty of each area, you will be sure to always learn new skills on the violin. Whether you are choosing to learn with a violin school like this or practice on your own: you need to have a structure in your practice to get the best results!
3. Start Your Violin Learning Journey: Practice, Practice, Practice
Now that you have a violin and a practice routine, you need to practice! When it comes to learning how to play the violin, the most important thing you can do is practice. Obviously, following your practice routine should be your first priority. However, that doesn’t mean that you can’t practice some fun songs on the side every now and then.
As long as you are able to focus for long enough on your practice routine, you should be good to go. To see results, some violinists choose to use specific practice techniques. While this is not necessary, it can help to keep more concentrated during a practice session. A technique that I like to use is the “pomodoro technique”. This technique is especially great for violinists who have lots of time to practice. It goes like this
You can keep going like this for as long as you want and stay incredibly focused. Here you can check out one of my practice sessions, to see what I usually focus on when practicing the violin:
For those who have less time, you can create a shorter version of the pomodoro technique. Focus for a certain amount of time on each part of playing you’d like to practice. For instance:
4. Get Feedback From a Violin Teacher
While it’s great to practice the violin on your own – it is also a great way to end up with an improper technique! Make sure to get help from a teacher to check for correct posture, technique and intonation. In this way, you will learn the right techniques from the very start! When it comes to getting feedback, you’ll have a few options:
5. Play for Others: Performing on the Violin
The time has finally come to share your violin skills with the world! It can feel awkward at first, especially if you are not used to performing. But after all, you learn how to play violin to also play for others, right?
A few practice runs may be beneficial! My students often practice performing for each other on Zoom first. In that way you can already get used to the nervousness you feel when playing for others. Just remember these key tips:
Here was a little surprise performance I did for my YouTube subscribers on Mothers Day. I played a few pieces with my mother, who is a classical pianist.
The audio quality wasn’t optimal in any way. I hope that is a good reminder that performing is about sharing, rather than perfection!
6. Don’t Give Up!
Finally, don’t give up! Learning to play the violin can be hard work and takes months, or even years to see results. Try not to get discouraged and hang in there. The violin world may feel difficult to enter, but these tips will help you get started in no time!
Beginner Guide How to Play the Violin
Often regarded as the archetype of the classical lead instrument….
The violin has also always been regarded as THE virtuoso’s musical instrument…
And is therefore also considered by many, the single MOST DIFFICULT instrument to play.
Just think about names such as:
One was a composer that was famous for his “inhuman” technique…
And the second is one of the most famous piece of classical music due to its extremely high level of technique. And yes, it was originally written for the violin.
But whether you want to become the next Paganini…
Or want to play:
The truth is that the violin is not limited to classical music anymore and is a center piece of many other music genres.
And with so much resources available on the internet nowadays, reaching a decent level on the violin is now easier AND quicker than ever.
So for today’s post, I compiled everything you need to know in order to get started on this beautiful instrument.
A little bit of history
The violin as we know it today is believed to have been created during the 16th century in Italy, during the Renaissance period.
And, funnily enough, it has remained virtually unchanged since then.
Now, before we get to the heart of the matter, I’d like to start by answering a question many musician, or wannabe musicians often ask themselves:
Why the Violin?
We often read how the violin is such a difficult instrument…
Which is absolutely true, to some extent. But why is that? And why do so many kids choose it as their first instrument if it’s so difficult to learn?
Well, here are the two main reasons:
But even though it might be tough in the beginning, being able to play the violin is rewarding as it’ll set you apart in the music scene…
Providing you with something MANY musicians actually lack: a true musical ear and exceptional pitch perception.
1. Sizes

If you’re an adult then it’s a no-brainer, go with a full size 4/4 violin.
However, if the violin is intended for a child you’ll need to choose between several different sizes.
And rather than looking at how tall the player is, it’s the arm length you need to measure.
Take a measuring tape, straighten your arm and start measuring from the middle of the palm all the way up to the neck.
2. Woods
With violins, the choice is pretty simple when it comes to woods since you only really have 2 options:
You might occasionally stumble upon a poplar-made violin, but that’s it.
3. Violin Anatomy

Excluding the bow, of course which we’ll cover further down.
On the image on the right you can see a very basic anatomy of the violin.
Now, INSIDE the violin, there are 2 parts that influence the sound a lot.
And these 2 parts are actually pretty much the same, the only difference is that one is used for the bass “side” of the violin, and the other for the treble “side”.

See? The bassbar is right under the leftside of the bridge, which is the bass sidesince it’s the side right under the G string.
And the soundpost is placed right under the right side of the bridge, wich is the treble side, since it’s right under the E string.
The Soundpost

So although this little rod might not seem like much, it actually has 2 essential roles:
The sound of the violin will change dramatically depending on the soundpost position…
Of course different luthiers have different opinions on the perfect placement of the soundpost, BUT the general consensus is that:
So that’s for the soundpost.
The Bassbar

And factors such as:
…All influence the sound of the violin.
On the image above you can notice the bass bar is actually tapered out on both ends. This is done in order to prevent the bar from falling over.
Stradivarius Violins
I think it’s pretty safe to assume virtually EVERYBODY has heard the name Stradivarius at least once in their life, even if they’re not musicians…
And everybody knows they are synonyms with “tens of millions of dollars“…
The thing is, NOBODY really knows why they are so expensive, or even why they’re so special, construction wise.
A lot of scientists, musicians and engineers have tried to analyze, study and understand the building method of Antonio Stradivari…
But nothing truly conclusive ever came out of it.
And so, the only thing we know for sure is that:
In fact, some blind tests have been done, and many of the participants said they preferred the sound of the newer violins to the ones of Stradivarius violins…
Anyway, since you’ll probably never come across a genuine Stradivarius, no need to really rack your brain around it!
4. The Bow

People often mistakenly disregard the importance of the bow when it comes to tone-shaping.
And, in fact, bows’ prices can range all the way from a few hundred bucks… To several dozens thousands of dollars.
So what makes a good bow exactly? Well, essentially these few characteristics:
Here are the wooden bows I recommend:
However, since the 2 first resources are so limited and expensive, new alternatives have recently emerged…

Carbonfiber bows are:
All in all they keep getting more popular and they’re pretty much a safe bet.
Check out the ones I recommend here:
As for fiberglass, they’re the cheapest bows available because fiberglass is a very fragile material.
They’re usually used by kids or students, but if you’d like to try one out, here are the ones I recommend:
How to prepare your bow before playing
The bow need some maintenance, or preparation before you use it. You’ll need to:
5. The Shoulder Rest

The shoulder rest is a kind of cushion that is attached to the violin’s back as seen on the image on the right.
It has 2 main purposes:
Now, all beginners are advised to use one and the truth is, it is really difficult to play without one…
Your clavicle will hurt and you will end up griping your violin way too strong because of the fear of letting it fall down.
And even professional violinists who don’t use one always use some sort of padding.
So don’t overlook the shoulder rest and just get one at the same time you purchase your first violin.
Here are the best ones I recommend:
6. Violin Tuning

Occasionally, a slightly different tuning can be used such as A D A E, G D A E ♭or G ♯ D A E♭.
Respectively, these last 2 examples were used in two famous classical pieces so as to emphasize the dissonance wanted by the composer.
In most classical, jazz and folk music though, the standard G D A E tuning is used.
As for tuning your instrument, it will definitely be pretty challenging in the beginning.
Just know that you should use both he tuning pegs AND the fine tuners to tune your violin.
And so to help you in this extremely important and crucial process, here are a few tuners options I recommend:
To learn more about tuners in general, check out this article:
7. Rent or Buy?
Renting a violin has always been a rather popular decision, unlike other instruments for which you wouldn’t even consider it.
So why is that? Well, mainly for these reasons:
Well, it really depends on what you’re looking. If you want a quality model you can’t afford buying right now, then yes.
But if you’re just looking to save money, just buy a cheap model. Because trust me, any good violinist will make a cheap violin sound good.
Got it? Then let’s move on…
8. Strings

So let’s answer all of these questions now, starting with…
1. When to replace your violin strings
There are several ways a string will let you know it’s worn out:
If you notice any of these happening, it’s time to replace your strings.
2. What strings should I choose?
Once you’ve decided it’s time to replace your strings, comes the difficult task to actually CHOOSE a string set.
The 2 main factors to take into consideration when choosing a violin string-set are:
And so, for materials you’ll find the next 3:
And then you also have some string sets with different winding depending on the string (like p latinum plated E, aluminum wound A, silver wound D & G for example). These are generally only found on the high-end though.
If you are a lead violinist in an orchestra or playing chamber music these might be a good option…
But if you’re not, they’re definitely overkill.
As for the gauge, it is usually advised that beginners use light gauge, and advanced players medium to high gauge.
Now, to be honest gauge is not nearly as important as material choice. And even then, if you listen to videos comparing different strings…
You’ll really have to listen hard to hear a real, significant difference between different models.
Now, I’m not saying you won’t hear small differences and variations, but if you listen to the video without looking at it, can you really tell he’s playing through a dozen different string sets?
And have no doubt these small differences might be very important for professional or advanced violinists, but they definitely aren’t for beginners
3. How to replace your strings?
After you’ve chosen the right set of strings, you’ll need to mount them on your violin.
Recommended Strings
Now that you’ve probably decided which strings are the best for you, here are the string sets I recommend:
9. Electric Violins

But beyond their peculiar look, what exactly sets electric violins apart from their acoustic counterpart? Well, a bunch of features as you’ll see:
So electric violins are definitely not the high end, unaffordable instruments they used to be 15 or 20 years ago (although these high-end models still exist)…
And it’s therefore normal to ask yourself whether you should choose an electric or acoustic violin as your first instrument.
But based on all the advantages I listed up above, I’m sure you’ll manage to figure it out…
And so if you choose to buy an electric violin, here are the best ones I recommend:
10. Online Lessons
Let’s be clear: learning the violin on your own is NOT EASY. Unlike the guitar, you won’t be able to strum a nice sounding chord after just a few minutes of effort…
And so taking lessons is almost indispensable. The good news is, finding lessons, paid OR free on the internet is nowadays easier than ever.
But how do you sort the good ressources from the bad ones?
Well, first of all remember what the old saying says: You get what you pay for.
Now, although that is true to some extent, there are in fact some quality FREE lessons out there. However, what you WON’T get with these is a dedicated, personal teacher.
And so for this list I decided to create 2 categories:
1. Free Online Lessons
2. Paid Online Lessons
11. A few accessories for beginners

As I was saying earlier, one of the reasons the violin is so difficult to play is that it has no visual cue whatsoever…
And when you’re starting out, it can be frustrating taking really long to play a simple note. That’s why the brand Don’t Fret developed this sticker that shows where to press your fingers on the fingerboard.
Also check out this model which, although a bit more expensive has much more information on it:
Another very useful tool for practicing is a practice mute. Just like what you’d find for a trumpet, violins can be played lower by using a practice mute.
How to Play the Violin
There are several methods that have been developed for students looking to learn how to play the violin. The most popular methods are the traditional and Suzuki methods. The traditional method is where the violinist reads music off a page, and is often started with children around 8 years old. The Suzuki method is a method where the student uses aural or listening skills to learn how to play, and is often started at 5 years of age, or even as early as 2. Both methods require a formal teacher, however some violinists self-learn. If you are endeavoring to learn the violin without a teacher, it is a good idea to find out as much information as you can about the violin, and watch and listen to other players as much as possible to get a feel for the instrument.
Correct Posture for Playing the Violin
The violin is held under the chin, in either a standing or sitting position. The best way to learn how to hold the violin properly is to watch a clip of a well-known violinist, and see how they hold their instrument.
Keep your joints unlocked (slightly bent) this includes your knees when standing! This helps to relax your main muscle groups when you play.
Try to use your tummy to hold you up as you play. If you focus holding your core tight (think about holding your belly button in) then you will produce a more intense, relaxed sound as the muscles in your arms and back will be more relaxed.
To get the scratch out of your playing, instead of focusing on pressing the bow into the string, focus on gliding the bow across the string, like a dragonfly skimming across water. Focus intensely on this and your sound should become less scratchy. Scratch is produced when there is too much tension in the arms and hands, so be sure to relax as much as you can!
Don’t press down too hard on the strings. Be firm, but remember the more relaxed you are, the more this will come through in the tone.
Violin Finger Names
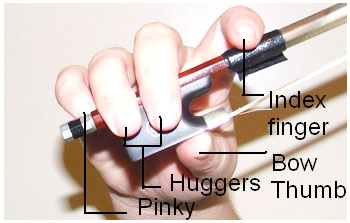 | 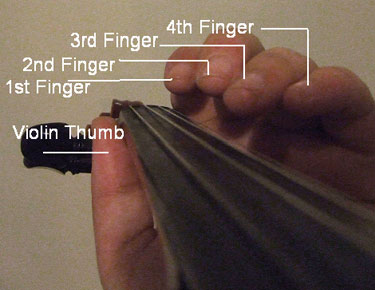 |
For beginner players, the names of the fingers that we refer to are as important to know as the parts of the violin.
The right hand is known as the bow hand (as this hand controls the bow), and the left the violin hand, which holds the violin. The fingers on both hands also have different names to differentiate them from one another. On the violin hand, the fingers are known as the violin thumb, and the 1st, 2nd, 3rd and 4th fingers (from thumb to pinky). You will often see numbers 1,2,3 or 4 above notes when reading written music, these numbers correspond to the names of the fingers you should use to play the note specified.
On the right hand the fingers are named slightly differently, according to the position that they take on the bow rather than their function. The thumb is known as the bow thumb, the first finger is called the index finger, the middle two fingers are known as the huggers, and the fourth or littlest finger as the pinky. The huggers are named as such because they ‘hug’ the bow, resting together on the side of the frog. The other fingers are named by their common names, to differentiate them from the numbered fingers of the left hand.
Practical Playing Tips for Beginners
When you are playing the violin, use the fingers you have put down on the string to guide you to the next note. For example, if you play a C# on the A string, followed by a G on the D string, use your 2nd finger to guide your 3rd finger into the right position. This makes it easier to play in-tune, and will help to increase the speed of your playing also.
Advanced Playing Techniques


That’s great Lorrie! I’m 14 and i just received my first violin, it has always been my dream to learn. Let’s keep practicing!

